
Looking for a quick and easy guide to transactional push notifications?
Push notifications are a great way to organically grow your fan base. And it’s really easy to add web push notifications to any site. But aren’t all transactional notifications ridiculously difficult to set up? Well, not really, no. Some of the most powerful transactional push notifications are super easy to set up.
In this article, we’re going to check out some incredible transactional push notifications, how to set them up, and how they can help you grow your business. And you don’t need any experience with push notifications or marketing to get started right now.
Sounds good? Let’s dive in.
What are Transactional Push Notifications?
Transactional push notifications are different from regular push notifications. Rather than focusing on marketing, these notifications share key, often urgent, information related to a user’s actions on an app or website.
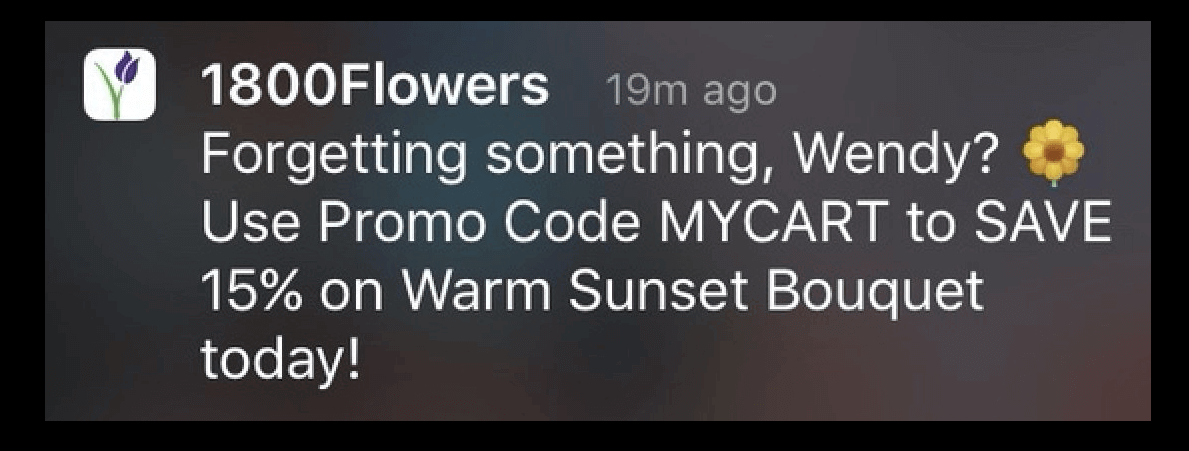
For example, after you make a purchase on a website or app, you might receive a transactional push notification confirming your order or providing a receipt. If you abandon your shopping cart, a well-timed notification might remind you to complete the purchase.
Transactional notifications go beyond simple updates.
They’re key parts of a smooth user experience, keeping customers informed and engaged. Since these automated push notifications that are tied to specific user activity, they’re typically more effective and less intrusive than general notifications.
In fact, due to their direct relevance, transactional push notifications often see a higher click-through-rate (CTR) than marketing notifications. Ultimately, they can play a significant role in boosting user engagement and driving conversions.
Let’s take a look at a few examples of transactional push notifications:
- Order Confirmations: These are instant messages sent after a user makes a purchase. They confirm the details of the transaction like the order number, total amount, and estimated delivery.
- Shipping Alerts: These notifications tell the user when an order has been shipped or delivered. They usually include tracking numbers and a link to the courier’s website for more details.
- Abandoned Cart Reminders: If a user adds items to their online shopping cart but doesn’t complete the purchase, a reminder can encourage them to check out. The message might show product details, the total price, or even a special discount.
- Service Notifications: For apps or services with subscriptions, these alerts can let users know about successful payments, changes in their plan, or upcoming auto-renewals. They can also be used for reminders about events or important dates.
- Account Activity Alerts: Whenever a change is made in a user’s account, like a password reset or profile update, these notifications keep them aware and secure.
- Feedback Requests: After a user has used a service or made a purchase, a push notification can ask them for their review. This helps collect useful feedback and shows customers that their views are important.
In short, transactional push notifications are an effective tool for enhancing user experiences. By delivering relevant updates in real-time, they help engage users and boost conversions on both web and mobile platforms.
Why Set Up Transactional Push Notifications
Push notifications can be a powerful tool to increase your repeat traffic, engagement, and sales. You can use transactional push notifications to grow your business rapidly. The best part about transactional push notifications is that they are easy to set up and quite easy for even startups to afford.
Let’s take any product business for example. Your goals are usually to:
- Increase push notification subscribers
- Get repeat traffic on autopilot
- Improve conversions
And you can do all of that fairly easily. Here’s an example from WickedWeasel:
WickedWeasel Makes $2K-4K a week using eCommerce push notifications. There’s absolutely no reason why you can’t do it too.
And if you’re running a media site or a service website, even then you can send transactional push notifications pretty easily:

You can either set up scheduled push campaigns or send automated push notifications such as RSS push notification campaigns.
Select a Service to Send Transactional Push Notifications
If you’re not collecting push subscribers already, you need to stop missing out right now. We recommend that you use PushEngage to start collecting push subscribers right now.

PushEngage is the #1 push notifications plugin in the world. If you compare it to the other best push notification services, you’ll see that it clearly comes out on top.
Push notifications help you grow your website traffic and engagement on autopilot. And if you’re running an online store, PushEngage also helps you grow your sales by helping you create automated eCommerce push notifications.
With the PushEngage Android and iOS SDKs, you can send mobile app push using the same reliable software for great delivery rates. But we’ve built several layers on top that make it super easy to build custom integrations with your app. And PushEngage manages the entire SDK. So, you don’t even have to spend a ton of time and money to manage your integrations.
All you have to do is build!
You can send broadcast notifications directly from your PushEngage dashboard once you’ve set up your app to send mobile app push notifications using PushEngage’s SDK. Yes, you still have to add code to your app and develop the connectors between your app and the PushEngage API. But once that’s done, you can easily create mobile app push campaigns from a pre-built software interface that also comes with:
- Highly engaging push campaign types
- Proven campaign templates with high conversion rates
- Web and app push campaigns
- Increased audience retention using data-based personalization
- High-converting automated campaigns to promote your content whenever you publish
- Multiple targeting and campaign scheduling options
- Goal tracking and advanced analytics
- Intelligent A/B testing
- A Dedicated Success Manager
You can get started for free, but if you’re serious about growing your business, you should buy a paid plan. Also, before buying any push notification service, you should check out this guide to push notification costs.
You’ll see that PushEngage is hands down the best bet if you want to build traffic, engagement, and sales for your business. And if you’re on a budget, you can always get a little bit creative with your push notifications.
The Most Powerful Transactional Push Notifications
Let’s check out some of the most powerful transactional push notifications and how you can set them up quickly.
It doesn’t matter how big your push notification subscriber base is. You can still use web push notifications to grow your business. Your push notifications can redirect your subscribers to:
- An abandoned shopping cart
- New blog post, podcast, or video
- New offers or sales
- Surveys, polls, and feedback forms
Take a look at these examples of online stores using push campaigns the right way. If you’re looking to create WooCommerce push notifications or Shopify push notifications, we recommend getting started with PushEngage.
PushEngage is the #1 push notification software in the world. And it’s super easy to set up welcome notifications using PushEngage. You can check out the full list of features in our review of PushEngage. Or, you could also take a look at the best push notification services in the world and choose the right one for you.
Or, you can simply get started right away with PushEngage.
#1. Welcome Push Notifications
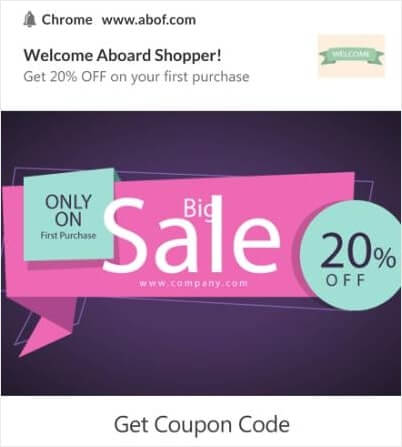
Whether you have a new store or an established one, website welcome messages are absolutely essential. Welcome push notifications are great for:
- Confirmation: You want to confirm that your new subscriber is indeed subscribed to your web push notifications.
- Re-engagement: Welcome campaigns are a great way to get your subscribers to come back to your site.
- Sales: You can give your new subscribers a welcome offer with discounts, freebies, and coupons.
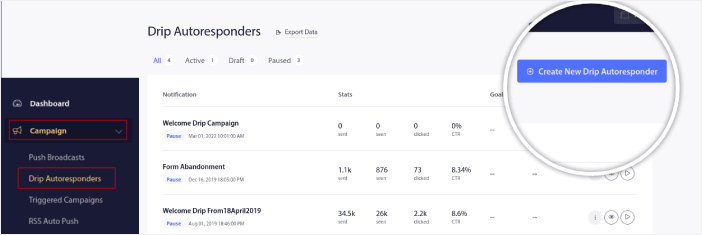
Let’s create a welcome push notification campaign now. Head over to your PushEngage dashboard and go to Campaign » Drip Autoresponders » Create New Drip Autoresponder:
Give your drip campaign a name that you can easily remember. Then, set the first push notification to go out immediately after a visitor subscribes to your push notifications.

You can edit the notification to create custom content for your welcome message. When you’re done, click the Add New Notification button to add more notifications to the sequence. You can edit the new notifications and set a custom delay between each notification.
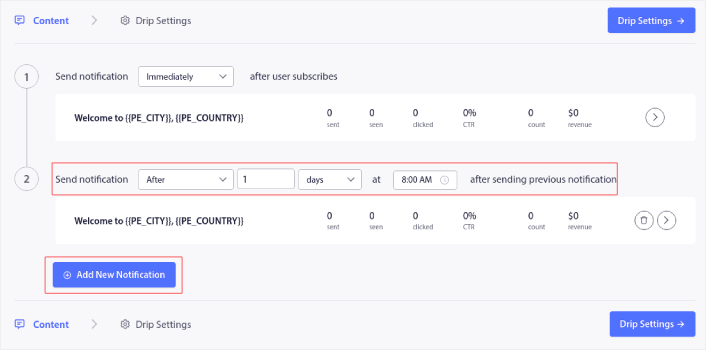
You can add as many notifications as you like, but we recommend creating a welcome drip with 5-7 notifications.
After that, select your audience in Drip Settings:
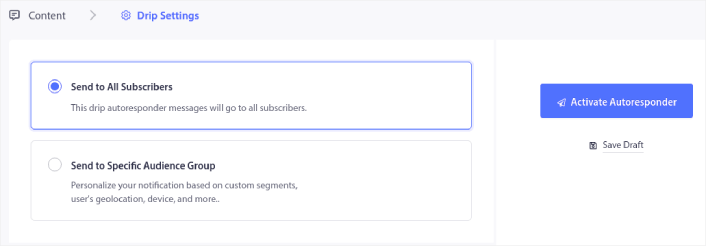
You can send different welcome drips for different segments by using the Send to Specific Audience Group option. This is especially useful when you’re segmenting visitors when they opt for push notifications. When you’re happy with your targeting, click on the Activate Autoresponder button. And you’re done!
#2. Cart Abandonment Push Notifications
Shopping cart abandonment is when a potential customer adds a product to the shopping cart and doesn’t complete the checkout process. In other words, they abandon your products for some reason and simply move on.
Online shopping cart abandonment can be due to a significant problem in the user interface or a lack of trust, or even some hidden charges. If you’re running a new store, then you should check out our article on how to reduce shopping cart abandonment.
Now, it’s time to create your cart abandonment campaign. Head over to Campaigns » Triggered Campaigns and click on Create New Triggered Campaign:

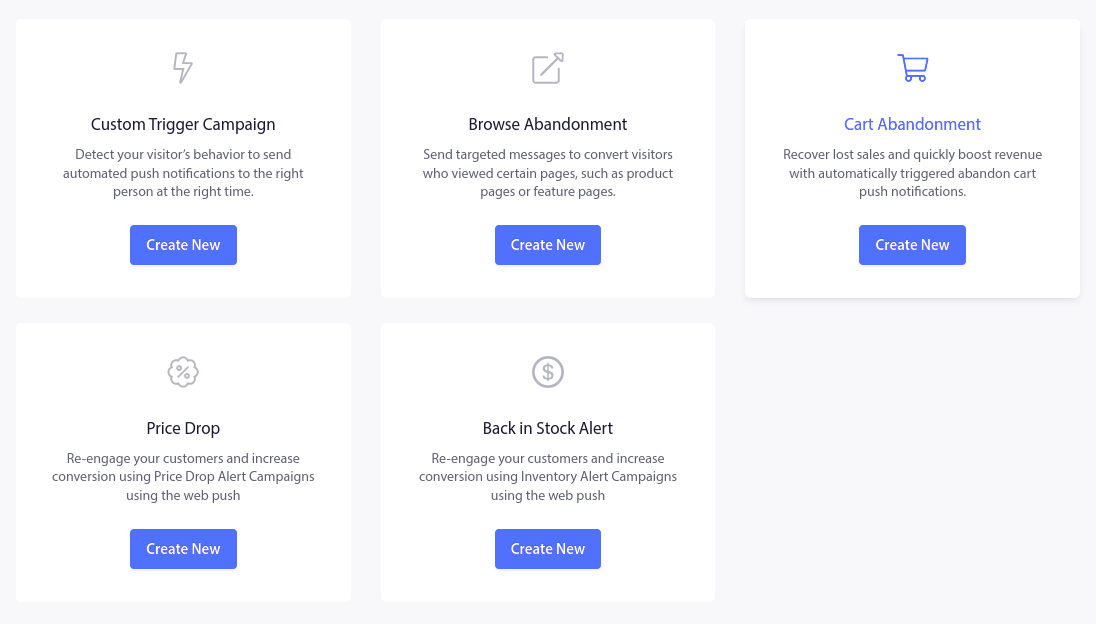
Then, from the campaign templates, select Cart Abandonment and click on Create New:
If you need a detailed tutorial on creating an abandoned cart campaign, check out this article on how to set up cart abandonment push notifications.
#3. Browse Abandonment Push Notifications
A browse abandonment notification is an automated push notification that gets sent when someone browsing your website decides to bounce without taking any action. Sending the visitor a reminder that they were interested in something on your website can hugely increase your conversion rates.
Browse abandonment campaigns are most commonly used by eCommerce sites. But that’s not to say that a travel portal or a news site (or any website, really) can’t use them.
A browse abandonment notification ends when your visitor adds something to their cart. After that, a cart abandonment notification takes over to convert them into paying customers.
That’s where browse abandonment campaigns come into play. Using the browse abandonment email examples in this article, you can target, convince, and convert:
- Customers who added a product to a Wishlist, but not their Cart
- Customers who viewed a product more than once
- Customers who browsed more than 3 products in the same category
- Customers who searched the site for a specific product
- Customers who stayed on a product page for at least 3 minutes and didn’t buy
Head over to your PushEngage dashboard and go to Campaign » Triggered Campaigns. Then click on Create New Browse Autoresponder:
And then, select the Browse Abandonment Campaign type from the list of campaign types and click on Create New:

By now, you should be able to see a campaign setup dashboard. Create your campaign under Content:
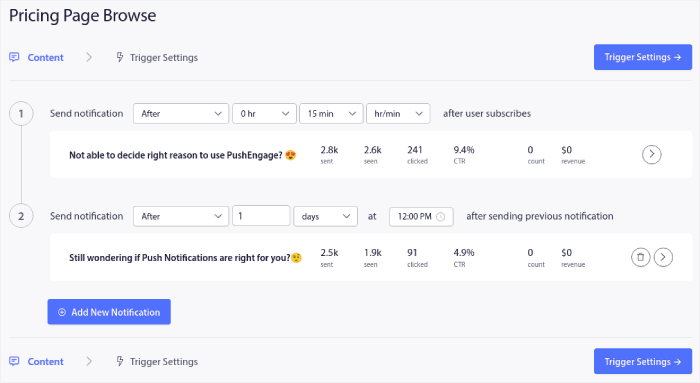
Most of this is straightforward. Give your campaign a name and create a sequence of browse abandonment push notifications. When you’re done, click on Trigger Settings.
It’s time to set up the trigger for browse abandonment:
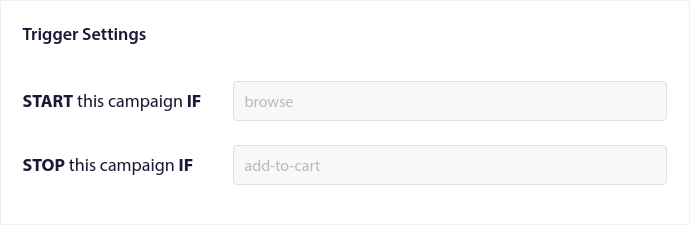
These are default values for the browse abandonment campaign template. So, you don’t have to change anything here.
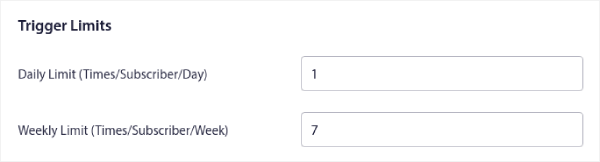
You can set Trigger Limits based on how often you want to send push notifications:
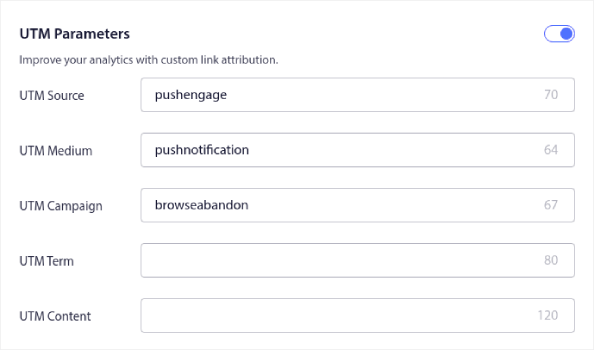
And you can also set up UTM parameters here:
And enable Goal Tracking as well:
If you’re new to push notification analytics, check out our guide to goal tracking for push notifications.
#4. Cross-Selling Push Notifications
Cross-selling is selling related or complementary products to a customer. It’s one of the most effective methods of marketing. You can easily increase your Average Order Value (AOV) using cross-selling campaigns.
According to Amazon, 35% of its sales come from cross-selling. Cross-selling push notifications are campaigns that automatically cross-sell products to your customers. Cross-selling push notifications help you increase sales as you’re 60-70% more likely to sell to an existing customer.
It’s also super easy to set up a cross-selling campaign for your online store using push notifications.
- Create segments based on product categories and add a customer to the relevant segment when they make a purchase
- Identify products to cross-promote under each segment
- Create a drip notification for each segment and send the relevant product or product list to cross-promote
It’s as simple as that.
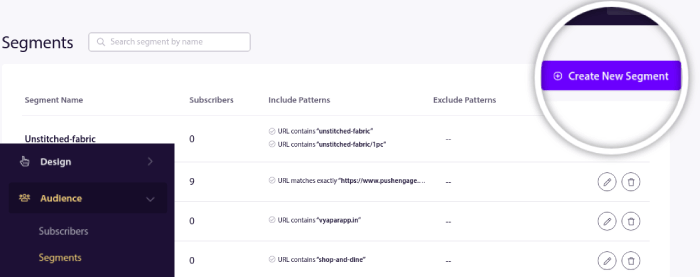
Head back to your PushEngage dashboard and go to Audience » Segments and create your segments:
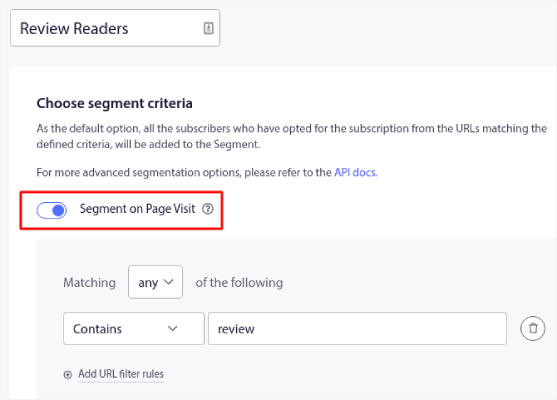
You’ll want to segment your visitors when they visit a product in a specific category:
Then, find a product to cross-sell for each segment and create a drip autoresponder to promote it.
#5. Recurring Sales for Your Web Store
You can schedule push notifications to keep repeating every week. Or every few days. Loads of PushEngage customers use repeat scheduling and they absolutely love this feature. It’s made an especially significant difference for web stores.
Why would you use repeat scheduling?
Imagine that you have a weekly sale for a flea market. Or a weekend sale. Or a stock clearance sale. Or even a monthly flash sale.
These are live events that keep repeating like clockwork.
Do you honestly want to create a different push notification every week? Especially if you know ahead of time that these sales are going to be a major part of your marketing strategy?
Or, would you rather just create the notification once and schedule it to fire off every week at a fixed time?
That’s exactly what recurring push notifications can do for you. It’s the perfect way to save a lot of time and energy. Instead of wasting time with new notifications, you can simply keep optimizing the existing campaign.
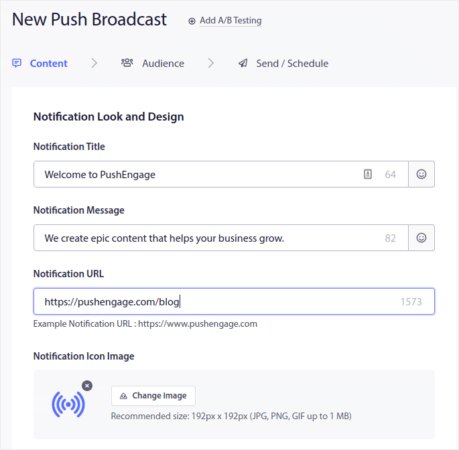
It’s also really easy to do. Just head over to the PushEngage dashboard and create a broadcast under Broadcast Push:

Then, create a new push notification to send. Customize the content under the Content tab:
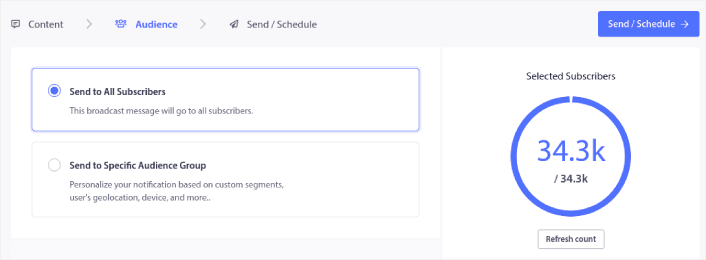
Next, select your audience under Audience:
And finally, under Send/Schedule, you can schedule the notification as a recurring push notification:
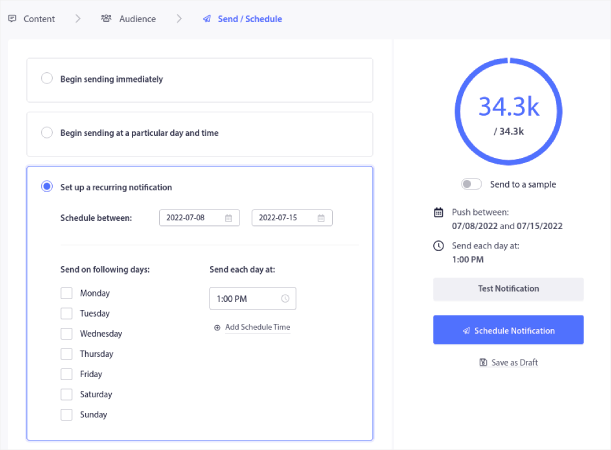
You can easily create any schedule you like for your push notifications including custom days, dates, and times.
#6. Product Feedback Push Notification Campaign
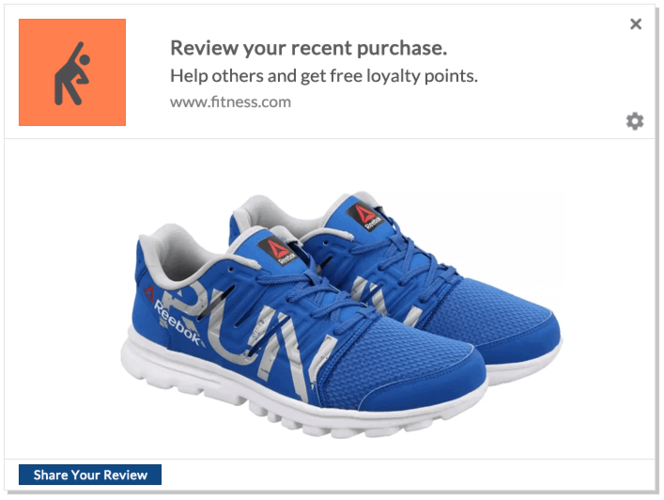
You can’t wait around hoping for your customers to leave a review. The smart thing to do is to simply ask for a review.
But of course, it can be a real pain to go around asking manually if you have a bunch of new customers every day. That’s exactly why a product feedback push notification campaign is so useful. It’s completely automated and if you do it right, product feedback campaigns really work:
From your PushEngage dashboard, head over to Campaign » Trigger Campaigns and click on Create New Triggered Campaign:

From the list of campaign templates, go ahead and click on Custom Trigger Campaign:
Give your campaign a name that you can recognize. Then, create the content for your push notification campaign:
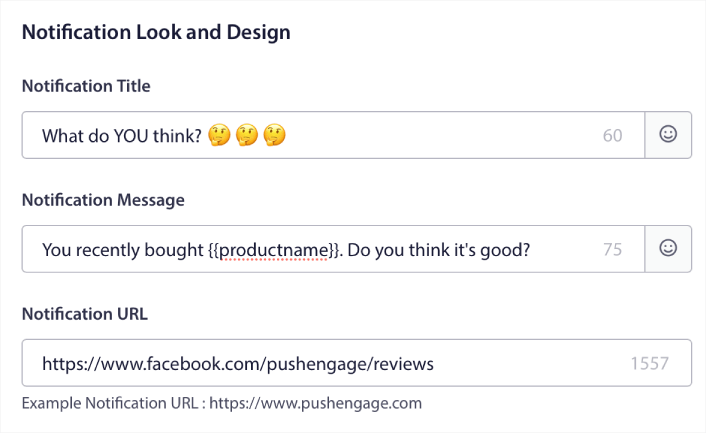
Since it’s a triggered campaign, you can create as many follow-ups as you like until you get a review from your customers.
Then, go to the Trigger Settings tab to set up the campaign triggers:
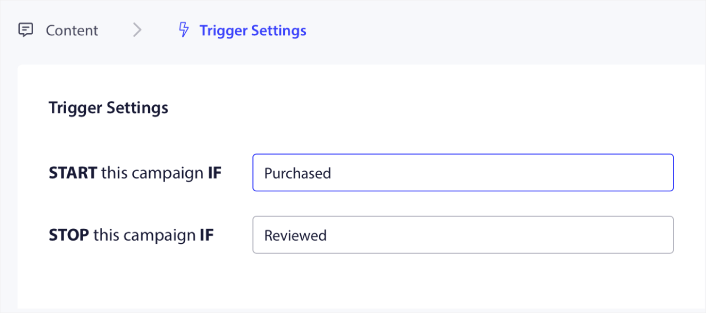
Set the campaign to start when the customer purchases your product and stop when they leave a review. You’ll need to use the PushEngage API to define the Purchase and Review events.
And finally, integrate the code with your website. You can get the code for Start campaign event, Stop campaign event, and Goal tracking by click on the Integration Code button.
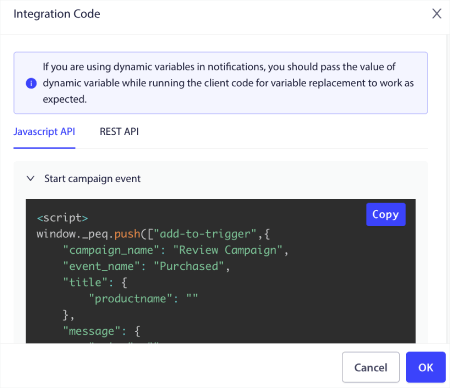
That’s all! Every time someone buys a product on your website, an automated campaign that asks for reviews will get triggered.
Best Practices for Transactional Push Notifications
Now that you know the power of transactional push notifications, it’s time for you to start creating your own campaigns. But before you get started with the campaigns, you should study some great push notification examples first.
And if you’re new to push notifications, you should check out our article on push notification best practices before you start creating campaigns. Some of the best practices that we actively recommend include:
- Boost Clicks With Curiosity
- Personalize Each Push Notification
- Stand Out With Rich Media
- Reactivate Dormant Push Subscribers
- Keep Customers Informed
- Use Emojis Wherever You Can
- Create a Sense of Urgency
Pro Tip: If you’re new to eCommerce push notifications, you should also check out this article on how to get more reviews.
We recommend using PushEngage to create your push notification campaigns. PushEngage is the #1 push notification software in the market and your campaigns will be in safe hands.
So, if you haven’t already, get started with PushEngage today.


