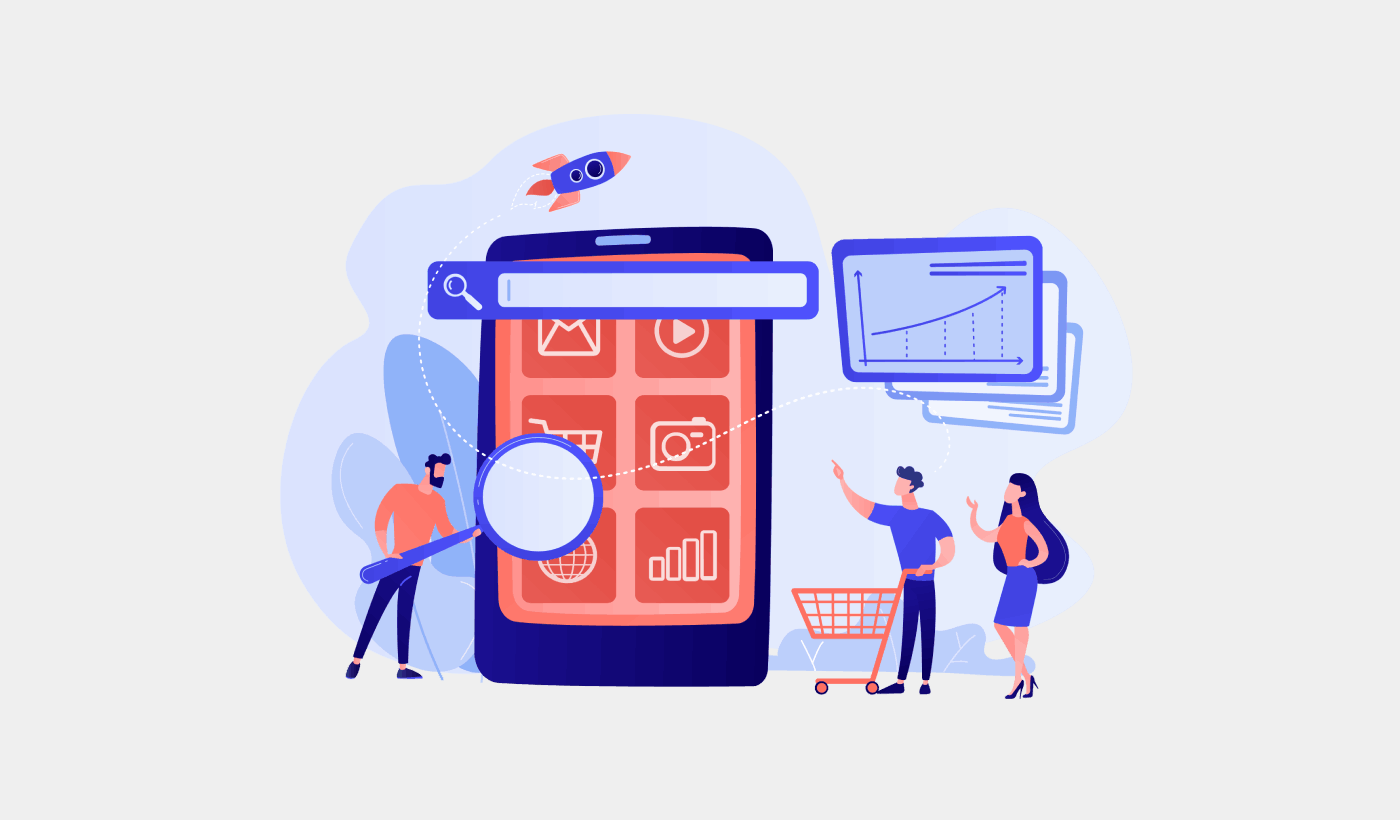
Looking for a way to increase your sales without having to spend more on ads? You should set up cross selling push notifications right away.
According to Amazon, 35% of its sales come from cross-selling. Cross-selling push notifications are campaigns that automatically cross-sell products to your customers. Cross-selling push notifications help you increase sales as you’re 60-70% more likely to sell to an existing customer.
That’s awesome! But how do you set up cross selling push notifications? Is it difficult? Do you need a developer to set it up for you? How expensive is it? How quickly can you see the results?
In this article, we’ll answer all these questions and more. We’re also going to check out how you can set up cross selling push notifications with no code and in 10 minutes.
Let’s dive in.
What is Cross Selling?
Cross-selling is selling related or complementary products to a customer. It’s one of the most effective methods of marketing. You can easily increase your Average Order Value (AOV) using cross-selling campaigns.
One of the simplest ways to increase your sales is to increase your Average Order Value (AOV). If the amount of money each customer spends on your site goes up, your revenue is going to double itself with very little effort.
Some examples of cross-selling would be:
- Selling a computer case, mouse, and screen cleaning wipes to a customer who just purchased a new laptop
- Offering renters’ insurance to customers buying car insurance
- Selling an extended warranty on a new toaster you just bought
- Offering a discount on a pack of three soap bars when you just bought face wash
And so on. You can offer cross sells on any type of product. The best part is that you don’t necessarily have to cross sell a physical product. You can cross sell an ebook on how to start cosplaying for beginners when you sell a cosplay kit. As long as you cross sell a product that adds value to your existing customer, you’ll make a ton of extra sales.
Cross selling only fails as a sales strategy when you have insufficient data on your customers. With push notifications, that’s not a problem because you can collect a lot of data on a customer even while you’re completely GDPR compliant.
What Are Cross Selling Push Notifications?
Cross selling push notifications are eCommerce push notifications that automatically try to sell your customers products based on their purchase habits. A cross selling push notification campaign will automatically target specific customers to try and get them to buy other products that they may need.
Here’s an example:
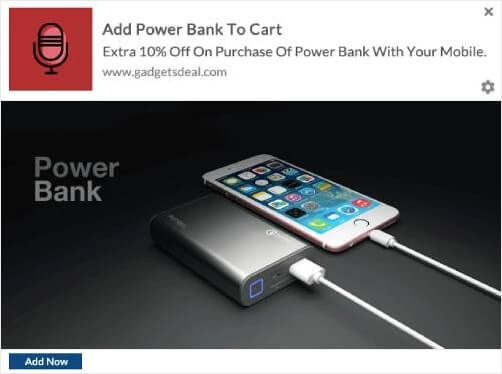
Typically, a cross sell is when you try to sell a product in the same price range as the products that your customers are already buying. So, if you understand the types of related products that your customers are likely to interested in, cross selling is easy.
Pro Tip: Think of tactics to include in your coupon marketing strategy to increase your conversions on cross selling push notifications.
How to Set Up Cross Selling Push Notifications
It’s super easy to set up a cross-selling campaign for your eCommerce site using push notifications.
- Create segments based on product categories and add a customer to the relevant segment when they make a purchase
- Identify products to cross-promote under each segment
- Create a drip notification for each segment and send the relevant product or product list to cross-promote
It’s as simple as that. Let’s take this step by step.
Step #1: Select a Push Notification Service
We recommend using PushEngage to cross selling push notifications.

PushEngage is the #1 push notifications plugin in the world.
Push notifications help you grow your website traffic and engagement on autopilot. And if you’re running an online store, PushEngage also helps you grow your sales by helping you create automated eCommerce push notifications.
You can get started for free, but if you’re serious about growing your business, you should buy a paid plan. Also, before buying any push notification service, you should check out this guide to push notification costs.
If you’re new to push notifications, you should check out our article on the best push notification services in the world. You’ll see why we recommend PushEngage so heavily.
Here’s a quick glance at what you get with PushEngage:
- High-converting automated campaigns
- Multiple targeting and campaign scheduling options
- Goal tracking and advanced analytics
- Smart A/B testing
- A Dedicated Success Manager
PushEngage is hands down the best bet if you want to build traffic, engagement, and sales for your business. And if you’re on a budget, you can always get a little bit creative with your push notifications.
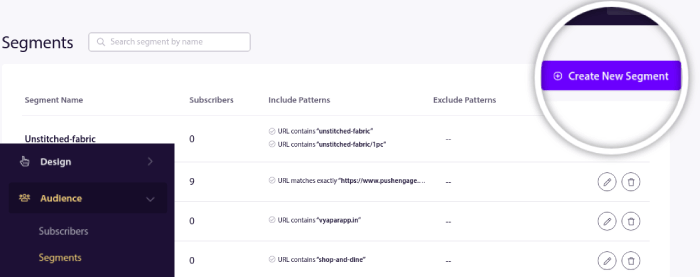
Step #2: Create Audience Segments
Head over to your PushEngage dashboard and go to Audience » Segments and click on Create New Segment create your segments:
You’ll want to segment your visitors when they visit a product in a specific category:
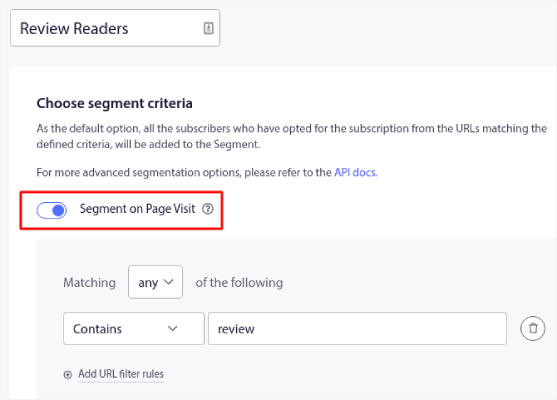
Segmenting on page visit is a great way to understand what your visitors are interested in. You can create segments based on each product category using the URLs for the category pages.
Once your segments are set up, it’s super easy to create personalized push notifications such as cross selling campaigns.
Step #3: Create Cross Selling Push Notifications
Next, find a product to cross-sell for each segment. You can exclude the product you’re trying to cross sell from your segments. This way, you won’t spam your customers with offers that they don’t need anymore.
This part of the process is the most time-consuming. But once you figure out what products you want to promote to each segment, the rest of the process is fairly easy. Finally, we’re going to create drip autoresponders to promote each product.
Start with one product and create an automated campaign around it.
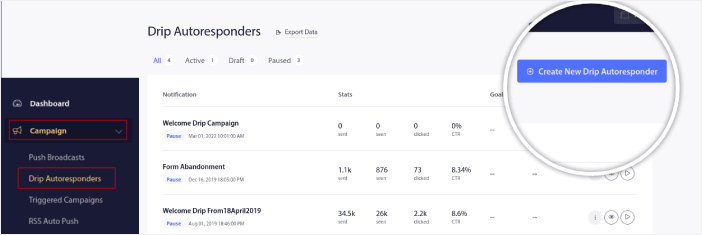
Head over to your PushEngage dashboard and go to Campaign » Drip Autoresponders » Create New Drip Autoresponder:
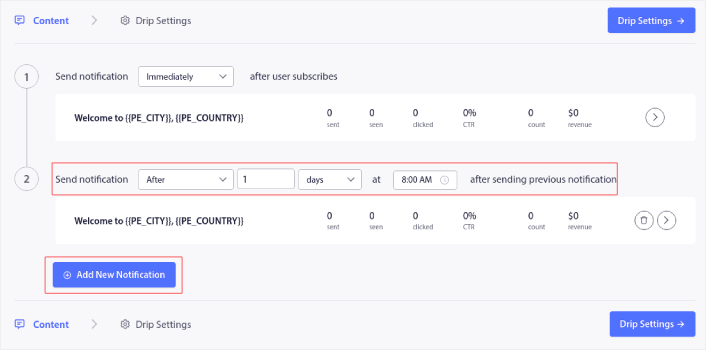
Under the Content tab, create your series of push notifications to cross sell a product of your choice:
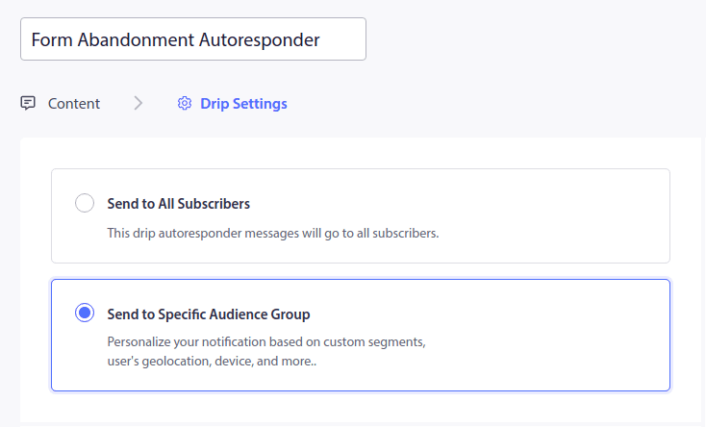
Finally, under Drip Settings, you can select your target audience using the segments you created earlier on:
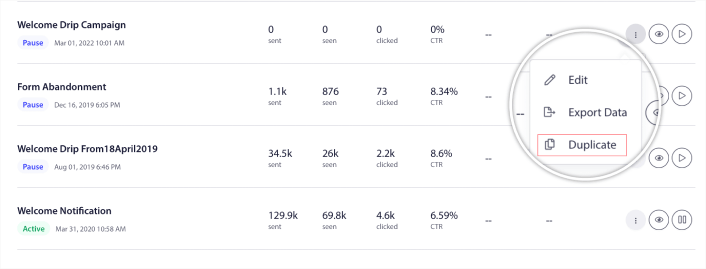
When you’re done creating the campaign, you can either create a new one from scratch. Or, you can duplicate the campaign and use it as a template to create your other cross selling push notifications.
And you’re done! You’ve successfully created cross selling push notifications.
What to do After You Create Cross Selling Push Notifications
Now that you know the power of eCommerce push notifications, it’s time for you to start creating your own campaigns. But before you get started with the campaigns, you should study some great push notification examples first.
And if you’re new to push notifications, you should check out our article on push notification best practices before you start creating campaigns. Some of the best practices that we actively recommend include:
- Boost Clicks With Curiosity
- Personalize Each Push Notification
- Stand Out With Rich Media
- Reactivate Dormant Push Subscribers
- Keep Customers Informed
- Use Emojis Wherever You Can
- Create a Sense of Urgency
Pro Tip: If you’re new to eCommerce push notifications, you should also check out this article on how to get more reviews.
We recommend using PushEngage to create your push notification campaigns. PushEngage is the #1 push notification software in the market and your campaigns will be in safe hands.
So, if you haven’t already, get started with PushEngage today.


