Are you looking for an easy way to send RSS push notifications?
Constantly creating content and managing a blog is hard work. But if you’re running a serious business, you know that just creating content isn’t good enough. You have to be able to promote your content as well.
And push notifications are a great way to gain subscribers in a cost-effective way. What makes push notifications so good as a marketing tool is that they can be completely automated.
That’s where RSS push notifications come into the picture.
If you set up RSS push notifications the right way, every time you publish content on your site, your subscribers automatically get a push notification that brings them to your content.
And in this article, we’re going to show you exactly how to set up RSS auto push on your site.
How to Enable RSS Push Notifications in Any Site
You can set up RSS push notifications for any type of website as long as it has an RSS feed. If you’re not sure if your site has an RSS feed, just go to the URL ‘yoursite.com/rss‘ to check (Replace the ‘yoursite‘ in the example with your actual site name).
And to send RSS push notifications, you’ll also need a push notification vendor. For this article, we’re going to show you how to use PushEngage to send RSS auto push. PushEngage is the #1 push notification software in the world. So, your campaigns will be in safe hands.
Let’s get started.
Step #1: Install PushEngage
Head over to the PushEngage home page and click the Get Started button:

You can select the free plan to try out PushEngage, or choose a paid plan if you’re serious about growing your business. The paid plans include better audience targeting options and campaign automation features.
Once you’ve signed up for an account, head over to the PushEngage dashboard and go to Site Settings » Site Details:

This is where you can customize how your brand looks in the push notifications that you send out. Go ahead and set a logo and site URL for your push notifications.
Your push notification subscribers will see your Site Name, Site Image, and Site URL on your notifications. So, you should set these up right now so that you can test your push notifications later on.
Once this is done, you’ll need to head over to the PushEngage dashboard and get the installation code. Click on the Click Here For Setup Instruction button:

Copy the installation code:
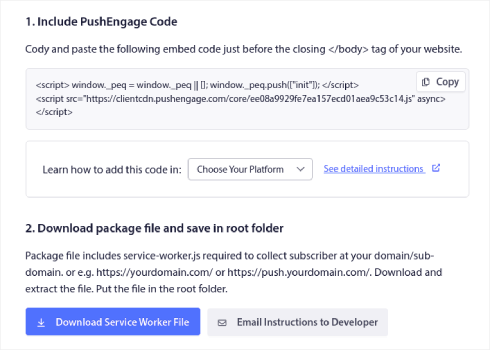
And then, you’d need to paste the installation code into the HTML <head> of your website. If you’re not sure how you can do that, check out this article on how to install web push notifications on any site.
Or, if you’re running a WordPress site, you can install the web notifications WordPress plugin. The plugin takes care of the entire installation by itself. And you’re ready to set up your push notification campaigns next.
Step#2: Create a New RSS Push Notifications Campaign
Once you’ve installed PushEngage on your site, head over to your PushEngage dashboard and go to Campaign » RSS Auto Push and click on Create New Campaign:

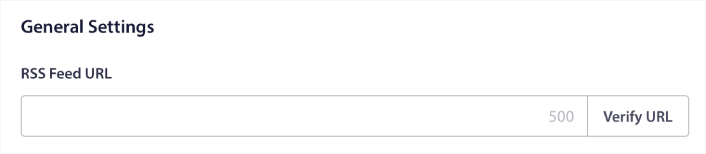
This will create a brand new RSS push notification campaign. You can set up multiple RSS feed campaigns in PushEngage. Start by giving your campaign a descriptive name. Then, paste in the URL for your RSS feed:
Step #3: Setup RSS Notification Settings
Next, you want to set the Campaign Frequency:
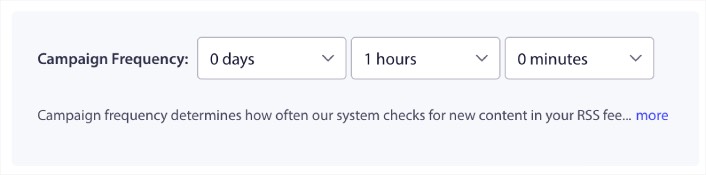
The Campaign Frequency is how often the RSS feed campaign looks for new content in your blog to send an automated push notification. The minimum value is 15 minutes and the maximum value is 7 days.
We recommend looking for content to promote once every 2 days unless you’re a news agency. For news agencies, you should keep it to 15 minutes. Keep in mind that PushEngage will only look for new content after you set up and publish your RSS feed campaign.
Step #4: Select Posts to Promote
You can select what posts to promote. You can choose between Only the latest item or All items. If you set up the RSS push notifications to select only the latest item, PushEngage only sends the latest post:
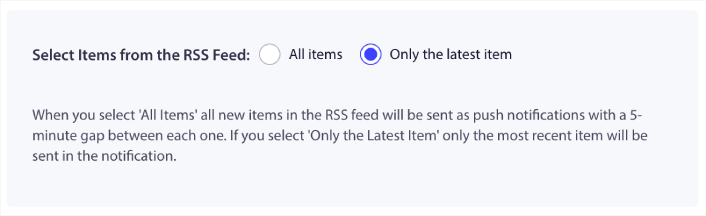
Or, you can select the All items options. In this case, the campaign will select all the posts on your site and send out push notifications for each with a 5-minute gap between them.
Step #5: Set an RSS Push Notifications Icon
Your push notification icon establishes your brand identity in your RSS push notifications. We recommend using your brand mark so that your subscribers know instantly that the notification is from your brand.
Now, there are two options here. You can either upload the notification icon manually:
And that’s really simple to do. Just click on Change image and upload your notification icon. Or, you can fetch it from your RSS feed:
You can either select the item element or the attribute inside an element to dynamically select your notification icon from the feed. Typically, most RSS feeds will hold the site icon inside the media:content item element. Even more specifically, it’s usually inside the media:thumbnail attribute of the media:content element.
To target the element, you can select the Item Element Value option and set it to media:content. Or, you can select the Element Attribute Value option and set it to media:content > media:thumbnail.
NOTE: We recommend using this option only if you know how to read XML. RSS feeds might not contain the site icon in the same XML tags as our example. So, if you’re not sure how to fetch the notification icon from the RSS feed, we recommend uploading it manually instead.
Step #6: Select Large Image for RSS Feed Notifications
Now, we’re going to select the large image for your RSS feed notifications. Again, there are two ways to do this. You can let PushEngage automatically find the image from the RSS feed:

Or, you can manually select which image you want from the feed:
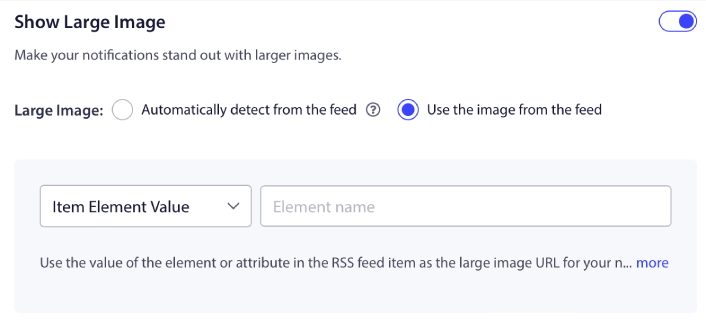
This is exactly the same as selecting the notification icon from the RSS feed. You can once again, select the image from XML element that contains it or you can select the specific attribute that contains your preferred image.
NOTE: We only recommend selecting a URL from your RSS feed if you know how to read XML. If you’re not sure how to read XML, it’s better to let PushEngage find the best image for your notifications.
Step #7: Set Push Notification Duration
The push notification duration is how long the notification stays in your subscriber’s notification tray before it get automatically deleted.
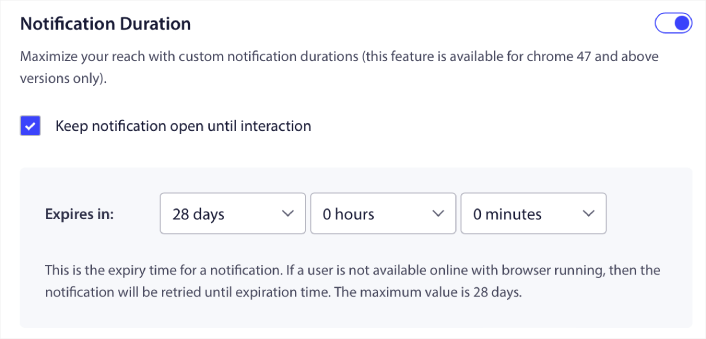
If you don’t want to overwhelm your subscribers with a bunch of unread notifications, it’s probably best to let the push notifications expire in a couple of days.
Unlike broadcast notifications or even other automated push notifications, you can’t really schedule RSS push notifications. So, you always have the option to keep the notification open until your subscriber interacts with it, even within the expiry limit.
Step #8: Set UTM Parameters
We’re almost done. Scroll down to set your own UTM parameters to track the push notifications:
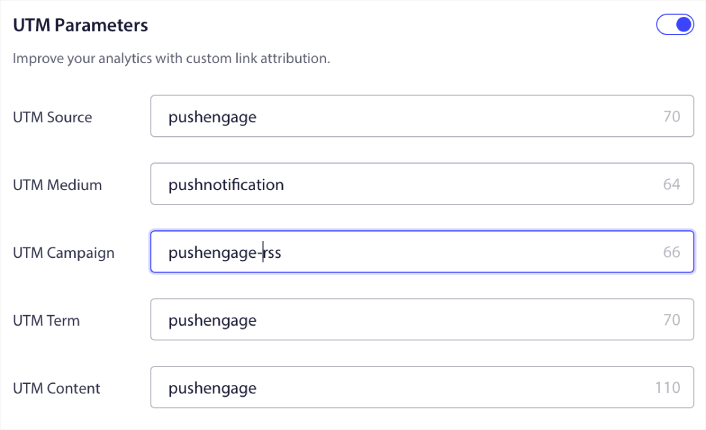
This way, you can attribute your traffic from these push notifications easily in Google Analytics.
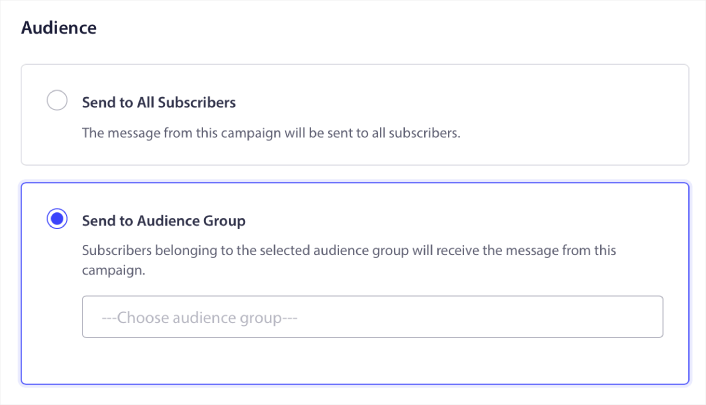
Step #9: Select Audience Group
Finally, we’re going to select an Audience Group to send your RSS push notifications. You either send the RSS feed campaign to all your subscribers, or you can create Audience Groups to send personalized push notifications even from your RSS feed.
And that’s it! That’s really all there is to it.
Now, every time you publish a new post, any push notification subscribers in the selected Audience Group will automatically receive a push notification about your new content.
What to do After You Set Up RSS Push Notifications
If you’re new to sending push notifications, you should follow a full-blown push notification testing process before you go live. It will help you troubleshoot common issues before your visitors see them and start complaining about a broken user experience.
And if you haven’t already, go ahead and give PushEngage a try. PushEngage is the #1 push notification service in the world. So, if you’re serious about growing your business, you should invest in PushEngage.
RSS push notifications are great. But you should start creating more targeted push notifications for better results. Creating custom push notification campaigns might take time, but they’re really worth it. Check out these articles before you make up your mind:
- How to Convert Subscribers To Buyers Using Web Push Notifications
- Push Notification Best Practices
- 21 Best Website Welcome Message Examples You Can Use
- Why Welcome Push Notifications Are Important
- How to do Push Notification A/B Testing (Best Practices)
Push notifications are helping businesses grow across the world. Are you just going to wait for your competitors to start using it before you?


