Let’s start growing your traffic using a web notifications WordPress plugin. Push notifications are a great way to get repeat traffic, engagement, and sales from your website visitors.
But what web notifications WordPress plugin should you choose? Can you afford web push notifications as a marketing channel? How do you make the most of your plugin? Most importantly, do you need a developer to get started?
In this article, we’ll take a look at how you can install a web push notifications WordPress plugin on your website with zero coding in less than 10 minutes. We’ll also show you how to send a test notification so that you know for sure that everything’s working as it should.
Very cool! Let’s dive right in.
NOTE: If your website isn’t built using WordPress, you can install push notifications using other methods. We don’t cover those methods in this article, but if you’re interested, check out our installation guide.
What Are Push Notifications?
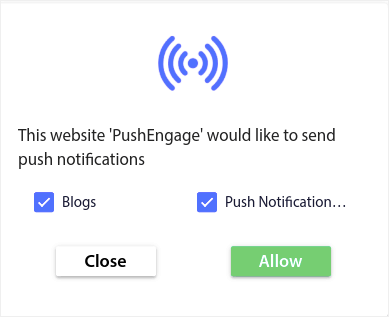
A push notification is a short, clickable pop-up message that appears on a subscriber’s device and redirects the subscriber to your content with one click:
The best part is that the notifications pop up even if the subscriber isn’t using a browser. It’s like an email blast, but with a web push notification, your subscribers don’t need to be using an app to see your message.
In short: WordPress push notification is a simple way to send out a clickable link to your content to anyone who is subscribed to push notifications.
With push notification sequences, your audience now has no excuse to ignore you. And unlike social media websites, there is no algorithm throttling your reach to get you to pay for ads. The coolest part about web push notifications is that you can use them to complement your lead magnets and email opt-in forms!
Pro Tip: If you’re not using lead magnets yet, you should start creating lead magnets to boost your conversions.
We recommend using PushEngage to get started with push notifications for free. And we’re going to do this using the PushEngage WordPress plugin. PushEngage is the best push notification service in the world and we’re going to show you how to get started with push notifications using PushEngage.
Why You Should Use a Web Notifications WordPress Plugin
Imagine getting free traffic on autopilot every time you publish a new blog post without the time-consuming SEO campaigns. If you’re running a WordPress site, you already know how much work it is to promote your content and get readers to keep coming back to your content.
The good news is that there’s an effortless way to generate repeat visitors on autopilot:
- Even if… you’re just starting and your fan base is still tiny;
- Even if… you’re running an e-commerce store with hundreds of promos every month;
- Even if… you have a mega blog that’s already generating a ton of SEO traffic;
The answer is:
A web notifications WordPress plugin. Push notifications can be incredibly powerful tools to get repeat traffic, engagement, and sales on your site. The cool bit is that push notifications are super affordable and you can create a bunch of automated push notification campaigns. You can send notifications on post publish, even for custom post types.
Whether you’re running a blog or an eCommerce site, web notifications in WordPress can help you quickly grow your business. Your push notifications can redirect your subscribers to:
- An abandoned shopping cart
- New blog post, podcast, or video
- New content, offers, or sales
- Surveys, polls, and feedback forms
One of the simplest ways to use a web notifications WordPress plugin is to automatically send RSS push notifications every time you publish a new post. But if you’re running an eCommerce site, you can create a bunch of powerful campaigns to grow your revenue as well. This includes advanced features and campaigns such as:
- Website welcome messages
- Cart abandonment push notifications
- Browse abandonment push notifications
- Cross-selling push notifications
- Recurring sales notifications
And more! You can get advanced user segmentation options to send targeted, personalized messages.
The following are just some of the reasons that make push notifications a great marketing tool:
- Subscribers need to give you their explicit permission to receive push notifications. So, it’s highly likely that you web push subscribers will be want to hear from you.
- Push notifications are shorter and demand less attention than email or social media updates. As long as you don’t send too many push notifications, you’ll have great results.
- Most social media algorithms will deliberately limit your reach. So, most your followers never get most of your updates. But push notifications have nearly 100% delivery rates.
- Your subscribers can control how their devices display notifications. So, push notifications are way easier to manage than having to unsubscribe from email marketing.
- Most of your competitors aren’t using push notifications. That means that you have a unique opportunity to create a loyal fanbase for your business.
A lot of eCommerce sites use SMS campaigns to promote their offers. By and large, push notifications are much cheaper than SMS campaigns. Not to mention, you can configure push notifications to include rich media, which is a challenge with SMS notifications.

You can also send push notifications to all Android and iOS mobile devices and web browsers including Google Chrome, Safari, Firefox, Microsoft Edge, and Opera. That range of targeting is something that you just won’t get with SMS campaigns.
We did a detailed breakdown of push notifications vs SMS. You should check that out as well.
How to Install a Web Notifications WordPress Plugin
Well, we’ve already hyped up PushEngage as a web notifications WordPress plugin. The setup process is super easy. So, let’s get our step-by-step guide started. And before you know it, you’ll be sending a notification yourself.
This tutorial works with any WordPress hosting and even for WooCommerce sites. You can also use it for any website builder in the market.
Step #1: Create a Free PushEngage Account
Head over to PushEngage and click on Get Started for Free Now:

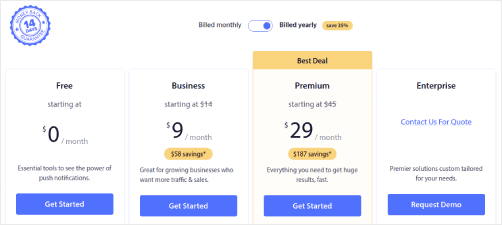
You can get started with the free plan. But if you’re looking for the most powerful browser notifications, you should select a paid plan based on your business needs:
Once you know which plan you want, click on Get Started to create your PushEngage account.
Step #2: Sign Up for PushEngage
Now, it’s time to create your PushEngage account. Start by signing up with an email address or a Gmail ID:

Then, fill out your account details:

And add your credit card information to buy your plan:

If you selected the free account, then your credit card will never be charged any money until you choose to upgrade your plan. And now, you’re all set to get access to your PushEngage dashboard. Just click on Complete Registration and Get Instant Access.
If you’ve used OneSignal or PushAlert before, you’ll see that PushEngage gives you a much cleaner experience from the dashboard. The OneSignal dashboard isn’t meant for advanced campaigns. For that, you’ll need the API more than the OneSignal plugin.
Step #3: Install the Web Notifications WordPress Plugin
You’re done creating your account. So, head over to the PushEngage dashboard and follow along:

Click on Site Settings » Site Details and click the Click Here For Setup Instruction button:

Click on the WordPress tab and click on the Install PushEngage WordPress Plugin button to install the plugin on your website.

Here’s the cool part: When you created your PushEngage account, you already synced your website with your PushEngage account. So, click on the installation link in the PushEngage dashboard to automatically install the PushEngage WordPress plugin to your website. It’s time to add WordPress push notifications to your WordPress site.
Step #4: Connect Your WordPress Website with PushEngage
When you’re done installing and activating the PushEngage WordPress plugin, you’ll see the PushEngage onboarding wizard:

The wizard is fairly straightforward. If you’re a new user, click on New? Claim Your Free Account. And if you’ve already signed up, click on Connect Your Existing Account.
Next, you can select your site from the Select a Site dropdown under Connect a registered site if you’ve already registered a site during signup:

Or, you can click Register a new site to add a new site if you have a Premium pricing plan or higher. In the next step, the onboarding wizard will prompt you to install other must-have WordPress plugins.

If you followed each step correctly, you’ll see this success message from the wizard:

You are now ready to create campaigns and push notification popup modals.
In your WordPress dashboard, head over to PushEngage » Dashboard to get a quick look at all essential elements of your PushEngage account:
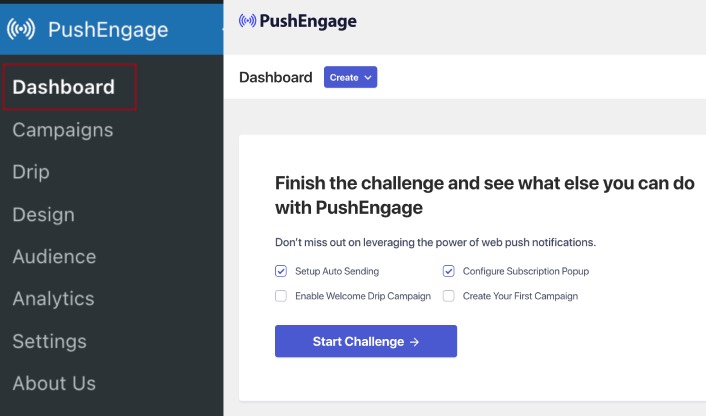
The first thing you see is the the Create button to help you quickly create a new campaign. And if your account is new, you get the Welcome Challenge to help you set up PushEngage quickly while sticking to standard practices.
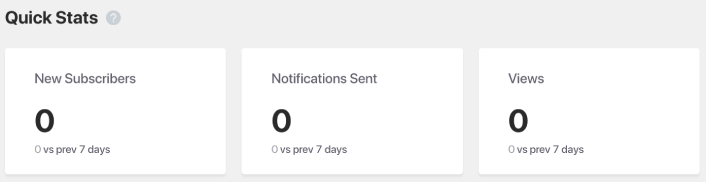
If you scroll further down, you get to see Quick Stats on how your push notifications are performing:
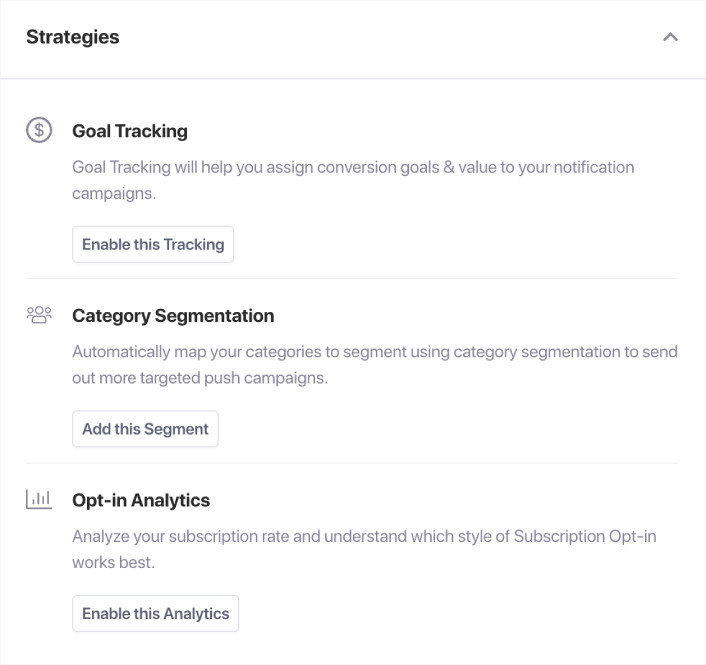
And if you scroll further down, you’ll see recommended strategies that can help you quickly get more push notification subscribers:
And this is barely scratching the surface.
Step #5: Configuring the PushEngage Popup Modals
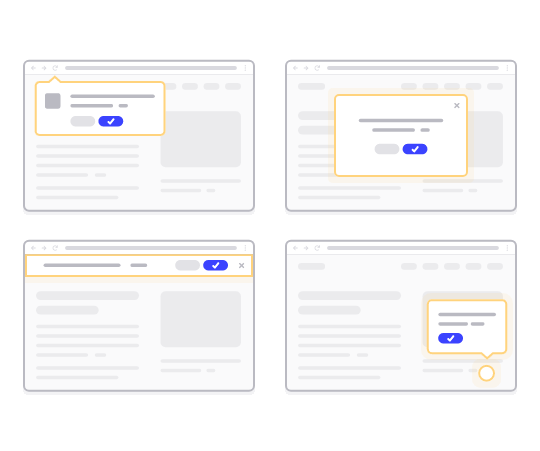
To collect push subscribers, you need a popup modal that asks visitors to subscribe. So, at this time, you’ll need to create a popup modal. Head back to your WordPress dashboard. Go to PushEngage » Design:
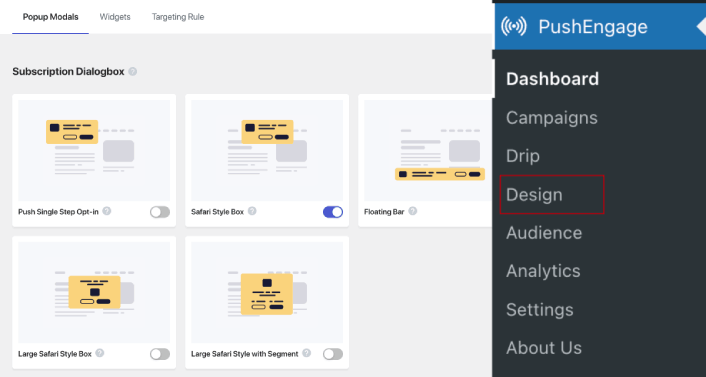
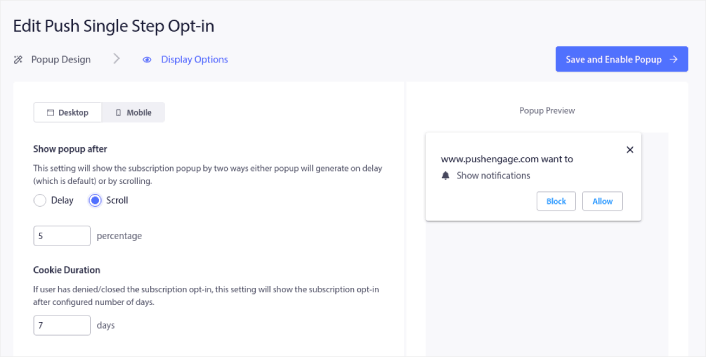
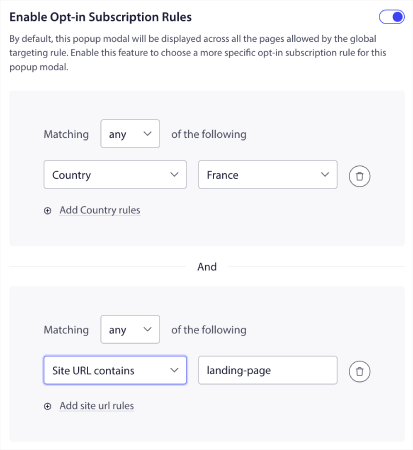
And you can set up as many popup modals as you please. Of course, you can make sure that they get triggered at different times under Display Options for each popup modal.
The idea here is to give your visitors a solid reason to subscribe. If you need some help with that check out our article on how to create a custom push notification opt-in.
And if you want to create more targeted popup modals, you can use the targeting rules under the Targeting Rule tab:
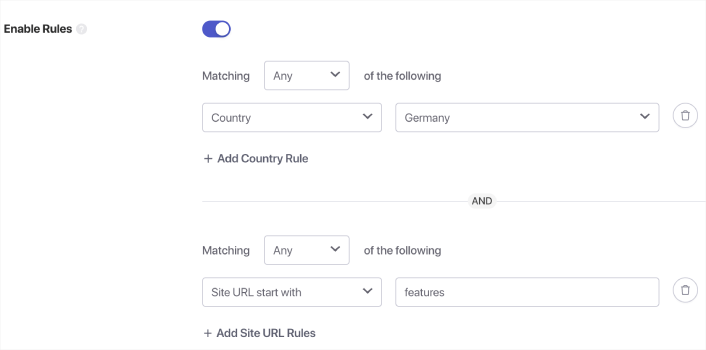
These are global targeting rules and will get preference over targeting rules for individual popup modals. But if you wish, you can create robust targeting rules for each modal by editing them.
For instance, you can create popup modals in different languages to target visitors from different countries.
And if you’d like some templates with a high click-through rate to get started, you should check out this article on high-converting push notification opt-ins.
Step #6: Creating Push Notification Broadcasts
Go to PushEngage » Campaigns to create push notification broadcasts:
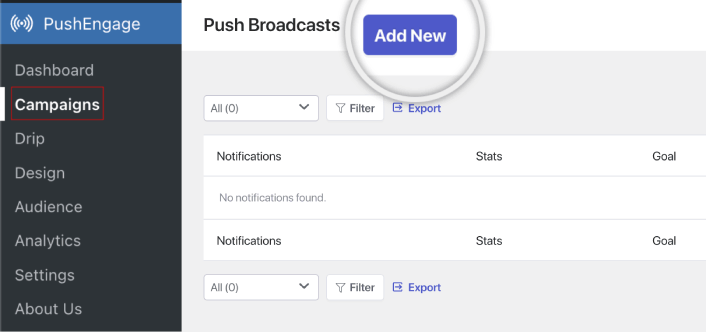
Click the Add New button to create a new push notification broadcast. If you’ve already sent push notifications using PushEngage before, you’ll see a list of your previous notifications here as well.
Step #7: Creating a Blog Subscription Widget
You can also create a subscription widget or an unsubscribe widget to unsubscribe from Chrome notifications from the Widgets tab:
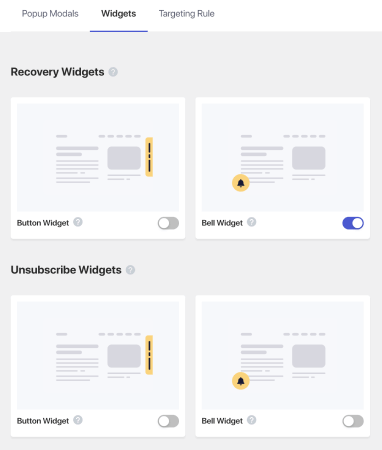
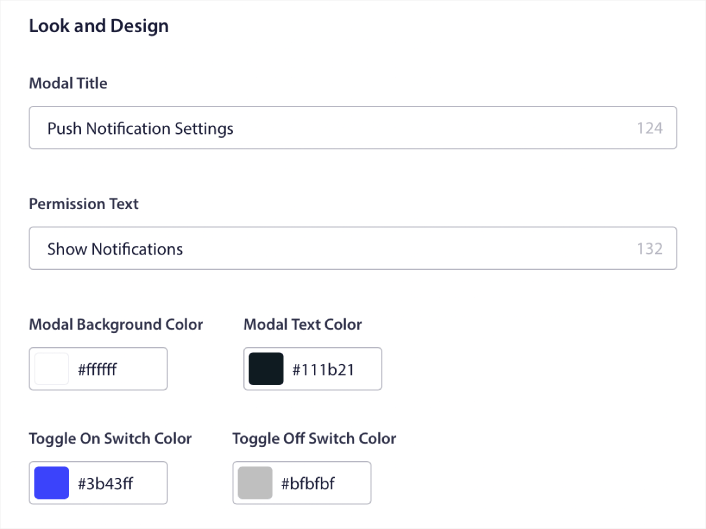
Hover on your widget type and click the Edit Widget button to customize your widget. Start by customising the look and feel of your widget to match your brand’s design language under Look and Design:
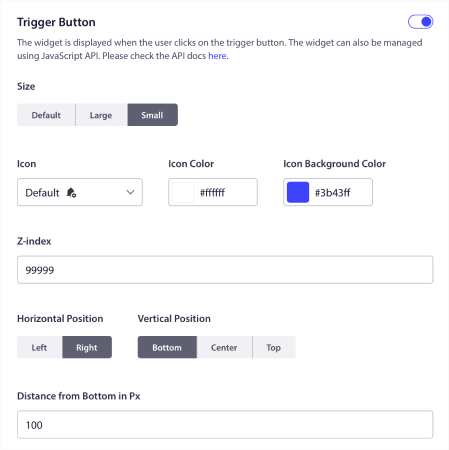
You can create a completely custom popup modal that sticks around even when your visitors don’t subscribe from your default popup modal. If the sizing of the popup trigger button feels off to you, you can customise that as well under Trigger Button:
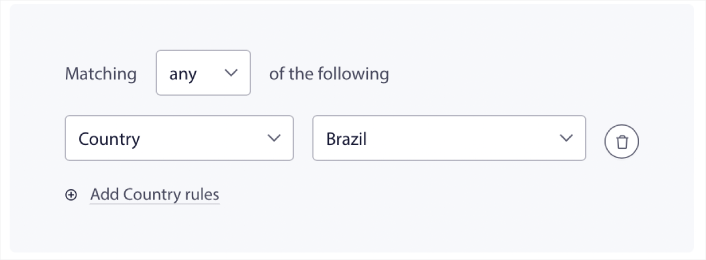
And the coolest bit is that you can also select specific pages to display the widget under Trigger Button Display Rules:

By default, the button will be shown across all pages. But you can create custom targeting rules to show specific versions of the widget by targeting specific:
Locations:
Devices:
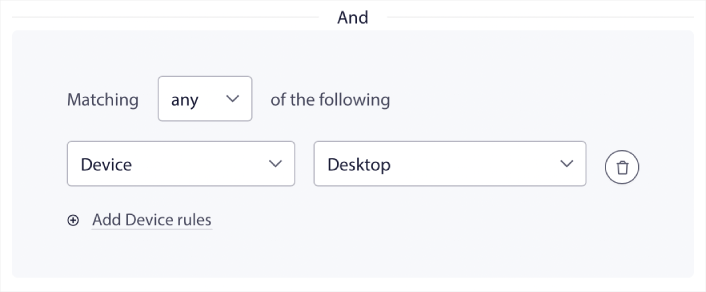
And URLs on your site:

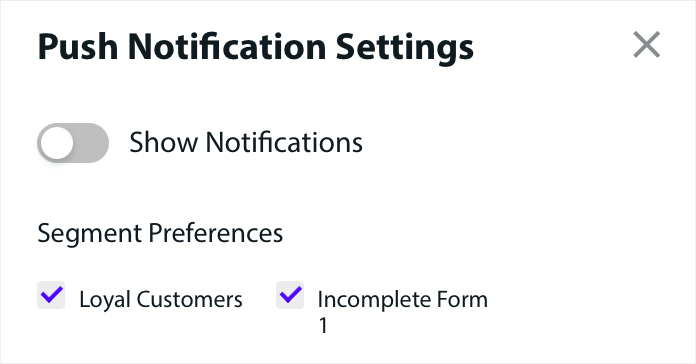
To take things to the next level, you can also allow your subscribers to select what types of notifications they want to receive under Segment Preferences:
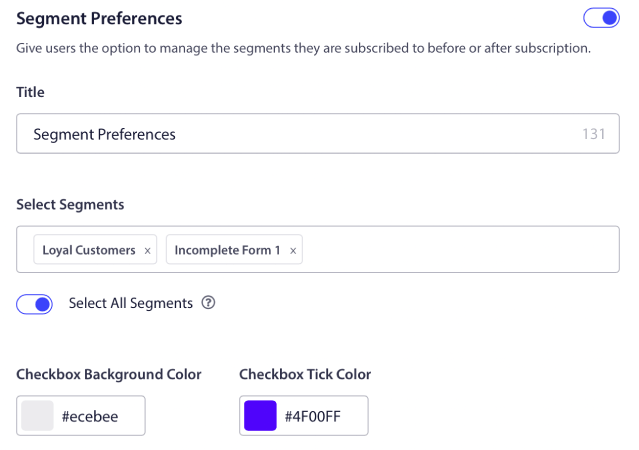
If you enable Select All Segments, then your subscribers will get automatically added to all the selected segments by default:
This is an incredibly powerful feature for news sites and blog sites.
If you’re running a eCommerce push notifications on your site, a lot of those are going to be triggered push notifications. This includes:
- Browse Abandonment Push Notifications
- Cart Abandonment Push Notifications
- Price Drop Alerts
- Back in Stock Alerts
And even custom triggered push notification campaigns.
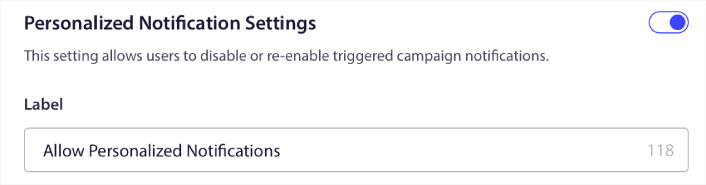
With the Subscription Management Widget, you can now allow your subscribers to choose if they want to see personalised notifications:
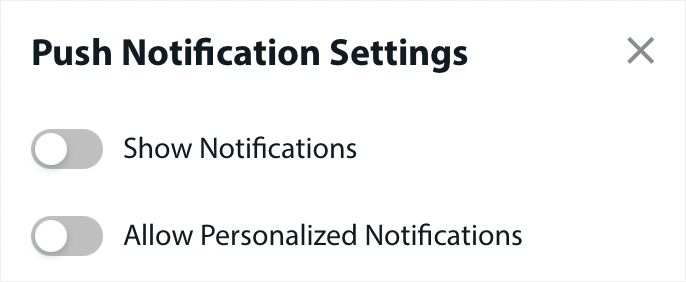
Just enable the option under Personalized Notification Settings:
Next, you’ll want to test your web push notifications to see if everything’s working alright.
Step #8. Create Automated Push Notifications to Promote Your Posts
You can now create automated push notifications to promote your posts from inside your WordPress Gutenberg editor. Head over to PushEngage » Settings » Auto Push Settings:
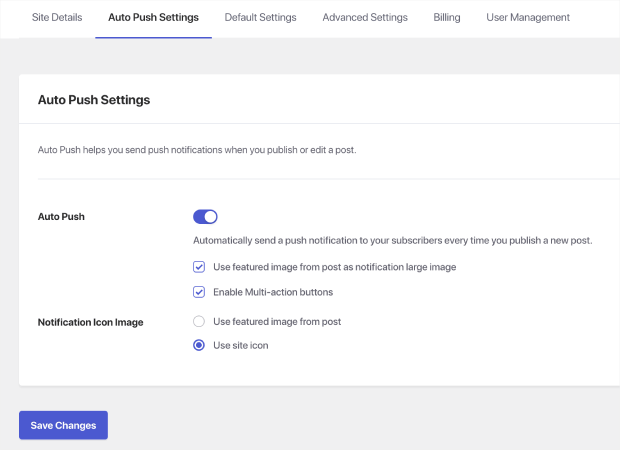
Enable the WordPress auto push feature using the toggle button. Then, check the boxes to enable multi-action buttons and use the featured image from the post as the notification large image. Enabling these settings will help you send rich push notifications like this one:
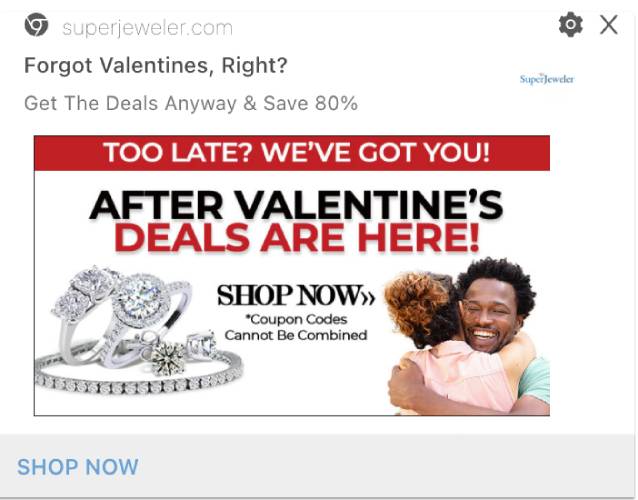
Using the large image and a call to action button will get you higher view rates and click rates.
Next, go ahead and edit any of your WordPress posts. At the bottom of your posts, you should now see the Gutenberg block to create an automated push notification to promote that post:
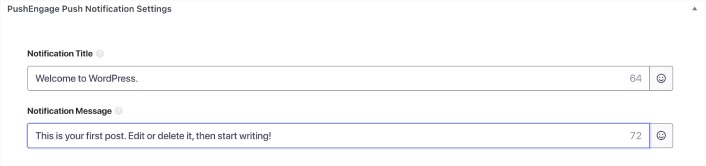
Add a Notification Title and Notification Message to create your auto push campaign. Then, scroll down for more settings.
You can add a push notification large image:
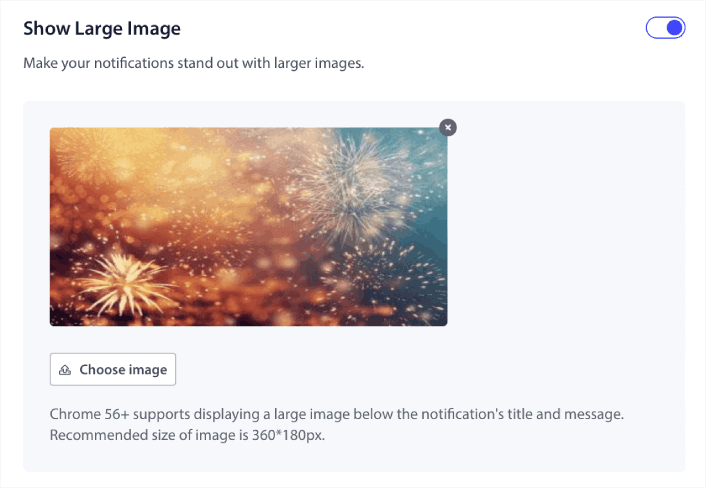
By default, if you enable the large image for the notification, PushEngage uses your post’s featured image as the large image. But you can add your own image as well.
You can also create buttons for your push notifications under Multi Action Notification:
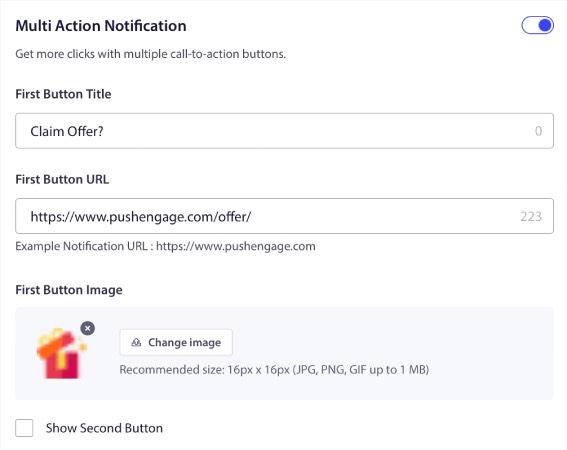
Push notifications with buttons usually get higher click rates than ones without buttons. In fact, it’s part of our push notification best practices guide to always use a call to action button for your notifications.
If you scroll down even further, you can see Audience settings to select who should get your auto push notification.
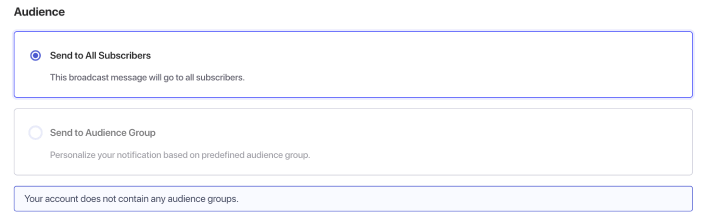
Of course, you’ll need to create an Audience Group before you can target them (more on this later). And when you’re done setting up your push notifications, take a look at the right-hand bar in Gutenberg for PushEngage Push Notification settings:
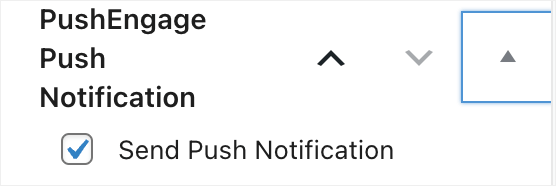
Make sure to enable the checkbox that says Send Push Notification. Whenever your post gets published, your push notification also gets sent.
Step #9: Segments and Audience Groups
Of course, nothing beats the level of personalization you can get by creating segments and audience groups for your push notification subscribers. Go to PushEngage » Audience and start creating segments and audience groups right away.
Under the Segments tab, you can create new segments or edit existing ones:

And if you need even deeper personalization, create an audience group in the Audience Groups tab:

If you’re new to push notification segments and personalized push notifications, you should check out our article on how to create segments and our announcement on advanced audience grouping.
Step #10: Get Detailed Push Notification Analytics
Analytics and A/B testing will help you stay on tracking with your business goals. While you can track push notifications in Google Analytics as well as your PushEngage dashboard, it’s way more convenient to get detailed analytics from your WordPress dashboard.
Go to PushEngage » Analytics:
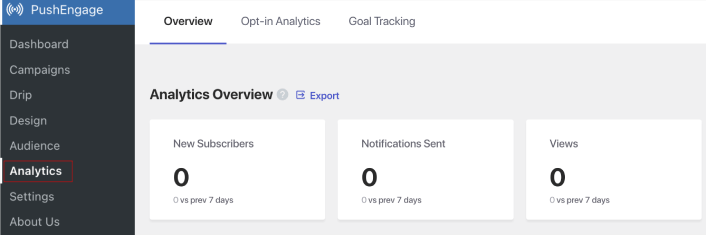
The default analytics dashboard simply gives you an overview of how your PushEngage campaigns are performing. But if you want a better look at the optin analytics for your popup modals, go to the Opt-in Analytics tab.

And you can enable goal tracking in PushEngage under the Goal Tracking tab:
Goal tracking helps you measure exactly how much each notification adds to your revenue.
How to Test Your Web Push Notifications On WordPress
You’ve now set up WordPress push notifications. It’s time to implement push notifications. But how do you know if your push notifications are working properly?
We recommend that you create a welcome push notification to test if your setup went smoothly. A welcome notification is a push notification you send a new subscriber to confirm their subscription and welcome them on board.
Let’s set up a welcome campaign right now.
Go to PushEngage » Drip:
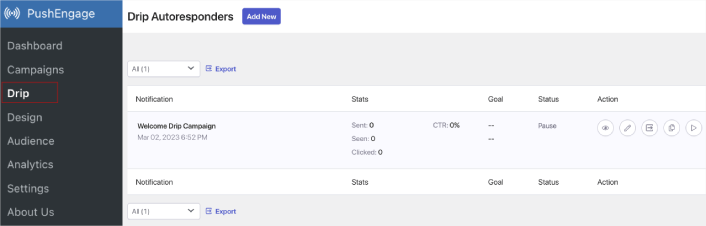
Click the Add New button. Then, name your campaign (we suggest something like Welcome Drip), and under Content, select the option that says, “Send notification immediately after user subscribes“:

At this point, you can click on the arrow next to the notification to edit the content of your notification. If you have a Premium or Enterprise plan with PushEngage, you’ll be able to add more than one notification to create a sequence of automatic push notification welcome messages. Just click on Add New Notification and edit the content.
Once you’re done, click on Drip Settings and select the option to send your welcome campaign to all subscribers:

Then, scroll down to set your own UTM parameters to track the push notifications:

And when you’re done, scroll back up and click the Activate Autoresponder button:

You can schedule notifications by time zone as well. Scheduling can help you get better click rates on your notifications.
NOTE: For now, you can’t create eCommerce push notifications inside the WordPress plugin. You can still create triggered notifications in the dashboard but they won’t show up in the WordPress plugin.
And that’s all there is to it! You have successfully add web push notifications to your WordPress website.
What to do After You Install a Web Notifications WordPress Plugin
A WordPress push notifications plugin can bring in some quick and easy traffic to your content. But that doesn’t mean that your notifications will always be 100% effective.
We suggest that you take some time to read our articles and learn how to supercharge your automated push notifications. Start with our article on push notification best practices.
If you’re new to push notifications, you should follow a full-blown push notification testing process before you go live. It’ll help you troubleshoot common issues before your visitors see them and start complaining about a broken user experience. And most definitely you should set up Google Analytics to track push notifications.
At their core, push notifications are a marketing tool to get repeat site visitors. So, you should see an increase in traffic after you install a web notifications WordPress plugin.
You should also check out some more automated push notification campaigns such as:
If you’re already familiar with email marketing, you could also start reading how to create Drip campaigns with PushEngage. It should be right up your alley.
And if you haven’t already, go ahead and give PushEngage a try. PushEngage is the #1 push notification service in the world. So, if you’re serious about growing your business, PushEngage is the right option for you.


This is a very beautiful and detailed narration. I’ve been using onesignal free for a long time, but the performance is so bad!
I have been using it for a long time. I am very glad I have 50000 subscribers
It’s a great article. I like your site very much.
I have been using it for a long time
Truly perfect timing to know about such a wonderful product for attracting visitors and keeping them! Great work!
Could we send a push notification that is automated and timed to go out 15 minutes after a non-subscriber last exits our blog? Could you accommodate such a push notification?
Hey, Gary! I’m sorry, but you can only send push notifications to a subscriber. You can send out automated push notifications to a subscriber. But if you’re struggling with readers exiting your blog, you should set up exit intent popups to capture their emails.