
Looking for a way to add cart abandonment push notifications to your site using Google Tag Manager?
Google Tag Manager acts like a bucket to store your push notification scripts and more. And cart abandonment campaigns are a great way to increase engagement and sales on autopilot. So, let’s put both these epic automation together.
In this article, we’re going to help you install GTM push notifications in less than 10 minutes.
Let’s dive in.
How to Create Cart Abandonment Push Notifications Using GTM
Installing push notifications using Google Tag Manager is a really quick and easy process. Setting up a cart abandonment campaign using GTM is slightly more technical, but we can do it together. Just follow these steps and by the end of this article, you should be able to send push notifications from your site like this one:

And the beauty of using Google Tag Manager to do it is that you don’t have to use any code at all. You don’t need to edit your website’s HTML to install push notifications either.
Let’s dive in.
Step #1: Set Up Your PushEngage Account Using GTM
Before creating cart abandonment campaigns, you’ll need to install PushEngage on your site. And since we’re going to set up cart abandonment campaigns using Google Tag Manager, it makes sense to install PushEngage using GTM as well.
We’re not covering that in this article, though. If you’re new to push notifications, go ahead and check out our tutorial on how to install push notifications on your site using GTM.
Follow the steps in that article. Once you’re done, we’ll get started with creating your cart abandonment campaign.
Step #2: Create a Cart Abandonment Campaign in PushEngage
Once you’re done setting up the opt-in, your site can collect subscribers.
Now, it’s time to create your cart abandonment campaign.
Head over to Campaigns » Triggered Campaigns and click on Create New Triggered Campaign:

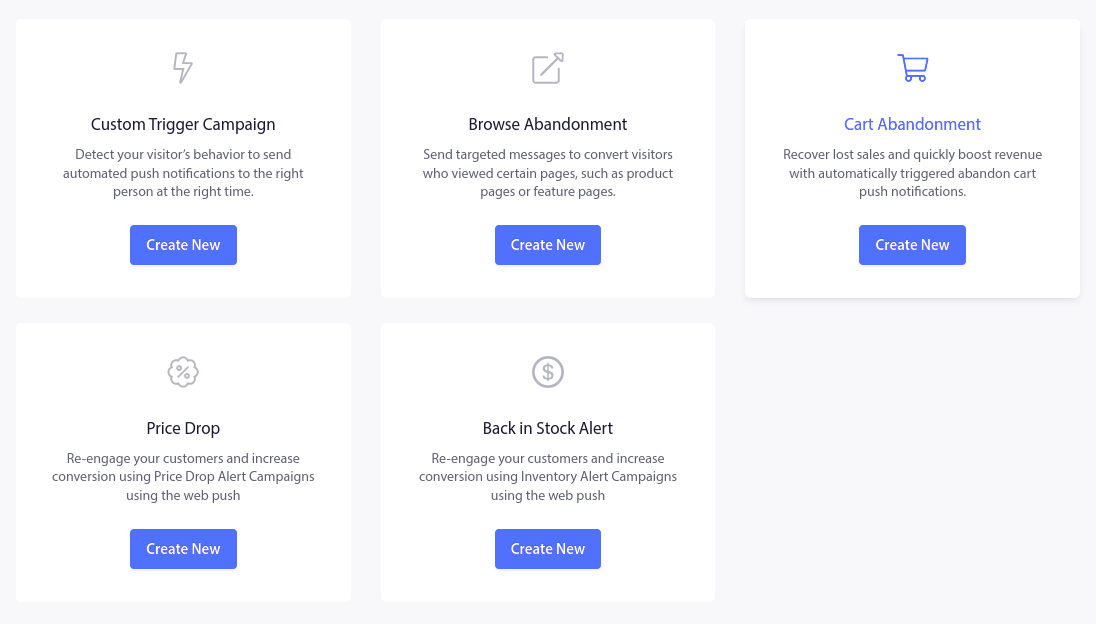
Then, from the campaign templates, select Cart Abandonment and click on Create New:
If you need a detailed tutorial on creating a cart abandonment campaign, check out this article on how to set up cart abandonment push notifications. Once you’re done, you’ll need to configure Google Tag Manager to trigger and send cart abandonment reminders.
Step #3: Create a dataLayer Object
According to Google, “To ensure maximum flexibility, portability, and ease of implementation, Google Tag Manager functions best when deployed alongside a data layer. A data layer is an object that contains all of the information that you want to pass to Google Tag Manager. Information such as events or variables can be passed to Google Tag Manager via the data layer, and triggers can be set up in Google Tag Manager based on the values of variables”
A dataLayer object is a set of variables in an array that’s used to fetch information dynamically. In simple terms, the dataLayer is your product feed. Check out Google’s documentation to learn more about dataLayer objects.
Here’s an example:
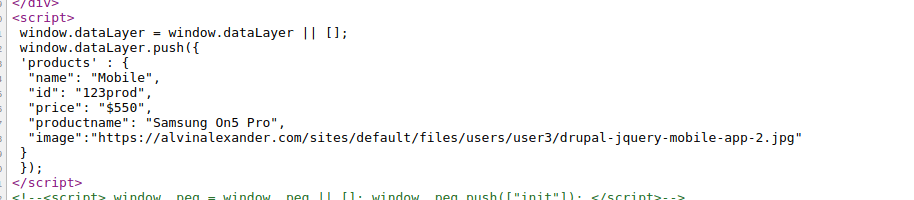
Once you have this dataLayer created, you’ll need to add it to the HTML <body> of your site.
Next, you’ll want to add a trigger event in your ‘Buy Now’ or ‘Add to Cart’ buttons so that when your visitors click on these buttons, the abandoned cart campaign is activated.

NOTE: Your abandoned cart campaign doesn’t start immediately after the event is triggered. Usually, the campaign starts if your visitors have added something to their cart but haven’t purchased anything even after half an hour.
Step #4: Create dataLayer Variables in GTM
In your Google Tag Manager Account, head over to Workspace » Variables » Configure and scroll down to Clicks:
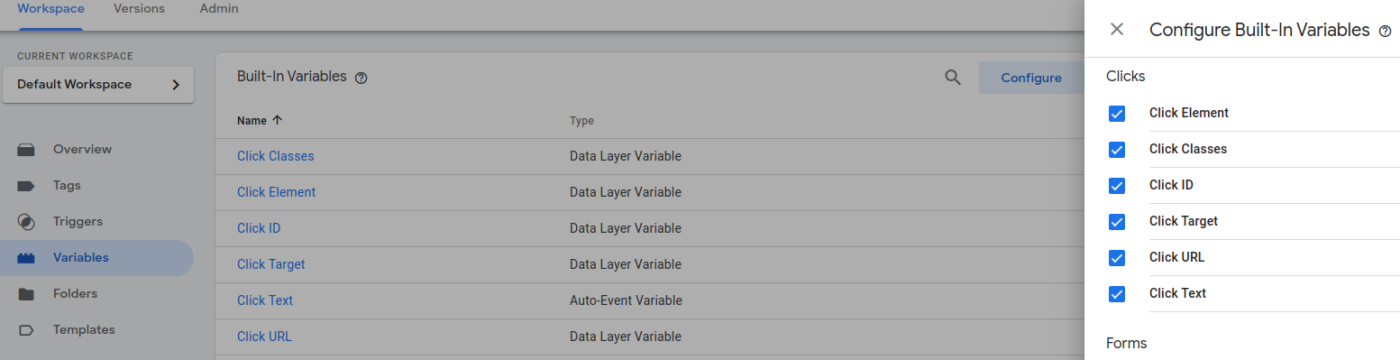
And enable all variables under Clicks.
Then, go back to Variables and under User-Defined Variables, click on Create New:
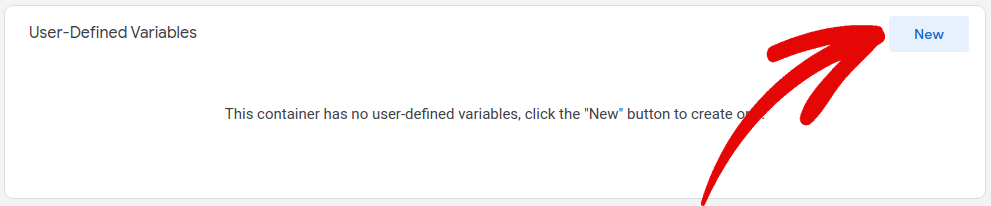
Here, add your dataLayer variables to Google Tag Manager:
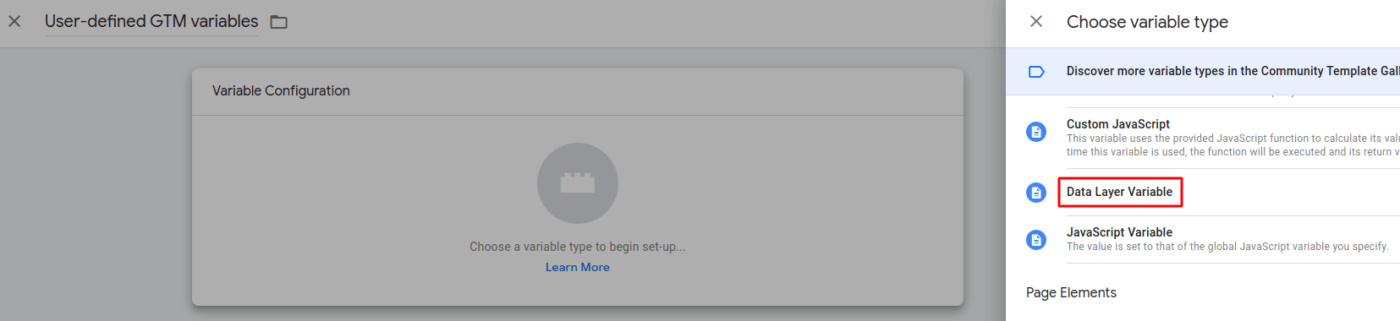
Your dataLayer variables are the different attributes of your products. In our example, the dataLayer variables would be:
- products.name
- products.id
- products.price
- products.productname
- products.image
You’ll need to add all these dataLayer variables in GTM.

IMPORTANT: Follow the syntax exactly or the campaign will never get fired at all.
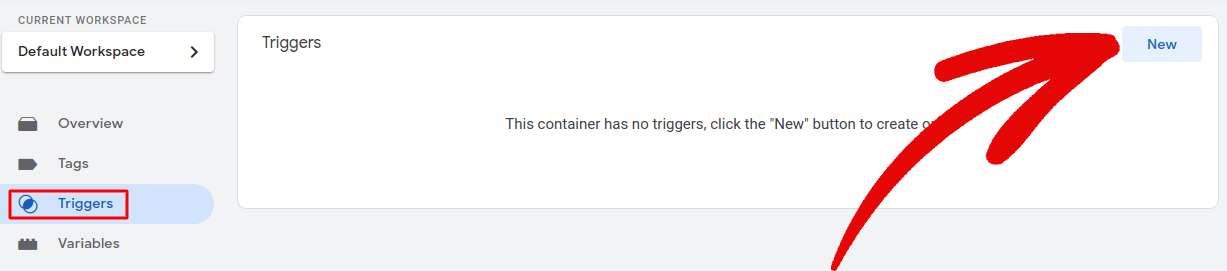
Step #5: Create a Trigger in GTM
Head over to Triggers and click on Add New:
And create a Custom Event to trigger your abandoned cart campaign when someone clicks a Buy Now button:
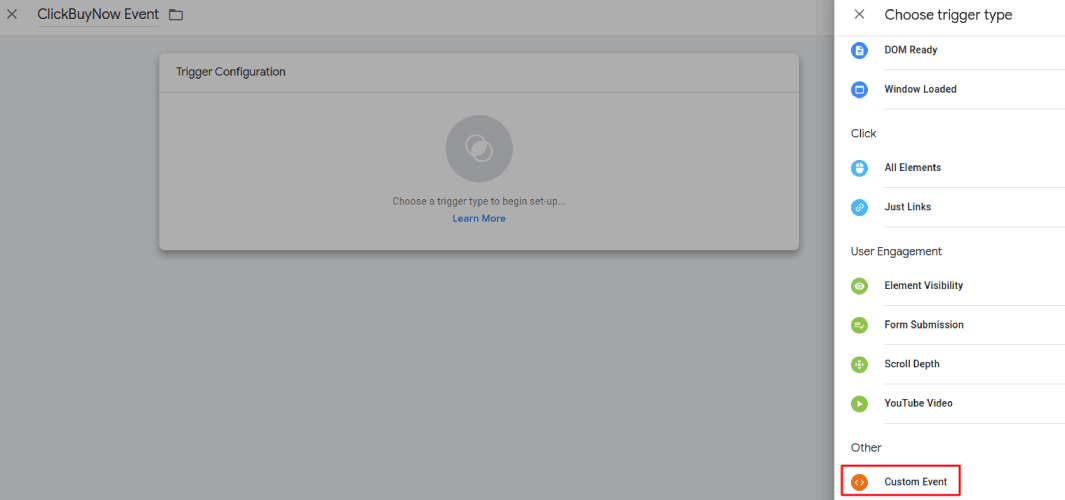
Configure the custom event to fire when someone clicks on a button with the button text “Buy Now”:

Step #6: Configure Tag with dataLayer Variables and Triggers
Finally, you’ll want to head back to your PushEngage dashboard and update the cart abandonment tag with dataLayer variables and triggers. Head over to Campaign » Triggered Campaigns and click on the Your Code button:
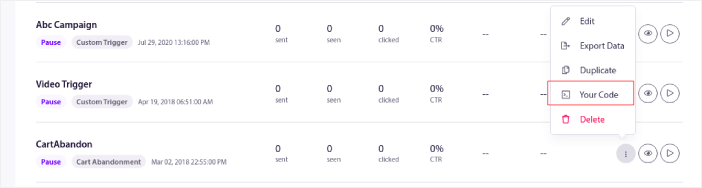
And copy your campaign code:

Once that’s done, you’ll want to paste the code into your website’s HTML code right above your Buy Now buttons.
And that’s it! You’re done.
What to do After You Set Up Cart Abandonment Notifications
That’s all for this one, folks!
You can also create segments dynamically through GTM. Maybe check that out next?
If you’re new to push notifications, you should follow a full-blown push notification testing process before you go live. It’ll help you troubleshoot common issues before your visitors see them and start complaining about a broken user experience.
You should also check out these epic resources while you’re at it:
- 7 Smart Strategies to Boost Customer Engagement
- How to Get More Traffic to Your WordPress Blog (9 Easy Ways)
- How to Boost Your Web Push Notification Opt-In Rate (7 Ways)
And if you haven’t already, go ahead and give PushEngage a try. PushEngage is the #1 push notification service in the world. So, if you’re serious about growing your business, you should invest in PushEngage.


this post is missing a screenshot of the tag itself. Towards the end you reference “Then in your GTM Dashboard create the tag with abandon cart code and add the dataLayer variables to it, you can see in the below example.” without an example available.
Please update with an example tag setup image.
also I’m assuming there’s a point where we’ll need to add the pushEngage script to the custom tag? That part could be more clear on this post.
Thanks,
How would you do this with a platform like Marketo or Pardot?
Hey, Dan! That’s a really great question. I think you should hit up our Customer Success team for a more detailed answer on this. Drop us a line on our contact page.