Struggling to improve your web push notification optin rate?
Don’t worry. This is a really common problem. Most businesses treat their push notification opt-ins in the same way as an email lead magnet.
And that’s really where things go wrong.
The dynamic between your web visitors and your web push notification opt-in is very different from your usual popup. Typically, with an email lead magnet, you can embed the opt-in anywhere on the website. Push notification opt-ins are different. You have to time the popup in a way so that it gets seen only when you’re confident that your visitors care enough about your business to subscribe.
So, in this article, we’re going to put the problem with low push notification opt-in rates to bed once and for all. We’re going to give you seven actionable ways to boost your web push notification opt-in rates.
All you have to do is simply follow along.
In this article, we’ll show you how to set things up using PushEngage. PushEngage is the #1 push notification software in the market. So, if you haven’t already, you should really get started with PushEngage.
Ready? Let’s get started!
When to Ask Visitors to Subscribe for Push Notifications
Push notifications cost very little to get started. But that does not mean that you shouldn’t focus on optimizing your signup processes. The old way to get subscribers was to promise your visitors a certain amount of value and ask them to subscribe. And it worked for a while. But the problem with that model is that your subscriber takes all the risk.
How does anyone visiting your site for the first know if your content is even worth trading their contact information? That’s a huge leap of faith that your audience has to take first. Eventually, fewer and fewer people subscribed to different newsletters and notifications.
We advise an entirely different model. Offer value upfront. In other words, you serve your audience first and make money as an outcome. So, if you’re wondering when is the right time to ask your visitors to subscribe for push notifications…
Do it only after you have offered something of value to your audience, and then promise them MORE good stuff if they subscribe.
You don’t have to create a ton of content to offer value. It could be something as simple as an article on something that your audience deeply cares about. Or, you could have a very well-written product page. That one piece of content can become reason enough to subscribe to your push notifications.
We’ll talk more about how you can do this later in this article. So, keep reading!
Where to Ask Visitors to Subscribe for Push Notifications
We get a really common question: Where do you ask website visitors to subscribe for push notifications? Do you ask:
- On the home page?
- In an article?
- On your sales pages?
- Using a popup?
- Using a sidebar widget?
- Using a floating bar at the bottom of the page?
- Using a button?
And the reality is that there is no one right answer.
It really depends entirely on your audience and what they value.
If you’re running a vegan food recipe blog, you might want to set up pop opt-ins with segments in your articles.
On the other hand, if you’re running an eCommerce site, your audience may want price drop alerts on your products. In that case, you should set up a button on product pages.
In any case, you should constantly check the analytics of your push notification opt-ins. That’s the only way to figure out where you should ask your visitors to subscribe to your push notifications.
How to Increase Your Push Notification Optin Rate
Let’s take a look at how you can increase your push notification opt-in rates in 7 simple ways.
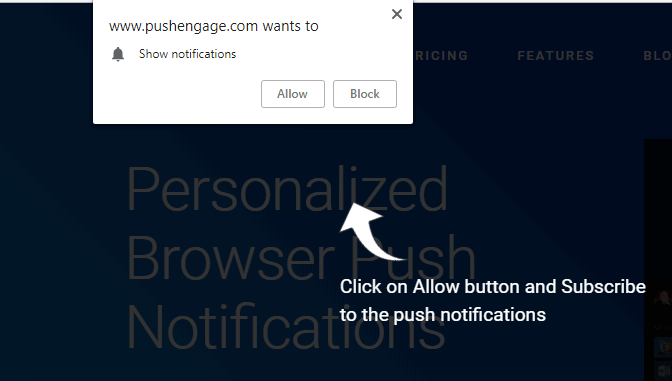
#1. Use Single-Step Push Notification Opt-Ins
Single-step push notification opt-ins get much higher opt-in rates.
The reason for this is fairly simple. Having to opt for anything and then confirm the subscription adds an extra step. If you’ve ever worked with marketing funnels, you’ll know that the more steps you add to any funnel, the higher your drop-off rates will be.
But there’s a trade-off: You get a lot of accidental subscribers with single-step push notification opt-ins. But that’s alright. You can segment your audience so that even a cold list warms up to your notifications over time.
Also, you should know that single-step opt-ins use the default browser popups.

So, you can’t really customize them like you can with two-step opt-ins.
Pro-Tip: From what we’ve seen from our customers, using regional languages in your opt-ins can get up to 20% higher opt-in rates.
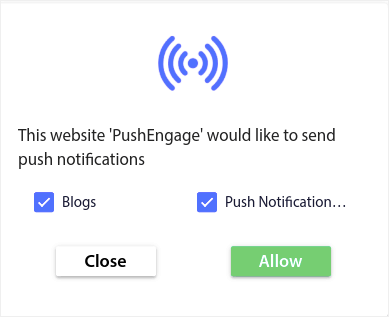
#2. Use A Subscription Overlay
Subscription overlays add focus to your opt-in popup:
And this is a great way to make sure that people won’t simply ignore your opt-in popup. The visitor has to either click on ‘Allow,’ ‘Block,’ or hit the close icon to move forward.
So, how do you set it up?
In your PushEngage dashboard, head over to Design » Popup Modals to see the list of different optin types:
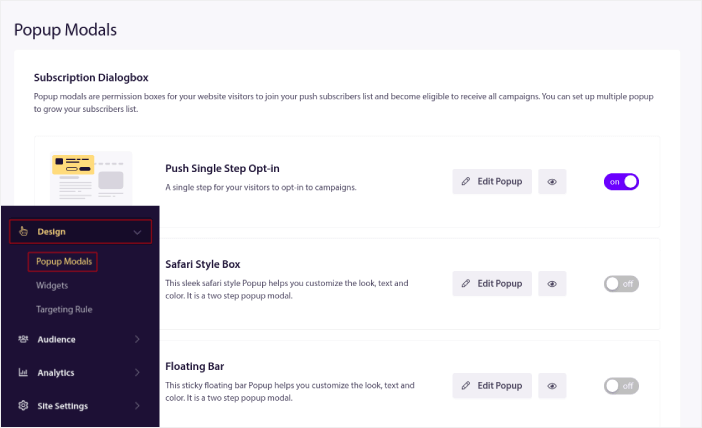
From this list, go to Push Single Step Optin and click on the toggle switch to enable the optin:
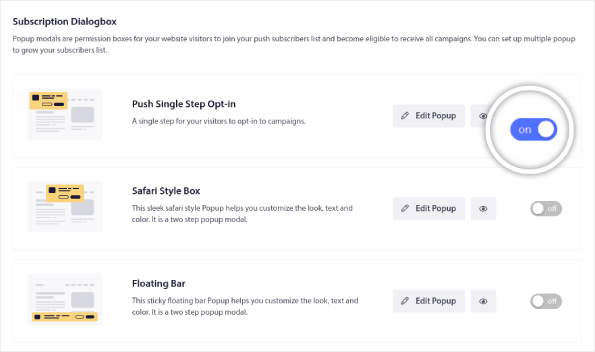
Then, click on the Edit Popup button to customize the optin:
You can also select where to show your popup on your site. Click on Enable Opt-in Subscription Rules:
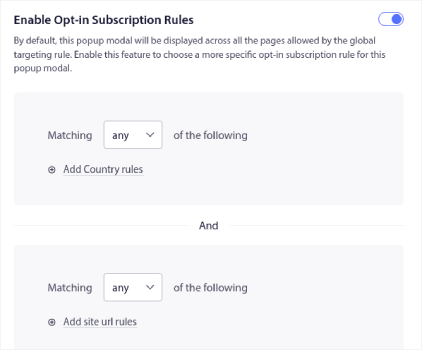
If you want your optin to be really prominent, you can use a subscription overlay to blur out the rest of the site until your visitor either subscribe to your notifications or exit the popup modal. Click on Enable Subscription Overlay:
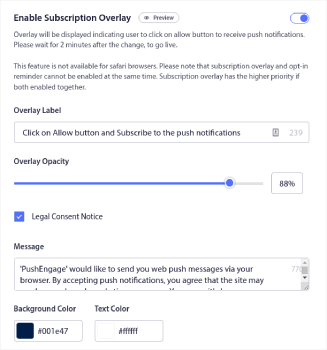
And you’re done!
#3. Show Optin After Optimal Time Spent
As we mentioned before, you want to give your visitors some value upfront before asking them to do something for you. One great way to do this is to delay showing the push notification opt-in. Wait until your web visitors have a good reason to hear from you.
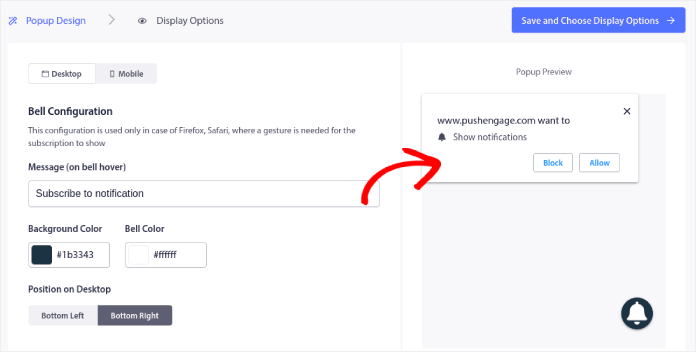
When you’re done with the Popup Design for your optin, click on Save and Choose Display Options.
Under Display Options, you can set up when to show your optin after a visitor lands on your site:
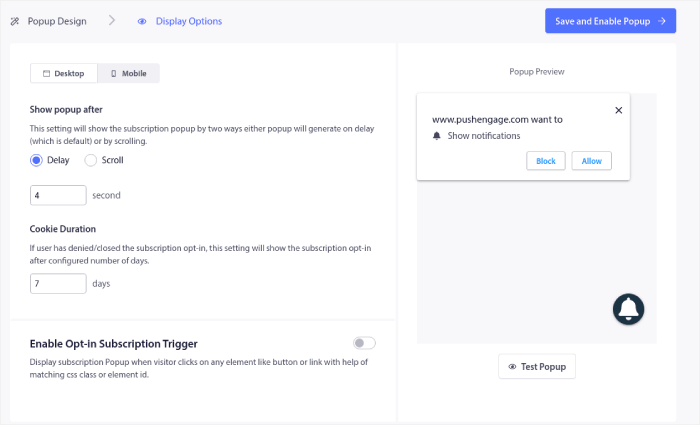
You can set a time delay after which the popup will show up. Or, you can set the optin to show up after your site visitors scroll a certain percentage of the web page.
If you’d like to create a click to subscribe button, you can also Enable Optin Subscription Trigger. When you’re done, click on Save and Enable Popup.
And you’re done!
#4. Show Your Opt-In On Page Scroll
A similar idea to the previous one is to trigger your opt-in popup on page scroll.
For this, you’ll probably want to use Google Analytics to figure out the average scroll depth of your content. If you’re not sure how to do this, check out this article on how to use scroll tracking on WordPress.
And then set your opt-in to get triggered just before your visitor hits that average scroll depth.
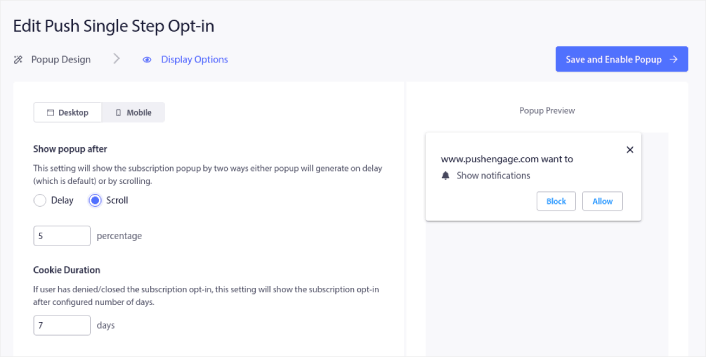
Under Display Options, you can also set a scroll percentage to trigger your optin:
#5. Set the Opt-In to Show Up Again
So far, we’ve seen that you can trigger the opt-in later by setting either a time delay or a scroll depth. But what happens if the visitor hits ‘Close’ or ‘Block’?
By default, the same popup will show up every single time the visitor returns to your site, or they never see it again. It really depends on the vendor you’re using.
Ideally, you’d want to give your visitors an option to subscribe again. But not every single time they visit. Especially if your traffic returns to your site daily.
You’d annoy your visitors to no end.
Thankfully, with PushEngage, you can actually modify when your opt-in popup gets shown again. In the same window as the last sections, you can set a cookie duration.
In our example, we’ve set it to 7 days before a visitor sees the popup again. But you can set it to whatever you like. We do recommend the 7-day minimum, though.
#6. Display A ‘Get Notifications’ Widget
We’ve already seen what you can do to pitch your visitors to subscribe for a second time. But what if they never meant to hit ‘Block’ in the first place?
And now your visitor wants to become a subscriber, but they don’t really know how to do that.
That’s exactly why you should also have a ‘Get Notifications’ widget.

Full disclosure: The widget alone won’t get massive opt-in rates. It’s meant as a safety net to improve overall numbers. A widget isn’t nearly as forceful as a popup. So, expect weak results from a standalone widget.
The good news is that if you pair it up with a popup, you’ll see a definite increase in your opt-in rates. In your PushEngage dashboard, head over to Design » Widgets.
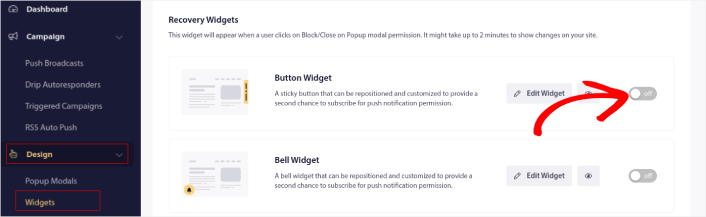
You can create a button widget or a bell widget depending on your site’s design language.
And you can customize your widget below the check box. You can customize where to show the widget on your site, what the button says, and how it looks on your site.
Very cool!
#7. Using Funnel Analytics
Almost every business uses Google Analytics to measure how well their content is performing. Every conversion toolkit under the sun comes with its own pop-up analytics. So, why should push notification popups be any different?
Here’s what’s epic…
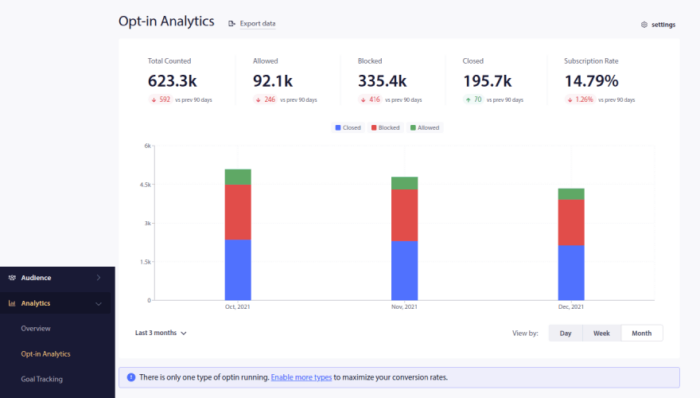
You can get analytics not just for your push notification campaigns but also for your opt-ins!
What to do After You Boost Your Push Notification Optin Rates
That’s all for this one, folks!
If you need some help getting started, you should check out this article on the most high-converting push notification opt-in examples for inspiration.
You should also check out some more automated push notification campaigns such as:
And if you’re just getting started with push notifications, you should definitely try using PushEngage. PushEngage is the #1 push notification software in the market. You can create powerful automated push notifications that generate repeat traffic and sales.
So, if you haven’t already, get started with PushEngage today!


