Still struggling to re-engage your Android app users once they close your app? You’re not alone. Most users abandon apps within days, and without the right tools to bring them back, they’re gone for good. That’s where Android push messages shine.
These small, timely alerts can re-engage users, boost repeat sessions, and drive conversions — even when they’re not actively using your app.
In this guide, we’ll break down:
- What Android push messages are
- How they work (with visuals)
- Why they matter for app growth
- And how to start using them effectively
Let’s dive in and turn your app into a retention engine.
Send Mobile App Push Notifications Today!
Push notifications are a super effective, low-cost marketing tool to help you grow your repeat traffic, engagement, and sales on autopilot.
- What Are Android Push Messages?
- Which Android Push Messages Service Should You Choose?
- How to Install Android Push Messages On Your Website
- How to Send App Push Messages on Android
- How Do Android Web Push Messages Work?
- How do Mobile Android Push Messages Work?
- What Are the Different Parts of Android Push Messages?
- Different Types of Push Notification Opt-ins
- How to Personalize Your Android Push Messages
- How to Create Targeted Android Push Messages
- How to Send Targeted Android Push Messages
- How to Create Android Push Messages Popup Modals
- What to Do Before You Send Targeted Android Push Messages
- What to Do After You Send Android Push Messages
What Are Android Push Messages?
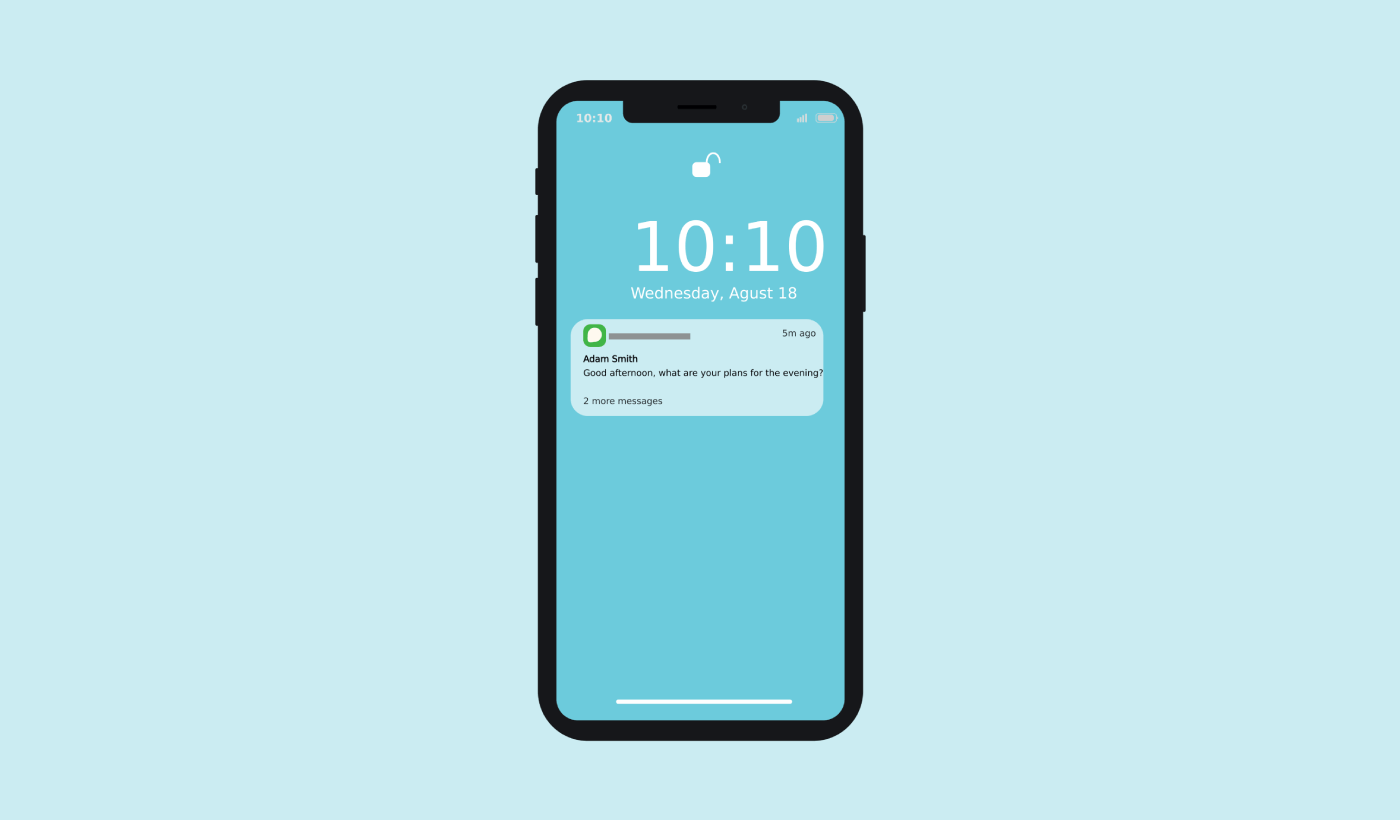
An Android push message is a short, clickable pop-up message that appears on a subscriber’s device and redirects the subscriber to your content with one click.
Broadly speaking, you can send two types of Android push messages:
- Android web push messages: Browser push messages that get delivered to the subscriber’s browser. As long as your push notification service is compatible with multiple browsers, you can target subscribers on an Android device.
- Android mobile push messages: Push messages that get delivered via your Android mobile app using Google’s Firebase Cloud Messaging (FCM).
So, you can send Android push messages with an app or a simple website. If you’re running a Progressive Web App (PWA), you can send push messages to both audiences at the same time.
If you choose to send a web push notification, then the push message pops up even if the subscriber isn’t using a browser. It’s like an email blast, but with a web push notification; your subscribers don’t need to be using an app to see your message.
But if you’re running an app business and you want to send Android push messages to your app users, you can do that as well.
In short: An Android push message is a simple way to send out a clickable deep link or a clickable URL to your content to anyone who opted in.
With push notification sequences, your audience now has no excuse to ignore you. And unlike social media websites, there is no algorithm throttling your reach to get you to pay for ads.
IMPORTANT: Web and app push messages work in fundamentally different ways for any device. Web push requires a manual optin from your site visitors before you can send a push message. App push doesn’t need any optin as such. If someone downloads your app, you can send them a message as long as they have notifications enabled on their device.
Which Android Push Messages Service Should You Choose?
I highly recommend using PushEngage to send Android push messages.
Let’s start things off by saying that most of the free push messaging services out there are actually free trials. Some of the providers out there offer a trial software, while others have a forever-free plan that you can opt for. But before you do, you should check out our article on push notification cost analysis.
I spent a lot of time comparing the best push notification apps and breaking down what they actually offer.
For now, I’ll just quickly recap why you should choose PushEngage.
Get a Low-Code Solution for Android Push Messages
Right till now, you had to use skeleton SDKs to send app push notifications. The problem with using those SDKs is that they are pretty bare bones.
Theoretically, you can send any type of mobile app push campaigns with them. But then, you also have to build:
- An interface to manage your campaigns
- An analytics suite to track your campaign performance
- Better support for rich media and in-app redirection links (or deep links)
- Processes to liaise between marketing and development teams
All for the sake of introducing a single channel of growth. Using the old tools to send mobile app push notifications is tedious, expensive, resource-intensive, and time-consuming. And of course, it requires deep coding skills in your team to develop and manage everything you build.
With the new PushEngage Android and iOS SDKs, you can send mobile app push using the same reliable software for great delivery rates. But we’ve built several layers on top that make it super easy to build custom integrations with your app. And PushEngage manages the entire SDK. So, you don’t even have to spend a ton of time and money to manage your integrations.
All you have to do is build!
You can send broadcast notifications directly from your PushEngage dashboard once you’ve set up your app to send mobile app push notifications using PushEngage’s SDK. Yes, you still have to add code to your app and develop the connectors between your app and the PushEngage API. But once that’s done, you can easily create mobile app push campaigns from a pre-built software interface that also comes with:
- Highly engaging push campaign types
- Proven campaign templates with high conversion rates
- Automated campaigns to promote your content whenever you publish
- Multiple targeting and campaign scheduling options
- Web push campaigns as a complementary growth channel
- Increased audience retention using data-based personalization
- Goal tracking and advanced analytics
- Smart A/B testing
- A Dedicated Success Manager
And so much more. We just took the pain out of developing Android and iOS mobile push campaigns for your app.
Establish Your Brand Identity
You can easily set an icon for Android mobile app push:
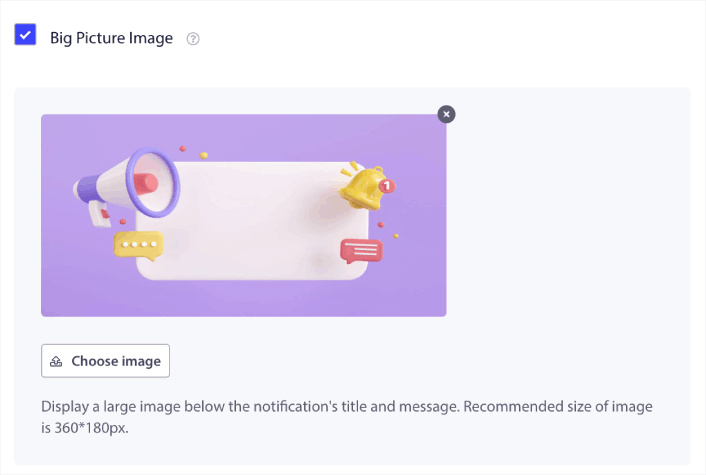
As well as a display image to make your mobile app push notifications more clickable:
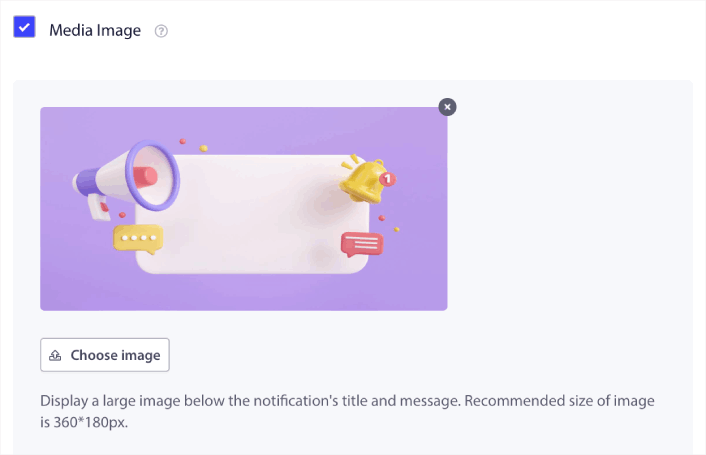
You can do the same for iOS mobile app push as well. Set a media image for your iOS app push notification to make your campaign more eye-catching:
In other words, you can preserve your brand design guidelines pretty easily when you send mobile push notifications. And all that, from an easy-to-use interface that you’ll never have to manage!
Send More Targeted and Personalized Messages
For Android app push, you can create Groups and Channels to customize exactly what your notifications look, feel, and sound like.
A Group is a collection of notification types with a common name.
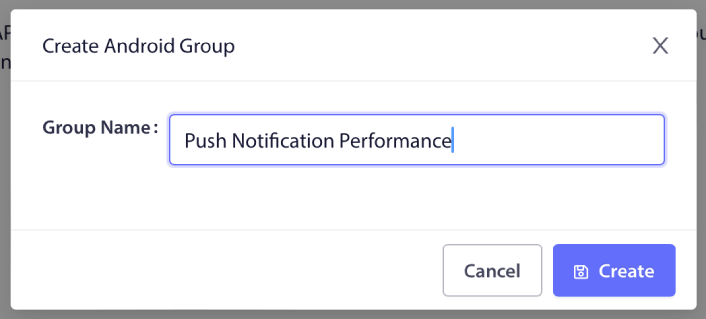
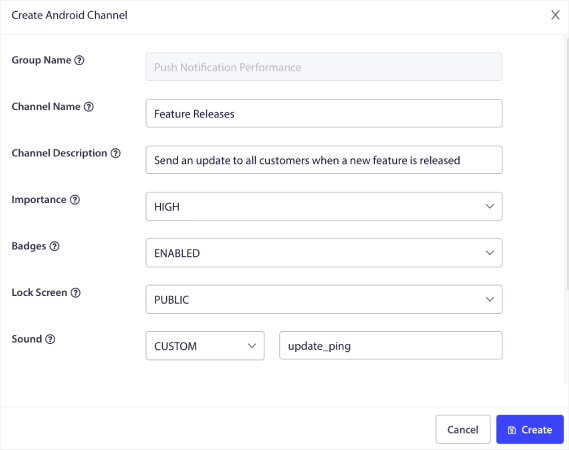
Think of it as categories in a blog. Inside each Group, you can add Channels:

A channel describes how your app notifications will behave when your users receive the notification. Will it show up over the lock screen? Should it show the app icon as the badge? What priority level will it have for your users? Do you want a custom notification sound to play when your users receive it?
All these settings can be configured within a channel.
For an iOS mobile app notification, there’s no concept of Group and Channel. However, you can create personalized notifications using other settings. You can set a notification sound, a category for your notifications, and a common thread ID to bundle them together.
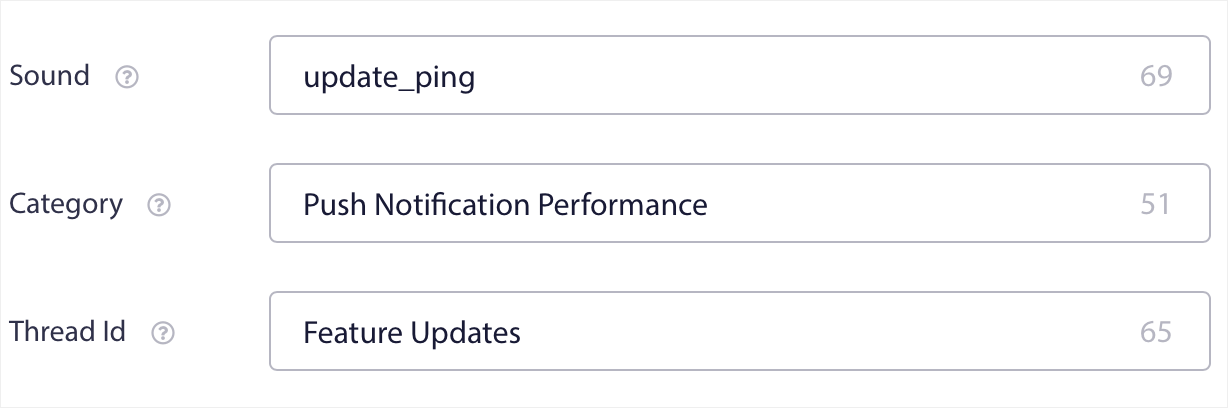
You can even set a custom badge for that notification that shows how many unread notifications the user has received from your app.
Redirect Your Users to Any Link Inside Your App Or Outside It
Mobile app push has a unique feature called Deep Links. Deep links are like URLs, but ones that point to a screen inside your app. You can send your users to any screen you want using a Deep Link from the PushEngage dashboard, or you could send them to any regular URL on the web.
This means that you can get your users to open your app when you want to.
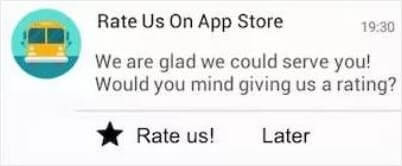
Or, even redirect them to the App Store or your website to leave a review of your app.
Of course, these are only basic ideas. You can use these links to run complex, multi-step engagement campaigns both inside and outside your app!
How to Install Android Push Messages On Your Website
We recommend using PushEngage to get started with Android web push messages for free. Every time you publish a blog post, PushEngage will automatically send out a push notification to all your subscribers.
Let’s start growing your audience with Android push messages for free.
Step #1: Create a Free PushEngage Account
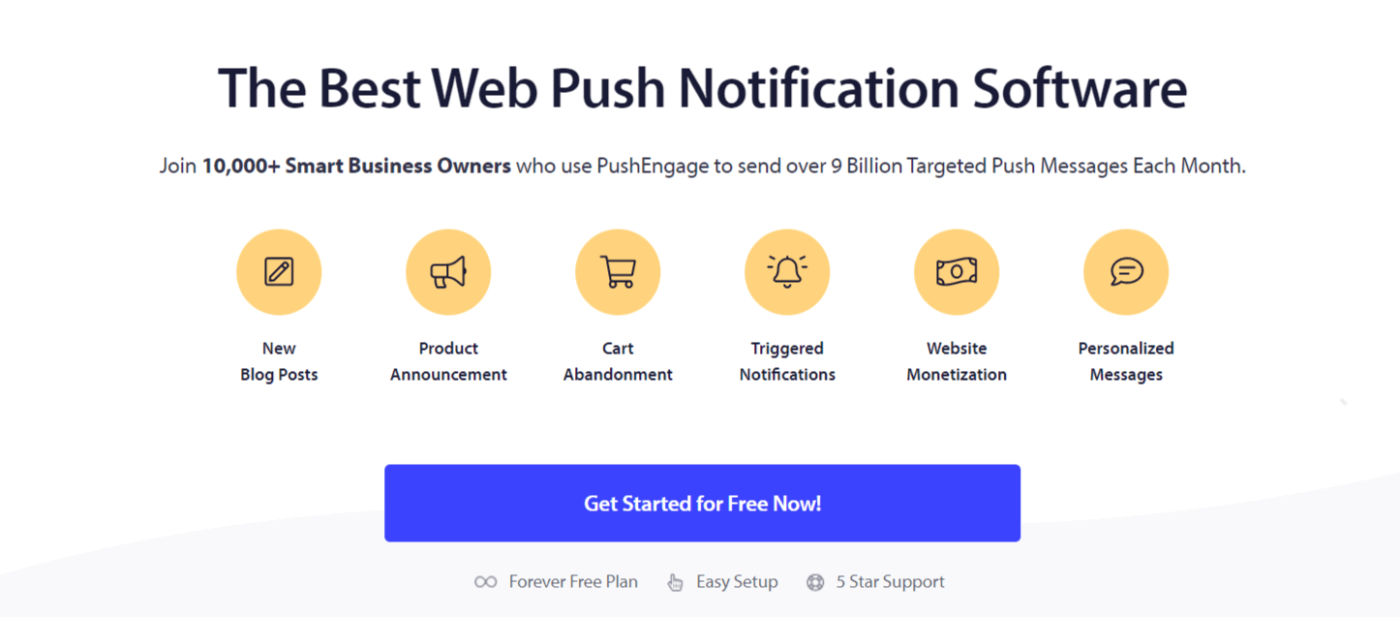
Head over to PushEngage and click on Get Started for Free:
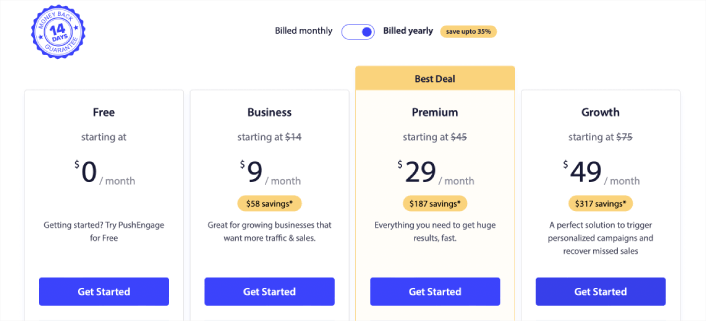
Select the Free plan or whichever suits your needs the best:
Step #2: Sign Up for PushEngage
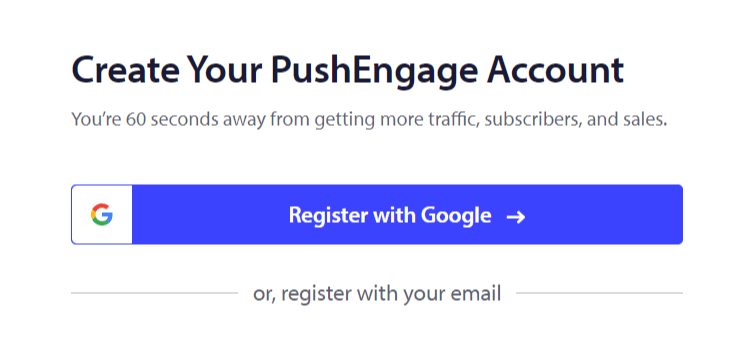
Signup for the plugin with your user details or your Gmail ID:
And just follow along with the instructions and finish setting up your account.
Step #3: Install the WordPress Plugin
NOTE: If your website isn’t built using WordPress, you can install Android push messages using other methods. We don’t cover those methods in this article but check out our installation guide if you’re interested.
Once you sign up, you’ll be taken to the PushEngage dashboard:

Head over to Site Settings »Site Details:

Click on the Click Here For Setup Instruction button:

Then, click on the Install WordPress Plugin button:

If you’ve already set up your site’s URL, PushEngage will install itself automatically on your site.
Step #4: Connect Your WordPress Website with PushEngage
When you’re done installing and activating the PushEngage WordPress plugin, you’ll see the PushEngage onboarding wizard:

The wizard is fairly straightforward. If you’re a new user, click on New? Claim Your Free Account. And if you’ve already signed up, click on Connect Your Existing Account.
Next, you can select your site from the Select a Site dropdown under Connect a registered site if you’ve already registered a site during signup:

Or, you can click Register a new site to add a new site if you have a Premium pricing plan or higher. In the next step, the onboarding wizard will prompt you to install other must-have WordPress plugins.

If you followed each step correctly, you’ll see this success message from the wizard:

You are now ready to create campaigns and push notification popup modals. The best place to start is to install a web notifications WordPress plugin.
How to Send App Push Messages on Android
Implementing push notifications for your Android application is now possible with PushEngage. Simply integrate the SDK once, and empower your marketing team to send contextual and personalized messages to your Android app users. You would need help of your developer to get this running for you.
Set Up a Firebase Project
Before you get started with app push notifications, you need to ensure that you have an existing Firebase account. Log in to your Firebase console, using your Google account, and click Add Project or select an existing project.

Enter a project name and click Continue. On the next screen, click Create project with your project name.

Then, click on Continue. Once Firebase is done configuring your account, you can click on Create Project.

Finally, click on the Android icon to add an Android app to the project.

Next, enter your Android app’s package name. I recommend using the name of the Android App you are trying to integrate, and click register.

Download the google-services.json file and place it into your Android app module root directory.

In the Firebase console, click the Settings icon next to Project Overview in the top left and select Project Settings.
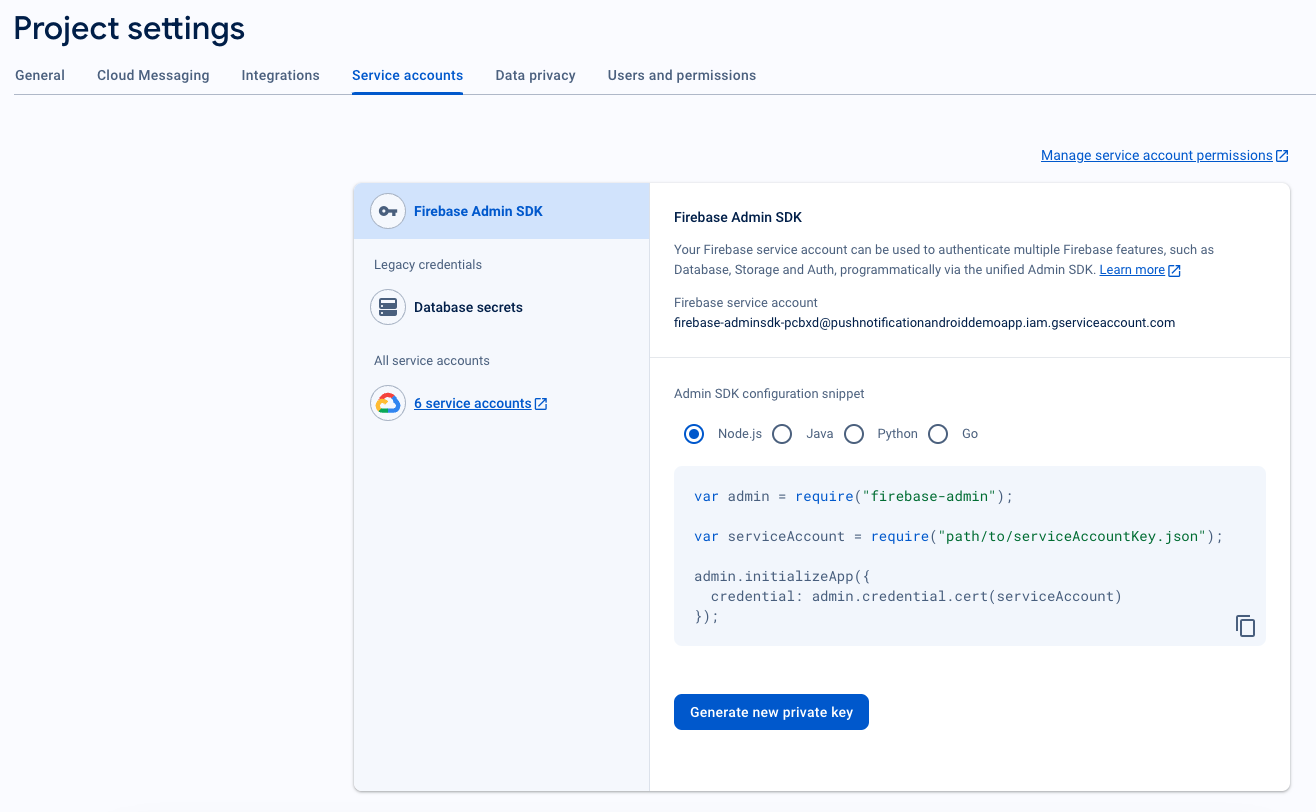
Click on Generate new private key.
IMPORTANT: Store the .json file downloaded from the previous step somewhere safe. You’ll need it to set up in the PushEngage dashboard.
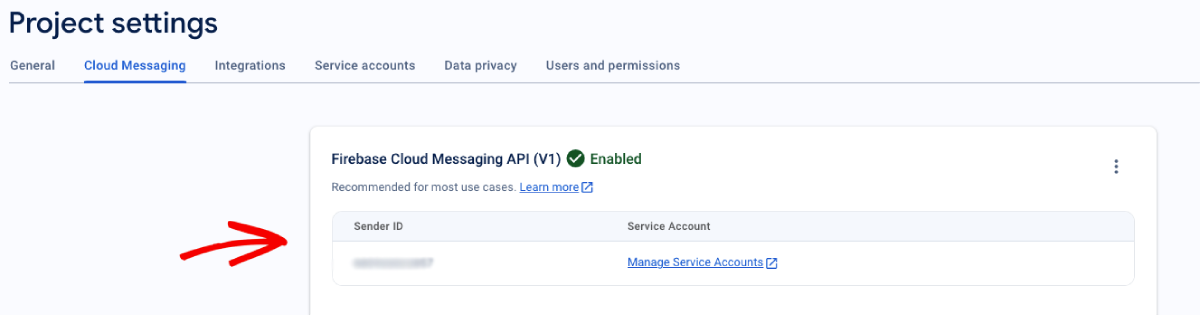
In the Firebase console, click the Settings icon next to Project Overview in the top left and select “Project settings.” Go to the Cloud Messaging tab, and find your Sender ID.
Integrate FCM with PushEngage Dashboard
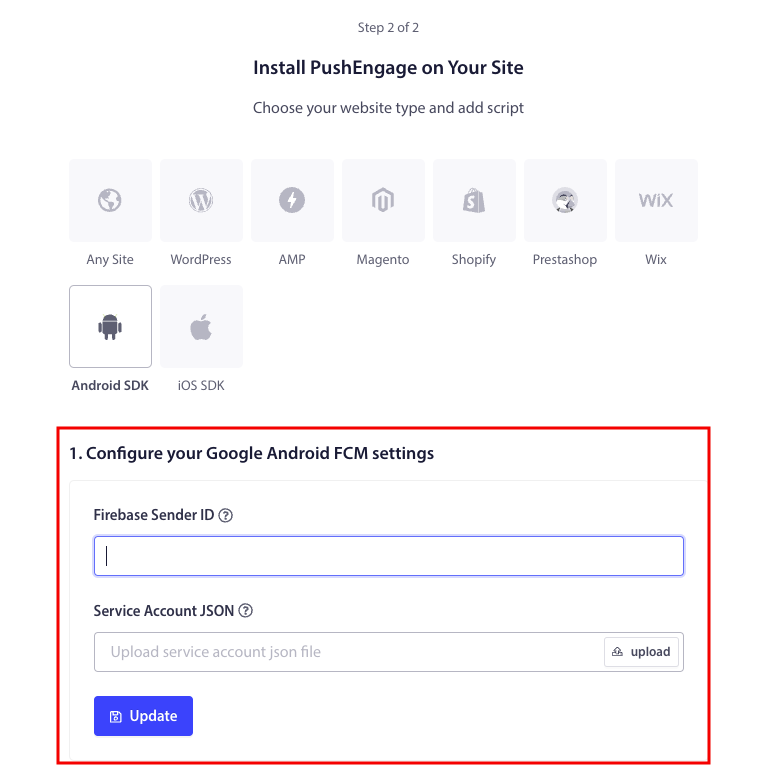
Once you have created the project in Firebase, you can then integrate the sender ID in the PushEngage dashboard. In your PushEngage account, navigate to Site Settings » Installation and select the Android SDK Tab.
Here, you can configure your Sender ID and Service Account JSON:
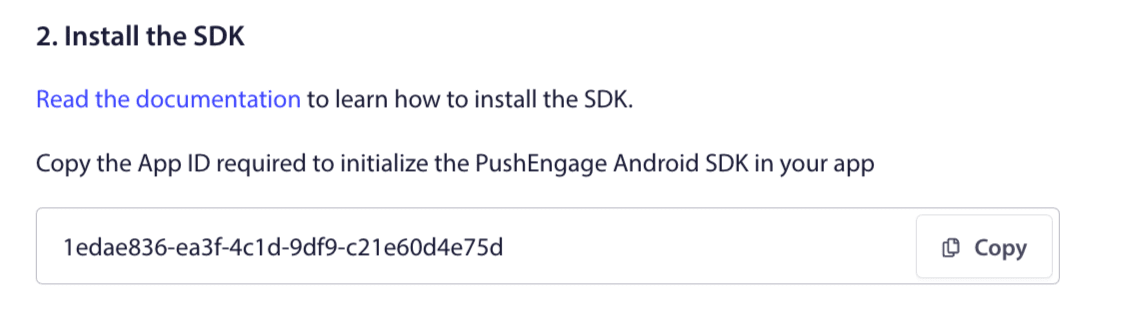
Copy the App ID required to initialize the PushEngage Android SDK in your application.
Add SDK Dependencies
Now is the time to add SDK Dependencies. We add the following line to your root build.gradle.
1. If your project is not using a centralized repository declaration, then at the project-level build.gradle file, add the following lines. Otherwise, you can skip to the second section.
// Project level build file where you can add configuration options common to all sub-projects/modules.
buildscript {
   repositories {
       google()
       jcenter()
   }
   dependencies {
       // ...
       // Add this line
       classpath "com.google.gms:google-services:4.3.10"

   }
}

allprojects {
   repositories {
      // ...
      // Check that you have the following line (if not, add it):
      google()
      maven {url 'https://jitpack.io' }
   }
}
If your project uses centralized repository declaration, add the following to your settings.gradle file.
dependencyResolutionManagement {
    repositoriesMode.set(RepositoriesMode.FAIL_ON_PROJECT_REPOS)
    repositories {
        //add this line
        maven { url 'https://jitpack.io' }
    }
Next, in the application-level “build.gradle” file add the following:
plugins {
   id 'com.android.application'
   // Add this line
   id 'com.google.gms.google-services'
}

dependencies {
   // ...
   // Add the following lines
   implementation 'com.github.awesomemotive:pushengage-android-sdk:0.0.5'
   implementation platform('com.google.firebase:firebase-bom:26.1.1')
}
Initialize the Android Push Messages SDK
Add the PushEngage SDK initialization code block to the onCreate method in the Application class. PUSHENGAGE_APP_ID should be replaced by the App Id you got from the PushEngage dashboard.
Note: If your mobile application does not have a custom class extending the Application class for PushEngage, you need to create a class which extends the Application class.
Here is an example in Java:
public class PEApplication extends Application {
@Override
public void onCreate() {
super.onCreate();

// PushEngage SDK Initialization code
PushEngage pushEngage = new PushEngage.Builder()
.addContext(getApplicationContext())
.setAppId("PUSHENGAGE_APP_ID")
.build();
// The small icon is displayed on the top status bar and in the notification.
// By default PushEngage displays a bell icon, however It is recommended to
// customize this so users easily recognize notifications from your app.
PushEngage.setSmallIconResource("your_icon_name");
}
}
Here is an example in Kotlin:
class PEApplication : Application() {
   override fun onCreate() {
       super.onCreate()
       // PushEngage SDK Initialization code
       val pushEngage = PushEngage.Builder()
           .addContext(applicationContext)
           .setAppId("PUSHENGAGE_APP_ID")
           .build()
        // The small icon is displayed on the top status bar and in the notification.
       // By default PushEngage displays a bell icon, however It is recommended to
       // customize this so users easily recognize notifications from your app.
       PushEngage.setSmallIconResource("your_icon_name");
   }
}
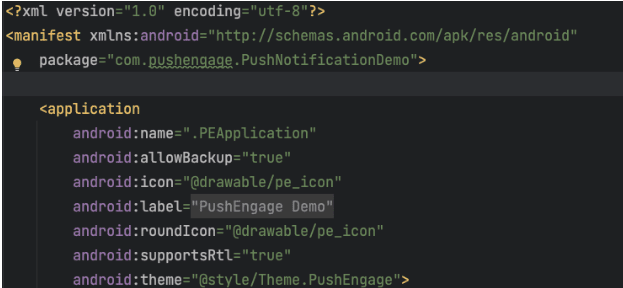
To register your custom class name, which extends the Application class, navigate into your application’s Manifest.xml file. Find the line that says “android:name=.”PEApplication”,” and swap out “PEApplication” with the name of your custom class. This is how it should look:
Once you have configured all the above steps, you can send push notifications to your Android application. Build and run the application on a physical device and send test push notifications from the PushEngage dashboard.
Handle Notification Permissions for Android 13 and Above
The Android 13 requires permission for some devices before sending them any notifications. So, if you’re running on Android 13 or above, here’s the code you need for permissions:
 @RequiresApi(api = Build.VERSION_CODES.TIRAMISU)
    private void requestNotificationPermissionIfNeeded() {
        int permissionState = ContextCompat.checkSelfPermission(this, android.Manifest.permission.POST_NOTIFICATIONS);

        if (permissionState == PackageManager.PERMISSION_DENIED) {
            ActivityCompat.requestPermissions(this, new String[]{android.Manifest.permission.POST_NOTIFICATIONS}, 100);
        }
    }
You can handle the result of the notification permission prompt:
@Override
    public void onRequestPermissionsResult(int requestCode, String[] permissions, int[] grantResults) {
        super.onRequestPermissionsResult(requestCode, permissions, grantResults);
        if (requestCode == 100) {
            if (grantResults.length > 0 && grantResults[0] == PackageManager.PERMISSION_GRANTED) {
                PushEngage.subscribe();
            } else {
                Log.d("MainActivity", "onRequestPermissionsResult: Permission denied");
            }
        }
    }
And that’s it! You’re done. You can now head back to the PushEngage dashboard and send Android push messages directly from the same dashboard.
If you want to explore our Android SDK a little bit more, you can go through our detailed API documentation.
How Do Android Web Push Messages Work?
Let’s get a little bit technical now and explore how Android web push messages work.
The simplified version is that every time a new visitor enters your website, they get prompted to become a push notification subscriber.
Next, you use a web push notification service like PushEngage to create and schedule the Android push messages you want to send out to your subscribers. You can choose to either send it to every subscriber on your list or to specific segments of your subscribers.
You’ll want to start by creating a Drip Autoresponder:
Finally, your subscribers receive your push messsges when their device comes online and take the suggested action.

This is all perfectly true, but this is only a small part of what happens in the background. So, let’s take a look at the technical details. But first, if you haven’t already, get started with PushEngage today.
First off, PushEngage has servers that connect to your subscriber’s devices and send them your Android push messages. Now, these servers don’t store any personal information such as the name or email address of any subscriber.
So, what do these servers store?
To PushEngage and our servers, your subscribers are a unique hash number generated based on your subscriber’s device and browser. Besides, the server can also store the geolocation of your subscribers.
Now, you won’t have direct access to these servers. You can only use the PushEngage Dashboard to create, optimize, and manage push notification campaigns.
In other words, PushEngage is your service provider. This means that you don’t need to know anything about coding or how to maintain the original servers. We take care of all that for you. All you have to worry about is setting up your campaigns and making a profit!
By now, you’re probably wondering how personalized push notifications work if the servers only store a hash number and no personal details. This is where the service provider API comes into play. For you, that would be the PushEngage Javascript API.
You can use this API and connect it to any other CRM or database you might have. This allows you to use the personal details of your subscribers to send them personalized Android push messages.
You can also use the PushEngage API to send out advanced campaigns such as cart abandonment campaigns.
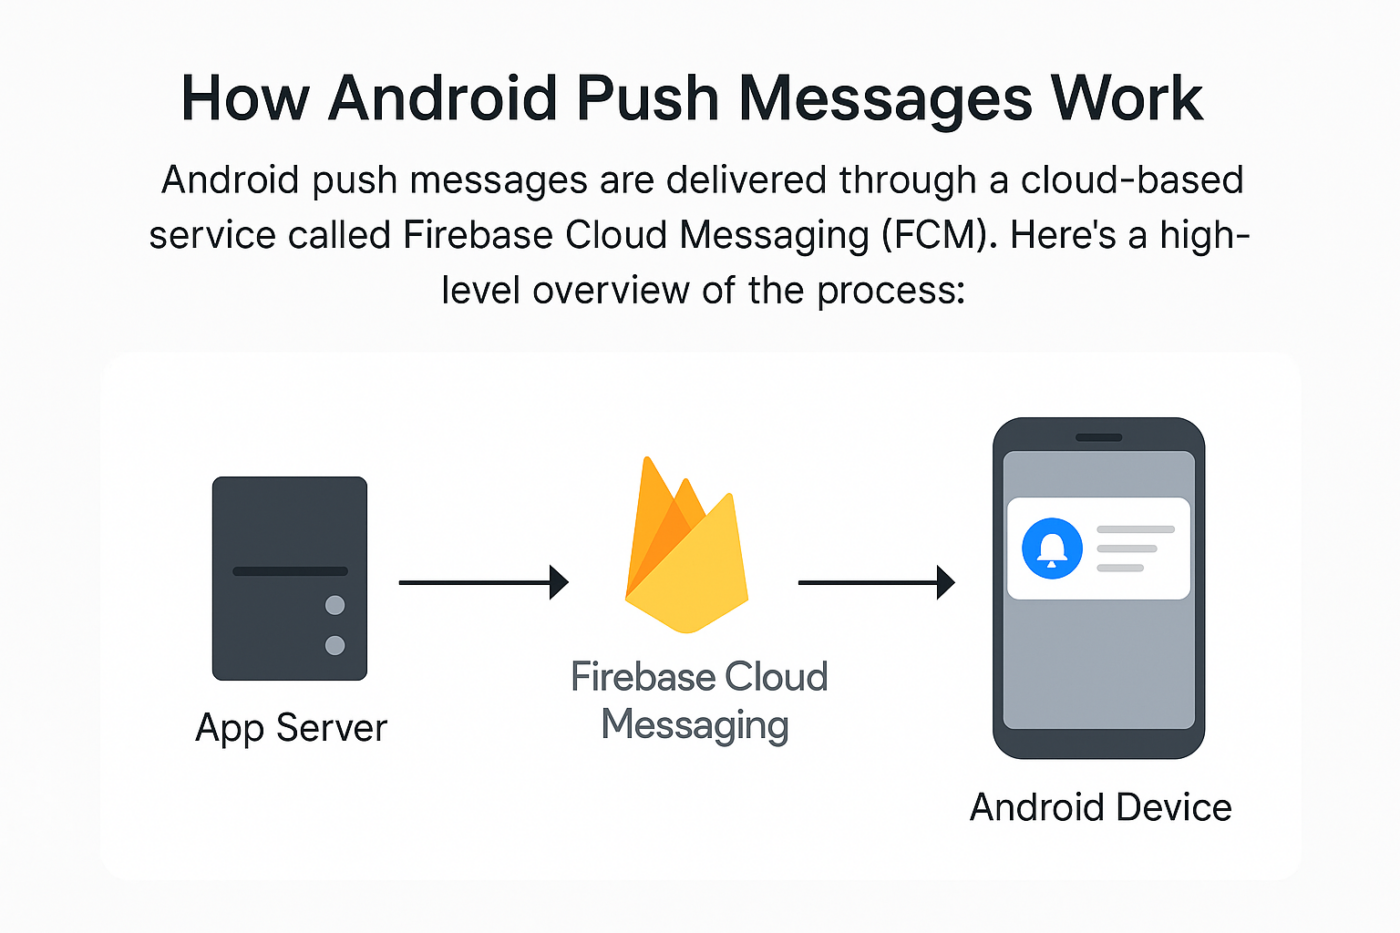
How do Mobile Android Push Messages Work?
Android push messages are delivered to users via a service called Firebase Cloud Messaging (FCM). Here’s what happens behind the scenes when your app sends a push notification:
Step #1: User Installs Your App
When a user downloads and opens your app, the app registers with Firebase Cloud Messaging (FCM) and gets a unique device token.
Step #2: Your Server Prepares a Notification
Your backend (or notification provider like PushEngage) creates a message along with rich media and selects the user(s) to receive it. It also sets up full-scale automation processes for each push message.
Step #3: PushEngage Sends It to FCM
The notification is sent to Firebase Cloud Messaging, which acts as a middleman between your server and the user’s phone.
Step #4: FCM Delivers to Android Device
FCM securely routes the push message to the user’s Android device—even if the app is closed.
Step #5: User Sees the Notification
The Android OS displays the push notification in the status bar, lock screen, or as a banner, depending on the device settings.
What Are the Different Parts of Android Push Messages?
Now that we understand how Android push messages work, let’s a look at the different parts of a push notification that you can customize (or can’t):
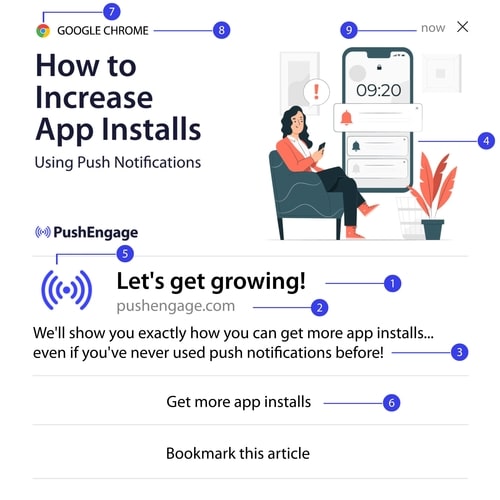
#1. Push Notification Title
The title is the most prominent text on the push notification. It’s restricted to 60-80 characters for clear visibility. The purpose of this title is to attract the subscriber’s attention. So, it’s important to have the entire title clearly visible.
Check out our push notification copywriting guide to create killer titles that your subscribers will love.
#2. The Domain
The domain of a push notification is just the URL of your website. You can’t change this either. But unlike the browser icon, your domain needs to be clearly visible as it adds to your brand recognition.
Now, there is an option for you to store the push notification data on a subdomain of PushEngage. If you use the subdomain, then this part of the push notification will display the URL of a PushEngage subdomain instead of your brand.
We don’t recommend using this option as it can lower your brand value.
#3. Push Notification Content
The notification content contains the largest portion of text in the entire notification. It’s restricted to 120-150 characters for visibility just like the title. While you can work in more character, we recommend keeping it short and sweet.
Typically, this part serves as a way to offer more context about the title or to complete an offer. Don’t bother using a call to action in the text itself. With push notifications, you can add call-to-action buttons.
Pro Tip: You can use regional languages to make your push notifications feel more personalized. Read this case study on how Phooto used local languages in push notifications to boost their engagement.
#4. Notification Large Image
The large image is the belle of the ball and it’s the first thing you spot in any notification. It’s typically a 360×180 image that serves as the most attractive part of a push notification.
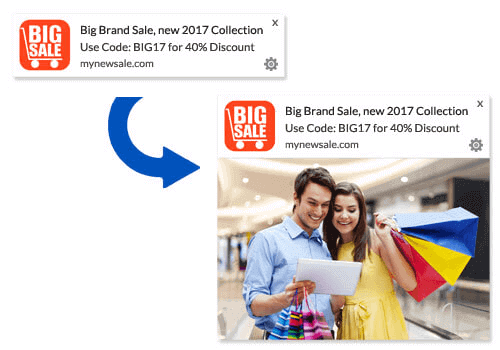
The notification image is also entirely optional. You can choose to not use one if you like. Using a notification image can make your push notification feel like an advertisement. This can cause the notification to be ignored by many subscribers.
But if you do it right, images can improve CTR (click-through rates) by up to 62%. Check out our study on the impact of images in push notifications by industry.
If you’re not sure whether you should use a large image, we suggest A/B testing the notification with and without the image.
#5. Push Notification Icon
The push notification icon is like the site icon on your website, but for your push campaigns. It’s an image that’s 192×192 or larger to represent your business. Typically, this will be your site icon and you can only set this one time for all your Android push messages.
Pro Tip: If you rebrand at any time, remember to change the push notification icon in PushEngage as well. Also, remember that you can’t use animated images for your icon. So, GIFs won’t work here.
#6. Call to Action Buttons
Every push notification supports up to 2 buttons. We recommend using customized call-to-action buttons for your campaigns. You can even add separate URLs and button icons for each CTA.
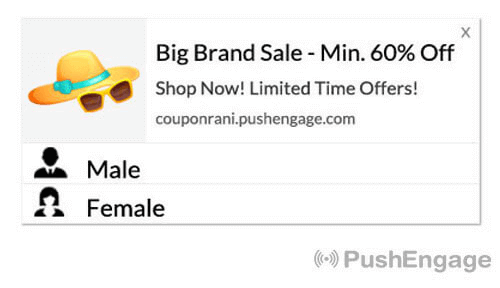
Check out this list of web push notification tricks for some nice CTA ideas.
#7. Browser Icon
The smallest part of the push notification is the browser icon that denotes which browser your subscriber is using currently. It’s one of the most overlooked parts because you can’t change this in any way and for the most part, a subscriber won’t notice the browser icon either.
#8. The Browser Label
The browser label is just the text version of a browser icon. Like the icon, you can’t change the browser name label.
#9. Time Stamp
The timestamp is a simple way for your subscribers to know when the message was received. It’s system generated and you can’t change this either.
Different Types of Push Notification Opt-ins
Every web push notification campaign begins with consent. It’s an extension of Seth Godin’s idea of permission marketing. The idea is very simple: before you send your web visitors any content that they may or may not want to see, ask for permission.
The process of getting permission to send any push notification is called “opting in”. So, before you can send out a push notification campaign, you first need your website visitors to opt-in and subscribe to your notifications.
If you’re a content creator on YouTube, then you’re already familiar with how subscribers work. The only difference is that you don’t own the list of your YouTube subscribers and you can’t control the notifications you send them.
With PushEngage, you do own that list because that information is stored on your domain. Now, there are two types of opt-ins you can use for your website:
- Single Opt-ins
- Double Opt-ins
The primary difference between them is very clear. Single opt-ins ask for permission to send push messages only once. Double opt-ins ask each subscriber to confirm their decision.
So, which one should you choose?
We’ve observed that single opt-ins can get up to 150% more subscribers than double opt-ins. Check out our article on how to increase your opt-in rate if you’re struggling with this.
From a legal point of view, GDPR requires you to only have a single opt-in. But with double opt-ins, you get way better engagement because your subscribers actually want more of your content. In terms of sheer opt-in numbers, though, single-step opt-ins are way more effective.
Another point to consider is that you NEED to install an SSL certificate on your website to be able to use single opt-ins. But you can install two-step opt-ins even without a secure website.
So, if you have an SSL certificate installed, use single opt-ins. If not, check out this article on how to install an SSL certificate on WordPress websites.
NOTE: You don’t need an opt-in for app push notifications unless you’re using Android 13 or above.
How to Personalize Your Android Push Messages
Before you create a campaign, you should set up segments and audience groups to send personalized push messages.
Nothing beats the level of personalization you can get by creating segments and audience groups for your push notification subscribers. Go to PushEngage » Audience and start creating segments and audience groups right away.
Under the Segments tab, you can create new segments or edit existing ones:

And if you need even deeper personalization, create an audience group in the Audience Groups tab:

If you’re new to push notification segments and personalized push notifications, you should check out our article on how to create segments and our announcement on advanced audience grouping.
How to Create Targeted Android Push Messages
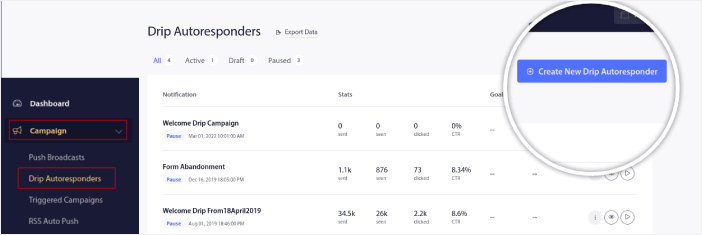
Go to PushEngage dashboard and head over to Campaign » Drip Autoresponders and click on Create New Drip Autoresponder:

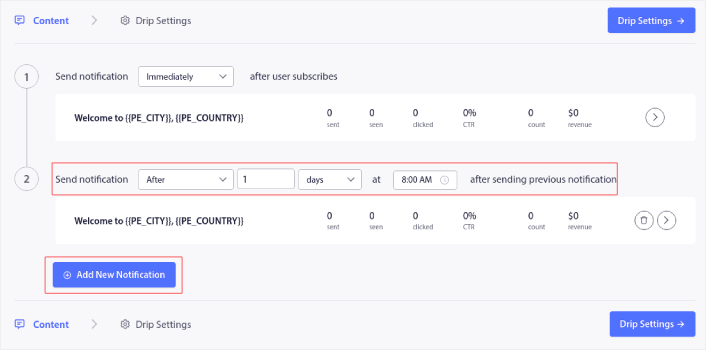
Then, name your campaign (we suggest something like Welcome Drip), and under Content, select the option that says, “Send notification immediately after user subscribes“):

At this point, you can click on the arrow next to the notification to edit the content of your notification.
If you have a Premium or Enterprise plan with PushEngage, you’ll be able to add more than one notification to create a sequence of automated welcome messages. Just click on Add New Notification and edit the content.
Once you’re done, click on Drip Settings and select the option to send your welcome campaign to all subscribers:

Then, scroll down to set your own UTM parameters to track the push notifications:

And when you’re done, scroll back up and click the Activate Autoresponder button:

And you’re done!
How to Send Targeted Android Push Messages
Head over to your PushEngage dashboard, go to Campaign » Push Broadcasts, and click on the Create a New Push Broadcast button:

Under the Content tab, add your push notification content:

And you can set up an A/B test to increase your click rates or you can schedule your push broadcasts to get more views. In either case, you should check out our push notification best practices for the best results.
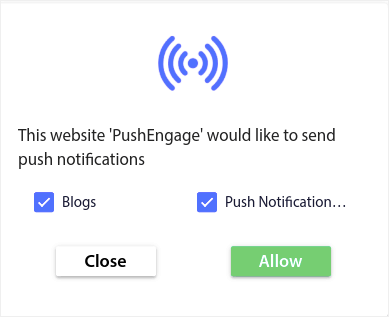
How to Create Android Push Messages Popup Modals
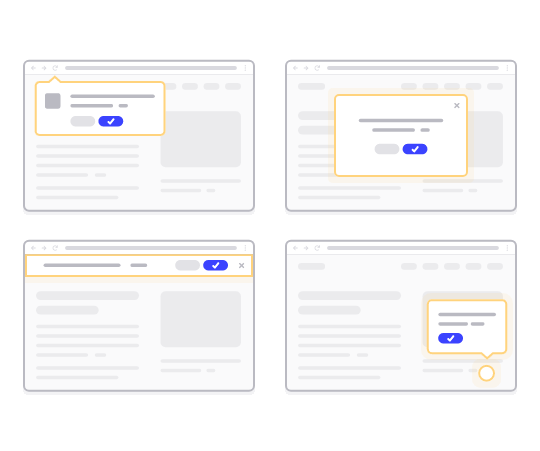
A push notification pop-up modal is a small window that appears on top of a website or mobile app interface to display a message or notification to the website visitor.
The popup modal can be triggered by various events. You can set up popups to get triggered on page visit, on scroll depth, and even on custom actions such as button click.
Usually, you’ll see a call to action on the pop-up modal, such as “Subscribe” or “Allow” to get consent from visitors to send Android push messages. If you follow this tutorial, you can create a popup like this one:
You can create popup modals that can segment subscribers directly or create regular popups that simply collect subscribers with the default attributes such as geolocation and browser.
Head back to your WordPress dashboard. Go to PushEngage » Design:
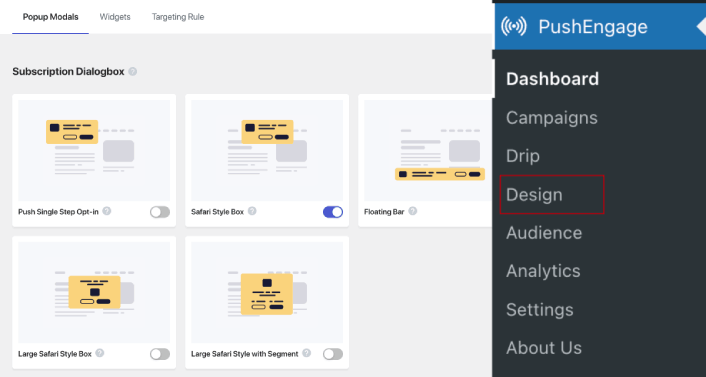
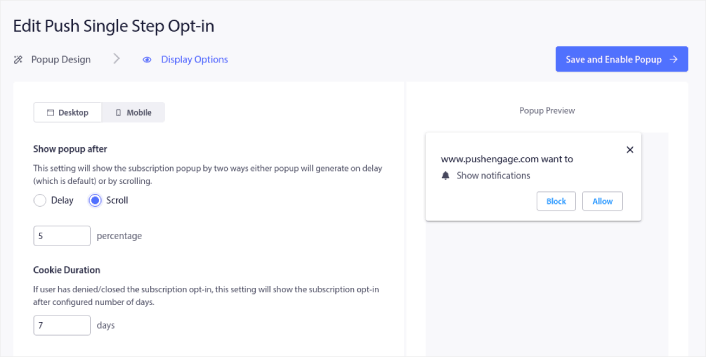
And you can set up as many pop-up modals as you please. Of course, you can make sure that they get triggered at different times under Display Options for each popup modal.
The idea here is to give your visitors a solid reason to subscribe. If you need some help with that check out our article on how to create a custom push notification opt-in.
And if you want to create more targeted pop-up modals, you can use the targeting rules under the Targeting Rule tab:
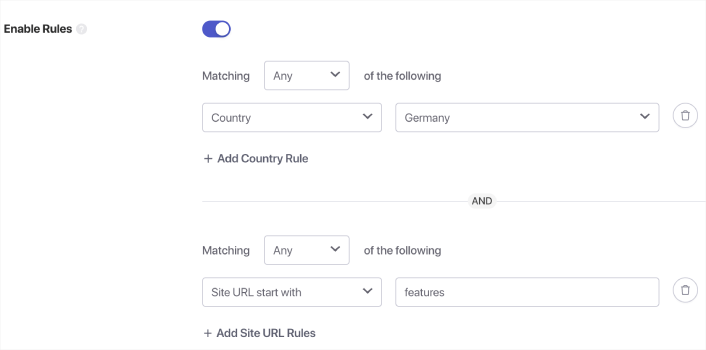
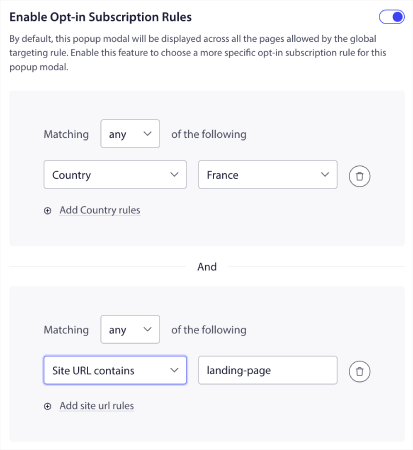
These are global targeting rules and will get preference over targeting rules for individual popup modals. But if you wish, you can create robust targeting rules for each modal by editing them.
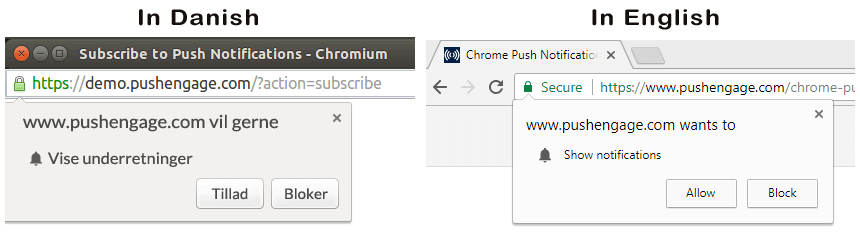
For instance, you can create popup modals in different languages to target visitors from different countries.
And if you’d like some templates with a high click-through rate to get started, you should check out this article on high-converting push notification opt-ins.
What to Do Before You Send Targeted Android Push Messages
You’re almost done.
Before you start sending push notifications, you’ll need to set up a subscription opt-in for your website. Your opt-in will convert web visitors into push notification subscribers. So, this is a critical element.
If you need some inspiration, you can check out this article on high-converting push notification opt-ins. Once you’re done setting up the opt-in, your site can collect subscribers. But how do you even know that your opt-in is working properly?
So, the sensible thing to do is set up a welcome push notification.
Pro-Tip: You should spend some time on a full-scale test of your push notifications. This will troubleshoot the most common problems and you won’t waste your time trying to resolve issues later on.
What to Do After You Send Android Push Messages
That’s all for this one, folks!
If you found this article helpful, be sure to drop a comment below.
Getting started with Android push messages can seem intimidating. But if you keep an eye on goal tracking and analytics, you should be fine. More importantly, you’ll make a lot more profit with the help of push notification campaigns. Here are a few cool resources to get you started:
- How to Use Retargeting Push Notifications to 2x Your Revenue
- How to Sort Your Push Notifications and Find Winning Campaigns
- How to Clean Up Push Notifications Subscriber Lists (Easy)
- How to Automatically Send RSS Push Notifications
- How to Use Push Notifications to Promote a News Site
- How to Use Cross Selling Push Notifications to 2x Your Sales
- How to Use Browse Abandonment Push Notifications (4 Steps)
If you’re new to push notifications, you should try out PushEngage. PushEngage is the #1 push notification software in the market. And your campaigns will be in safe hands.
So, if you haven’t already, get started with PushEngage today!


