Looking for a guide to creating drip campaigns to boost your sales?
Marketing is incomplete today without automation. Sure, you can collect subscribers and send out push notifications and emails. What then? Keep selling them on your business with every newsletter and hope that your subscribers convert?
There’s no way to:
- Personalize your campaigns
- Get new customers on autopilot
- Retain existing customers with your content
- Upsell or cross-sell products
- Recover lost sales
Unless… you use drip campaigns that convert.
In this article, we’ll show you how to set up drip campaigns and make the most of them. The best part? You don’t need any previous experience.
Sounds good? Let’s dive in.
What Are Drip Campaigns?
Think of drip campaigns like setting up a bunch of emails or even push notifications to be sent out automatically, sort of like a sprinkler system for your garden. Instead of watering plants, you’re sending out messages to people who are interested in what you’ve got to say or sell.
Here’s how it works:
- It’s not magic, it’s automated: Once you set it up, these messages keep going out on their own. You don’t have to keep sending them manually.
- You can talk to the right people: You can send different messages to different groups of people. For example, someone who just signed up might get a friendly “hello” message, while someone else who’s been around for a while might get special deals or updates.
- It’s personal: These messages can use the person’s name or talk about things they’ve shown interest in. It makes them feel like you’re really talking to them, not just sending the same thing to everyone.
- Timing is everything: The messages are sent at times that make the most sense – like right after someone signs up or looks at something on your site.
- Each message has a job: Every email or notification is meant to do something specific, like help people get to know your product better or remind them about something they looked at but didn’t buy.
- You can see how it’s doing: You can check out things like how many people open the messages or click on links inside them. This helps you know if your messages are working well.
Drip campaigns aren’t just for emails – they work app push notifications and web push notifications as well. They’re great for keeping in touch with people who are interested in your stuff, without overwhelming them. It’s a smart way to keep people engaged and interested in what you’re doing.
Types of Drip Campaigns
Let’s dive into the different types of drip campaigns. Just like ice cream comes in all sorts of varieties, drip campaigns have different types too. Each kind is tailored for a specific purpose or audience. Here are some of the most common ones:
- Welcome Series: This is like saying “Hi!” to someone new. When someone signs up for your emails or notifications, you send them a few friendly messages to introduce them to your brand or service. It’s like rolling out the red carpet for your new guests.
- Onboarding Campaigns: Think of this as a helpful guide. When someone buys a product or signs up for a service, these messages walk them through how to use it, offer helpful tips, or show them things they might not know about. It’s like giving a tour to someone new in town.
- Abandoned Cart Reminders: Ever put something in your online shopping cart and then forget about it? These campaigns are little nudges to remind people about stuff they were interested in but didn’t buy. It’s like a gentle tap on the shoulder saying, “Hey, did you forget about this?”
- Re-engagement Campaigns: These are for reaching out to people who used to interact with your brand but haven’t in a while. It’s like calling up an old friend and saying, “Hey, let’s catch up!” You might offer them a special deal or just remind them about your brand.
- Educational Content: Here, the goal is to teach your audience something valuable related to your product or industry. It’s like a mini-course, delivered in small, digestible messages. Think of it as a series of fun and informative lessons.
- Product Updates: Got something new or improved? This type of campaign keeps your audience in the loop about new features, products, or services. It’s like showing off your latest gadget to friends.
- Event Invites: Hosting a webinar, workshop, or another event? These campaigns are all about getting people excited and signed up for your events. It’s like sending out cool invitations to a party.
- Seasonal Campaigns: These are tied to specific times of the year, like holidays, seasons, or special events. It’s like decorating your store for Christmas or having a summer sale.
Each type of drip campaign has its own charm and purpose. By matching the right type of campaign with your audience and goals, you can create meaningful connections and keep your audience engaged in a way that feels natural and not too sales-y.
How to Create Push Notification Drip Campaigns
Installing push notifications to a website isn’t difficult. But it does have a few steps and you’ll want to follow along with this guide step-by-step.
Don’t jump ahead in time at any time and you’ll be fine.
Before you create a welcome push notification campaign, you need to select a push notification service. A push notification service is a software that allows you to create push campaigns without any coding.
We recommend using PushEngage.

PushEngage is the #1 push notifications plugin in the world.
Push notifications help you grow your website traffic and engagement on autopilot. And if you’re running an online store, PushEngage also helps you grow your sales by helping you create automated eCommerce push notifications.
You can get started for free, but if you’re serious about growing your business, you should buy a paid plan. Also, before buying any push notification service, you should check out this guide to push notification costs.
Here’s a quick glance at what you get with PushEngage:
- High-converting automated campaigns
- Multiple targeting and campaign scheduling options
- Goal tracking and advanced analytics
- Smart A/B testing
- A Dedicated Success Manager
You’ll see that PushEngage is hands down the best bet if you want to build traffic, engagement, and sales for your business. And if you’re on a budget, you can always get a little bit creative with your push notifications.
NOTE: If you’re running a WordPress site, you should install and activate the PushEngage WordPress plugin.
Let’s go!
Step #1: Create a Free PushEngage Account
Head over to PushEngage and click on Get Started for Free Now:
You can get started with the free plan. But if you’re looking to send targeted push notifications, you should select the Growth Plan. Once you know which plan you want, click on Get Started to create your PushEngage account.
Step #2: Sign Up for PushEngage
Now, it’s time to create your PushEngage account. Start by signing up with an email address or a Gmail ID:

Then, fill out your account details:

And add your credit card information to buy your plan:

If you selected the free account, then your credit card will never be charged any money until you choose to upgrade your plan. And now, you’re all set to get access to your PushEngage dashboard. Just click on Complete Registration and Get Instant Access.
If you’ve used OneSignal or PushAlert before, you’ll see that PushEngage gives you a much cleaner experience from the dashboard. The OneSignal dashboard isn’t meant for advanced campaigns. For that, you’ll need the API more than the OneSignal plugin.
Step #3: Install the Web Notifications WordPress Plugin
NOTE: If you’re not running a WordPress site, you should check out our installation guides to get started.
You’re done creating your account. So, head over to the PushEngage dashboard and follow along:

Click on Site Settings » Site Details and click the Click Here For Setup Instruction button:

Click on the WordPress tab and click on the Install PushEngage WordPress Plugin button to install the plugin on your website.

Here’s the cool part: When you created your PushEngage account, you already synced your website with your PushEngage account. So, click on the installation link in the PushEngage dashboard to automatically install the PushEngage WordPress plugin to your website.
Step #4: Connect Your WordPress Website with PushEngage
When you’re done installing and activating the PushEngage WordPress plugin, you’ll see the PushEngage onboarding wizard:

The wizard is fairly straightforward. If you’re a new user, click on New? Claim Your Free Account. And if you’ve already signed up, click on Connect Your Existing Account.
Next, you can select your site from the Select a Site dropdown under Connect a registered site if you’ve already registered a site during signup:

Or, you can click Register a new site to add a new site if you have a Premium pricing plan or higher. In the next step, the onboarding wizard will prompt you to install other must-have WordPress plugins.

If you followed each step correctly, you’ll see this success message from the wizard:

You are now ready to create campaigns and push notification popup modals.
Step #4: Send Personalized Drip Campaigns
Before you create a campaign, you should set up segments and audience groups to send personalized push messages.
Nothing beats the level of personalization you can get by creating segments and audience groups for your push notification subscribers. Go to PushEngage » Audience and start creating segments and audience groups right away.
Under the Segments tab, you can create new segments or edit existing ones:

And if you need even deeper personalization, create an audience group in the Audience Groups tab:

If you’re new to push notification segments and personalized push notifications, you should check out our article on how to create segments and our announcement on advanced audience grouping.
Step #5: Create Your Drip Push Notifications Campaign
Go to PushEngage dashboard and head over to Campaign » Drip Autoresponders and click on Create New Drip Autoresponder:

Then, name your campaign (we suggest something like Welcome Drip), and under Content, select the option that says, “Send notification immediately after user subscribes“):

At this point, you can click on the arrow next to the notification to edit the content of your notification.
If you have a Premium or Enterprise plan with PushEngage, you’ll be able to add more than one notification to create a sequence of automated welcome messages. Just click on Add New Notification and edit the content.
Once you’re done, click on Drip Settings and select the option to send your welcome campaign to all subscribers:

Then, scroll down to set your own UTM parameters to track the push notifications:

And when you’re done, scroll back up and click the Activate Autoresponder button:

And you’re done!
How to Create Email Drip Campaigns
Setting up those nifty automated drip campaigns in WordPress? You can do that easily with an email marketing tool. Follow along with the rest of this guide and you’re all set!
Step #1: Select an Email Drip Service
We suggest giving Constant Contact a whirl. It’s like the superstar of email marketing services. Super user-friendly and it comes with a cool drag-and-drop feature for crafting emails.

Constant Contact is the best email marketing service to set up autoresponders for your business. It’s super easy to use and offers tons of automation features to improve your email campaigns.
Here’s what makes Constant Contact such a great choice for setting up email marketing campaigns:
- Easy drag and drop builder to create emails
- Hundreds of pre-designed email templates
- Welcome messages, birthday offers and abandoned cart autoresponders
- List building tools and signup forms to grow your audience
- Split testing for targeted emails
- Integrations with CRMs and third-party services
- Excellent support via live chat and phone
Not to mention, Constant Contact has a forms plugin for WordPress that you can use for lead generation. You can also nurture and close your leads with autoresponders.
But hey, this isn’t the only game in town. Most of the big email marketing services, like Brevo (you might know it as Sendinblue), HubSpot, and others, they’ve got this drip email magic too.
With a few clicks, you can get those automated emails rolling out to your subscribers. Plus, Constant Contact plays nice with WordPress plugins like WPForms and OptinMonster. And if you’re into eCommerce, using WooCommerce or Shopify, it’s got you covered for reaching out to new customers or reminding folks about those items they left in their carts.
Ready to give it a go? Pop over to the Constant Contact website, sign up, and guess what? You get to try it out with a 60-day free trial. It’s like test driving a car but for email marketing. This way, you can see if it’s the right fit before you decide to go for a paid plan.
Step #2: Create an Email List
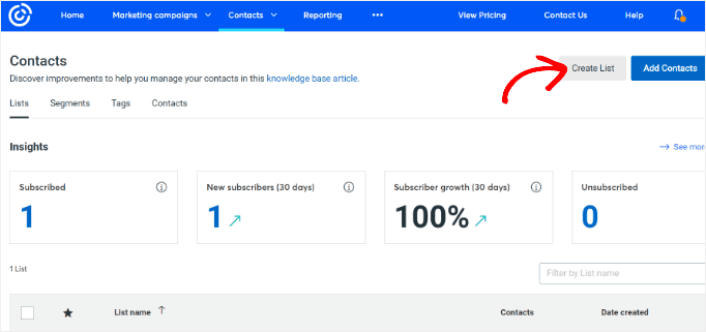
After creating an account, you can visit the Constant Contact dashboard to create a contact list.
Constant Contact will have already created a default list for you. However, you can create your own list by going to the Contacts tab in the top menu and then clicking the Create List button.
You can connect your WordPress newsletter form with Constant Contact and start building an email list. You should also check out our blog post on how to add a WordPress blog subscription widget.
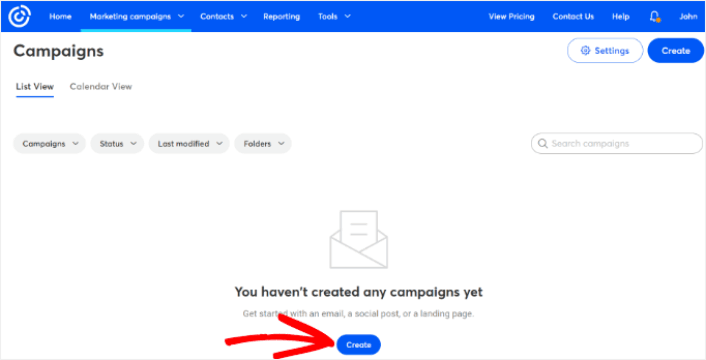
Step #3: Create Marketing Drip Campaigns
Now that you’ve added subscribers to your Constant Contact list, the next step is to create an automated drip campaign. Head over to the Marketing Campaigns tab and then click the Create button.
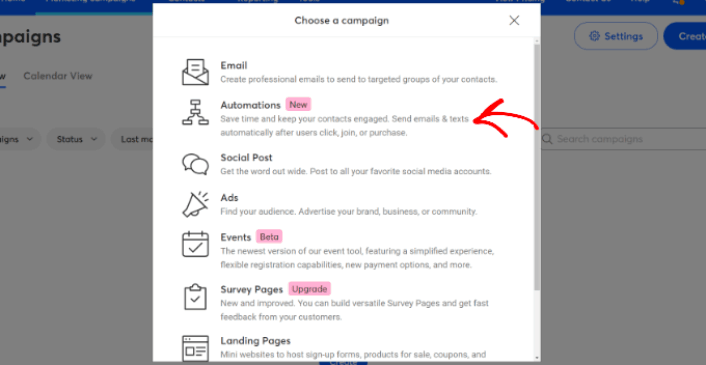
Constant Contact will show you multiple options for creating a campaign. Go ahead and select the Automations campaign.
From here, you can choose from several pre-built campaign templates to set up a drip campaign. You can create a Custom Automation to start from scratch, or you can quickly get started using any of the campaign templates.
For this tutorial, we will select the Create custom path template to get started. Select the Subscribes for email option and then click the Next button.
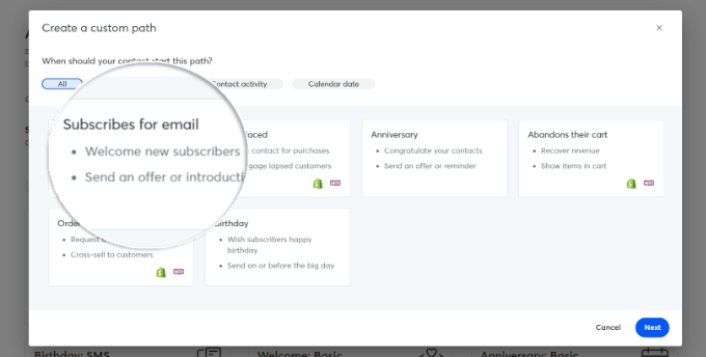
Give your custom path a name and you’re done! This template will trigger a drip campaign any time someone new subscribes to your email list. So, it’s perfect for a welcome campaign. If you’re looking to create an onboarding campaign, you can use tags to put them on a separate drip campaign.
Step #4: Create a Campaign Flow
However, you can simply drag actions and rules from the menu on the left onto the path. For instance, you add different actions like sending an email or sending an SMS to your workflow.
There are also different rules that help you customize your automation. You can add a time delay and specify when the next email should be sent. Similarly, there is a conditional split option that lets you set up Yes and No conditions and split the path.
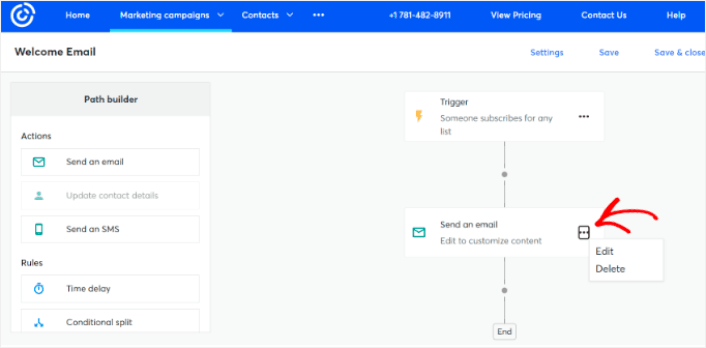
Tweaking your automated workflow is a breeze too. Just spot the three dots icon and give it a click. Choose Edit to make changes. Say you want to change up the Send an email action.
Once you do that, a popup window shows up. Here’s where you can either whip up a brand new email or use one you’ve already made.
Since it’s your first time setting up this workflow, go ahead and pick Create a new email. Put in a cool name for your email, then hit Continue. And just like that, you’re on your way to customizing your email workflow!
Step #5: Creating Your Email Campaign
You can search for a template based on the occasion or use a blank template to create an email from scratch.
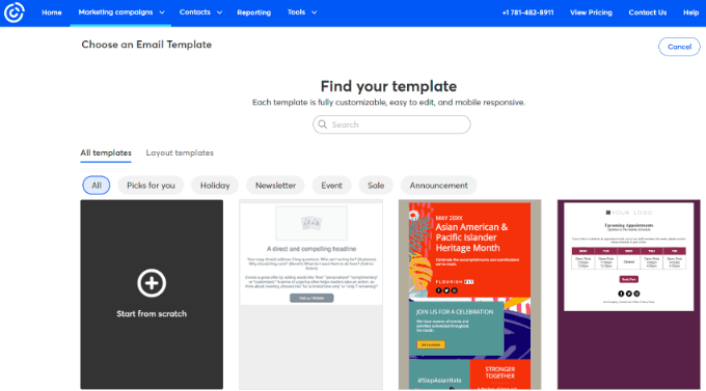
Once you select a template, the email editor will launch.
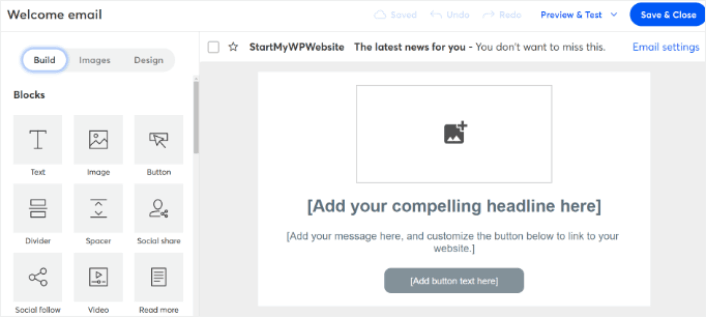
When you are done, hit the Save & Close button at the top. This will take you back to the Path Builder in Constant Contact. Go ahead and finish your automation path by adding as many actions and rules to your path and editing each one of them.
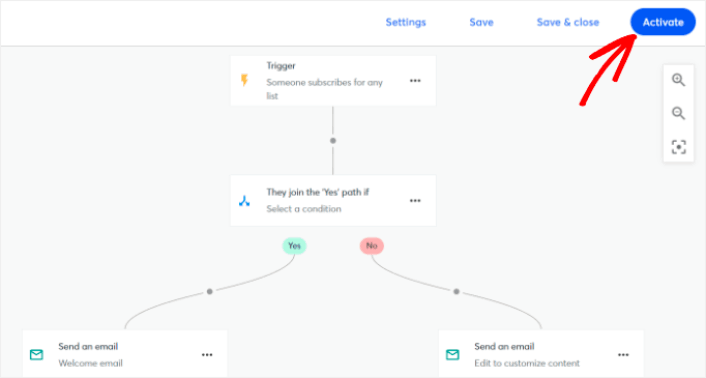
After creating an automated workflow, you can simply click the Activate button at the top. And you’re done!
What to do After You Create a Drip Campaign
That’s all for this one, folks!
If you found this article helpful, be sure to drop a comment below.
Getting started with drip campaigns can seem intimidating. But if you keep an eye on goal tracking and analytics, you should be fine. More importantly, you’ll make a lot more profit with the help of push notification campaigns. Here are a few cool resources to get you started:
- How to Use Retargeting Push Notifications to 2x Your Revenue
- How to Sort Your Push Notifications and Find Winning Campaigns
- How to Clean Up Push Notifications Subscriber Lists (Easy)
- How to Automatically Send RSS Push Notifications
- How to Use Push Notifications to Promote a News Site
- How to Use Cross Selling Push Notifications to 2x Your Sales
- How to Use Browse Abandonment Push Notifications (4 Steps)
If you’re new to push notifications, you should try out PushEngage. PushEngage is the #1 push notification software in the market. And your campaigns will be in safe hands.
So, if you haven’t already, get started with PushEngage today!


