Looking for a guide on how to improve push notification engagement rates and grow your business?
You’re definitely in the right place.
In this article, we’ll show you how to add push notifications to your site, create your first targeted push campaigns with high engagement rates, and send them. All this without any coding, and in less than 10 minutes.
Sounds good? Let’s dive right in!
How to Start Increasing Push Notification Engagement Rates
Installing push notifications to a website isn’t difficult. But it does have a few steps and you’ll want to follow along with this guide step-by-step.
Don’t jump ahead in time at any time and you’ll be fine.
Before you create a welcome push notification campaign, you need to select a push notification service. A push notification service is a software that allows you to create push campaigns without any coding.
We recommend using PushEngage.

PushEngage is the #1 push notifications plugin in the world.
Push notifications help you grow your website traffic and engagement on autopilot. And if you’re running an online store, PushEngage also helps you grow your sales by helping you create automated eCommerce push notifications.
You can get started for free, but if you’re serious about growing your business, you should buy a paid plan. Also, before buying any push notification service, you should check out this guide to push notification costs.
Here’s a quick glance at what you get with PushEngage:
- High-converting automated campaigns
- Multiple targeting and campaign scheduling options
- Goal tracking and advanced analytics
- Smart A/B testing
- A Dedicated Success Manager
You’ll see that PushEngage is hands down the best bet if you want to build traffic, engagement, and sales for your business. And if you’re on a budget, you can always get a little bit creative with your push notifications.
NOTE: If you’re running a WordPress site, you should install and activate the PushEngage WordPress plugin.
Let’s go!
Step #1: Create a Free PushEngage Account
Head over to PushEngage and click on Get Started for Free Now:
You can get started with the free plan. But if you’re looking to send targeted push notifications, you should select the Growth Plan. Once you know which plan you want, click on Get Started to create your PushEngage account.
Step #2: Sign Up for PushEngage
Now, it’s time to create your PushEngage account. Start by signing up with an email address or a Gmail ID:

Then, fill out your account details:

And add your credit card information to buy your plan:

If you selected the free account, then your credit card will never be charged any money until you choose to upgrade your plan. And now, you’re all set to get access to your PushEngage dashboard. Just click on Complete Registration and Get Instant Access.
If you’ve used OneSignal or PushAlert before, you’ll see that PushEngage gives you a much cleaner experience from the dashboard. The OneSignal dashboard isn’t meant for advanced campaigns. For that, you’ll need the API more than the OneSignal plugin.
Step #3: Install WordPress Plugin to Best Measure Push Notification Engagement Rates
NOTE: If you’re not running a WordPress site, you should check out our installation guides to get started.
You’re done creating your account. So, head over to the PushEngage dashboard when you can track push notification engagement rates and follow along:

Click on Site Settings » Site Details and click the Click Here For Setup Instruction button:

Click on the WordPress tab and click on the Install PushEngage WordPress Plugin button to install the plugin on your website.

Here’s the cool part: When you created your PushEngage account, you already synced your website with your PushEngage account. So, click on the installation link in the PushEngage dashboard to automatically install the PushEngage WordPress plugin to your website.
Step #4: Connect Your WordPress Website with PushEngage
When you’re done installing and activating the PushEngage WordPress plugin, you’ll see the PushEngage onboarding wizard:

The wizard is fairly straightforward. If you’re a new user, click on New? Claim Your Free Account. And if you’ve already signed up, click on Connect Your Existing Account.
Next, you can select your site from the Select a Site dropdown under Connect a registered site if you’ve already registered a site during signup:

Or, you can click Register a new site to add a new site if you have a Premium pricing plan or higher. In the next step, the onboarding wizard will prompt you to install other must-have WordPress plugins.

If you followed each step correctly, you’ll see this success message from the wizard:

You are now ready to create campaigns and push notification popup modals.
Improve Push Notification Engagement Rates by Personalizing
Before you create a campaign, you should set up segments and audience groups to send personalized push messages.
Nothing beats the level of personalization you can get by creating segments and audience groups for your push notification subscribers. Go to PushEngage » Audience and start creating segments and audience groups right away.
Under the Segments tab, you can create new segments or edit existing ones:

And if you need even deeper personalization, create an audience group in the Audience Groups tab:

If you’re new to push notification segments and personalized push notifications, you should check out our article on how to create segments and our announcement on advanced audience grouping.
Create Targeted Push Notifications with High Engagement Rates
Go to PushEngage dashboard and head over to Campaign » Drip Autoresponders and click on Create New Drip Autoresponder:

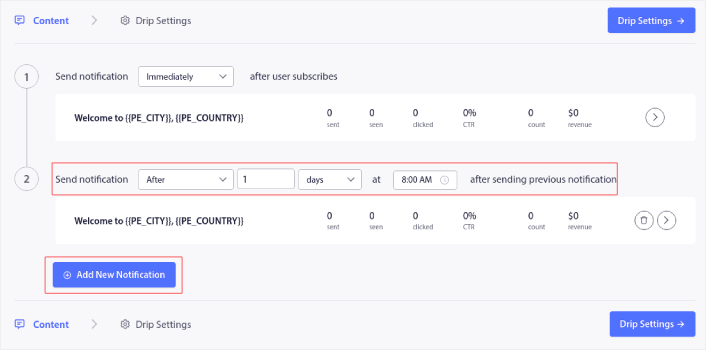
Then, name your campaign (we suggest something like Welcome Drip), and under Content, select the option that says, “Send notification immediately after user subscribes“):

At this point, you can click on the arrow next to the notification to edit the content of your notification.
If you have a Premium or Enterprise plan with PushEngage, you’ll be able to add more than one notification to create a sequence of automated welcome messages. Just click on Add New Notification and edit the content.
Once you’re done, click on Drip Settings and select the option to send your welcome campaign to all subscribers:

Then, scroll down to set your own UTM parameters to track the push notifications:

And when you’re done, scroll back up and click the Activate Autoresponder button:

And you’re done!
How to Increase Broadcast Push Notification Engagement Rates
Head over to your PushEngage dashboard and go to Campaign » Push Broadcasts and click on the Create a New Push Broadcast button:

Under the Content tab, add your push notification content:

And you can set up an A/B test to increase your click rates or you can schedule your push broadcasts to get more views. In either case, you should check out our push notification best practices for the best results.
How to Create Engaging Push Notifications Popup Modals
A push notification popup modal is a small window that appears on top of a website or mobile app interface to display a message or notification to the website visitor.
The popup modal can be triggered by various events. You can set up popups to get triggered on page visit, on scroll depth, and even on custom actions such as button click.
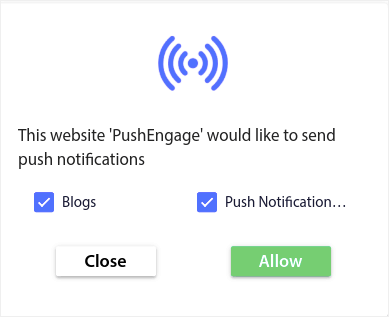
Usually, you’ll see a call to action on the popup modal such as “Subscribe” or “Allow” to get consent from visitors to send them push notifications. If you follow this tutorial, you can create a popup like this one:
You can create popup modals that can segment subscribers directly or create regular popups that simply collect subscribers with the default attributes such as geolocation and browser.
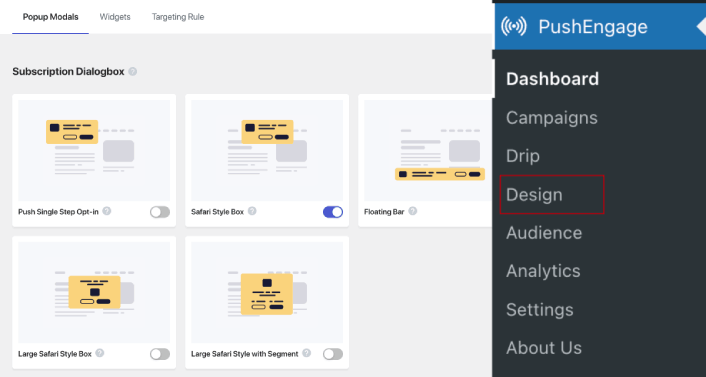
Head back to your WordPress dashboard. Go to PushEngage » Design:
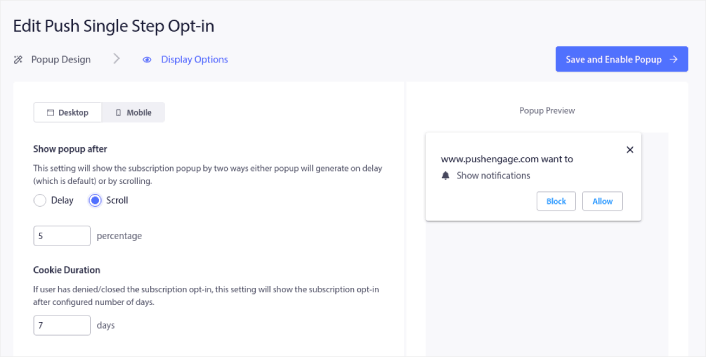
And you can set up as many popup modals as you please. Of course, you can make sure that they get triggered at different times under Display Options for each popup modal.
The idea here is to give your visitors a solid reason to subscribe. If you need some help with that check out our article on how to create a custom push notification opt-in.
And if you want to create more targeted popup modals, you can use the targeting rules under the Targeting Rule tab:
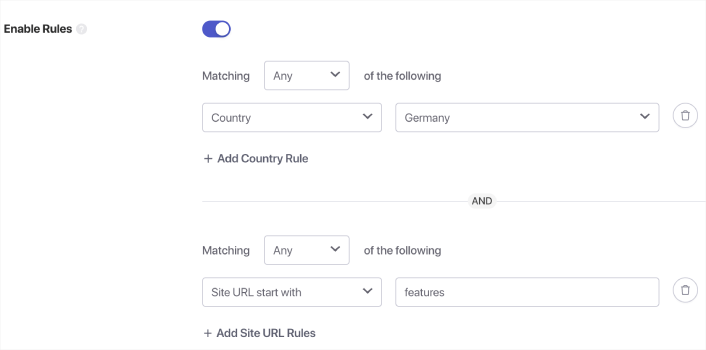
These are global targeting rules and will get preference over targeting rules for individual popup modals. But if you wish, you can create robust targeting rules for each modal by editing them.
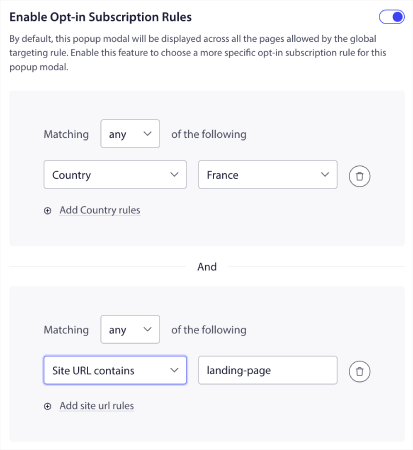
For instance, you can create popup modals in different languages to target visitors from different countries.
And if you’d like some templates with a high click-through rate to get started, you should check out this article on high-converting push notification opt-ins.
What to Do Before You Send Targeted Push Notifications
You’re almost done.
Before you start sending push notifications, you’ll need to set up a subscription opt-in for your website. Your opt-in will convert web visitors into push notification subscribers. So, this is a critical element.
If you need some inspiration, you can check out this article on high-converting push notification opt-ins. Once you’re done setting up the opt-in, your site can collect subscribers. But how do you even know that your opt-in is working properly?
So, the sensible thing to do is set up a welcome push notification.
Pro-Tip: You should spend some time on a full-scale test of your push notifications. This will troubleshoot the most common problems and you won’t waste your time trying to resolve issues later on.
What to Do After You Send Push Notifications
That’s all for this one, folks!
If you found this article helpful, be sure to drop a comment below.
Getting started with targeted push notifications can seem intimidating. But if you keep an eye on goal tracking and analytics, you should be fine. More importantly, you’ll make a lot more profit with the help of push notification campaigns. Here are a few cool resources to get you started:
- How to Use Retargeting Push Notifications to 2x Your Revenue
- How to Sort Your Push Notifications and Find Winning Campaigns
- How to Clean Up Push Notifications Subscriber Lists (Easy)
- How to Automatically Send RSS Push Notifications
- How to Use Push Notifications to Promote a News Site
- How to Use Cross Selling Push Notifications to 2x Your Sales
- How to Use Browse Abandonment Push Notifications (4 Steps)
If you’re new to push notifications, you should try out PushEngage. PushEngage is the #1 push notification software in the market. And your campaigns will be in safe hands.
So, if you haven’t already, get started with PushEngage today!


