Looking for a way to create a push notifications Audience Group?
Creating Audience Groups is a good way to personalize your marketing messages. If you’ve ever set up Facebook or Instagram ads, you’ll know that targeting your audience’s interests and behavior is super important for conversions.
You can do the same for your push campaigns and broadcasts as well.
In this article, we’re going to walk you through different ways to create push notifications Audience Groups. And you don’t need any experience in coding or marketing to get launched in less than 10 minutes.
Sounds good?
Let’s dive in.
Why Use Audience Grouping
The most common way to use an Audience Group is as a way to refine your segments.
Segments in your push notification subscriber lists are based primarily on your subscriber’s interests and browsing behavior. However, with Audience Groups, you can take that several steps further.
Of course, not every push notification service will give you the option to create Audience Groups. We recommend using PushEngage to create your campaigns and push notification Audience Groups.

PushEngage is the #1 push notifications plugin in the world.
Push notifications help you grow your website traffic and engagement on autopilot. And if you’re running an online store, PushEngage also helps you grow your sales by helping you create automated eCommerce push notifications.
You can get started for free, but if you’re serious about growing your business, you should buy a paid plan. Also, before buying any push notification service, you should check out this guide to push notification costs.
Here’s a quick glance at what you get with PushEngage:
- High-converting automated campaigns
- Multiple targeting and campaign scheduling options
- Goal tracking and advanced analytics
- Smart A/B testing
- A Dedicated Success Manager
You’ll see that PushEngage is hands down the best bet if you want to build traffic, engagement, and sales for your business. And if you’re on a budget, you can always get a little bit creative with your push notifications.
NOTE: If you’re running a WordPress site, you should install and activate the PushEngage WordPress plugin.
With Audience Groups, you can filter your subscribers by:
- Interests and Behavior
- Browsers and Devices
- Geolocation
- Engagement Metrics
- Identifiers
You can get started easily and create custom groups in a matter of minutes. Save your Audience Groups to retarget specific subscribers with personalized push notifications every time you send push broadcasts.
Before you get into the details of Audience Grouping, you should know that this feature is available with all PushEngage plans. But you can make the most of it only if you have Subscriber Segments and A/B testing to grow your audience. Both these features are available with the PushEngage Premium plan.
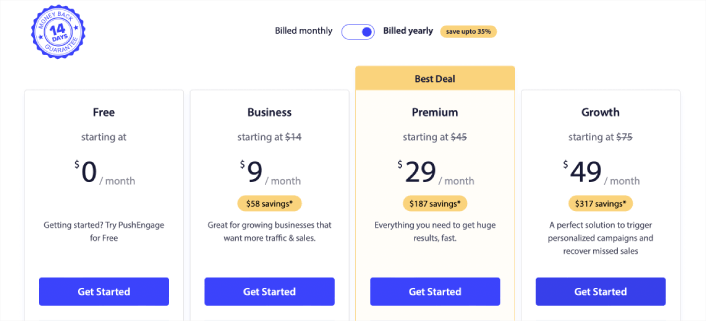
So, this is a good time for you to go ahead and upgrade your account.
How to Create a Push Notifications Audience Group
To get started, head over to your PushEngage dashboard and go to Audience » Audience Groups and click the Create New Audience Group button:

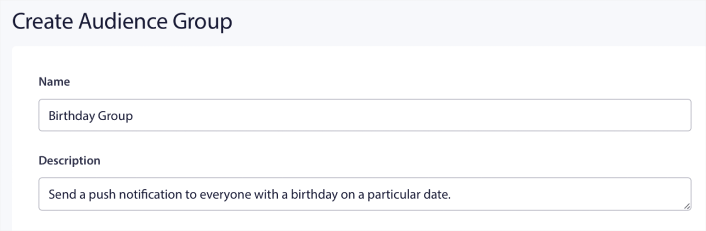
Before you can use your Audience Groups to send targeted push broadcasts, you’ll need to create an Audience Group with rules to create that group. You can start with a name and description for your Audience Group.
Create a Selection Criteria
Next, create a selection criteria to filter and target the right audience:
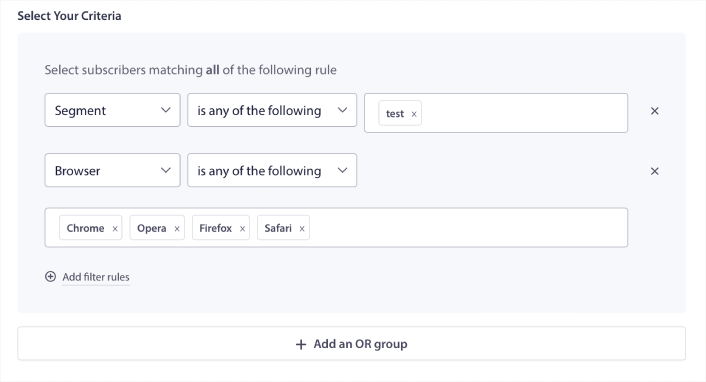
You can click Add filter rules to select subscribers who match ALL the filter rules or, you can click Add an OR group to create a filter where the subscribers meet at least one of the selection criteria.
How to Filter By Subscriber Behavior
User behavior is the most fundamental way to target your push notification subscribers. As we said before, subscriber segments usually group visitors who like to browse similar content. But even within that group of subscribers who love the same content, there are small personalizations that you can make.
Even more to the point, you can club multiple subscriber segments to send them a common, relevant message.
Filter By Subscriber Segment
If you haven’t already, you should start segmenting your push notification subscribers right away. Otherwise, this filter simply won’t work. But if you already have segments, then you can select multiple segments as the base for your audience group.

After that, you can add other filters to improve your targeting.
Filter By Subscriber Attribute
While attributes are mostly for drip push notifications, you can use them for push broadcasts as well. Now, push notification attributes are mostly useful for eCommerce sites. But you can also use them to send personalized push notifications if you have a Customer Relationship Management (CRM) tool.
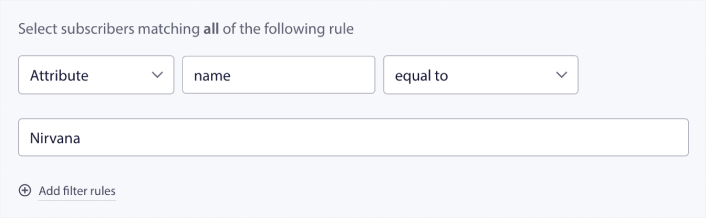
Attributes can hold personal information such as subscriber names, date of birth, any other info that you’d store in your CRM for personalized marketing campaigns.
Filter By Subscriber’s Device and Browser
In many cases, it’s crucial to know how you subscribers receive your messages.
There’s a really great story about Michael Jackson. Every time he recorded a song, he’d listen to it on a radio. Not his million-dollar recording suite in top audio quality, but a cheap radio like most of his audience would later on. If he liked how the song sounded even on the cheapest device on the market, he’d sign off on releasing the song.
No wonder Billie Jean went Platinum 29 times!
For your push notifications, it’s no different.
Filter By Subscriber Browser
Different browsers have different character limits for push notifications. So, when you send a push broadcast you need to be wary of these limits. The cool thing is that you can save different audience groups to retarget different browsers. You don’t need to create segments each time.

Filter By Subscriber Device
There’s a difference in the types of rich push notifications you can send to iOS, Android, and Windows devices. So, not every campaign you send out will look the same on all devices. In fact, many push notification types won’t even show up on all devices. Different devices also have different screen sizes. So, you may want to optimize how your push notifications look before sending them.
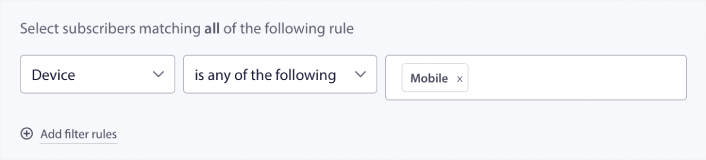
But now that you can filter your audience by their device, that shouldn’t be a problem anymore.
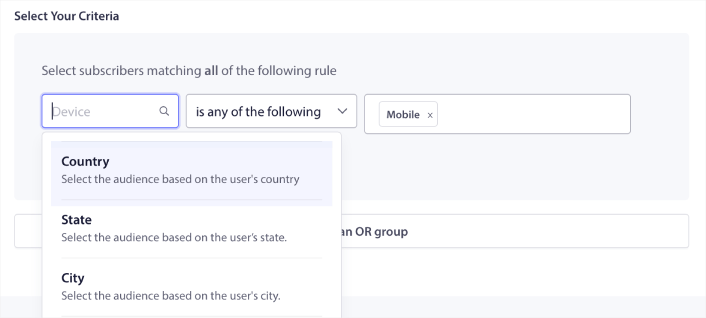
How to Filter By Geolocation
You can also filter by geolocation to personalize your campaigns further. The filter allows you to select an audience group by country, city, and state:
Phooto used geolocation to send push notifications in local languages. And it helped them skyrocket their engagement rates quickly. Read the full case study.
How to Filter By Engagement Metrics
One of the best things about Audience Groups is that it can help you create retargeting campaigns using push notifications. You can filter your audience by:
- Subscription Date
- Last Sent Date
- Last Click Date
- Last View Date
Using these metrics can help you retarget subscribers with low engagement rates or sell to subscribers with high engagement rates.
Or, you can filter the audience by:
- Total Send Count
- Total View Count
- Total Click Count
These numbers can help you find subscribers who get the least messages from you so that you can find better ways to personalize notifications. You can also find the subscribers who interact with your push notifications most often.
Pro Tip: Combine two or more filters to find the best ways to re-engage with your subscribers. For instance, subscribers with a high Total View Count and high Total Click Count will give you the subscribers who have been engaging with you for a while. These are loyal subscribers who deserve a reward.
How to Filter By Identifiers
Identifiers are how PushEngage identifies your subscribers. Since PushEngage is GDPR compliant by default, our software never stores any personally identifying data for any of your subscribers. Instead, we assign each subscriber a profile ID and a subscriber hash.
Keep in mind, you’ll be using profile IDs and subscriber hashes mostly as part of advanced campaigns. In other words, you’ll need to use the PushEngage API to create custom campaigns that use these identifiers.
Identifiers are amazing for sending transactional push notifications like this one:
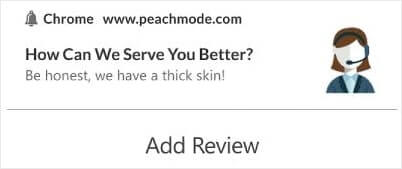
They’re great for custom eCommerce push notifications. So, we don’t really recommend using them for anything besides testing push broadcasts from the dashboard.
Use an Audience Group to Send a Push Broadcast
Once you’ve created an Audience Group, head over to Campaign » Push Broadcasts and click on the Create New Push Broadcast button:

Then, create your push notification:

Then, under the Audience tab, click on Send to Specific Audience Group and select your Audience Group from the dropdown menu.
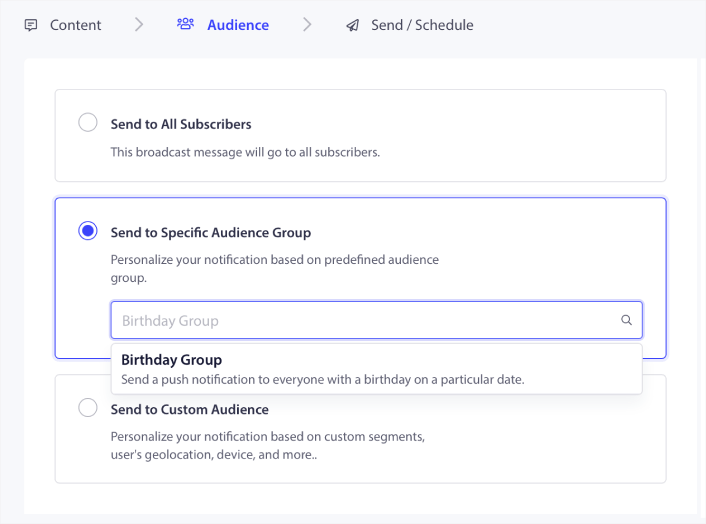
And then send or schedule your push campaigns.
What to Do After Creating a Push Notifications Audience Group
That’s all for this one, folks!
If you found this article helpful, be sure to drop a comment below.
Getting started with push notifications can seem intimidating. But if you keep an eye on goal tracking and analytics, you should be fine. More importantly, you’ll make a lot more profit with the help of push notification campaigns. Here are a few cool resources to get you started:
- How to Use Retargeting Push Notifications to 2x Your Revenue
- How to Sort Your Push Notifications and Find Winning Campaigns
- How to Clean Up Push Notifications Subscriber Lists (Easy)
- How to Automatically Send RSS Push Notifications
- How to Use Push Notifications to Promote a News Site
- How to Use Cross Selling Push Notifications to 2x Your Sales
- How to Use Browse Abandonment Push Notifications (4 Steps)
If you’re new to push notifications, you should try out PushEngage. PushEngage is the #1 push notification software in the market. And your campaigns will be in safe hands.
So, if you haven’t already, get started with PushEngage today!


