
Looking for a quick and easy guide on how to setup web push notifications on your website?
We’ve got you covered.
In this article, we’ll show you how to set up web push notifications on your website even if:
- You’ve never done it before
- You don’t have a developer to do it for you
- You’ve tried and failed to add push notifications to your site
The best part? We’ll do it without the technical jargon. So, even if you’re not a developer, you can still install push notifications pretty easily.
For this article, we’re going to use PushEngage to set up push notifications on your website. PushEngage is the #1 push notification software in the world. So, your campaigns will be in good hands.
Let’s dive in.
How to Install Push Notifications on Your Site
Before we start, here’s a quick look at what you can expect on your site at the end of this article. If you follow the steps in this tutorial you should be able to send push notifications from your site just like this one:

It doesn’t matter at all how you developed your site, what kind of business you’re running, or any other technical specifications. You’ll be able to install push notifications on your site either way.
Let’s dive in.
Step #1: Set Up Your PushEngage Account
Head over to the PushEngage home page and click the Get Started button:

You can select the free plan to try out PushEngage but if you’re serious about growing your business, choose a paid plan. The paid plans include better audience targeting options and campaign automation features.
Once you’ve signed up for an account, head over to the PushEngage dashboard and go to Settings » Site Settings » Installation Settings:
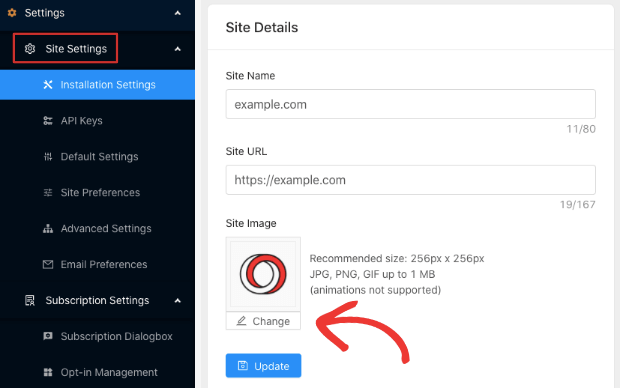
You can configure your site’s URL and identity on this screen. Go ahead and set a logo and site URL for your push notification campaigns and broadcasts.
All your push notification subscribers will see the Site Name, Site Image, and Site URL on your notifications. So, you should set these up right now so that you can test your push notifications later on.
Step #2: Get the Installation Code from PushEngage
Next, you’ll need to head over to the PushEngage dashboard and get the installation code. Head over to Settings » Site Settings » Installation Settings:
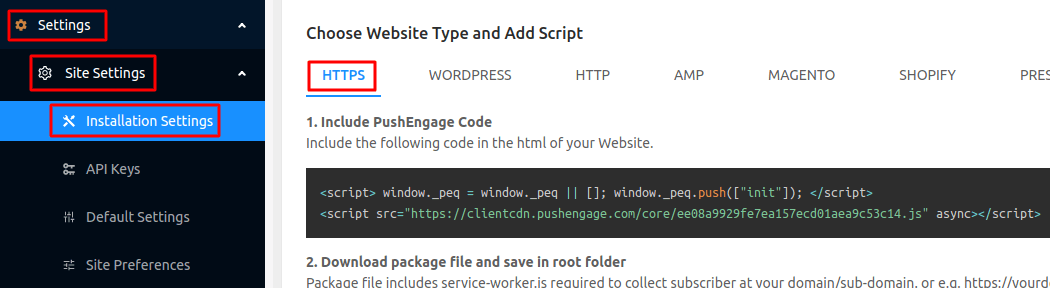
Inside this tab, you’ll see that you can get a different code for different types of websites. Find the right one for your site and copy it. If you’re running a site on a CMS that isn’t listed in the tab, you can head over to either HTTP or HTTPS tabs based on whether your site has an SSL certificated installed.
This next part is super important. If you don’t do this step, your site won’t be able to collect push notification subscribers.
If you’re using an HTTPS site and you have access to your server’s root folder, you’ll need to download the service-wroker.js file from the same tab. Then, upload it to your root folder.
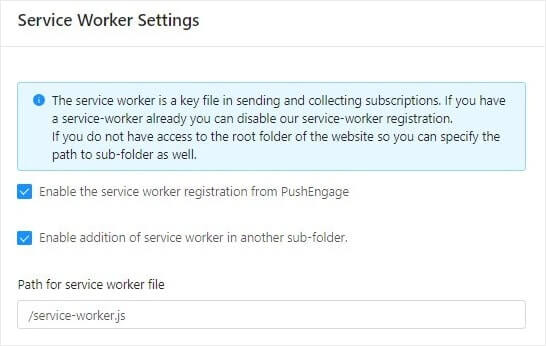
NOTE: If you can’t upload the service-worker file to the root folder, you can still upload the file to another folder. Go to PushEngage Dashboard » Settings » Site Settings » Advanced Settings.
Just follow the instructions in the Service Worker Settings and you’re golden:
Finally, you’ll want to place the installation code for PushEngage in the HTML <head> of your website. If you’re a developer who’s used to coding in HTML, you already know how to do this.
But if you’re new to HTML and you’re using a CMS to run your site, don’t worry. The process to edit the HTML <head> is different for different platforms. So, we’ve created detailed, step-by-step guides for the most popular platforms for you:
- Install push notifications on WordPress
- Install push notifications on WordPress (without a plugin)
- Install push notifications on WooCommerce
- Install push notifications on Wix
- Install push notifications on Blogger
- Install push notifications on Zoho
- Install push notifications on Volusion
- Install push notifications on Weebly
- Install push notifications on ClickFunnels
- Install push notifications on PrestaShop
- Install push notifications on OpenCart
- Install push notifications on CS-Cart
- Install push notifications on Drupal
- Install push notifications on Squarespace
- Install push notifications on X-Cart
- Install push notifications on BigCommerce
- Install push notifications on Jimdo
IMPORTANT: You can insert your installation code directly from your dashboard in some website builders and CMSs. In other instances such as PrestaShop, you’ll need to use the PushEngage API Key instead. That’s why we recommend following platform-specific tutorials to add the push notification code correctly.
Step #3: Configuring the PushEngage Opt-In
Finally, in your PushEngage dashboard, go to Settings » Subscription Settings » Subscription Dialogbox » Edit:
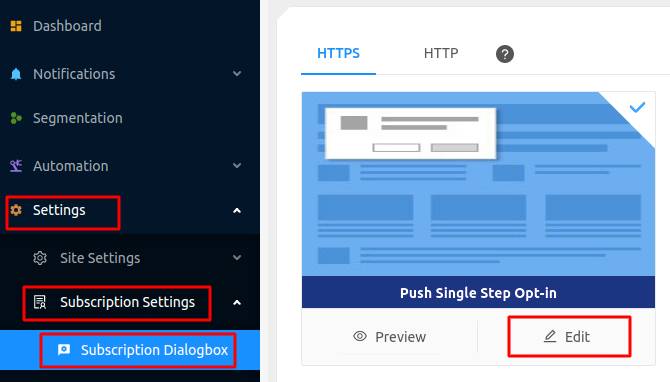
From here, you can customize your push notification opt-in. If you need help with that, you should check out this article on how to create a custom push notification opt-in.
If you need some inspiration, you can check out this article on high-converting push notification opt-ins.
BONUS Step: Create a Welcome Notification
Once you’re done setting up the opt-in, your site can collect subscribers.
But how do you know if your push notifications are working properly?
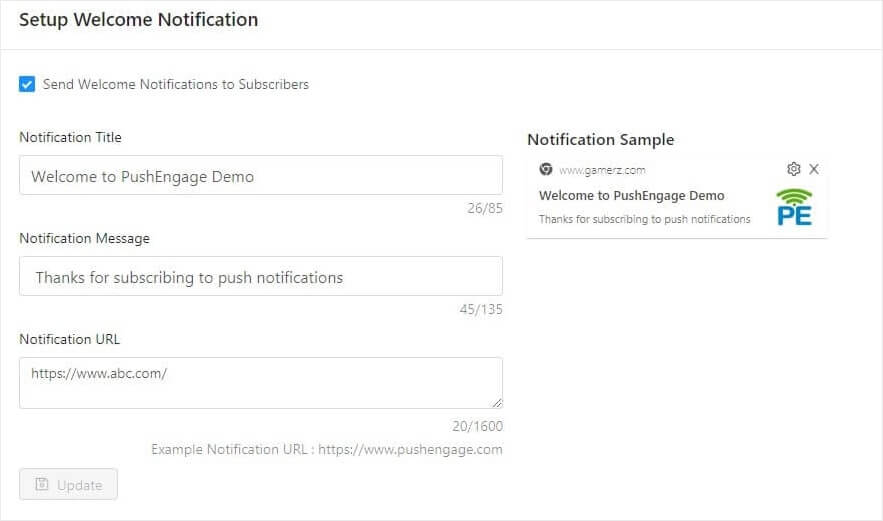
We recommend that you create a welcome push notification to test if your setup went smoothly. A welcome notification is a push notification you send a new subscriber to confirm their subscription and welcome them on board.
Head over to Settings » Site Settings » Installation Settings and configure your welcome message:
Finally, head back to your site and opt for your own push notifications to test whether it’s all working smoothly.
And that’s all there is to it!
You have successfully set up web push notifications on your website. It’s time to head back to your PushEngage dashboard and start creating your push notification campaigns.
Wrapping Up
If you’re new to push notifications, you should follow a full-blown push notification testing process before you go live. It’ll help you troubleshoot common issues before your visitors see them and start complaining about a broken user experience.
We recommend that you get in touch with our Customer Success Managers if you’re stuck with any of this. We’re more than happy to help you with any issue. Push notifications are a great way to drive repeat traffic to your site and grow direct sales and engagement.
Not convinced? Check out these epic resources:
- Drip Campaigns and Autoresponders For Web Push Notifications
- 5 Benefits of Using Cart Abandonment Push Notification Campaign
- How to Convert Subscribers To Buyers Using Web Push Notifications
If you haven’t already, go ahead and give PushEngage a try. PushEngage is the #1 push notification service in the world. So, if you’re serious about growing your business, PushEngage is the right option for you.


