Looking for a detailed guide on how to change themes in WordPress?
Themes control everything WordPress right down from the look and feel of the site to the range of functionality that comes with it. Truth be told, if you have a WordPress development team on hand, you can use almost any WordPress theme or create your own. But if you can’t custom-develop your own theme, then the right theme matters quite a lot.
And if you’re stuck with a mediocre theme, then you need to change themes quickly. But how do you do it? If you simply deactivate one theme and install another, you’ll likely wreck your site. Most themes leave behind HTML and CSS code that define how your site looks.
In this article, we’re going to show you how to change themes in WordPress the right way without coding.
Let’s dive in.
Before You Learn How to Change Themes in WordPress
As we said, deactivating a theme and installing a new one isn’t all there is to changing themes in WordPress. Before you learn how to change themes in WordPress, there are a couple of small things to take care of.
Let’s check out the necessary prep work.
#1. Copy Snippets from Your Current Theme
There’s a good chance that your existing website has some custom code in it. If you had your website or theme modified, the code for that is going to be in your functions.php file. Since most of these are one-time changes, it’s easy to forget about them.
We recommend heading into your functions.php file and copying any added code to a file so that you can add it back later on. If you’re not sure how to add code to WordPress, check out this article on how to add custom code to your site without breaking it.
#2. Test Load Time
The time it takes for a page on your site to load can have a huge impact on your SEO traffic and rankings. Poorly coded sites tend to take much longer to load. So, before you change themes in WordPress, always test your load time.
If you know your load time before and after you change themes, it can help you troubleshoot or fix bloated code on your site. For detailed instructions on testing load times, check out this guide on how to run a site speed test.
#3. Copy Your Tracking Code
Many themes allow you to directly add tracking and analytics code to the theme files from their settings. The tracking code is super important for keeping track of your marketing efforts. So, if you lose that code, it can make you lose sight of your traffic, engagement, and conversion data.
You need to make sure that you copy all the tracking codes, so you can add them to your new site after changing the theme. This is exactly why we recommend using a Google Analytics plugin on your site such as MosnterInsights.

MonsterInsights is a WordPress plugin that makes it easy for you to use Google Analytics. Google Analytics is too complicated to use for a beginner. But even worse, it’s easy to get lost in a sea of data without getting any actionable insights on growing your business.
MonsterInsights focuses on insights over volumes of data. This is super useful for an eCommerce business because in addition to SEO metrics, you’ll also need to check out revenue numbers.
The cool part is that you don’t need a single line of code to install Google Analytics on WordPress.
Here’s a quick look at what MonsterInsights can do for you:
- Google Analytics Tracking Without Any Code
- Compatible with Any Version of Google Analytics
- Reports to Find Top-Performing Content
- Detialed Audience Insights
- eCommerce Analytics
- Form Sign Up Analytics
- Additional Insights from Custom Dimensions
- Affiliate Link Click Tracking
- GDPR Compliance
- Premium Integrations
If you need to take a close look at the features, you should really check out our review of MonsterInsights.
For other tracking codes such as Facebook and Pinterest Pixels, you should use the WPCode plugin to insert code on your site.
#4. Take a Full WordPress Site Backup
WordPress backups include both files and the database. Taking a backup manually can be super technical and it’s not always successful. We recommend using a WordPress backup plugin to store a backup to your computer or on a cloud server.
If something goes wrong with changing themes, you can always use the backup to restore your WordPress site to the way it was. For future reference, changing anything on your site without taking a backup is a bad idea. You can easily wreck your entire site and lose all your progress in a matter of seconds.
#5. Copy Sidebar Content
Sidebars are used for adding different widgets including social links, advertisements, subscription forms, or a contact form.
Make sure to double-check these changes. If there is any custom code added to a widget, then make sure you copy and paste this code on your computer, so you can reuse it in your new theme.
#6. Enable Maintenance Mode
While you’re switching themes and working out the kinks, it’s best to put your site in maintenance mode. We recommend using SeedProd to enable maintenance mode on your site.

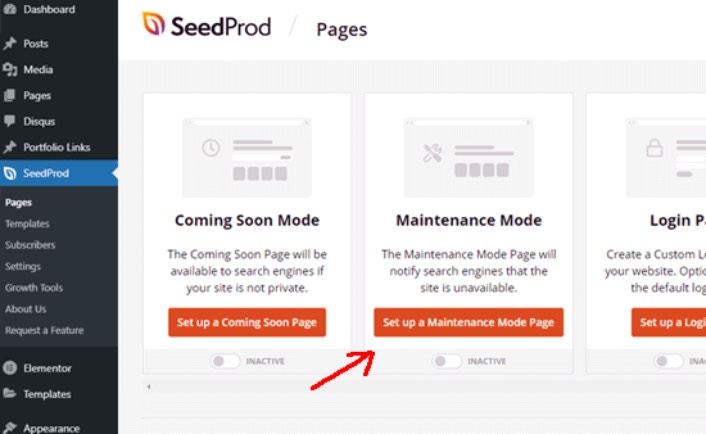
To keep your site in maintenance mode, you need to install and activate the SeedProd plugin. Next, head over to SeedProd » Pages from your WordPress admin panel and then click the Set up a Maintenance Mode Page.
After that, you’ll need to select a template for your maintenance mode page. You can also use a blank template and create a page from scratch. You can now use the SeedProd drag and drop page builder to customize your maintenance mode page.
How to Install a New Theme in WordPress
Once you’re done with the precautions, the next step is to install a theme that you want to use on your site. WordPress has thousands of free and paid themes to choose from, but we recommend using SeedProd.
SeedProd is the best drag and drop website builder for WordPress. We already mentioned you can use it to create a maintenance mode page. But, you can also use it to create a custom WordPress theme without writing any code.
If you’re not 100% sure if SeedProd is the right theme builder for you, then check out our full review of SeedProd first. But no matter what theme you settle for, go ahead and download the zip file for the theme.
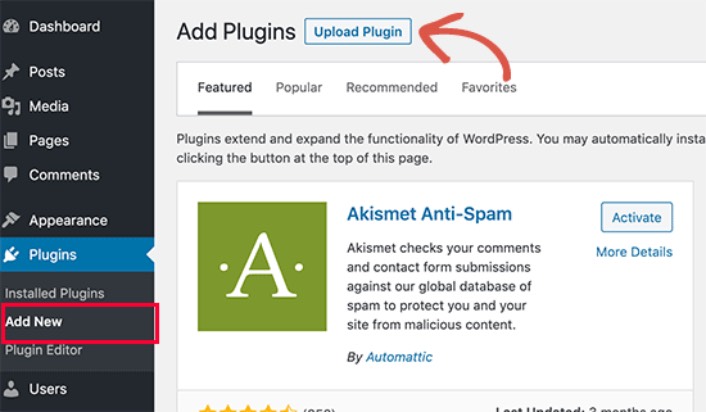
For SeedProd, go ahead and buy the plugin. Then, from the SeedProd dashboard, download the zip file. Next, go to your WordPress dashboard and head over to Plugins » Add New and click on Upload Plugin:
Click on Choose File to upload your plugin zip file:

Then, click the Activate button once WordPress finishes uploading the plugin. Finally, go to the SeedProd plugin welcome screen and verify your license key:

After your account is verified, you’re ready to create a landing page or your own theme without any coding.
Preview Your Theme Before Changing It
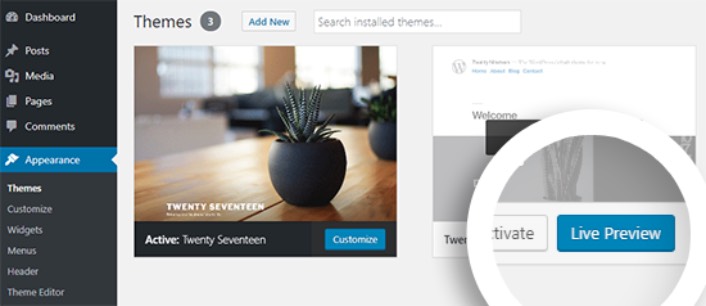
Once you’re done creating a theme or installing one, you need to preview it to make sure that it doesn’t wreck your site. By default, WordPress allows you to preview a theme on your website without changing it. To do that, head over to Appearance » Themes from the left sidebar of your admin panel.
On this page, you’ll see all the installed themes on your site. You need to hover your mouse over the theme you want to preview and click on the Live Preview button.
This will open your new theme in the WordPress Theme Customizer. You can now test your new theme and make sure that everything is working properly. Checking the Live Preview of your theme is a good way to find unwanted leftover code on your site. If you see code snippets on your pages, go ahead and delete that HTML. It’s super easy to do and it prevents your site from breaking down.
After you clean up the site, click the Activate button to activate your new theme.
Pro Tip: After changing themes in WordPress, remember to go back to SeedProd and deactivate the maintenance mode.
What to do After You Know How to Change Themes in WordPress
Now that you know how to change themes in WordPress, the only challenge you have left is growing the traffic to your site. We recommend checking your site loading speed after changing themes, but your core focus should be to increase traffic, engagement, and sales on your site.
And if you’re looking for an affordable way to grow your traffic, we recommend using push notifications. Push notifications can help you bring in more repeat traffic and site engagement. You can also create automated push notification campaigns that generate sales.
Not convinced? Check out these resources:
- 7 Smart Strategies to Boost Customer Engagement
- Are Push Notifications Effective? 7 Stats + 3 Expert Tips
- How to Set Up Abandoned Cart Push Notifications (Easy Tutorial)
- How to Add a Web Notifications WordPress Plugin to Your Site
We recommend using PushEngage to create your push notification campaigns. PushEngage is the #1 push notification software in the world. So, if you haven’t already, get started with PushEngage today!


