
Want to create a WordPress order form for your site?
An order form is a great way to monetize your site without having a full-fledged eCommerce site. But how do you actually create one? Should you even consider creating a WordPress order form from scratch?
The short answer is: No. You can create a WordPress form using a form plugin in less than half the time as creating one from scratch. And if you’re not a developer yourself, using a plugin is probably going to be way more affordable as well.
But there are tons of form plugins out there. Which one do you choose?
In this article, you’re going to see step-by-step how to make a WordPress order form using a simple, easy-to-use plugin. And you can use this method even if you have zero experience with coding.
Let’s dive in.
Why You Need an Order Form
A WordPress order form on your site allows you to sell services, merchandise, and digital products without an eCommerce setup. So, using a WordPress order form is the perfect option for service sites, freelancers, and influencers. There’s little to no maintenance involved and you can get set up and started very quickly.
We don’t mean to say that there’s anything wrong with creating an eCommerce site. If that’s the direction you want to take, good on you. But if you don’t want to create a store and manage the inventory yourself, order forms are your best bet.
The best part is that you can integrate an order form directly into a landing page. If you’re already used to WordPress plugins, then you’ll know that most WordPress landing page builders allow you to add forms to any page.
Now that we know why you should create a WordPress order form, let’s start creating one!
How to Create a WordPress Order Form
To create our online event registration form, we’re going to use a super popular form builder plugin for WordPress called WPForms.
The best part about using WPForms isn’t how easy it is to create a form. It’s the fact that you don’t need an eCommerce plugin such as WooCommerce or Easy Digital Downloads to sell products and services online.
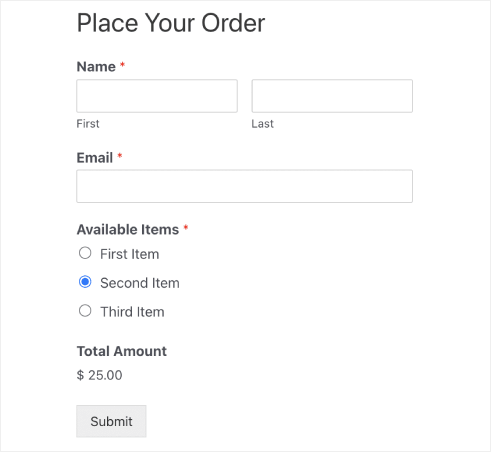
If you follow every step in this article, you can create a WordPress order form like this one:

Step #1: Create a New WordPress Form
The first thing you’ll need to do is install and activate WPForms.

WPForms is the #1 WordPress form builder plugin in the world. If you’re not sure how to install WPForms, you should check out this step-by-step guide on how to install a plugin in WordPress.
Then, head over to your WPForms dashboard and go to Downloads to get your plugin:
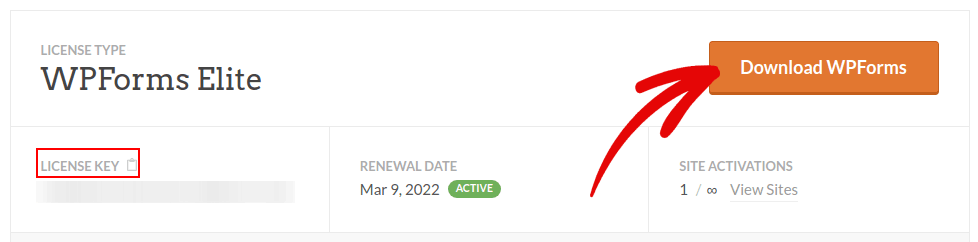
Next, install and activate the plugin on your site. And copy your license key in the same tab.
Finally, go to your WordPress dashboard and head over to WPForms » Settings and paste in your License Key:
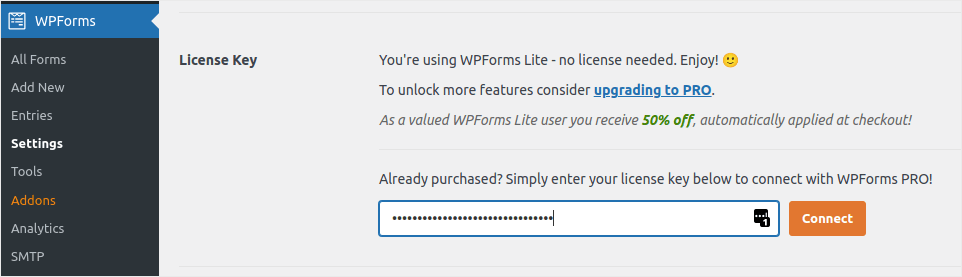
When you’re done, click Connect.
Now that WPForms is installed and activated, it’s time to create your first form. Head over to WPForms » Add New:

This will open the WPForms drag and drop form builder.
Step #2: Select WordPress Order Form Template
To create a new form, give it a name and select your form template:
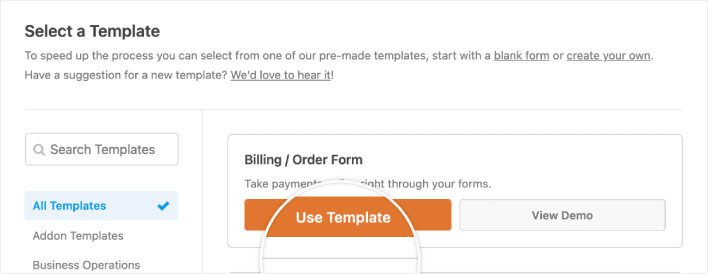
With WPForms, you get a ton of predesigned form templates that you can simply import with a single click and then customize as you please. For a closer look at the full list of features, you should check out our review of WPForms.
Step #3: Customize Your Order Form
Next, you’ll want to modify what items are available to order.
To do this, scroll down to the “Available Items” section on the right that the template includes and click on it.
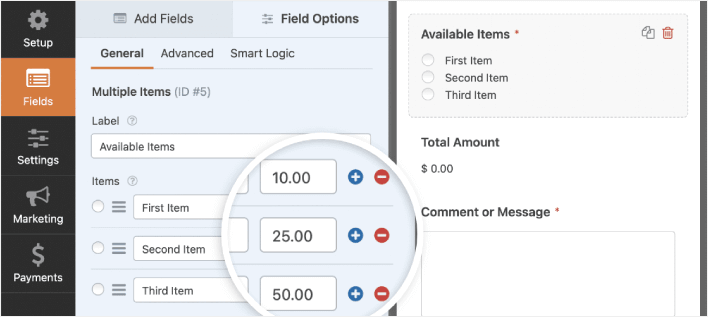
This will open up the Field Options in the left panel. Here you can rename the field, add or remove order items, and change the prices. When you’re done customizing your WordPress order form, click Save.
You can also make forms look great by following the steps in our post on how to create a multi-step form in WordPress. It’s a great way to improve the user experience and reduce cart abandonment rates. But we’ll stick with a single page for this tutorial.
Step #4: Configure Your WordPress Order Form Settings
Next, you’ll want to set up notifications and confirmations.
Notifications are emails that you get when someone fills out the form. Confirmations are meant to alert the user that they’ve successfully filled up the form. Usually, this is a “Thank You” message, but you can also redirect your users to a dedicated page.
Head over to Settings » Confirmations to configure confirmation settings:

And then in the same menu, go to Notifications to configure your notification messages:

By default, the notifications are sent to the WordPress admin email. So, if you’d like the emails to be sent somewhere else, such as the email ID of your Head of Sales, you can do that right here.
Step #5: Configure WordPress Order Form Payment Settings
Next, we’re going to help you accept payments through your online event form. WPForms integrates with PayPal, Authorize.Net, Square, and Stripe for accepting credit card payments. So, all you have to do is install a payment addon for WPForms.
Then, click the Payments tab in the form editor and select the integration you set up.
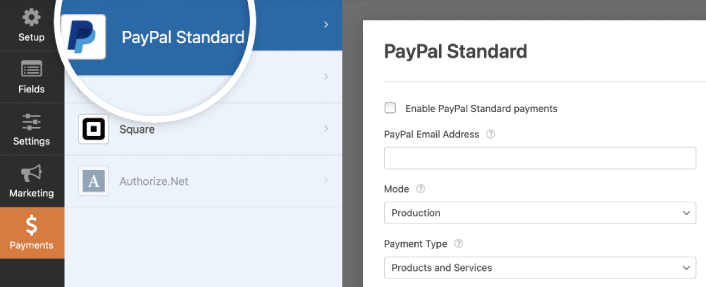
After you’re done configuring the payment settings, click Save to store your changes.
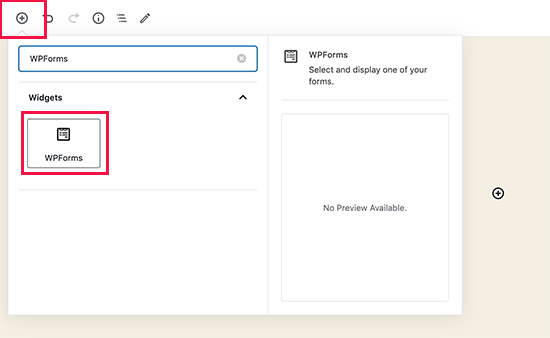
Step #6: Add the WordPress Order Form to Your Site
You can add the online event registration form anywhere on your site using the WPForms WordPress block:
Select your WordPress Order Form:
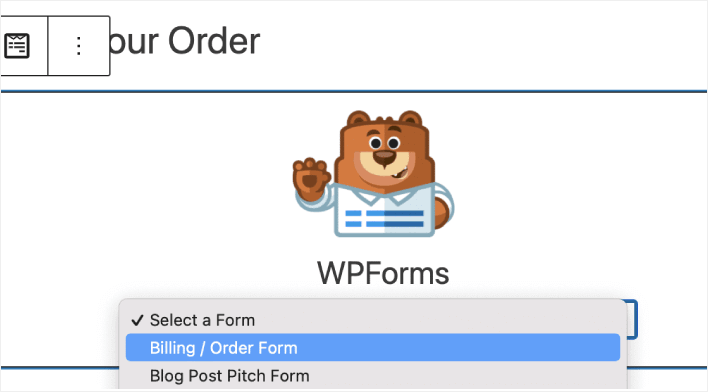
And you’re done!
If you followed every step, you should see an order form on your site like this:
How to Promote Your WordPress Order Form
That’s all for this one, folks!
By now, you’ve created a WordPress order form. Next, you should set up form abandonment tracking to reduce your form abandonment rates.
After that, all that’s left is generating traffic to your site so that your form can get to work and start converting. A simple way to do that is to start using push notifications. Sending push notifications is a great way to generate repeat traffic for your site. If that’s something you’re interested in, you should check out these articles as well:
- Push Notification Cost: Is It Really Free? (Pricing Analysis)
- How to Get More Traffic to Your WordPress Blog (9 Easy Ways)
- How to Boost Your Web Push Notification Opt-In Rate (7 Ways)
- How to Add a Web Notifications WordPress Plugin to Your Site
We recommend using PushEngage to send your push notifications. PushEngage is the #1 push notification software in the world. So, if you haven’t already, get started with PushEngage today.


