
Looking for a tutorial to create a WordPress multi-step form?
A multi-step form splits up large forms into smaller parts. Multi-step forms reduce the clutter and make it simpler for your visitors to sign up. It’s a great way to increase conversions and improve the overall user experience.
But creating one from scratch is really tiring and if you have to hire a developer to create one, it’s going to be expensive as well.
In this article, we’re going to show you how to create a WordPress multi-step form the easy way without coding.
Let’s dive in.
Step 1: Create a New Form With WPForms
The first thing you’ll need to do is install and activate WPForms.

WPForms is the #1 WordPress form builder plugin in the world. If you’re not sure how to install WPForms, you should check out this step-by-step guide on how to install a plugin in WordPress.
Then, head over to your WPForms dashboard and go to Downloads to get your plugin:
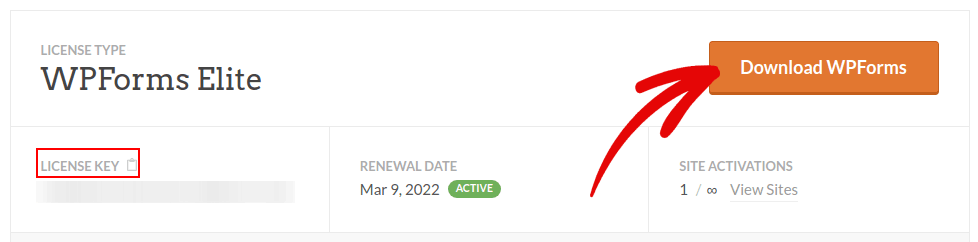
Next, install and activate the plugin on your site. And copy your license key in the same tab.
Finally, go to your WordPress dashboard and head over to WPForms » Settings and paste in your License Key:
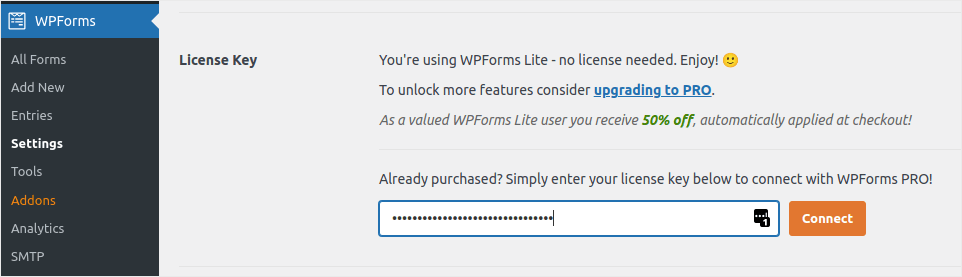
When you’re done, click Connect.
Now that WPForms is installed and activated, it’s time to create your first form. Head over to WPForms » Add New:

This will open the WPForms drag and drop form builder.
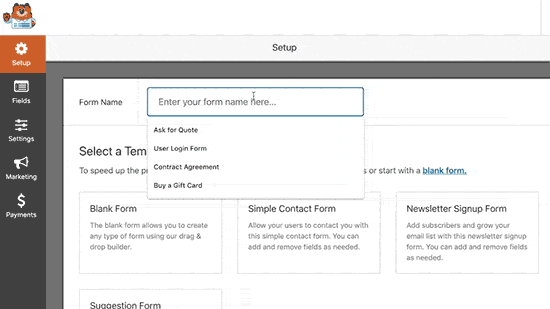
To create a new form, give it a name and select your form template:
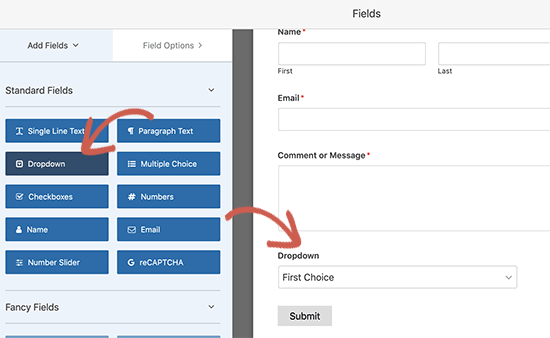
And that’s it! if you want to add or edit the fields in your contact form, you can do so from the sidebar. Darg and drop form fields to add new ones and click on the existing fields to edit them:
When you’re done, hit Save.
Step 2: Insert the Page Break Field Into Your Form
Splitting your form into multiple pages is very simple and easy with WPForms.
Once you’ve added and customized all the form fields on your form, you need to add the Page Break form field to your site to split it into different pages.
To do this, drag the Page Break form field, found under Fancy Fields, from the left-hand panel to the right-hand panel.
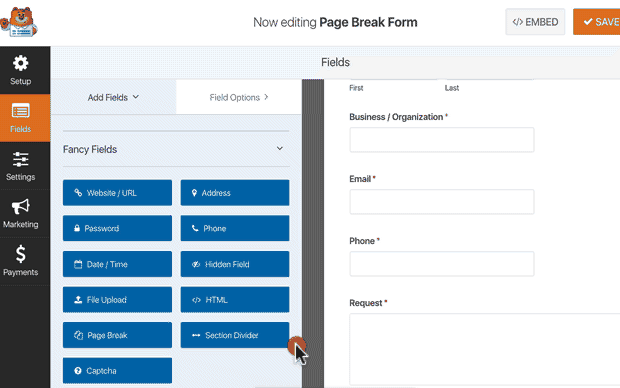
Place the field where you want the form to split. If you want multiple breaks, just use multiple page break modules.
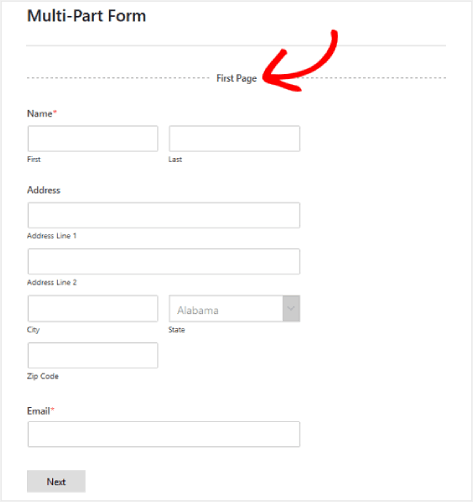
Step 3: Customize the Multi-Page Form Progress Bar
Most of your work in designing the form is done at this point. But for any multi-page form, we recommend using a progress bar to let your visitors know how far along they are in the signup process. You can go above and beyond to give your pages titles as well.
To customize the progress bar and page title of the first page of your multi-step form, click on the First Page break section.
In the sidebar, you can set the type of progress indicator as either Circles or Connectors. You can also set the title for the page.
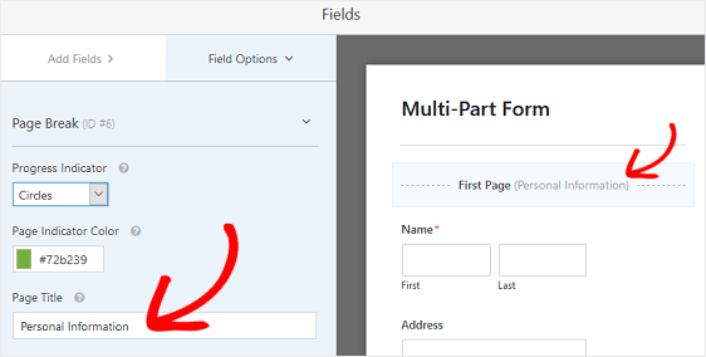
The epic thing is that you can also set a custom Page Indicator Color. When you’re happy, you can also customize the other page breaks in the exact same way.
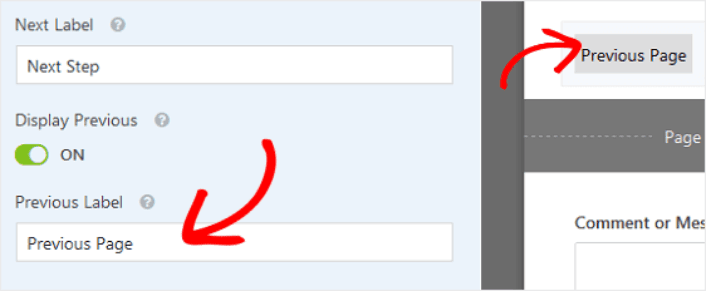
You can also toggle on the feature that lets you show site visitors a Previous page button. This way they can return to the previous page of your form if they need to.
When you’re done, just hit the Save button.
Step 4: Configure Your Multi-Step Form Settings
Next, you’ll want to set up notifications and confirmations.
Notifications are emails that you get when someone fills out the form. Confirmations are meant to alert the user that they’ve successfully filled up the form. Usually, this is a “Thank You” message, but you can also redirect your users to a dedicated page.
Head over to Settings » Confirmations to configure confirmation settings:

And then in the same menu, go to Notifications to configure your notification messages:

By default, the notifications are sent to the WordPress admin email. So, if you’d like the emails to be sent somewhere else, such as the email ID of your Head of Sales, you can do that right here.
Step 5: Add Your Multi-Step Form to Your WordPress Website
You’re done configuring your WordPress contact form at this point. So, let’s go ahead and add it to a page. There are 3 basic methods to add a WPForms contact form to your WordPress site. We’re going to take a look at each.
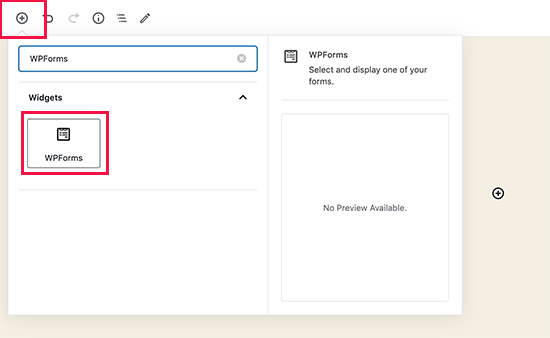
Method#1: Add the Form Using the Block Editor
Head over to whichever page you want to add your contact form and add a new WPForms block:
Then, select your newly created form using the dropdown menu:
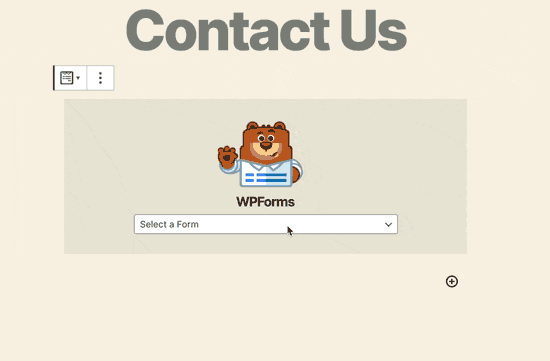
And you should see your contact form get inserted automatically into your page.
Just hit Save and Publish to see your WordPress form in action.
Method #2: Add Your Contact Form Using WPForms Shortcodes
WPForms also generates a shortcode for each WordPress contact form. You can copy the contact form shortcode by visiting WPForms » All Forms:
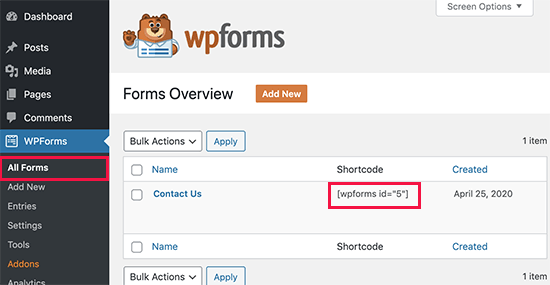
And then, paste the shortcode into any post or page you want. It’s that simple.
If you’re new to shortcodes, you should check out this article on how to add a shortcode on WordPress sites.
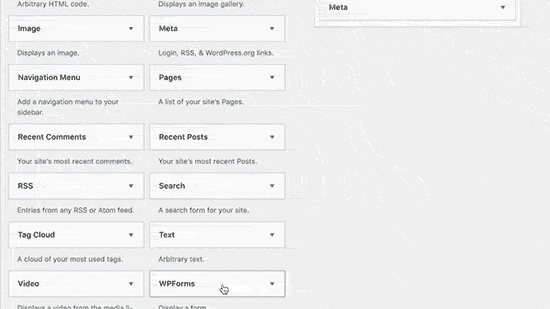
Method #3: Add Your Contact Form to the Sidebars
The sidebar is one of the most underused features in most WordPress sites. We highly recommend inserting a contact form in your site’s sidebars. Head over to Appearance » Widgets in your WordPress dashboard and add the WPForms widget to your sidebar:
And you’re done!
How to Promote Your WordPress Multi-Step Form
That’s all for this one, folks!
By now, you’ve created a WordPress multi-step form. Next, you should set up form abandonment tracking to reduce your form abandonment rates.
After that, all that’s left is generating traffic to your site so that your contact forms can get to work. A simple way to do that is to start using push notifications. Sending push notifications is a great way to generate repeat traffic for your site. If that’s something you’re interested in, you should check out these articles as well:
- Push Notification Cost: Is It Really Free? (Pricing Analysis)
- How to Get More Traffic to Your WordPress Blog (9 Easy Ways)
- How to Boost Your Web Push Notification Opt-In Rate (7 Ways)
- How to Add a Web Notifications WordPress Plugin to Your Site
We recommend using PushEngage to send your push notifications. PushEngage is the #1 push notification software in the world. So, if you haven’t already, get started with PushEngage today.


