Not sure how to create a landing page in WordPress?
You’ve probably heard how important it is to create a killer landing page. After all, your landing page is meant to convert your traffic into customers.
But how do you actually create a landing page in WordPress?
The default options with Gutenberg editor aren’t that great. And if you’re using a theme to draft your pages, that’s not the same as creating a high-converting landing page. Your theme is simply going to carry forward all the styles as the rest of the site.
What if you don’t want the navigation menu to show up on the landing page? What if you want to integrate eCommerce modules for direct checkouts? What if you want to get rid of all the custom sidebars on the rest of the site?
In this article, we’re going to show you how to create a landing page in WordPress in 5 simple steps.
The best part? There’s ZERO coding involved.
Let’s dive in.
Before We Start: What’s a Landing Page?
A landing page is a webpage on your site that is specifically designed to sell your product or service. You can also use landing pages to collect leads.
In short: a landing page is a conversion machine on your site.
The way it works is also simple. You create marketing or advertising campaigns that bring traffic straight to your landing page. Then, the landing page converts that traffic into leads or paying customers.
Since the goal of a landing page is to convert more of your website traffic into customers, it has to look attractive and engaging. Most importantly, you’ll have to properly design various call-to-action elements such as:
- The buy button
- Signup forms
- Play media button
And more!
How to Create a Landing Page in WordPress
In the next few sections, we’re going to show you step-by-step how to create a landing page in WordPress. As we said, creating a landing page using your theme isn’t a good solution.
That’s why we recommend using one of the top WordPress landing page plugins. Even if you’re not a developer, you can create a high-converting landing page in WordPress and boost your website traffic and sales.
Our recommendation is to use SeedProd.

SeedProd is the best WordPress landing page builder in the market. In this article, we’re going to use SeedProd to create your first landing page. If you’re not 100% convinced that this is the right landing page builder for you, you should go check out our review of SeedProd.
And then, get started!
Step #1: Install the SeedProd Plugin on Your Site
First, you’ll need to visit the SeedProd website and purchase the plugin. Then, you can download the plugin file to your computer. Then, copy the plugin license key from your SeedProd dashboard.
Next, you’ll have to log into your WordPress dashboard and install the plugin. If you need detailed instructions, check out this step-by-step guide to installing a WordPress plugin. Head over to the SeedProd plugin welcome screen on WordPress and verify your license key:

After your account is verified, you’re ready to create a landing page.
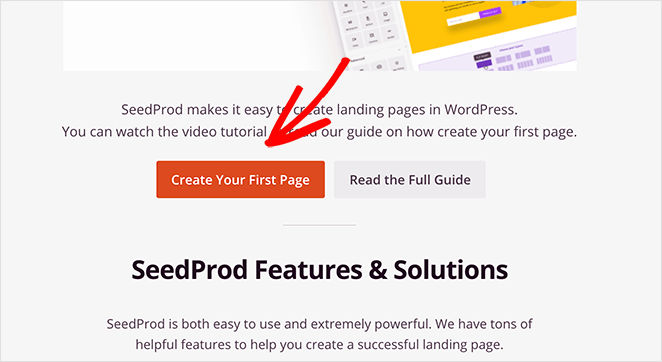
Step #2: Create a Landing Page with SeedProd
In the SeedProd welcome screen, scroll further down and click on Create Your First Page button:
Then, you’ll see 5 different types of landing pages that you can create:

Using SeedProd’s templates, you can quickly launch complicated pages such as:
- Coming Soon and Maintenace Mode Pages
- Login Pages
- 404 Pages
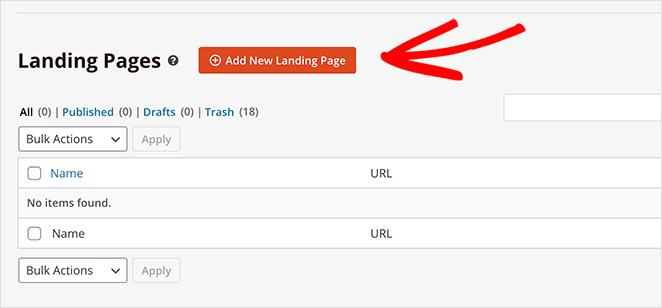
And if you scroll down a little further, you can launch a custom landing page from pre-built templates. Click on Add New Landing Page:
Then, choose a landing page template from the pre-built landing pages listed in SeedProd’s builder:
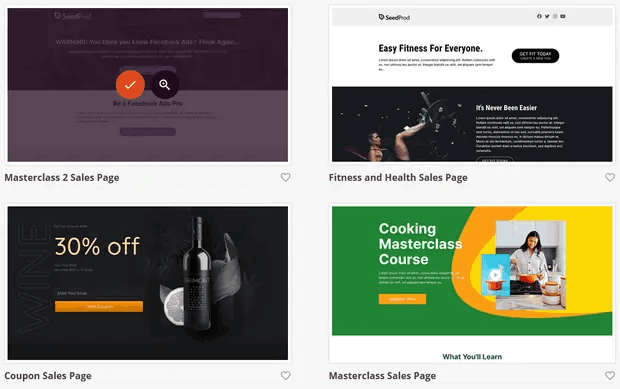
Take your time and select the right template for you. To select a template, just click the checkmark icon on the template.
Remember, the template is just a starting point. In the next section, we’ll see how to customize your landing page easily using SeedProd’s drag-and-drop builder.
Step #3: Customize the Landing Page Template
After choosing your landing page template, you’ll be redirected to SeedProd’s visual drag and drop builder where you can customize your landing page. The left hand side of the editor is a list of the design elements that you can use to customize your landing page:
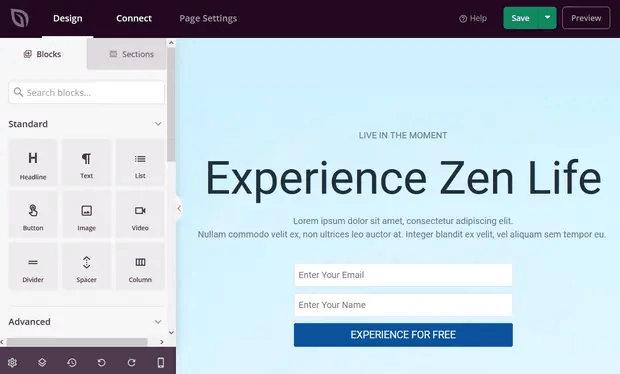
And you can also click on any of the design elements in the live preview to edit them directly on the preview:
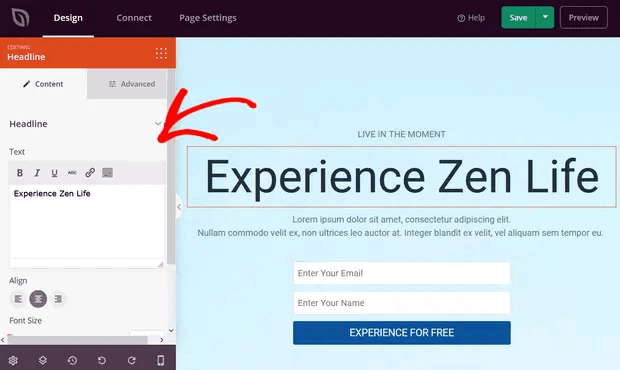
You can change the text, its style, color, alignment, and layout to fit your product or overall brand. Additionally, you can easily add new blocks such as buttons, optin forms, contact forms, social profiles, and more to your landing page template.
For instance, you can drag and drop a countdown timer to increase urgency:
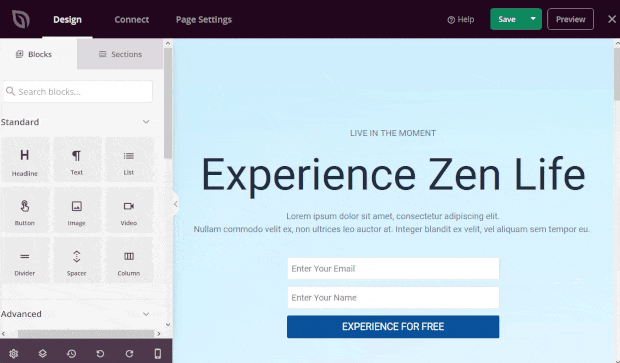
When you’re done, click on Save.
Step #4: Add a Click to Subscribe Button to Your Landing Page
You can also add a click to subscribe button to collect push notification subscribers. Push notifications are a great way to increase your repeat traffic, get more engagement and even sell official merch if you have some.
In SeedProd, just drag and drop the Custom HTML module from the sidebar.
We’ve put the subscribe button directly underneath the email signup form in the first fold.

But you can insert the button anywhere you like.
For this part, you need some experience with HTML and CSS. Or, you can copy this code and paste it into your Custom HTML block:
<button onclick="subscribeOnClickButton()" style="border: none; padding-left: 5%; padding-right:5%; text-align: center; display: inline-block; color: blue;">Get Updates via Push Notifications</button>That’s a standard button in HTML with very little styling. The only fancy bit is the onclick function in the code. It basically means that your visitors can click on the button to subscribe to something. Now, we need to give the button some extra code to allow your visitors to subscribe to push notifications.
Head over to the PushEngage home page and click the Get Started button:

Then, you’ll want to select the free plan to try out PushEngage or choose a paid plan if you’re serious about growing your business. The paid plans come with more campaign options and the ability to build even bigger subscriber lists.
In your PushEngage dashboard, head over to Site Settings » Site Details and click the Click Here for Setup Instructions button. Under Any Site, you’ll get your installation code:

WARNING: You need to copy the code you get from your dashboard. The code is unique for each PushEngage user. You won’t be able to copy the code in the image and collect push notification subscribers.
Once you have the code in your PushEngage dashboard, add this snippet to your code:
<script> window._peq = window._peq || [];</script> <script>
function subscribeOnClickButton(){
window._peq.push(['subscribe',{}.pe,function(res){
if(res.statuscode==1)
{
// Code to return response
console.log(res);
}
}]);
}
</script>
Your final code should look something like this:
<script src="https://clientcdn.pushengage.com/core/02a6e92667ae2279fcba8932356c1d93.js" async></script>
<script> window._peq = window._peq || [];</script> <script>
function subscribeOnClickButton(){
window._peq.push(['subscribe',{}.pe,function(res){
if(res.statuscode==1)
{
// Code to return response
console.log(res);
}
}]);
}
</script>
You’ll want to add this code to the HTML block in your landing page after the code for the button. It should look something like this:

Feel free to customize the styles for the button any way you please. When you’re done customizing your landing page, go ahead and hit the Save button.
Step #5: Connect Your Email Marketing Service
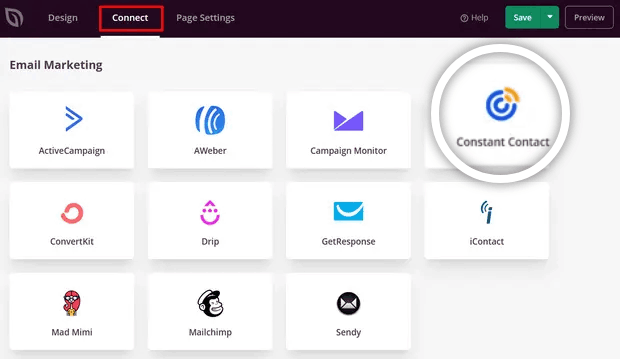
A lot of small businesses collect leads from their landing page instead of selling something. If you’re creating a landing page to collect leads on your site, then you’ll want to create an optin. Then, connect your optin to an email service provider such as Constant Contact.
To do this, go to the Connect tab on the SeedProd builder and select your email service provider from the list:
Next, click Connect New Account:
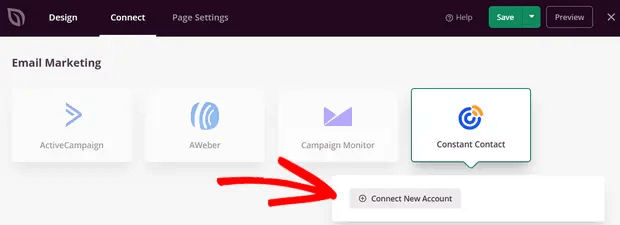
And follow the instructions to set up your email service to collect leads.
Step #6: Publish Your Landing Page
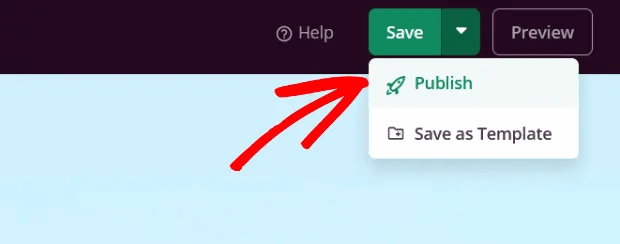
When you’re done customizing your page, click on Save. Then, click on the dropdown arrow next to the Save button and hit Publish:
You should see a success message on publishing your page that looks something like this:
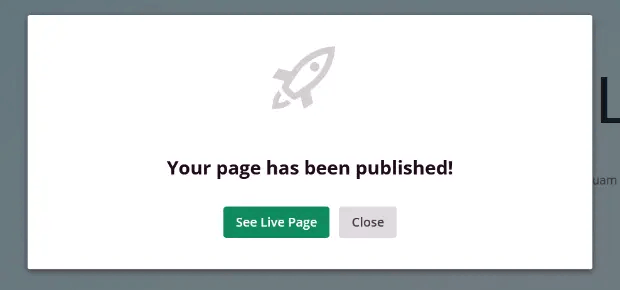
You can click on the See Live Page button to view your landing page. And you’re all done!
What to Do After You Create a Landing Page in WordPress?
That’s all for this one, folks!
Now that your landing page is live, the only challenge you have left is to send traffic to your landing page.
And if you’re looking for an affordable way to grow your traffic, we recommend using push notifications. Push notifications can help you bring in more repeat traffic and site engagement. You can also create automated push notification campaigns that generate sales.
Not convinced? Check out these resources:
- 7 Smart Strategies to Boost Customer Engagement
- Are Push Notifications Effective? 7 Stats + 3 Expert Tips
- How to Set Up Abandoned Cart Push Notifications (Easy Tutorial)
- How to Add a Web Notifications WordPress Plugin to Your Site
We recommend using PushEngage to create your push notification campaigns. PushEngage is the #1 push notification software in the world. So, if you haven’t already, get started with PushEngage today!


