Hello, Engagelings.
Exciting news: we just launched a new WordPress plugin!
Why? Because of you!
That’s right, we’re making the user experience (a.k.a.: your experience) much better. You can now do everything in the plugin from your WordPress dashboard that you could do from the PushEngage app.
We’ve also made it super easy to use. A lot of work went into this plugin and we think that you’ll love it. It’s also a major update, so there’s a LOT to unpack.
Let’s dive in.
Why Use the PushEngage WordPress Plugin?
The short version is that the PushEngage WordPress plugin:
- Saves time in creating, editing, and managing your push notification campaigns
- Allows you to create push notifications for your blog posts inside the Gutenberg editor
- Gives you detailed push notifcation analytics within the WordPress dashboard
- Allows you to manage your push notification audience inside your WordPress site
- Create push notification popup modals directly from your WordPress site
To date, most push notification services either allow you to operate from their app dashboard or give you an API service where you have to create custom code to send push notification campaigns.
Any push notification plugin in the market simply acts as a way for their dashboard to connect to your site. In other words, you’ll have to go back and forth between your content and you marketing plugins.
Not anymore!
With the new PushEngage WordPress plugin, you get ALL the functionality right inside your WordPress dashboard. After you’re done installing PushEngage, you don’t really have to even think about going back to the app dashboard. The plugin was designed for the WordPress ecosystem. So, it’s not just easy to use. It’s also super lightweight.
It’s not just a WordPress plugin to replace the dashboard either. Any campaign you create within the dashboard is also carried forward to your plugin. This way, if a team member creates a campaign on the PushEngage dashboard, you can still manage it from within your WordPress plugin.
Access Everything From the WordPress Plugin Dashboard
Once you’ve installed the WordPress plugin, you can access your PushEngage campaigns, strategies, popup modals, and analytics from the plugin. In your WordPress dashboard, head over to PushEngage » Dashboard to get a quick look at all essential elements of your PushEngage account:
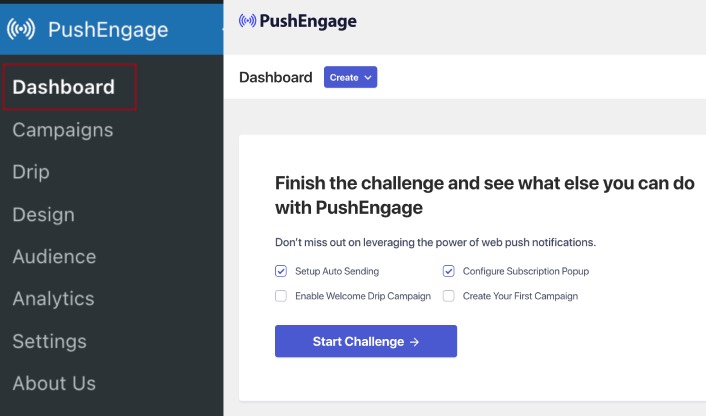
The first thing you see is the the Create button to help you quickly create a new campaign. And if your account is new, you get the Welcome Challenge to help you set up PushEngage quickly while sticking to standard practices.
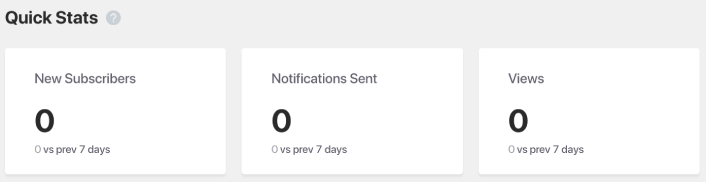
If you scroll further down, you get to see Quick Stats on how your push notifications are performing:
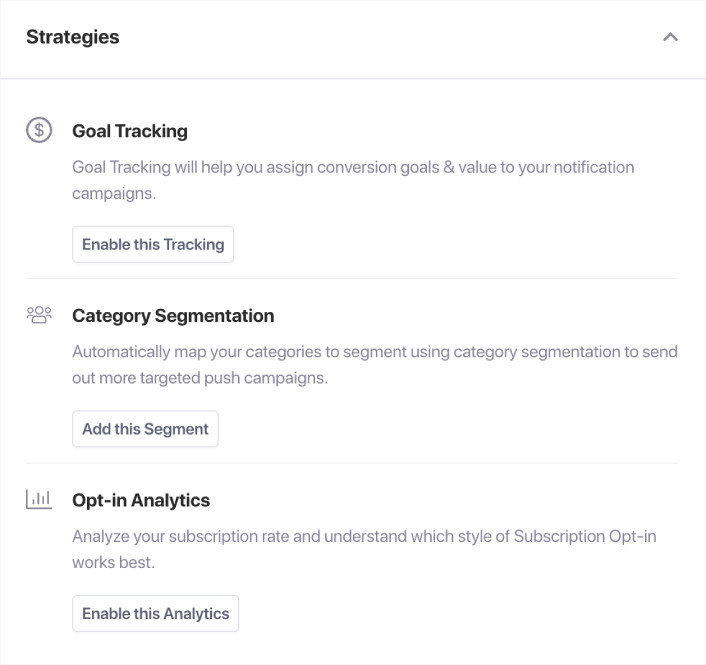
And if you scroll further down, you’ll see recommended strategies that can help you quickly get more push notification subscribers:
And this is barely scratching the surface.
Create Automated Push Notifications to Promote Your Posts
You can now create automated push notifications to promote your posts from inside your WordPress Gutenberg editor. Head over to PushEngage » Settings » Auto Push Settings:
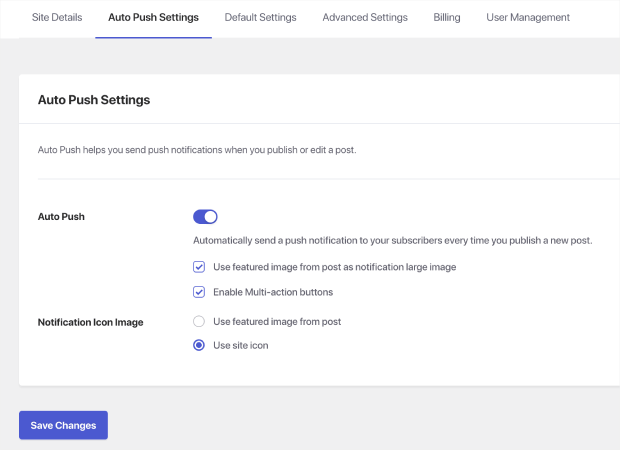
Enable the WordPress auto push feature using the toggle button. Then, check the boxes to enable multi-action buttons and use the featured image from the post as the notification large image. Enabling these settings will help you send rich push notifications like this one:
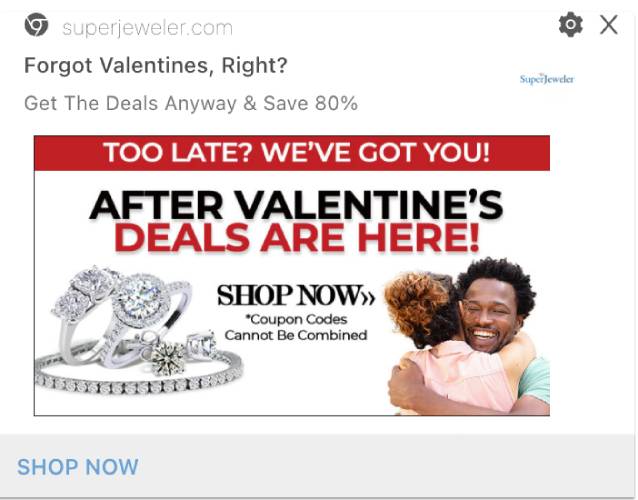
Using the large image and a call to action button will get you higher view rates and click rates.
Next, go ahead and edit any of your WordPress posts. At the bottom of your posts, you should now see the Gutenberg block to create an automated push notification to promote that post:
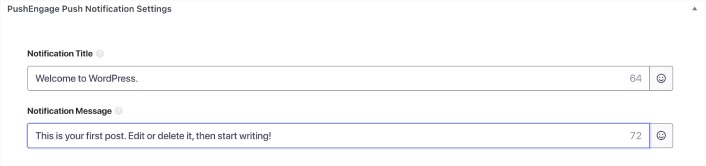
Add a Notification Title and Notification Message to create your auto push campaign. Then, scroll down for more settings.
You can add a push notification large image:
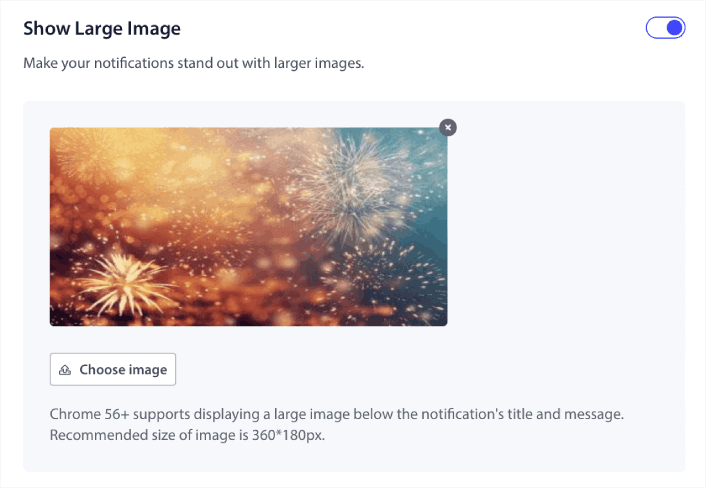
By default, if you enable the large image for the notification, PushEngage uses your post’s featured image as the large image. But you can add your own image as well.
You can also create buttons for your push notifications under Multi Action Notification:
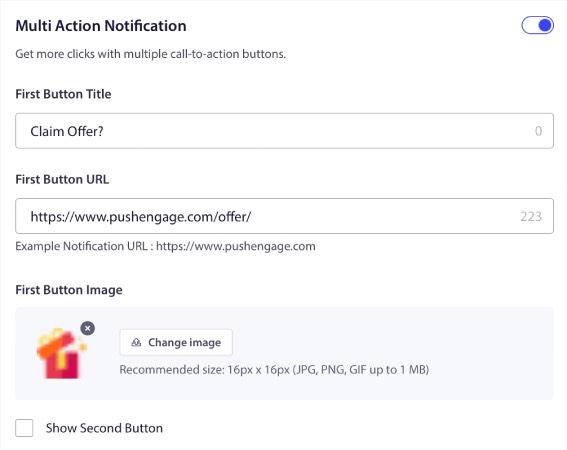
Push notifications with buttons usually get higher click rates than ones without buttons. In fact, it’s part of our push notification best practices guide to always use a call to action button for your notifications.
If you scroll down even further, you can see Audience settings to select who should get your auto push notification.
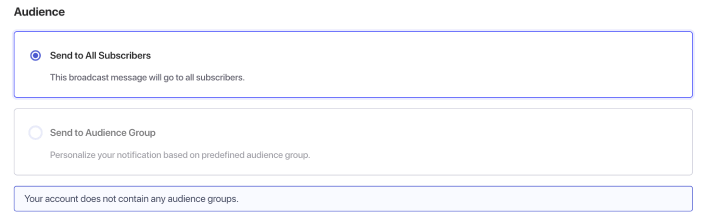
Of course, you’ll need to create an Audience Group before you can target them (more on this later). And when you’re done setting up your push notifications, take a look at the right-hand bar in Gutenberg for PushEngage Push Notification settings:
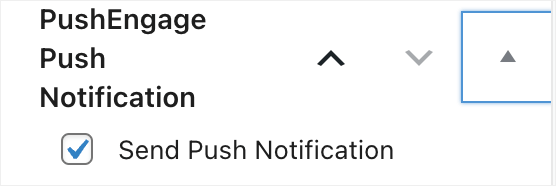
Make sure to enable the checkbox that says Send Push Notification. Whenever your post gets published, your push notification also gets sent automatically even if your post is scheduled for a later date!
Create Push Notification Broadcasts
Go to PushEngage » Campaigns to create push notification broadcasts:
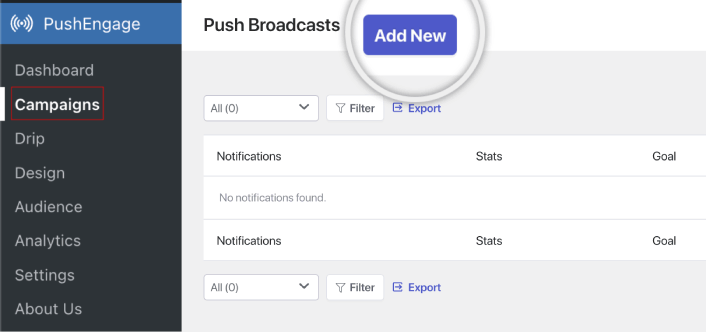
Click the Add New button to create a new push notification broadcast. If you’ve already sent push notifications using PushEngage before, you’ll see a list of your previous notifications here as well.
Set Up Drip Autoresponders
You can also create drip campaigns from scratch inside the plugin. Go to PushEngage » Drip:
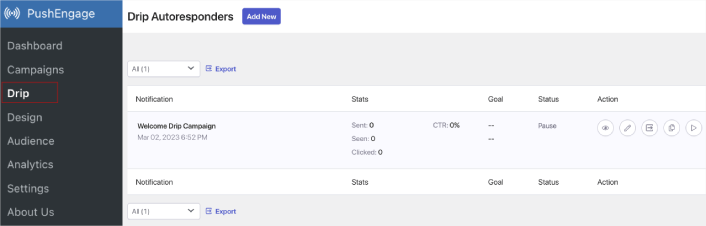
This includes a website welcome campaign. You can also view, edit, enable, and disable all your drip autoresponders listed here.
NOTE: For now, you can’t create eCommerce push notifications inside the WordPress plugin. You can still create triggered notifications in the dashboard but they won’t show up in the WordPress plugin.
Design Push Notification Popup Modals
Your push notification popup modals are used as optins to collect subscribers. Without a popup modal, you can’t collect subscribers or send push notifications to anyone. The cool thing is that you can design, customize, enable, and disable your push notification popup modals inside the WordPress plugin.
Go to PushEngage » Design:
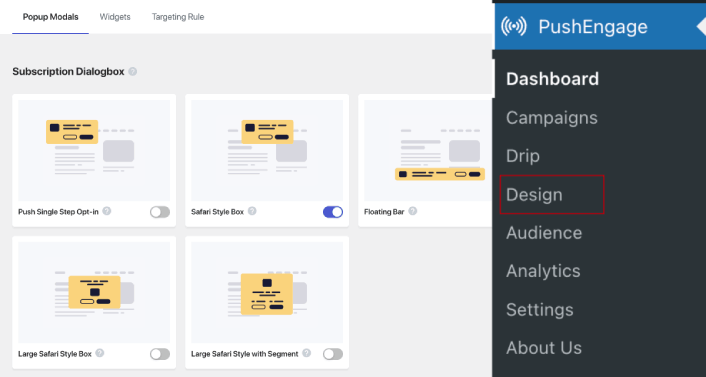
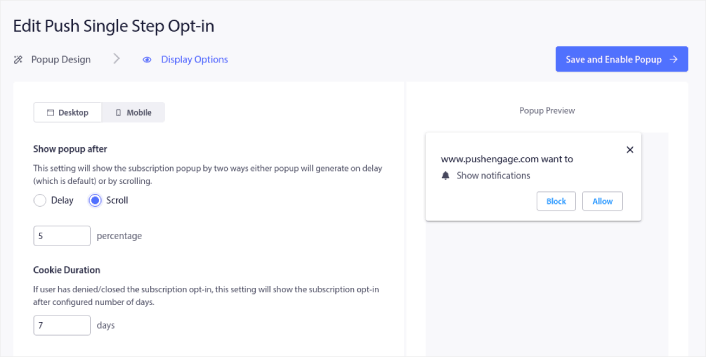
And you can set up as many popup modals as you please. Of course, you can make sure that they get triggered at different times under Display Options for each popup modal.
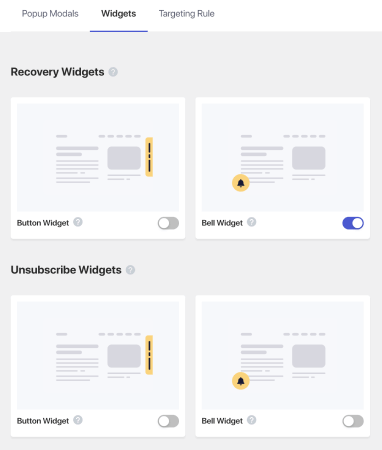
You can also create a subscription widget or an unsubscribe widget to unsubscribe from Chrome notifications from the Widgets tab:
And if you want to create more targeted popup modals, you can use the targeting rules under the Targeting Rule tab:
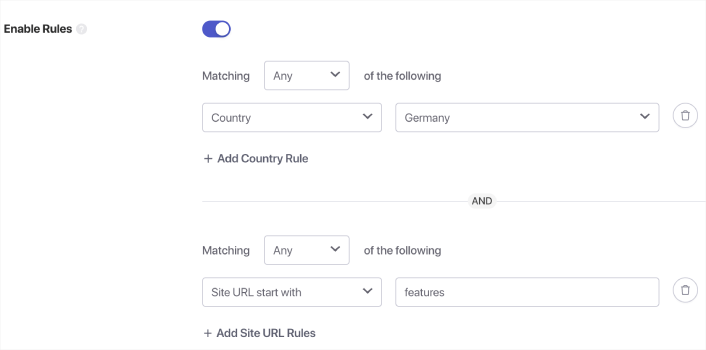
These are global targeting rules and will get preference over targeting rules for individual popup modals. But if you wish, you can create robust targeting rules for each modal by editing them.
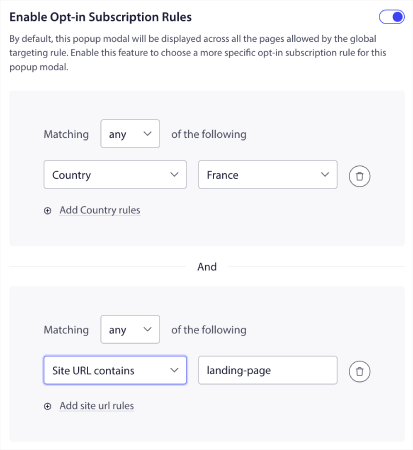
For instance, you can create popup modals in different languages to target visitors from different countries.
Create Segments and Audience Groups for Targeted Push Notifications
Of course, nothing beats the level of personalization you can get by creating segments and audience groups for your push notification subscribers. Go to PushEngage » Audience and start creating segments and audience groups right away.
Under the Segments tab, you can create new segments or edit existing ones:

And if you need even deeper personalization, create an audience group in the Audience Groups tab:

If you’re new to push notification segments and personalized push notifications, you should check out our article on how to create segments and our announcement on advanced audience grouping.
Get Detailed Push Notification Analytics
Analytics and A/B testing will help you stay on tracking with your business goals. While you can track push notifications in Google Analytics as well as your PushEngage dashboard, it’s way more convenient to get detailed analytics from your WordPress dashboard.
Go to PushEngage » Analytics:
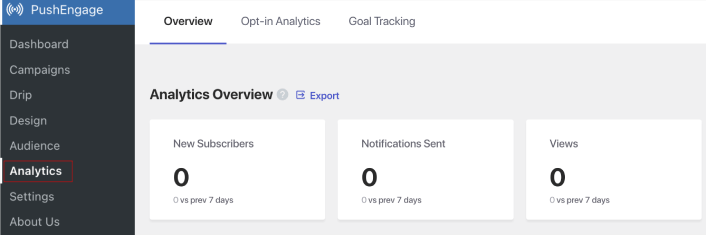
The default analytics dashboard simply gives you an overview of how your PushEngage campaigns are performing. But if you want a better look at the optin analytics for your popup modals, go to the Opt-in Analytics tab.

And you can enable goal tracking in PushEngage under the Goal Tracking tab:
Goal tracking helps you measure exactly how much each notification adds to your revenue.
What Else?
We know that growing a business is hard work. At PushEngage, we’re always looking to improve our product and your experience. We launched this new plugin to help you get even more value out of your PushEngage subscription.
Thank you so much for reading this announcement.
If you have any questions, our Customer Success team is here to help. Just start a conversation on Live Chat or check out our contact page.
And thank you for using PushEngage. Whether you’re using the free version or the Enterprise version, you’re just as important to us. The PushEngage WordPress plugin is meant to help you succeed and we wish you all the very best.
Let us know your thought in the comments below and if you haven’t already, get started with PushEngage today!


