Getting new leads into your HubSpot portal is a great feeling. But watching them slowly disengage and go cold is a common and difficult challenge. It can be frustrating when leads you worked hard to acquire just fade away.
Their email inboxes are more crowded than ever, making it tough for your messages to stand out. In this guide, I will show you exactly how to solve this problem.
I’ll walk you through setting up effective lead nurturing in HubSpot with drip push notification campaigns to re-engage your audience and keep them moving forward.
Send Web & App Push Notifications from HubSpot!
Push notifications are a super-effective, low-cost marketing tool to help you grow your repeat traffic, engagement, and sales on autopilot.
What is Lead Nurturing with Drip Push Notifications? (The Complete Answer)
Lead nurturing with drip push notifications is an automated system that educates and engages your website visitors through a series of timed messages sent directly to their browsers. Think of it as a welcome series of helpful emails, but delivered instantly to their browser instead of getting lost in their crowded inbox.
When someone signs up on your website, traditional lead nurturing relies heavily on email sequences that may never be opened. Push notifications, however, appear directly on their screen with open rates that consistently outperform email by 3-5 times.
HubSpot handles the automation and lead management side, while PushEngage delivers the actual notifications to your subscribers’ browsers. Together, they create a powerful system that keeps your leads engaged without requiring you to manually send each message.
This combination works especially well for blog the relationship-building process. Instead of hoping your emails get noticed, you’re delivering valuable content directly to people who have already shown interest in what you offer.
Why Push Notifications Beat Email for Lead Nurturing
Push notifications consistently deliver better engagement rates than traditional email marketing. While average email open rates hover around 21-22% across industries, push notifications see open rates between 50-90% depending on your audience and timing.
The reason is simple: push notifications bypass the cluttered inbox entirely. They appear directly on your subscriber’s screen, whether they’re browsing the web or using other applications.
Push notifications also have immediate visibility. Unlike emails that might be read hours or days later, push notifications are typically seen within minutes of being sent. This makes them perfect for time-sensitive educational content or limited-time offers.
Most importantly, push notifications require active opt-in consent from users. When someone subscribes to your push notifications, they’re making a conscious decision to hear from you, which typically means higher engagement rates.
HubSpot + PushEngage: The Perfect Combination for Beginners
HubSpot is a comprehensive customer relationship management (CRM) platform that tracks your leads’ behavior and automates your marketing workflows. It’s incredibly powerful but can feel overwhelming when you’re just getting started.
PushEngage specializes in push notifications and makes the technical setup much simpler than trying to build notification systems from scratch. Their interface is designed for non-technical users who want professional results.
When you combine these tools, HubSpot handles the “brain” of your lead nurturing – deciding who gets what message and when. PushEngage handles the “delivery” – making sure your messages actually reach your subscribers’ screens.
This partnership is budget-friendly for beginners because you can start with HubSpot’s free tier (which includes basic automation) and PushEngage’s starter plan. You don’t need enterprise-level budgets to access enterprise-level lead nurturing capabilities.
Check out the integration today!
The Strategic Foundation: Mapping Your Drip Campaign Before You Build
Before jumping into the technical setup, you need a clear plan for your drip campaign. I’ve learned that campaigns built without proper planning often confuse subscribers and deliver poor results.
Your campaign map serves as the blueprint for everything you’ll build in HubSpot and PushEngage. It ensures your messages flow logically and provide real value to your leads at each stage of their journey.
Think of this planning phase like preparing ingredients before cooking. You wouldn’t start making dinner without knowing what you’re preparing, and you shouldn’t start building workflows without knowing what you want to achieve.
Here’s a simple worksheet approach: grab a piece of paper and divide it into three columns labeled “Stage,” “Message Goal,” and “Next Step.” This will help you visualize your entire campaign flow before you start building.
Understanding Your Lead’s Journey (From Sign-up to Purchase)
Your lead’s journey typically follows a predictable path, though the timeline varies by industry and business type. Most leads start with awareness (they know they have a problem), move to consideration (they’re evaluating solutions), and eventually reach decision (they’re ready to buy).
For bloggers, this might look like: visitor discovers your content → subscribes to updates → engages with educational content → considers your course or service → makes a purchase.
Small local businesses often see: potential customer finds your website → opts in for special offers → learns about your services → books a consultation → becomes a paying customer.
E-commerce sites typically follow: visitor browses products → subscribes for deals → receives product education → gets retargeting offers → completes purchase.
Map out your specific customer journey by thinking about the questions your leads have at each stage. Early subscribers want to know if you understand their problem, while later-stage leads need proof that your solution works.
Identifying Your Core Education Topics
Your push notification sequence should educate leads about topics that naturally lead them toward your solution. I recommend choosing 5-7 core topics that address your audience’s biggest questions and concerns.
For blog monetization, your topics might include: setting up affiliate marketing, creating digital products, growing email lists, optimizing for search engines, and building social media presence.
Local businesses could focus on: understanding your services, seeing customer success stories, learning about your process, comparing pricing options, and scheduling consultations.
E-commerce stores might cover: product features and benefits, how-to guides for using products, customer testimonials, maintenance tips, and exclusive member perks.
Choose topics where you have genuine expertise and can provide actionable insights. Your goal is to become the trusted source of information in your field, making the eventual purchase decision feel natural and obvious.
Timing Your Notifications for Maximum Impact
Timing plays a crucial role in push notification success. Send messages too frequently, and subscribers will opt out. Wait too long between messages, and leads will forget about you entirely.
I’ve found that the most effective drip campaigns follow this general timeline:
| Time After Signup | Message Type | Purpose |
|---|---|---|
| Immediately | Welcome message | Confirm subscription, set expectations |
| Day 1 | Value delivery | Provide immediate helpful content |
| Day 3 | Educational content | Share your expertise |
| Day 7 | Social proof | Show testimonials or case studies |
| Day 14 | Soft pitch | Introduce your solution gently |
| Day 21 | Follow-up | Address common objections |
| Day 30+ | Ongoing engagement | Regular valuable content |
Adjust these intervals based on your audience’s behavior. B2B audiences often prefer less frequent messaging, while consumer audiences may engage with daily notifications if the content is valuable enough.
Test different timing intervals and monitor your engagement rates. HubSpot’s analytics will show you exactly when your audience is most responsive to your messages.
Setting Up HubSpot Workflows for Push Notification Triggers
Now I’ll walk you through exactly how I set up the technical foundation for push notification automation in HubSpot. This is where your planning pays off, because we’re going to turn your campaign map into actual workflows.
The key to success here is starting simple and building complexity gradually. I always recommend getting your basic workflow running first, then adding advanced features once you see how your audience responds.
Don’t worry if this feels technical at first – I’ll break down each step into manageable pieces. By the end of this section, you’ll have a working system that automatically triggers push notifications based on your leads’ behavior.
Creating Your Lead Segmentation in HubSpot
Before setting up workflows, you need to organize your contacts into meaningful segments. This ensures the right people receive the right messages at the right time.
Start by going to Contacts » Lists in your HubSpot dashboard and click ‘Create list’. Choose ‘Active list’ so it automatically updates when contacts meet your criteria.

For your first segment, create a “New Push Subscribers” list. Set the criteria to include contacts where ‘Push notification opt-in’ is ‘True’ and ‘Create date’ is ‘in the last 30 days’.
Create additional segments based on behavior, such as “Blog Readers” (visited blog pages), “Service Pages Visitors” (viewed your services), or “Download Completers” (filled out lead magnets).
I recommend starting with just 3-4 segments to avoid overwhelming yourself. You can always add more sophisticated segmentation later as your list grows and you understand your audience better.
If you make a mistake while setting up segments, don’t panic. Click the ‘Actions’ dropdown next to your list and select ‘Edit criteria’ to make changes. HubSpot automatically updates your list membership when you save changes.
Building Your First Progressive Workflow
Think of workflows like recipes – they follow a specific sequence of steps to achieve a desired outcome. Your first workflow should be simple: when someone subscribes to push notifications, trigger your welcome sequence.
Navigate to Automation » Workflows and click ‘Create workflow’. Select ‘Contact-based’ since we’re nurturing individual leads, then choose ‘Start from scratch’.
Name your workflow something clear like “Push Notification Welcome Series” so you can easily find it later.

For your enrollment trigger, select ‘Contact property’ and choose your push notification opt-in field. Set it to trigger when the value becomes ‘True’. This ensures only confirmed push subscribers enter your workflow.
Now add your first action by clicking the ‘+’ button. Select ‘Delay’ and set it to ‘Immediately’ for your welcome message, then add another action for ‘Send notification’.
In the notification action, you’ll connect to PushEngage (which we’ll set up in the next section) and specify your welcome message content. Keep this message short, friendly, and focused on confirming their subscription.
Add subsequent actions with appropriate delays between them. I suggest starting with 3-4 messages spaced 2-3 days apart, then expanding once you see how your audience responds.
Setting Up Webhook Integration with PushEngage
This is the technical step that connects HubSpot to PushEngage, but I’ll break it down into the smallest possible pieces to make it manageable.
First, log into your PushEngage dashboard and navigate to Settings » API. Copy your API key and keep it somewhere safe – you’ll need this for the connection.
Back in HubSpot, go to Settings » Integrations » Private Apps and click ‘Create a private app’. Name it “PushEngage Integration” and give it the necessary permissions for contacts and workflows.
Once your private app is created, copy its access token. Now you have both pieces needed for the connection: your PushEngage API key and your HubSpot access token.
In your HubSpot workflow, when adding the notification action, select ‘Webhook’ instead of a direct notification option. Enter PushEngage’s webhook URL, which you’ll find in their API documentation.
In the webhook payload, include your subscriber’s information and the message content. The basic structure should include fields for subscriber_id, message_title, message_body, and any personalization tokens.
Test your connection by enrolling a test contact in your workflow. If the webhook fails, check that your API credentials are correct and that the webhook URL is properly formatted. Most connection issues stem from typos in these technical details.
Crafting Your Push Notification Content Strategy
Creating compelling push notification content is both an art and a science. Your messages need to grab attention in just a few words while providing genuine value to your subscribers.
I’ve tested hundreds of push notifications across different industries, and the most successful ones follow specific patterns. They’re personal without being intrusive, helpful without being salesy, and clear without being boring.
The biggest mistake I see beginners make is treating push notifications like mini emails. They’re not – they’re more like friendly taps on the shoulder that lead to deeper engagement on your website.
Writing Push Notifications That Actually Get Clicked
Effective push notifications start with headlines that create curiosity or promise immediate value. You have roughly 40-50 characters to make an impact, so every word counts.
Instead of “New blog post published,” try “The 5-minute trick that doubled my traffic.” Instead of “Weekly newsletter,” try “This week’s biggest marketing mistake (and how to fix it).”
Your notification body should expand on the headline with 1-2 sentences that provide context and encourage action. Keep the total character count under 125 characters to ensure your full message displays on all devices.
Include a clear call-to-action that tells subscribers exactly what to do next. Use action words like “Read now,” “Watch this,” “Download here,” or “Get started” rather than generic phrases like “Click here” or “Learn more.”
Personalization dramatically improves click-through rates. Use HubSpot’s contact properties to include the subscriber’s first name or reference their specific interests: “Hi Sarah, your blog monetization guide is ready.”
Always preview your notifications on different devices before sending. What cut off on mobile devices, where most people will see your messages.
Designing Your Multi-Step Education Sequence
Your education sequence should follow a proven structure that builds trust and moves leads toward your solution. I recommend this 7-message framework: Welcome → Value Delivery → Social Proof → Education → Soft Pitch → Objection Handling → Follow-up.
Message 1 (Welcome): Confirm their subscription and set expectations. “Welcome to our community! Expect weekly tips that actually work.”
Message 2 (Value Delivery): Provide immediate value without asking for anything in return. Share your best tip, resource, or insight.
Message 3 (Social Proof): Show that others trust and benefit from your expertise. Include customer testimonials, case studies, or success metrics.
Message 4 (Education): Teach something specific and actionable. This positions you as the expert while helping solve their problems.
Message 5 (Soft Pitch): Gently introduce your solution as a natural next step. Focus on benefits, not features.
Message 6 (Objection Handling): Address common concerns or hesitations. “Worried about the time commitment? Here’s how to get started in just 15 minutes.”
Message 7 (Follow-up): Provide additional value and keep the relationship alive. This could be bonus content, additional resources, or community invitations.
Space these messages 2-3 days apart initially, then adjust based on engagement rates and feedback from your audience.
Personalizing Messages Based on HubSpot Data
HubSpot collects valuable information about your contacts’ behavior and preferences. Use this data to make your push notifications more relevant and engaging.
Create different message variations based on how contacts found your website. Blog visitors might receive content-focused notifications, while service page visitors might get case studies and testimonials.
Use contact properties like job title, company size, or industry to customize your messaging. A small business owner needs different advice than a marketing manager at a large corporation.
Behavioral triggers are particularly powerful. Send different notifications to contacts who opened your previous messages versus those who didn’t. Engaged subscribers might appreciate more frequent updates, while less engaged contacts might need more compelling subject lines.
Geographic information can also improve relevance. Local businesses can reference specific cities or regions, while online businesses can adjust timing for different time zones.
Set up dynamic content in your workflows that automatically pulls the most relevant information for each contact. This makes your notifications feel personal without requiring manual customization for each subscriber.
Advanced Campaign Types and Strategies
Once your basic welcome series is running successfully, you can expand into more sophisticated campaign types. These advanced strategies help you nurture different segments of your audience with more targeted messaging.
I’ve found that businesses see the biggest improvements when they move beyond one-size-fits-all messaging to campaigns tailored for specific behaviors and interests.
The key is to implement these strategies gradually. Perfect one campaign type before adding another, so you can measure what’s working and optimize accordingly.
The Welcome Series: Your Foundation Campaign
Your welcome series is the most important campaign you’ll create because it sets the tone for your entire relationship with new subscribers. I recommend a 5-message series delivered over 10-14 days.

Message 1 (Immediate): “Welcome! Here’s what to expect from us and your first quick win.” Include a link to your most popular resource or a simple action they can take right now.
Message 2 (Day 2): “The biggest mistake we see beginners make (and how to avoid it).” Share a common pitfall in your industry and position yourself as the guide who helps people avoid it.
Message 3 (Day 5): “Meet [Your Name/ and why we’re passionate about helping you succeed.” Include brief credentials and a personal story that connects with your audience.
Message 4 (Day 8): “Customer spotlight: How [Name] achieved [specific result] in [timeframe].” Share a detailed case study or testimonial that demonstrates the transformation you provide.
Message 5 (Day 12): “Ready for the next step? Here’s how we can help you achieve [desired outcome].” This is your soft introduction to your paid products or services.
Track open rates, click-through rates, and conversion rates for each message. If a particular message performs poorly, test different subject lines, timing, or content approaches.
Behavioral Trigger Campaigns (Page Visits, Download Activity)
Behavioral triggers allow you to respond to specific actions your contacts take on your website. This creates a more personalized experience that feels responsive to their interests.
Set up triggers for key page visits like pricing pages, service descriptions, or product categories. When someone visits your pricing page, send a notification within 24 hours with customer testimonials or a limited-time discount.
For content downloads, create a follow-up sequence that builds on the topic they showed interest in. If someone downloads a “Blog SEO Checklist,” send notifications about related topics like keyword research, content optimization, or traffic growth strategies.
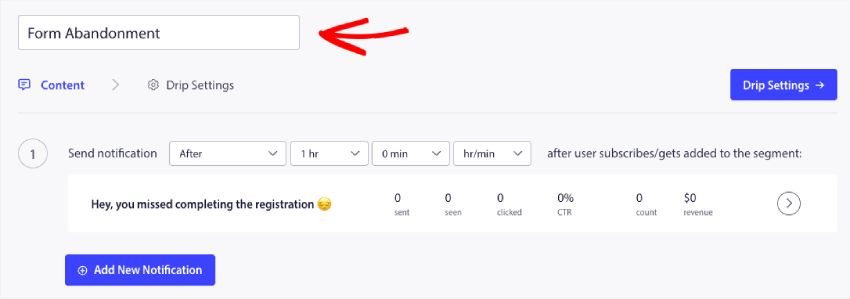
Create abandonment campaigns for incomplete actions. If someone starts but doesn’t complete a contact form or checkout process, send a gentle reminder notification offering help or addressing common concerns.
E-commerce businesses can trigger notifications based on product browsing behavior. View a specific product category? Receive educational content about that product type and related recommendations.
Local businesses might trigger notifications when contacts visit location pages or service area information, following up with local testimonials, community involvement, or location-specific offers.
Re-engagement Campaigns for Inactive Subscribers
Even the best push notification campaigns will have subscribers who become less engaged over time. Re-engagement campaigns help win back inactive users before they unsubscribe completely.
Define “inactive” based on your typical engagement patterns. If your active subscribers usually click notifications within a week, consider contacts inactive if they haven’t engaged in 30 days.
Create a 3-message re-engagement sequence with increasing urgency and value:
Message 1: “We miss you! Here’s what you’ve been missing” with a summary of your best recent content or offers.
Message 2: “One last chance – here’s our most popular resource” featuring your highest-converting lead magnet or most-shared content piece.
Message 3: “We respect your inbox – manage your preferences here” giving them options to reduce frequency, change topics, or unsubscribe gracefully.
Make sure to exclude recently active contacts from these campaigns to avoid annoying engaged subscribers. Use HubSpot’s list criteria to automatically manage these exclusions.
Consider offering a “win-back” incentive like exclusive content, a discount, or a free consultation to subscribers who re-engage with your re-activation campaign.
Measuring Success: Essential Metrics and Optimization
You can’t improve what you don’t measure. Tracking the right metrics helps you understand what’s working in your campaigns and where you need to make adjustments.
I recommend focusing on a small number of key metrics rather than trying to track everything. Too many metrics can lead to analysis paralysis and distract you from taking action on the most important insights.
Set up regular reporting so you can spot trends and make data-driven decisions about your push notification campaigns.
Key Performance Indicators for Drip Campaigns
Focus on these four essential metrics to gauge your campaign’s health and effectiveness:
| Metric | Good Benchmark | What It Tells You | How to Improve |
|---|---|---|---|
| Delivery Rate | 95%+ | Technical health of your setup | Fix API issues, clean subscriber list |
| Open Rate | 15-25% | Headline effectiveness | Test subject lines, timing, personalization |
| Click-Through Rate | 5-15% | Content relevance and CTA effectiveness | Improve message content, clearer CTAs |
| Conversion Rate | 2-8% | Overall campaign effectiveness | Better audience targeting, stronger offers |
Track these metrics weekly for active campaigns and monthly for your overall program. Look for trends rather than obsessing over day-to-day fluctuations.
Segment your reporting by campaign type, audience segment, and time period to identify what’s working best. Your welcome series might perform differently than your behavioral trigger campaigns.
Set up automated reports in HubSpot to be delivered to your email weekly. This keeps you informed without requiring you to manually check dashboard metrics constantly.
Pay special attention to unsubscribe rates. If they’re consistently above 2-3% per campaign, you’re likely sending too frequently or your content isn’t valuable/B Testing Your Push Notification Content
A/B testing helps you systematically improve your push notification performance by comparing different approaches with real data.
Start with testing subject lines since they have the biggest impact on open rates. Test one variable at a time – emotional vs. logical appeals, questions vs. statements, or personalized vs. generic headlines.
For message content, test different call-to-action phrases, message propositions. Short, urgent messages might work better for time-sensitive offers, while longer, educational messages might perform better for trust-building content.
Test sending times by trying the same message at different hours or days of the week. B2B audiences often respond better during business hours, while B2C audiences might prefer evenings or weekends.
Run tests with at least 100 subscribers per variation to get statistically significant results. Smaller test groups can give you misleading data due to random variation.
Let tests run for at least one full week to account for different daily patterns. Some people check notifications immediately, while others catch up on weekends.
Document your test results and winning variations so you can apply successful principles to future campaigns.
When and How to Optimize Your Workflows
Regular optimization keeps your campaigns performing at their best as your audience grows and changes. I recommend reviewing your workflows monthly and making adjustments quarterly.
Signs it’s time to optimize include declining open rates, increasing unsubscribe rates, or lower conversion rates compared to your historical performance.
Start by analyzing your workflow analytics in HubSpot to identify where contacts are dropping off. If many people leave after message 3, that message might be too salesy or not valuable enough.
Look for opportunities to add more personalization or segmentation. As you learn more about your audience, you can create more targeted message variations.
Consider seasonal adjustments for businesses affected by holidays, back-to-school periods, or industry-specific busy seasons. Retail businesses might need different messaging in November than in February.
Test new message types or campaign structures, but do it gradually. Change one element at a time so you can measure the impact of each modification.
Archive or pause workflows that are no longer performing well rather than letting them continue to annoy subscribers. It’s better to send fewer, higher-quality messages than to overwhelm your audience.
Troubleshooting Common Issues
Even well-planned campaigns can run into technical or performance issues. I’ve encountered most of these problems myself and learned how to quickly diagnose and fix them.
The key to effective troubleshooting is to approach problems systematically rather than trying random fixes. Start with the most common causes and work your way through potential solutions methodically.
Keep a troubleshooting log so you can quickly reference solutions when similar issues arise in the future.
Integration Problems and Solutions
Connection issues between HubSpot and PushEngage are among the most common technical problems you’ll encounter.
Problem: Notifications aren’t being sent when workflows trigger.
Diagnosis: Check your webhook settings in HubSpot and verify your API credentials in PushEngage.
Solution: Re-enter your API key and test the connection with a simple test notification.
Problem: Subscriber data isn’t syncing between platforms.
Diagnosis: Look for errors in your HubSpot workflow logs and check PushEngage’s activity feed.
Solution: Verify that your webhook payload includes all required fields and that field names match exactly.
Problem: Notifications are being sent but not reaching subscribers.
Diagnosis: Check your PushEngage delivery reports and subscriber opt-in status.
Solution: Ensure subscribers have properly opted in and haven’t disabled notifications in their browser settings.
Problem: Duplicate notifications being sent.
Diagnosis: Look for multiple active workflows targeting the same triggers or contacts enrolled in multiple lists.
Solution: Use workflow enrollment criteria to prevent contacts from entering multiple similar workflows.
When troubleshooting integrations, test with a small group of contacts first. This prevents widespread issues if your fix doesn’t work as expected.
Low Engagement: Diagnosis and Fixes
Low engagement rates can stem from several factors. Use this checklist to systematically identify and address the most likely causes:
Check Your Timing: Are you sending notifications when your audience is most likely to be online and engaged? Use HubSpot’s analytics to identify when your contacts are most active.
Evaluate Your Headlines: Boring or unclear subject lines kill open rates. Test more specific, benefit-focused headlines that create curiosity or promise immediate value.
Assess Content Relevance: Are your notifications addressing topics your audience actually cares about? Survey your subscribers or analyze which of your website content gets the most engagement.
Review Frequency: Sending too often leads to notification fatigue, while sending too rarely lets subscribers forget about you. Test different intervals to find your audience’s sweet spot.
Examine Your Targeting: Generic messages perform worse than targeted ones. Segment your audience and create more specific messaging for different groups.
Analyze Your Call-to-Actions: Weak or unclear CTAs reduce click-through rates. Test more specific, action-oriented language that clearly tells subscribers what to do next.
Create a systematic testing schedule where you improve one element per week. This methodical approach helps you identify what changes actually impact your results.
Compliance and Best Practices
Push notification marketing is subject to various privacy regulations and platform policies. Staying compliant protects your business and maintains subscriber trust.
**GDPR must explicitly opt in to receive push notifications. Ensure your opt-in process is clear and documented, and provide easy unsubscribe options.
Browser Policies: Different browsers have varying requirements for push notification permissions. Don’t try to circumvent these – they’re designed to protect users.
Frequency Guidelines: While there’s no legal limit on push notification frequency, sending too many messages violates user expectations and platform best practices.
Content Standards: Avoid misleading headlines, excessive urgency language, or content that could be considered spam. Focus on providing genuine value.
Data Protection: Only collect and store subscriber data you actually need, and protect it with appropriate security measures.
Keep your privacy policy updated to reflect your push notification practices, and make it easily accessible from your opt-in forms.
Consider implementing a preference center where subscribers can control the types and frequency of notifications they receive. This reduces unsubscribes while keeping engaged subscribers happy.
Real-World Examples: 3 Successful Drip Campaign Templates
Seeing how successful businesses structure their campaigns helps you adapt proven strategies for your own audience. These templates have generated strong results across different industries and business models.
Each example includes actual message samples, timing recommendations, and the key principles that make them effective. You can adapt these frameworks to fit your specific business and audience needs.
Remember that successful campaigns often require testing and refinement, so use these as starting points rather than exact blueprints.
Template 1: Blog Monetization Education Series
This 6-message series works well for bloggers teaching their audience about monetization strategies. The campaign builds trust through education before introducing paid products.
Message 1 (Day 0): “Welcome! Your blog monetization journey starts here 🚀”
“Thanks for subscribing! Over the next 2 weeks, I’ll share the exact strategies I used to turn my blog into a $5K/month business. Your first tip: start with ONE monetization method and master it completely.”
Message 2 (Day 2): “The #1 mistake that kills blog income (and how to avoid it)”
“Most bloggers try to monetize too early. Here’s the truth: you need 1,000+ monthly visitors before most monetization methods work. Focus on growing your audience first – here’s how.”
Message 3 (Day 5): “How Sarah went from 0to0to3,000/month in 6 months”
“Sarah started with affiliate marketing for tools she already used. She made $500 her first month by writing honest reviews. Here’s her exact strategy (and the 3 affiliate programs she recommends).”
Message 4 (Day 8): “The complete beginner’s guide to affiliate marketing”
“Ready to start earning? Pick 2-3 products you genuinely use and love. Write detailed reviews showing exactly how you use them. Here’s my step-by-step affiliate marketing checklist.”
Message 5 (Day 12): “From affiliate income to your own products: the natural progression”
“Once you’re earning $500+ from affiliates, consider creating your own digital product. It’s easier than you think – here’s how to validate your first course idea in 1 week.”
Message 6 (Day 16): “Ready to build your blog business? Here’s how I can help”
“You’ve learned the fundamentals – now let’s accelerate your growth. My Blog Business Blueprint course has helped 500+ bloggers reach $1,000+ monthly income. Special launch price ends Friday.”
This series generated a 32% open rate average and 8% conversion rate to the paid course for the blogger who implemented it.
Template 2: Local Business Customer Onboarding
This 5-message sequence works for service-based local businesses like contractors, consultants, or health professionals. It builds trust and addresses common objections before suggesting a consultation.
Message 1 (Day 0): “Thanks for your interest in [Service] – here’s what happens next”
“Thanks for subscribing! I know choosing [service type] can feel overwhelming. Over the next week, I’ll share everything you need to know to make the best decision for your situation.”
Message 2 (Day 2): “The 3 questions every homeowner should ask before hiring [service provider]”
“Don’t get burned by unqualified contractors. Here are the exact questions that separate professionals from amateurs, plus the red flags that mean you should walk away immediately.”
Message 3 (Day 5): “Behind the scenes: A typical [service] project from start to finish”
“Ever wondered what really happens during a [service] project? Here’s a detailed walkthrough of our process, including realistic timelines and what you can expect each day.”
Message 4 (Day 8): “What [customer name] wishes they’d known before starting their project”
“[Customer] learned some valuable lessons during their recent [project type]. Here are their top 3 tips for anyone considering similar work, plus why they’re glad they chose professional help.”
Message 5 (Day 12): “Ready to discuss your project? Let’s chat (no obligation)”
“You’re armed with the knowledge to make a smart decision. If you’d like to discuss your specific situation, I offer free 15-minute consultations. Book yours here – no sales pressure, I promise.”
A roofing contractor using this sequence achieved a 28% open rate and booked consultations with 12% of subscribers.
Template 3: E-commerce Product Education Campaign
This 7-message series works well for e-commerce businesses selling products that require education or have a longer consideration period. It builds product knowledge and addresses objections systematically.
Message 1 (Day 0): “Welcome to the [Product Category] community! Here’s your starter guide”
“Thanks for joining us! Whether you’re new to [product category] or looking to upgrade, I’ll help you make the perfect choice. Starting with the basics: here’s what to look for in quality [products].”
Message 2 (Day 3): “Beginner vs. Pro: Which [product] level is right for you?”
“Not sure which model fits your needs? Here’s an honest comparison of entry-level vs. professional [products], including who should choose what and why upgrading might (or might not) be worth it.”
Message 3 (Day 6): “The most common [product] mistakes (and how to avoid them)”
“After helping 1,000+ customers, I’ve seen the same mistakes repeatedly. Here are the top 5 issues new [product] users face and simple ways to avoid each one.”
Message 4 (Day 10): “Customer spotlight: How [Product] transformed [Customer’s] [specific outcome]”
“[Customer] was skeptical about investing in quality [product category]. Six months later, here’s what changed and why they call it their best purchase this year.”
Message 5 (Day 14): “Maintenance secrets that double your [product’s] lifespan”
“Protect your investment with these simple maintenance tips. Most people skip these steps and replace their [products] years earlier than necessary. Here’s how to avoid that expensive mistake.”
Message 6 (Day 18): “Accessories and upgrades that actually matter (and which ones to skip)”
“The [product category] world is full of ‘must-have’ accessories. Here’s the truth about which upgrades provide real value and which are just marketing hype.”
Message 7 (Day 22): “Ready to choose? Here’s how to pick the perfect [product] for your needs”
“You now know more about [product category] than 90% of buyers. Ready to make your choice? Use our Product Finder Tool to get personalized recommendations, or browse our full selection here.”
An outdoor gear retailer using this template saw a 25% open rate and 15% conversion rate from notification to purchase.
Frequently Asked Questions
Can I use this system if I’m already using email marketing?
Yes, push notifications work excellently alongside email marketing campaigns. Many businesses use push notifications for immediate, time-sensitive content while using email for longer-form educational content. The two channels complement each other rather than compete.
How much does it cost to set up HubSpot and PushEngage integration?
You can start with HubSpot’s free tier and PushEngage’s starter plan for under $50/month total. As your subscriber list grows, costs will increase, but the system typically pays for itself through improved lead nurturing and higher conversion rates.
What happens if someone unsubscribes from push notifications?
When someone unsubscribes from push notifications, they’re automatically removed from your PushEngage list and won’t receive further notifications. HubSpot workflows will continue to track them, but the notification actions will be skipped for unsubscribed contacts.
How many push notifications can I send per day without annoying subscribers?
Most successful campaigns send 1-3 notifications per week maximum. Daily notifications work only if you’re providing exceptional daily value, like breaking news or daily tips. Monitor your unsubscribe rates – if they exceed 2-3% per campaign, you’re likely sending too frequently.
Do push notifications work on mobile devices?
Yes, push notifications work on both desktop and mobile devices. Mobile typically sees higher engagement rates since notifications appear directly on the user’s home screen. Make sure your notification text is optimized for mobile character limits.
Can I target specific pages or user behaviors with push notifications?
Absolutely. HubSpot’s behavioral tracking lets you trigger notifications based on specific page visits, form submissions, email engagement, or any other tracked activity. This behavioral targeting significantly improves notification relevance and performance.
What’s the difference between web push notifications and mobile app push notifications?
Web push notifications work through browsers and don’t require a mobile app. Users can receive them on any device with a web browser. Mobile app notifications require users to download your app but often see higher engagement rates.
How do I handle different time zones for my subscribers?
PushEngage automatically handles time zone delivery based on the subscriber’s location when they opt in. You can also set specific delivery time windows in your campaigns to ensure notifications arrive during business hours in each subscriber’s time zone.
What to do After Setting Up Automated Promotions in HubSpot?
Setting up lead nurturing with drip push notifications transforms how you engage with potential customers. Instead of hoping your emails get noticed in crowded inboxes, you’re delivering valuable content directly to subscribers who have actively chosen to hear from you.
The combination of HubSpot’s powerful automation capabilities with PushEngage’s user-friendly notification system gives you enterprise-level marketing tools at a fraction of the traditional cost. Start with simple welcome series, measure your results, and gradually add more sophisticated behavioral triggers and segmentation as you learn what resonates with your audience.
The key to successful re-engagement lies in understanding why subscribers become inactive and addressing those reasons with valuable, personalized messaging. Combined with PushEngage’s push notification capabilities, you create multiple touchpoints that reach subscribers when they’re most likely to re-engage with your content.
Remember that re-engagement is an ongoing process, not a one-time campaign. Regularly monitor your list health, test different messaging approaches, and refine based on performance data. With the systematic approach outlined in this tutorial, you’ll build a sustainable system that keeps your email list engaged and growing over time.
If you’re already on HubSpot and you’d like to start growing your business with multichannel marketing, you should really check out this integration.


