Looking for a tutorial on how to customize headers in WordPress?
A WordPress header is super important because it holds the entire navigation menu for the site. The only problem is that it can be really difficult to customize the header without coding knowledge and expertise.
The worst part is that most themes don’t even allow you to create a custom header. The only way to create a custom header might be to go to your theme’s code files and modify them manually.
In this article, we will show you how to customize headers in WordPress using visual editors and zero coding experience.
Let’s dive in.
DISCLAIMER: These are not the only two methods to customize a WordPress header. You can also edit the header.php file for your WordPress to modify the header. But that involves custom coding and we don’t recommend that method unless you’re a seasoned coder.
Method #1: How to Customize Headers in WordPress with SeedProd
If you want to create a custom header in WordPress using a drag-and-drop visual builder, then you should use SeedProd. You can do the same thing with a few themes such as Divi. But SeedProd works for absolutely any theme. So, you can customize your WordPress header no matter what theme you’re using.

SeedProd is the best WordPress landing page builder. It’s perfect for businesses, bloggers, and website owners looking to build high-converting landing pages without any development skills.
With SeedPreed, you get pre-built templates for high-converting landing pages that you can publish instantly. This includes templates for:
- Sales pages
- Coming soon pages
- 404 pages
- Maintenance pages
- Squeeze pages
- Login pages
- Thank you pages
- Webinar pages
- Video pages
And lots more! We love using SeedProd and we even wrote an in-depth review of the SeedProd plugin. Go ahead and check that out. And then, get started with how to customize headers in WordPress using SeedProd.
Step #1. Install The SeedProd Theme Builder Plugin
First, install and activate SeedProd on your WordPress site. If you’re not sure how to do that, go ahead and check out this article on how to create a landing page for step-by-step instructions. After activating the plugin, go to the SeedProd » Settings page to enter your plugin license key.

Click the Verify key button and you’re ready to create a custom header in WordPress.
Step #2. Choose a Starter Theme Template
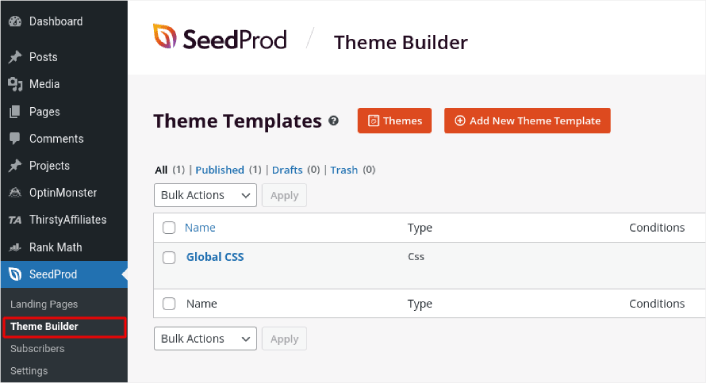
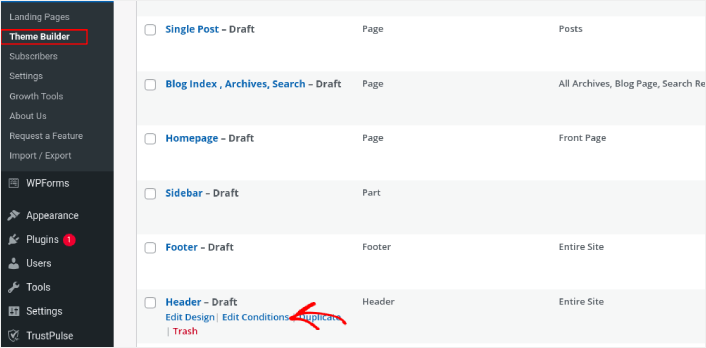
Head over to SeedProd » Theme Builder in your WordPress dashboard:
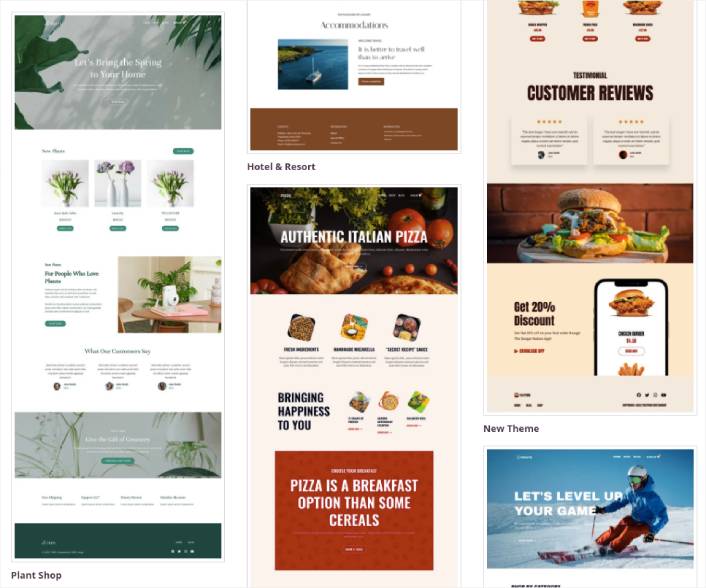
Here, you can select a starter theme with SeedProd. You can create a custom theme using SeedProd very easily. But for now, we’re going to select a pre-built template. Click on the Themes button and select your starter theme.
After choosing a theme, SeedProd will automatically create all the theme templates. From here, you can edit each template using the drag-and-drop editor.
Step #3. How to Customize Headers in WordPress
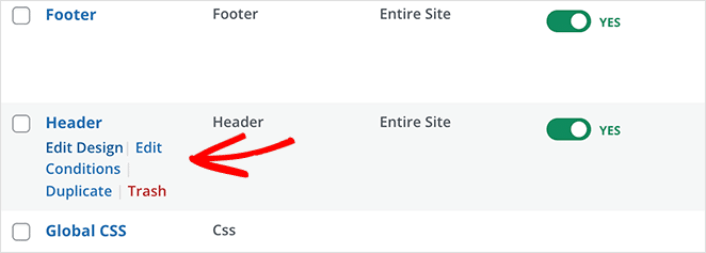
To customize your header with SeedProd, go to the Header template and click the Edit Design link:
You should see the SeedProd visual builder open up. This is where you can drag and drop design elements from the sidebar to customize your site header:
You can customize colors, fonts, background, spacing, and more. When you’re done customizing your site header, click the Save button in the top-right corner.
Step #4. Publish Your Custom WordPress Header
In SeedProd, you can launch your custom header whenever you want. All you have to do is go to SeedProd » Theme Builder and click on the Enable SeedProd Theme toggle button.
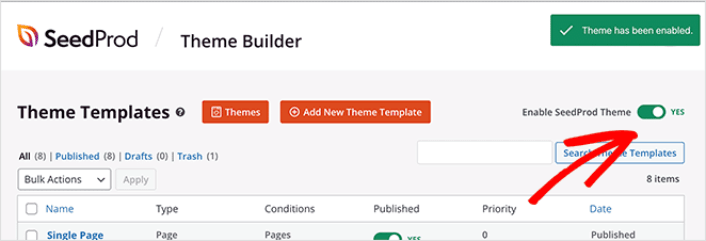
SeedProd will automatically replace your theme with your SeedProd theme and start using all your custom templates. This includes your WordPress header as well. Once you go live with your new header, you will be able to see it on your site:

If you want to create multiple custom headers, you can also customize the display settings for each header. The display settings can control which pages you want the header to show up on. Click on the Edit Conditions link to change the display settings:
In the popup, you can change where the header will show up on your site:

And that’s it! You now know how to customize headers in WordPress using SeedProd.
Method #2: Edit WordPress Headers with Theme Customizer
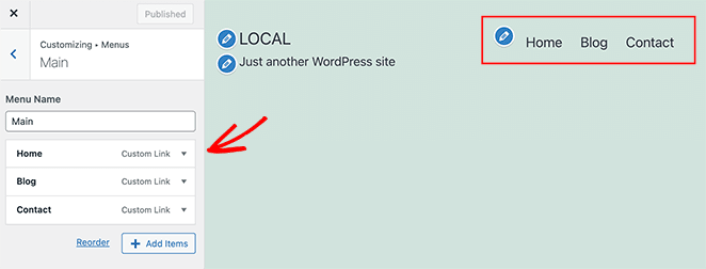
WordPress themes will typically give you some settings to customize your header. It’s not usually a very flexible set of customization options. Go to Appearance » Customize from your WordPress admin area. Then click the Site Identity heading from the list in the left column.
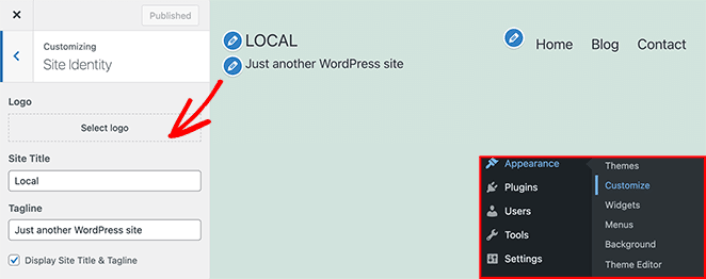
You can then click the Menus heading and change your navigation menu’s layout.
NOTE: This is an example using the Twenty Twenty Two theme. Every WordPress theme will offer different options. If you want to stick to your current theme and customize your WordPress headers, you should check out the theme documentation.
Now That You Know How to Customize Headers in WordPress
That’s all for this one, folks!
Now that you know how to customize headers in WordPress, it’s time to optimize your header to increase conversions. Ideally, you want your header to lead your site visitors to click on your most important links.
And if you’re looking for an affordable way to grow your traffic, we recommend using push notifications. Push notifications can help you bring in more repeat traffic and site engagement. You can also create automated push notification campaigns that generate sales.
Not convinced? Check out these resources:
- 7 Smart Strategies to Boost Customer Engagement
- Are Push Notifications Effective? 7 Stats + 3 Expert Tips
- How to Set Up Abandoned Cart Push Notifications (Easy Tutorial)
- How to Add a Web Notifications WordPress Plugin to Your Site
We recommend using PushEngage to create your push notification campaigns. PushEngage is the #1 push notification software in the world. So, if you haven’t already, get started with PushEngage today!


