
Look for a detailed tutorial on how to add AdSense to WordPress?
Google AdSense is a super simple way to make money from your website traffic. Normally, you’d have to build affiliates, put up banners manually on your site, and then set up click-tracking to earn money for displaying ads on your site. Google AdSense takes all that manual effort away.
In a few simple clicks, you can set up AdSense to keep automatically displaying the ads that your audience will want to click on.
Let’s check out how to add AdSense to WordPress in 10 minutes.
What is Google AdSense?
Google AdSense is an advertising exchange that allows you to make money by showing ads on your site.
Businesses want to advertise their products and services all the time. And Google happens to be one of the biggest advertisement brokers in the world right now. Google’s ad exchange works in two stages:
- Let’s say that we want to advertise PushEngage online. We can set up a Google Ad Account to create ads that Google displays either on Google search pages or on partner websites.
- This is where you come in as a partner website. Google shares a small percentage of the ad revenue with you for showing our ad on your site.
The beauty of Google AdSense is that it’s a really great way to earn passive income. Of course, the payout isn’t always the best compared to some other Google AdSense alternatives.
How to Add AdSense to WordPress in 4 Steps
AdSense will crawl your site to understand the type of content on your site so that it can serve better ads. The process of getting payments is hassle-free because you don’t need to deal with advertisers. Google deals with the advertisers, collects payment from them, and sends you a percentage of the collected money.
So, now that you understand the benefit of AdSense and how it works, let’s figure out how to add AdSense to WordPress.
Step 1: Create a Google AdSense Account
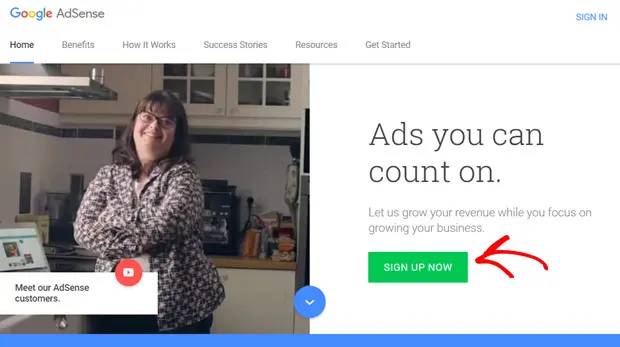
First, you’ll need to sign up for a Google AdSense account by going to the Google AdSense website. Click the Sign Up Now button to start the signup process.
Then, you’ll need to enter your website URL and email address. You can choose to get updates from AdSense or not. After making your choice, click on the Save and Continue button.
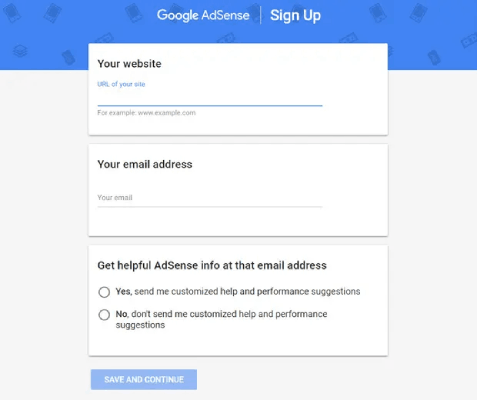
Choose your country and confirm that you’ve read the Terms and Conditions box to proceed.
IMPORTANT: We know that it’s a drag, but we recommend that you read the Terms and Conditions before accepting them with any software that uses your data. With GDPR compliance now being a mandate for Google, your privacy is somewhat protected. But you should still be fully aware of the data you’re sharing.
Finally, click the Create Account button. And you’re done!
Step 2: Add AdSense to WordPress
You’ll get redirected to the AdSense home page once you’ve successfully created your AdSense account. After this, the next step is to activate your account.
To activate your AdSense account, you’ll have to:
- Provide your payment details.
- Connect your WordPress site to AdSense.
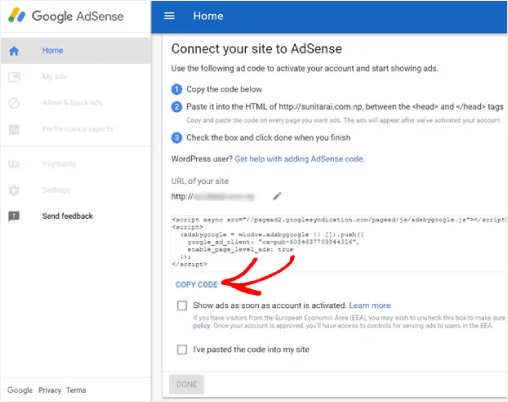
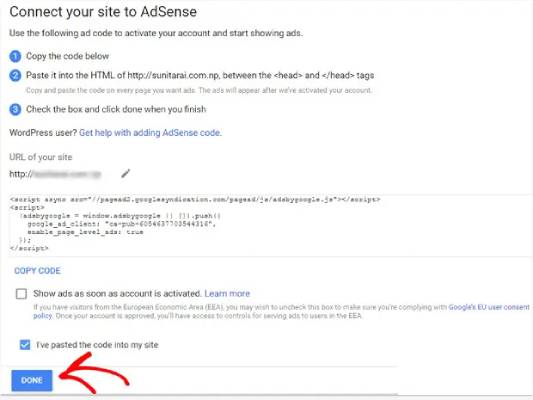
To connect your site to AdSense, you’ll need to add a piece of HTML code to your WordPress site’s header. Let’s start with getting the code first. You’ll find this code under the AdSense Home tab. Click on the Copy Code button.
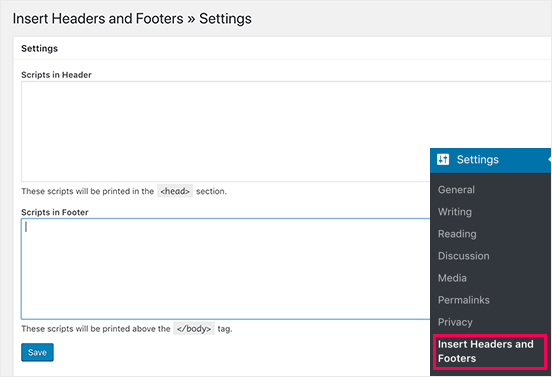
To add the code, head over to your WordPress dashboard and install the Insert Headers and Footers plugin. This is a free plugin that lets you insert code into your theme’s header and footers safely without having to edit your theme’s file.
If you’re not sure how to do it, check out this tutorial on how to install a WordPress plugin.
After you install the plugin, you can go to Settings » Insert Headers and Footers and paste the HTML code into the Scripts in Header field.
When you’re done, go back to your AdSense account. You’ll have to click the I’ve pasted the code into my site checkbox and click the Done button:
You’ll see a notice from Google AdSense saying that they’re reviewing your application. This can take a few days. So, you’ll just have to wait.
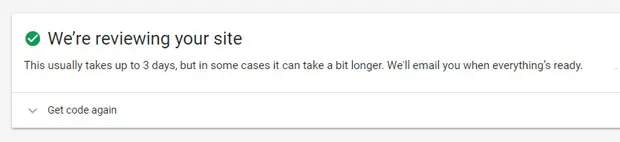
IMPORTANT: For some websites, this review can take up to a few weeks. Google can’t activate your account if your site fails to comply with the AdSense program policies. So, make sure to check out their policies while you’re waiting.
Step 3: Configure AdSense to Add Auto-Ads in WordPress
This step is highly recommended for beginners. If this is the first time you’re adding AdSense to any site, you’ll want to turn on Auto-Ads in Google AdSense. Auto-Ads automatically figures out the best ads for your site and also finds the best placement on your site for you. So, it really takes the load off your shoulders to have to manually optimize your ad placements.
Head back to the AdSense account. Then click on the Ads tab and under Overview, you’ll then see a Get code option.
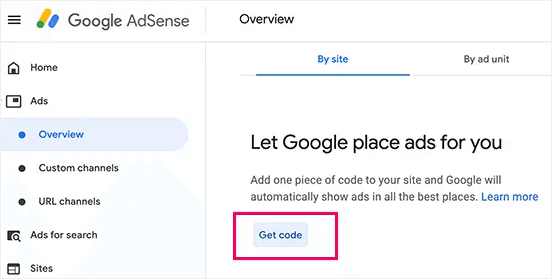
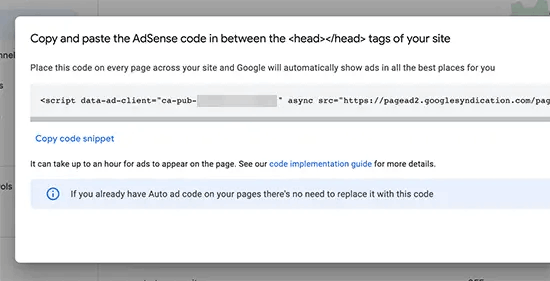
AdSense will automatically generate the code for you and all you have to do is copy it and paste it into your website header using the Headers and Footers plugin. It’s the exact same process as adding the AdSense code to your site.
And that’s all!
Step 4: Manually Add Google AdSense Ads to WordPress
Once you’re more comfortable with Google AdSense and you’re willing to experiment with ad placements, you’ll want to manually create ads for your site. This is a slightly advanced process that you’ll likely use to further optimize your ad placements. Of course, Google’s AI is pretty great. But no one knows your audience better than you do.
To create an ad in Google AdSense, you’ll need to go to Ads » Overview and then navigate to the By ad unit tab.
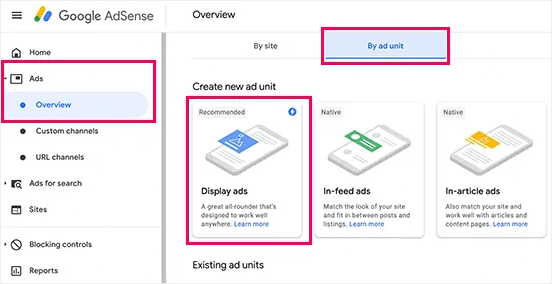
Here, you’ll want to select the ad type. We recommend going with Display Ads if you’ve never done this before.
Give the ad unit a proper name that helps you remember why you’re creating that unit. Then, select the ad orientation you prefer (square, horizontal, or vertical). For the Ad Size, you can select either Responsive or Fixed. We highly recommend creating Responsive so that your site can display the ad on any screen size.
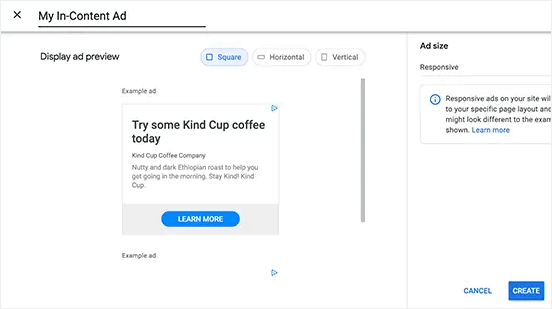
When you’re happy with the settings, click on the Create button.
AdSense will automatically generate the code to embed the ad unit on your WordPress site.
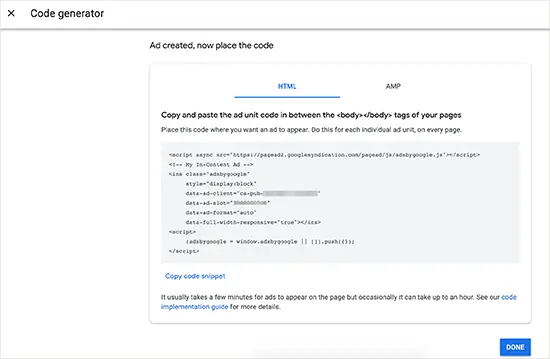
Copy this code snippet and save it somewhere safe. You’ll likely need this code multiple times later on.
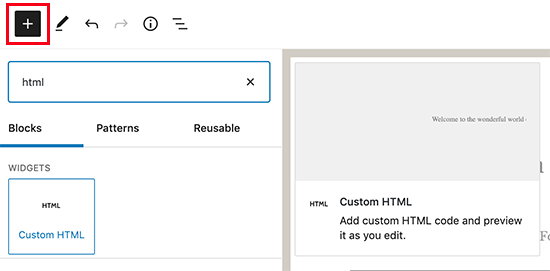
Next, you’ll have to decide on a place where you want the ad to show up on your site. You can use the Custom HTML block in Gutenberg to add your code wherever you like on your site.
There you go! We have successfully figured out how to add AdSense to WordPress.
Pro Tip: A good way to create high-performing ad units is to start with where you want to place your ads and then decide on the ad unit settings.
What’s Next?
That’s all for this one, folks!
AdSense helps you make money with your existing blog traffic. But what can you do to generate more traffic?
After all, more traffic means more money for you.
Here’s an idea: Try using push notifications to generate repeat traffic on your website.
We recommend using PushEngage to create push notification campaigns. Why? It’s only the #1 web push notification software in the world. If you’re unsure what push notification campaigns are or where to get started, check out this article on web push notifications.
Not fully convinced? Check out these other amazing resources that help you generate free traffic:
- How to Automatically Send RSS Push Notifications
- Why Push Notifications Are Important (7 Powerful Benefits)
- 21 Best Website Welcome Message Examples You Can Use
- How to Add a Web Notifications WordPress Plugin to Your Site
And if you haven’t already, get started with PushEngage today!


