Most WordPress stores make the same mistake with chat widgets: they show the same chat experience on every page.
That’s a problem.
- A visitor on a product page is deciding whether to buy.
- A visitor on a blog post is still learning.
- A visitor on a pricing page is comparing options.
Treating all of them the same hurts conversions and increases unnecessary support load.
Page-level chat targeting fixes this by letting you show different chat widgets on different pages, each tailored to the visitor’s intent.
In this guide, you’ll learn how page-level chat targeting works, why it matters, and exactly how to set it up on your WordPress or WooCommerce store using PushEngage.
Send Multichannel Messages Today!
Push and WhatsApp messaging are super effective, low-cost marketing tools to help you grow your repeat traffic, engagement, and sales on autopilot.
- What Is Page-Level Chat Targeting?
- Why Page-Level Targeting Improves Engagement and Conversions
- What You Can Control With Page-Level Targeting in PushEngage
- How to Set Up Page-Level Chat Targeting in PushEngage
- How to Set Up Different Chat Widgets Using PushEngage
- Common Page-Level Chat Use Cases
- Best Practices for Running Multiple Chat Widgets
- What to Do After Setting Up Chat Widgets
What Is Page-Level Chat Targeting?
Page-level chat targeting means showing different chat widgets based on the page a visitor is viewing.
Instead of one global widget, you create multiple widgets and control:
- Where each widget appears
- What message it shows
- Which channels it offers (chat, WhatsApp, email, etc.)
- Which agents or teams it routes to
- When it triggers
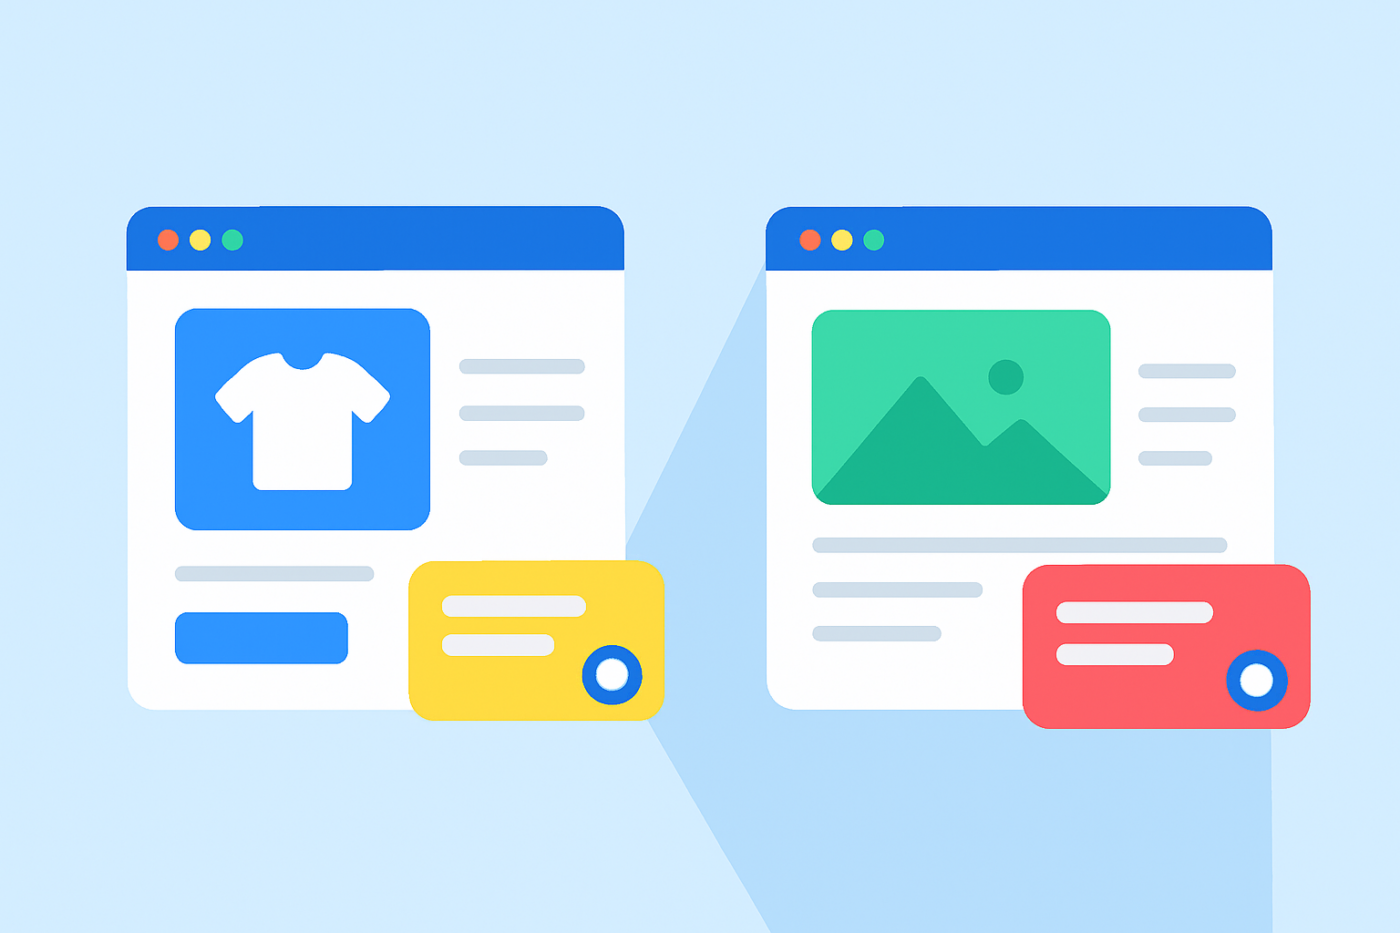
For example:
- Product pages → sales-focused chat
- Blog pages → educational or low-pressure chat
- Pricing pages → conversion or demo-focused chat
The chat experience adapts to the page context automatically.
Why Page-Level Targeting Improves Engagement and Conversions
Visitors Have Different Intent on Different Pages
A blog reader doesn’t want to “talk to sales.” A checkout visitor doesn’t want to read documentation.
Page-level targeting ensures your chat matches what the visitor is trying to do right now.
It Reduces Friction and Annoyance
Generic chat widgets feel interruptive.
Contextual chat feels helpful.
When chat appears with the right message, on the right page, at the right time, engagement goes up and bounce rates go down.
It Protects Your Support Team
Without targeting, agents get flooded with low-intent questions.
With page-level targeting:
- Sales questions go to sales
- Support questions go to support
- Educational questions get redirected to resources
Everyone wins.
What You Can Control With Page-Level Targeting in PushEngage
PushEngage lets you control page-level chat behavior across several dimensions:
- Widget design (colors, layout, CTA style)
- Message copy (sales vs support tone)
- Channels (WhatsApp, email, call, links)
- Agents or routing
- Page rules (URL-based or page-type based)
- Behavior triggers (scroll, delay, exit intent)
This makes page-level targeting flexible enough for both small stores and complex WooCommerce setups.
This flexibility is exactly what makes “page-type-based personalization” possible.
How to Set Up Page-Level Chat Targeting in PushEngage
Step 1: Create Multiple Chat Widgets
In your WordPress dashboard, go to:
PushEngage » Chat Widgets
Create your first widget and name it based on intent, for example:
- “Product Page Chat”
- “Blog Page Chat”
- “Pricing Page Chat”
Don’t try to handle everything in one widget.
How to Set Up Different Chat Widgets Using PushEngage
This is the exact configuration you’ll use in WordPress/WooCommerce with PushEngage.
Step 1: Create Your First Chat Widget
- In WordPress, go to: PushEngage » Chat Widgets » Create New Widget
- Name it: Product Page Chat
- Choose a prominent color and style
- Add channels like WhatsApp + Live Chat
- Assign your sales or product agents
Step 2: Add a Sales-Focused Message
Under Content » Appearance » Advanced view, scroll down to the CTA Text field and add a sales message.
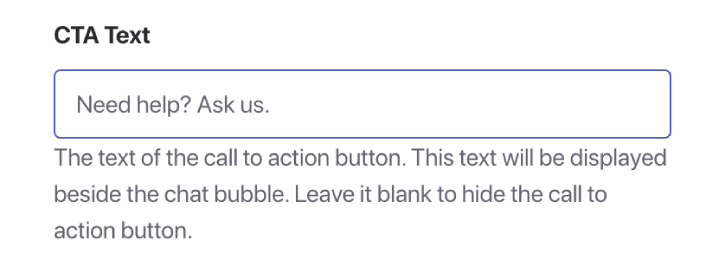
Examples:
- “Need help before buying? Ask us anything.”
- “Unsure about size or fit? I can help.”
- “Get your product delivered faster — ask how!”
This message is meant to prompt action.
Step 3: Target the Widget to WooCommerce Product Pages
Go to the Triggers tab and scroll down to Display Rules.
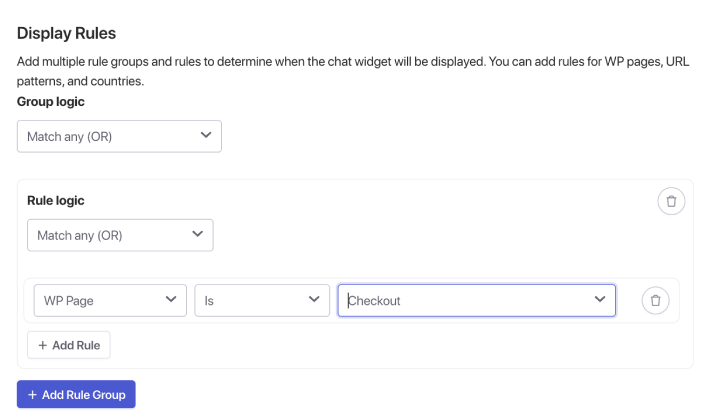
Here, you can use the WP Page option to find WooCommerce pages such as product, checkout, etc. But if you’d rather use specific URLs, just click that drop down and select URL instead and modify your targeting accordingly.
When you’re done, just save your chat widget and activate it.
The same goes for setting up a blog page chat widget. Create a separate widget that targets blog pages exclusively.
Recommended Behavior Rules
- Show after 45–60 seconds
- Or after 60–70% scroll
- Desktop only (optional)
This makes the widget feel supportive, not interruptive.
Common Page-Level Chat Use Cases
Product Pages
- “Have questions before buying?”
- Sales or product experts
- Fast triggers
Blog Pages
- “Need help understanding this?”
- Educational tone
- Delayed triggers
Pricing Pages
- “Want help choosing a plan?”
- Sales or demo routing
- Exit-intent triggers
Checkout Pages
- “Questions before checkout?”
- Minimal, reassurance-focused messaging
- No upsells
Category Pages
- “Need help choosing?”
- Browsing assistance
- Medium delay
Best Practices for Running Multiple Chat Widgets
1. Keep Your Design Consistent
Even if the widgets differ by context, they should still feel like the same brand.
2. Don’t Overwhelm Visitors
Avoid too many proactive popups. Let context do the heavy lifting.
3. Assign the Right Agents
Product pages → Sales
Blog pages → Support or educational staff
4. Check Analytics Monthly
Look at:
- Triggered sessions
- Avg. response time
- Conversion flow
- Pages where users drop off
Fine-tune based on real data.
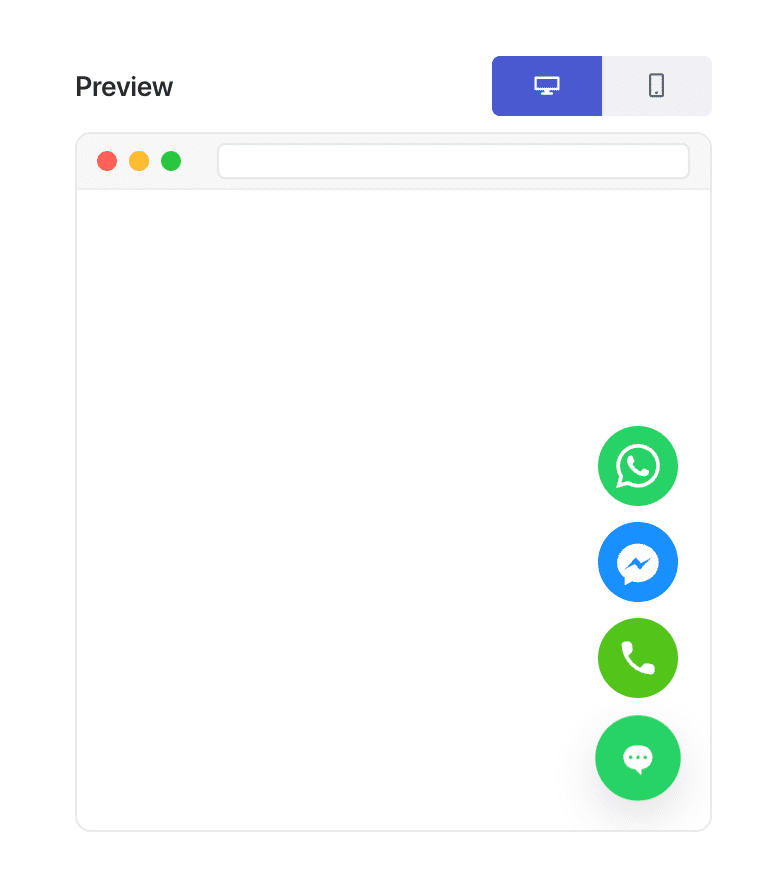
5. Remember Mobile vs Desktop Differences
Mobile previews are essential. Adjust message length and trigger timing accordingly.
What to Do After Setting Up Chat Widgets
Page-level chat targeting turns your chat widget from a generic support button into a context-aware engagement tool.
Instead of asking visitors to adapt to your chat, you adapt chat to them.
With PushEngage, you can set this up in minutes—and the impact shows up quickly in engagement, conversions, and support efficiency.
If you haven’t implemented page-level chat targeting yet, it’s one of the highest-leverage improvements you can make to your WordPress store.
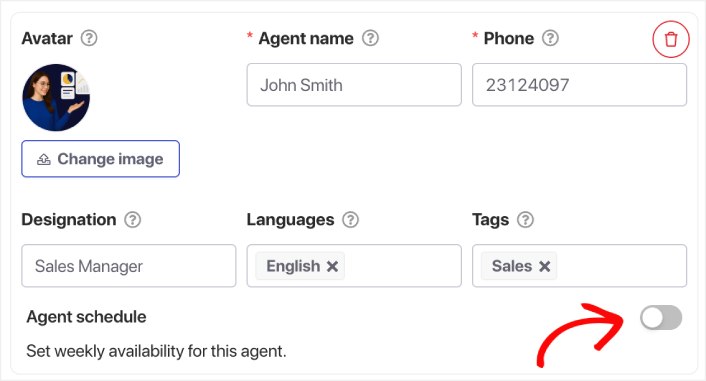
- Customers always see someone online
- Response times drop
- Pre-purchase conversions rise
- Support feels faster and more reliable
- Your store feels global-ready
Once the schedules are set, your team can operate more efficiently—and your customers get the experience they expect.
If you haven’t already set up agent profiles and schedules in PushEngage, now’s the time.
Not convinced? Check out these amazing resources on multichannel marketing campaigns:
- How to Increase Hotel Sales in Low Season
- How to Do Multichannel Marketing for Hotels in 2025
- How to Convert Subscribers To Buyers Using Web Push Notifications
- How to Notify Subscribers of New WordPress Posts
- How to Send Back-in-Stock Notifications to Get More Sales
- How to Clean Up Push Notifications Subscriber Lists (Easy)
- How to Automatically Send RSS Push Notifications
- How to Use Push Notifications to Promote a News Site
- How to Use Cross Selling Push Notifications to 2x Your Sales
- How to Use Browse Abandonment Push Notifications (4 Steps)


