
Looking for a way to add push notifications to the AMP version of your site? Adding AMP push notifications can be a little technical. But we’re going to help you do it the easy way.
AMP or Accelerated Mobile Pages are essentially a mobile version of your site. So, if you’re not setting up web push on your AMP site, then you’re going to lose a bunch of subscribers because a huge part of your audience will use mobile devices to visit your site.
In this article, we’re going to use PushEngage to install AMP push notifications because it’s way easier than doing things manually.
Let’s dive in.
How to Install AMP Push Notifications
Installing AMP push notifications is a really quick and easy process. Just follow these steps and by the end of this article, you should be able to send push campaigns from your site like this one:

Looks good, doesn’t it? Let’s dive in.
Step #1: Set Up Your PushEngage Account
Head over to the PushEngage home page and click the Get Started button:

You can select the free plan to try out PushEngage, or choose a paid plan if you’re serious about growing your business. The paid plans come with more campaign options and the ability to build even bigger subscriber lists.
Once you’ve signed up for your PushEngage account, head over to your PushEngage dashboard and go to Site Settings » Site Details:

You can set your logo, site name, and site URL here. It’s really important to sort this stuff out right now so that you can test your entire setup later.
Step #2: Get the AMP Push Notifications Installation Code
To install web push on your AMP site, you’ll need to get an installation code. In your Site Settings screen, scroll down and click on the Click Here For Setup Instruction button:

Head over to the AMP tab to get installation settings.
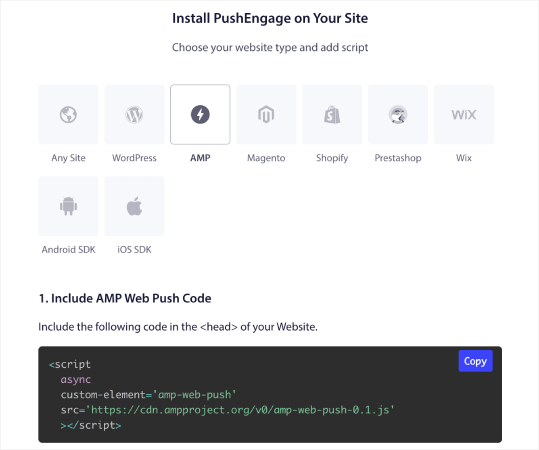
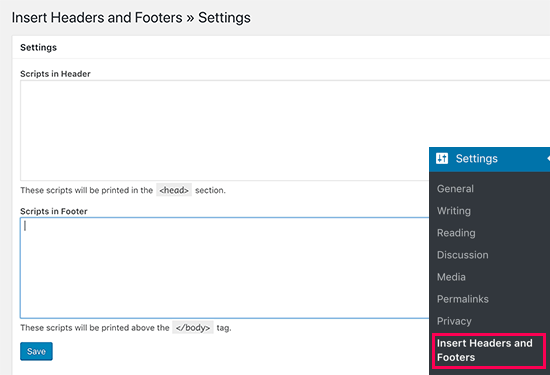
Copy this code. You’ll need to paste this code in the HTML <head> of your site. If you’re running a WordPress site with an AMP version, the simplest way to do this is to use the Insert Headers and Footers plugin. It’s a free plugin where you can paste in the AMP installation code without having to go into the actual HTML of your site:
Step #3: Install Service Worker on Your AMP Site
Next, download the package file that includes the service worker.

This includes:
- service-worker.js
- amp-helper-frame.html
- amp-permission-dialog.html
Unzip the package and place these files in the root folder of your server. This part is super important. If you skip this step, your site won’t be able to collect push subscribers.
Pro Tip: If you’re not sure what the root folder is and how you can upload files there, you should check out this article on the WordPress File and Directory Structure. It’s a really simple guide for beginners and you get a lot of insight into how WordPress works.
Step #4: Add the AMP Push HTML Code to Your Site
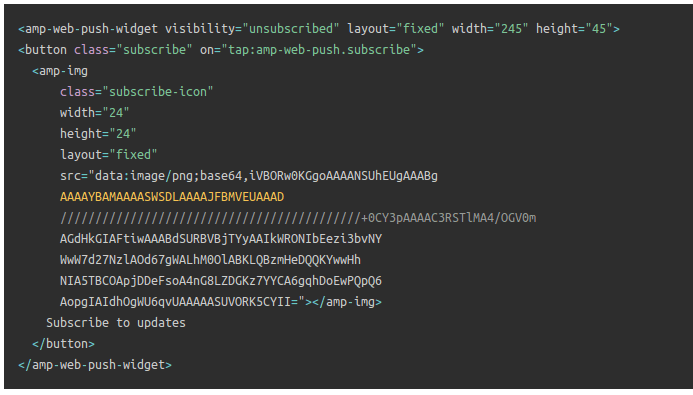
Next, add the HTML code to enable a subscribe on click button and a button to unsubscribe from push campaigns.
This code enables the service worker file you uploaded and allows your site to display subscribe and unsubscribe buttons. To collect subscribers, you need to give your visitors a simple way to subscribe to your push campaigns. The unsubscribe button will give your active subscribers a way to opt out if they’re not interested in your content. Both are pretty important.
Add the `Subscribe to updates’ button where you want it to show up on your site:
And add an ‘Unsubscribe from updates’ button:
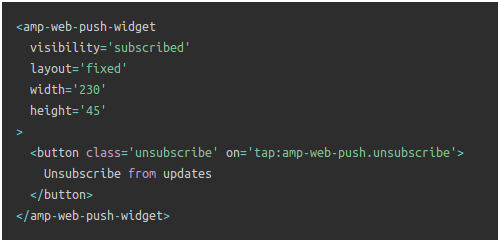
The Unsubscribe button is going to be a simple ‘tap to unsubscribe’ button. You get a lot more customization options for the non-AMP version of your site on both mobile and desktop devices. So, we recommend that you add AMP CSS to your <body> section.
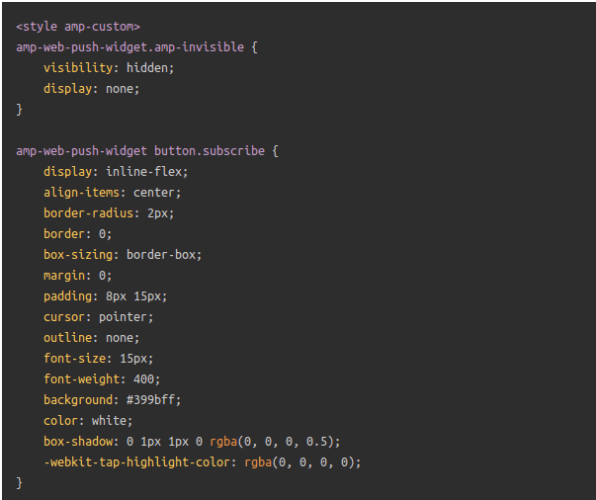
This code snippet is meant to customize the look and feel of both Subscribe and Unsubscribe buttons. If you’d like to play around with these styles, go for it. Just make sure that you don’t change the AMP HTML tags that the code is styling.
And that’s it. You’re done.
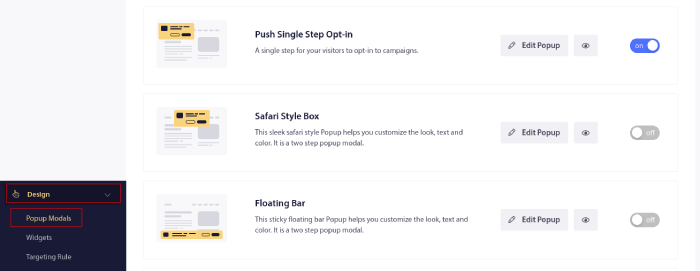
Step #5: Configuring the PushEngage Opt-In
Now, head back to your PushEngage dashboard. Go to Design » Popup Modals and select the optin of your choice:
The idea here is to give your visitors a solid reason to subscribe. If you need some help with that check out our article on how to create a custom push notification opt-in.
And if you’d like some templates to get started, you should check out this article on high-converting push notification opt-ins.
BONUS Step: Create a Welcome Campaign
Once you’re done setting up the opt-in, your site can collect subscribers.
But how do you know if your push campaigns are working properly?
We recommend that you create a welcome push notification to test if your setup went smoothly. A welcome notification is a web push notification you send a new subscriber to confirm their subscription and welcome them on board.
Go to PushEngage dashboard and head over to Campaign » Drip Autoresponders and click on Create New Drip Autoresponder:

Then, name your campaign (we suggest something like Welcome Drip), and under Content, select the option that says, “Send notification immediately after user subscribes“):

At this point, you can click on the arrow next to the notification to edit the content of your notification. If you have a Premium or Enterprise plan with PushEngage, you’ll be able to add more than one notification to create a sequence of automated welcome messages. Just click on Add New Notification and edit the content.
Once you’re done, click on Drip Settings and select the option to send your welcome campaign to all subscribers:

Then, scroll down to set your own UTM parameters to track the push campaigns:

And when you’re done, scroll back up and click the Activate Autoresponder button:

And that’s all there is to it!
You have successfully set up AMP web push notifications on your website. It’s time to head back to your PushEngage dashboard and start creating your push campaigns.
What to do After You Add AMP Push Notifications to Your Site
That’s all for this one, folks!
If you’re new to push campaigns, you should follow a full-blown push notification testing process before you go live. It’ll help you troubleshoot common issues before your visitors see them and start complaining about a broken user experience.
You should also check out some more automated push notification campaigns such as:
We recommend that you get in touch with our Customer Success Managers if you’re stuck with any of this. We’re more than happy to help you with any issue.
And if you haven’t already, go ahead and give PushEngage a try. PushEngage is the #1 push notification service in the world. So, if you’re serious about growing your business, PushEngage is the right option for you.


Thanks for this tips & information. Its very easy to understand.
good explanation