
Looking for a way to enable a single-step optin on your site to collect push notification subscribers?
Push notifications can be a really great tool to generate engagement, repeat traffic, and sales. It’s also a very affordable marketing tool that’s perfect for growing small businesses.
But before you create send push notifications, you must first create an optin to collect a subscriber list from website visitors.
In this article, we’re going to set up a single-step optin for your site in less than 10 minutes. We’re going to use PushEngage for this article to show you how to get started with push notifications. PushEngage is the #1 push notifications software in the world. So, your campaigns will be in safe hands.
Let’s dive in.
How to Enable Push Single Step Opt-in On Your Site
IMPORTANT: Before you get started, there are a couple of quick things to take care of. To install a single-step optin for push notifications, you must have:
- An HTTPS Website (a website with an SSL certificate)
- Access to the root directory in your hosting service
All good? Let’s get started!
Step #1: Set Up Your PushEngage Account
Head over to the PushEngage home page and click the Get Started button:

You can try out PushEngage for free. If you’re running a small blog that needs repeat traffic and engagement, that’s probably good enough. But if you’re serious about sales, you should get the Enterprise package and unlock the automated campaigns.
Once you’ve signed up for your PushEngage account, head over to your PushEngage dashboard and go to Site Settings » Site Details:

Here, you get to update the basic details of your site. You can set your logo, site name, and site URL. It’s really important to sort this stuff out right now so that you can test your entire setup later.
Step #2: Install PushEngage On Your Site
In the same tab, scroll down and click on the button that says Click Here For Setup Instruction:

Depending on the platform on which your site was built, the installation process will vary. Check out our installation guides to finish this process. If you’re using a CMS to build your site, most of the installation process will be done by the PushEngage plugin for that platform. For a custom site, you’ll need to download the Service Worker package.
After you click on the Click Here For Setup Instruction, click on Download Service Worker File:
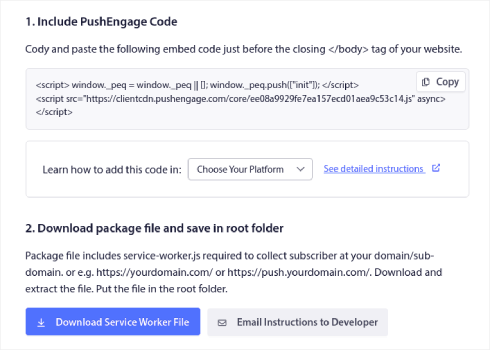
Then, upload the zip file to the root directory of your website in the public_html folder.
Once you have added the file here make sure it is accessible. Go to https://yoursite.com/service-worker.js and check if it’s a valid URL (replace yoursite.com with the URL to your site).
Here’s the PushEngage service-worker.js file URL for example: https://www.pushengage.com/service-worker.js.
Step #3: Create Your Single-Step Push Notification Optin
In your PushEngage dashboard, head over to Design » Popup Modals to see the list of different optin types:
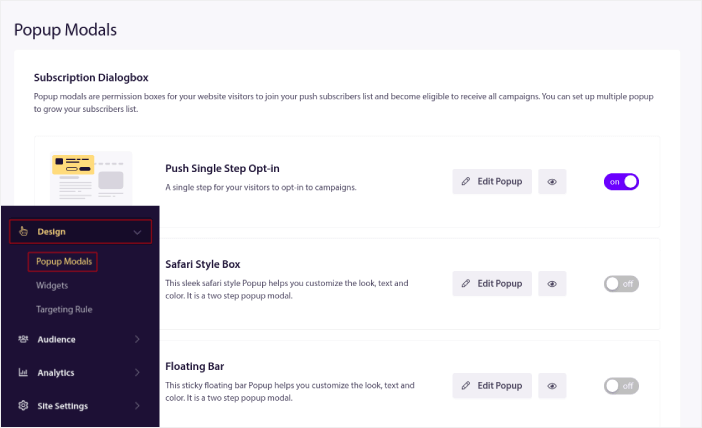
From this list, go to Push Single Step Optin and click on the toggle switch to enable the optin:
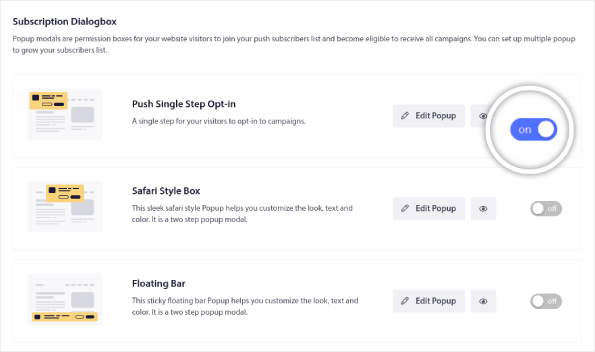
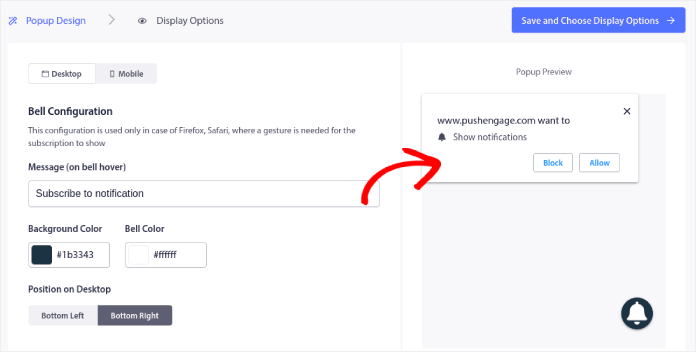
Then, click on the Edit Popup button to customize the optin:
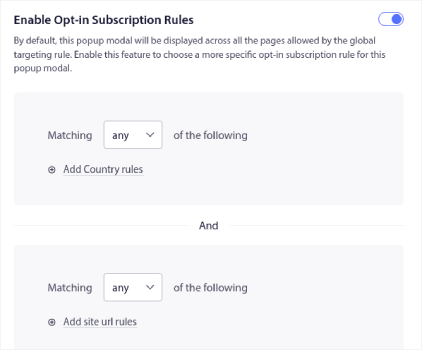
You can also select where to show your popup on your site. Click on Enable Opt-in Subscription Rules:
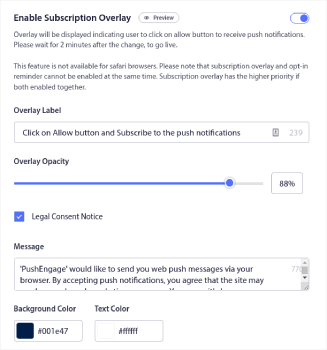
If you want your optin to be really prominent, you can use a subscription overlay to blur out the rest of the site until your visitor either subscribe to your notifications or exit the popup modal. Click on Enable Subscription Overlay:
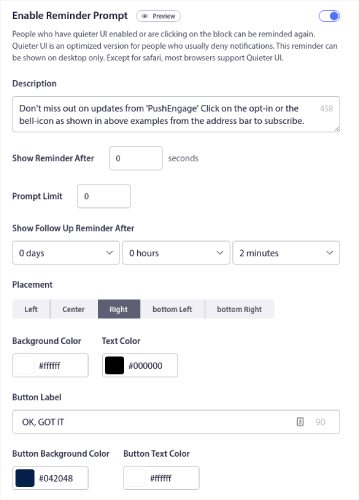
You can customize your overlay so that it fits your brand and looks awesome on your site. Finally, you can also enable reminder prompts for visitors who have QuieterUI mode activated on their browser:
When you’re done, click on Save and Choose Display Options.
Under Display Options, you can set up when to show your optin after a visitor lands on your site:
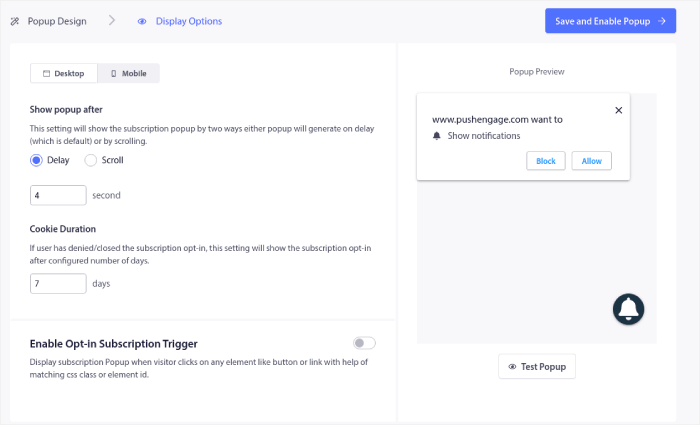
You can set a time delay after which the popup will show up. Or, you can set the optin to show up after your site visitors scroll a certain percentage of the web page.
If you’d like to create a click to subscribe button, you can also Enable Optin Subscription Trigger. When you’re done, click on Save and Enable Popup.
And you’re done!
Wrapping Up
That’s all for this one, folks!
You just added a single-step push notification optin to your site in less than 10 minutes!
Check out how to create automated push notification campaigns as well. Most push campaigns are simple and effective. So, we recommend setting up multiple campaigns for your site. Here are a few great ones to start with:
- How to Automatically Send RSS Push Notifications
- How to Setup Cart Abandonment Push Notifications Using GTM
- How To Schedule Push Notifications the Easy Way [5 Min. Guide]
And if you haven’t already, get started with PushEngage. PushEngage is the #1 push notification software in the world. So, your campaigns are in safe hands.


