
Looking for a tutorial on how to add a WordPress donate button to your site?
A donate button encourages your website visitors to help you sustain your passion projects and non-profit organizations. But how do you even create a donate button? Do you need a developer? Do you need to hire someone just for a button?
The short answer is: No. You can create a WordPress donate button using a plugin in less than 15 minutes. And if you’re not a developer yourself, using a plugin is probably going to be way more affordable as well.
But there are tons of donation plugins out there. Which one do you choose?
In this article, you’re going to see step-by-step how to create a WordPress donate using a simple, easy-to-use plugin. And you can use this method even if you have zero experience with coding.
Let’s dive in.
PushEngage is the #1 push notifications plugin in the world. Get it for free!
Why You Need an WordPress Donate Button
Having a donate button on your WordPress website is a great idea for a few reasons:
- Collecting funds: A donate button makes it super easy for people to support your cause or organization by giving money. They can simply click the button and contribute right there on your website.
- Nonprofits: If you run a nonprofit, a donate button is essential. It lets you collect donations online from people who believe in your cause and want to help you make a difference.
- Crowdfunding: If you’re doing a crowdfunding campaign to raise money for a specific project or idea, a donate button on your website is a must. It lets potential backers contribute directly, making it convenient and boosting your chances of reaching your funding goal.
- Supporting creators: If you’re a blogger, artist, or content creator, a donate button is a way for your fans to show their appreciation and support. They can give you a little something to help you keep creating awesome content.
- Community help: If you provide valuable resources or services to your community, a donate button allows people to chip in financially to support what you do. It’s a way for them to contribute and help you continue your good work.
To add a donate button to your WordPress site, you can use plugins, payment gateways, or custom code. Just make sure it’s easy to find and click on, so people can support you without any hassle.
Remember, a donate button is a simple but powerful tool to gather funds and support your cause, projects, or creative ventures.
How to Create a WordPress Donate Button
To create our donate button, we’re going to use a super popular WordPress donation plugin called Charitable. If you follow every step in this article, you can create a WordPress donate button like this one:

Step #1: Install a WordPress Donation Plugin
The first thing you’ll need to do is install and activate Charitable.
Charitable is the best WordPress donation plugin in the world. If you’re not sure how to install the Charitable plugin, you should check out this step-by-step guide on how to install a plugin in WordPress.
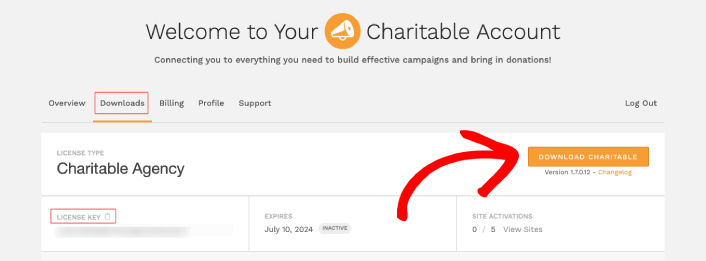
Head over to your Charitable dashboard and go to Downloads to get your plugin and license key:
Next, install and activate the plugin on your site. And copy your license key from the same tab to activate your license. Finally, go to your WordPress dashboard and head over to Charitable » Settings and paste in your License Key under General settings:
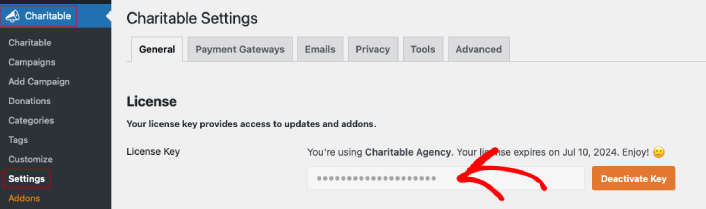
When you’re done, click Connect.
Step #2: Configure WordPress Donate Button Settings
Before you create a WordPress donate button, you’ll need to configure how to accept payments, what email receipts to send, and where to show your donation form.
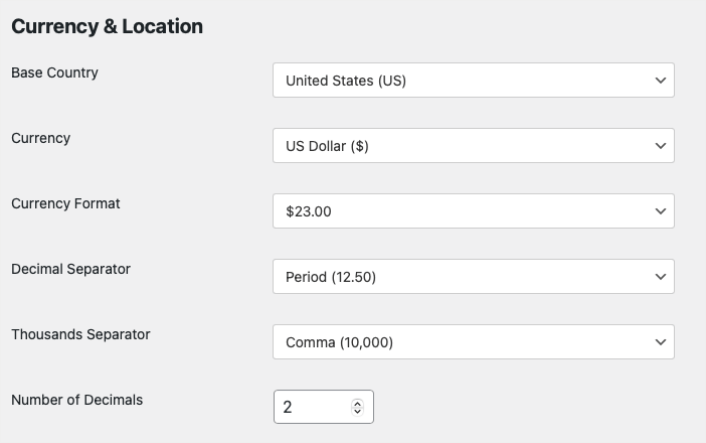
Head over to Charitable » Settings » General and configure your Currency and Location settings:
Then, you can select where to show your donation form:
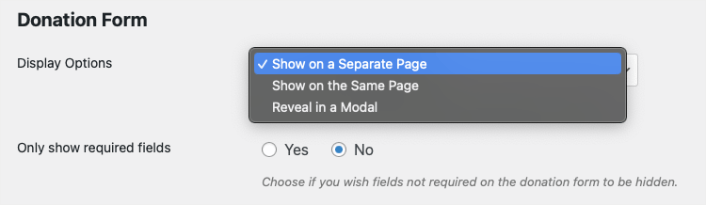
If you wish, you can turn your donation form into a popup modal or redirect visitors to a separate donations landing page. Or, you can create a compact donation form that you can embed anywhere on your site.
Next, go to Charitable » Settings » Payment Gateways and set up your payment gateway to accept donations:
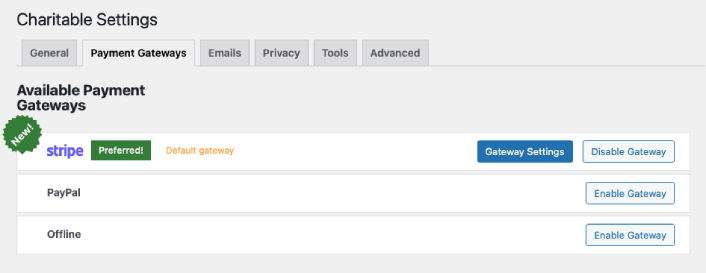
You don’t even need a Stripe payments plugin to accept payments. Simply select your payment gateway and click on Enable Gateway to connect to your payment gateway.
Finally, go to Charitable » Settings » Emails and enable donation receipts for all your donors:
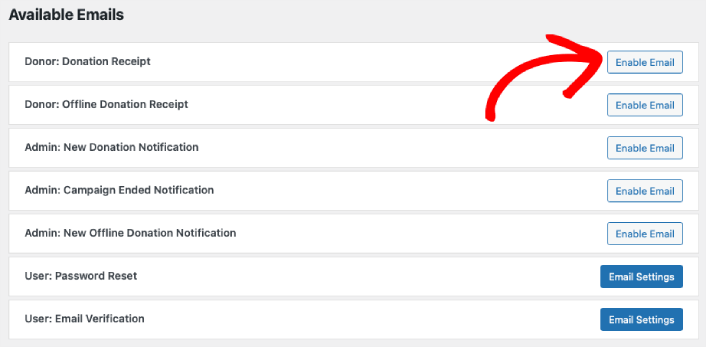
Simply click on Enable Email and you’re all done.
Step #3: Create Donation Campaign
Every donation button in Charitable is set up as a campaign. So, head over to Charitable » Add Campaign to create a new campaign:
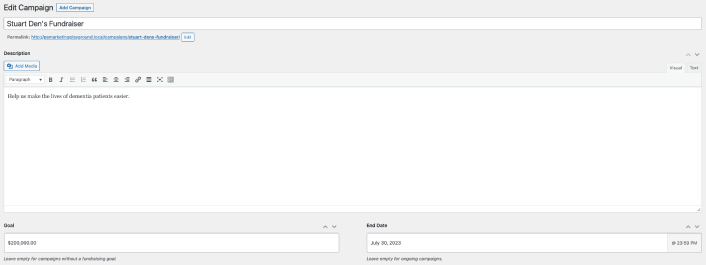
You can add a campaign name, description, goal amount, and the end date for the campaign.
This besides, you can also add a suggested donation amount and customize the text for your WordPress donate button. You can even set a campaign image right here.
When you’re done, just hit the Publish button. Charitable will automatically create a page for your campaign along with the donate button.
How to Promote Your Donation Campaign
That’s all for this one, folks!
By now, you’ve learned how to create a WordPress donate button with no code. Next, you should set up form abandonment tracking to get more people to donate.
After that, all that’s left is generating traffic to your site so that your form can get to work and start converting. A simple way to do that is to start using push notifications. Sending push notifications is a great way to generate repeat traffic for your site. If that’s something you’re interested in, you should check out these articles as well:
- Push Notification Cost: Is It Really Free? (Pricing Analysis)
- How to Get More Traffic to Your WordPress Blog (9 Easy Ways)
- How to Boost Your Web Push Notification Opt-In Rate (7 Ways)
- How to Add a Web Notifications WordPress Plugin to Your Site
We recommend using PushEngage to send your push notifications. PushEngage is the #1 push notification software in the world. So, if you haven’t already, get started with PushEngage today.


