
Looking for a tutorial on how to add a WooCommerce side cart to your online store?
A side cart enables your customers to have quick access to their shopping cart from any page while browsing your goods. It allows them to conveniently view the items in their cart, make additions or removals, and apply coupons, all without the need to navigate to a separate cart page.
In this article, we’ll guide you through the simple steps of adding a WooCommerce side cart to your site.
The best part is that you don’t need any experience in web development, conversion optimization, or automated sales funnels. You can simply follow the steps in this article and create a high-converting side cart in a matter of minutes.
Let’s dive in.
What is a WooCommerce Side Cart?
A sliding side cart is a dynamic panel that conveniently appears when a customer adds an item to their shopping basket. Additionally, customers have the flexibility to access this cart panel at any time by simply clicking on the cart icon, eliminating the need to navigate to a separate WooCommerce cart page.
Depending on the configuration of the cart, shoppers may also have the ability to seamlessly manage their cart contents, including adding or removing items and applying discount coupons, directly from the sliding panel. It’s also possible to incorporate call-to-action buttons, such as a link to your WooCommerce checkout page.
PushEngage is the #1 push notifications plugin in the world. Get it for free!
Adding a WooCommerce side cart significantly enhances the customer experience by streamlining the shopping process and allowing shoppers to keep a close eye on their expected costs at the time of checkout. Not to mention, it’s a great way of reducing cart abandonment rates.
Now, let’s proceed to explore how to incorporate a sliding side cart into your WooCommerce setup.
How to Create a WooCommerce Side Cart (Quick & Easy)
Now that you understand what a WooCommcere side cart is, it’s time to build one for your site. This tutorial is for a WooCommerce site. So, if you haven’t already, you need to create a WooCommerce site first.
Once you install WooCommerce, you’ll want to get the FunnelKit plugin as well. FunnelKit is a WordPress plugin that helps you create a custom sales funnel for WooCommerce sites with the help of proven templates.
FunnelKit automatically creates powerful sales pages by importing pre-built templates. The templates are only the starting point, though. You can customize anything you want about the pages using a visual builder.
Go ahead and install FunnelKit to your WooCommerce site. If you don’t know how to do that, check out this article on how to install a WordPress plugin. For this tutorial, we’ll help you create a four-step sales funnel.
Step #1: Install and Activate FunnelKit
The first thing you need to do is activate your FunnelKit plugin:
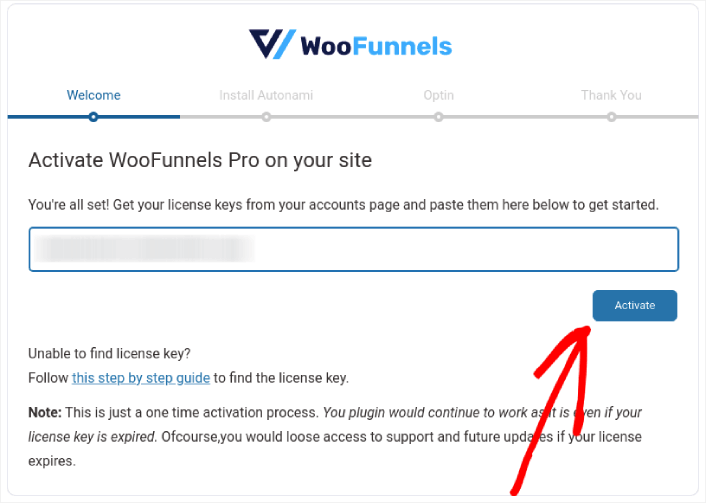
Once that’s done, you’re ready to create your first WooCommerce side cart and get more sales.
Step #2: Select Where to Show Your WooCommerce Side Cart
In your WordPress dashboard, go to FunnelKit » Cart. You’ll see a preview of the sliding slide cart towards the right of the screen.
You can show the cart button across your entire site, limit it to WooCommerce pages only, or add the button to specific pages and posts using a shortcode.
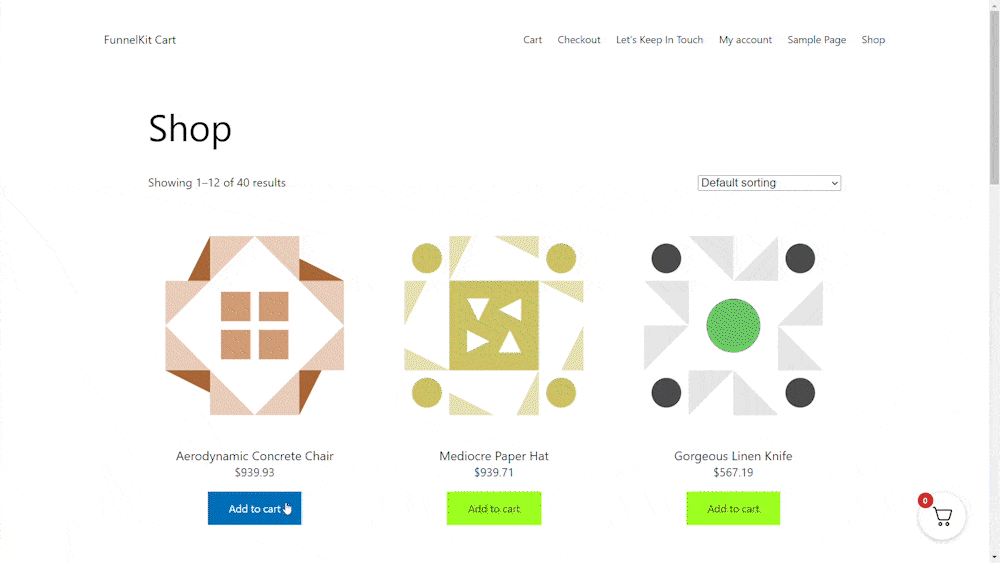
First and foremost, you have the option to choose whether you want to display the cart icon throughout your entire website or exclusively on WooCommerce-related pages.
Opting for Entire Website means that shoppers will have the convenience of opening the sliding cart from any page on your site. This is particularly well-suited for online marketplaces and stores with a broad range of products and categories.
However, it’s important to consider that your website may contain a substantial amount of non-ecommerce content. For instance, you might operate a popular WordPress blog while also using WooCommerce to offer merchandise to your dedicated fans.
Having a cart button displayed on every individual blog post could potentially become intrusive or annoying for your readers. In such scenarios, you can choose the WooCommerce Pages radio button.
Another alternative is to opt for None. This option conceals the cart icon from view. Use it to retain the flexibility to manually incorporate the icon on specific pages, posts, or widget-ready areas through the use of a shortcode.
Of course, you can also insert the cart icon into your navigation menu.
Step #3: Enable Coupons in Your Side Cart
Coupons serve as a highly effective means to boost sales and foster customer loyalty.
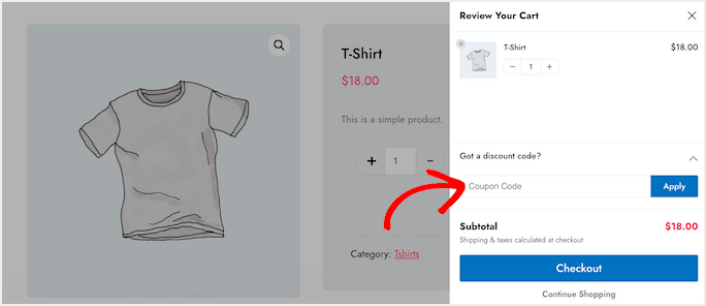
When a customer clicks on the Apply button, the sliding cart will instantly display the amount they’ve saved through the coupon.
When you show your customers the discount, you not only reduce cart abandonment rates but also motivate them to add more items in their shopping basket.
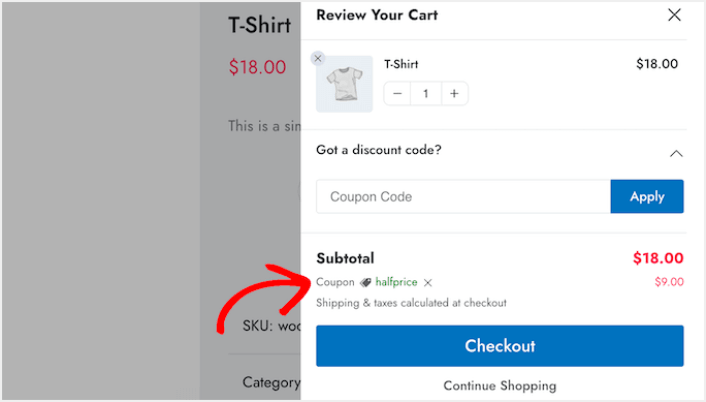
To include the coupon field, simply click on the Enable Coupon Box toggle and you’re done!
Step #4: Customize the Call To Action for Your WooCommerce Side Cart
The sliding side cart comes with a standard checkout button, but you have the freedom to tailor this action button to boost your conversions. To begin, you can include a checkout icon by using the Enable Button Icon toggle.
You can supercharge the checkout button by incorporating the cart price through the Enable Cart Price toggle.
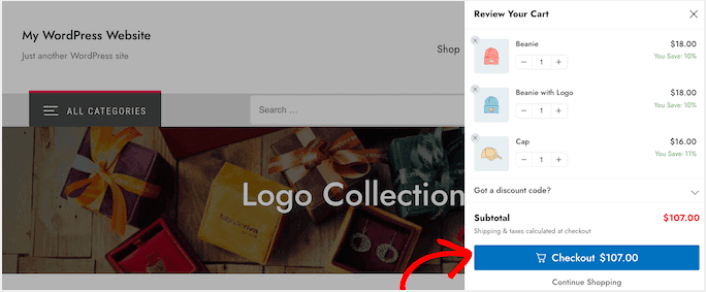
This feature helps shoppers see how much their cart will cost, especially if you’ve removed the subtotal from the cart summary section.
By default, FunnelKit includes a Continue Shopping link at the bottom of the sliding side cart. You can change this text to your own message by typing in the Continue Shopping Text field.
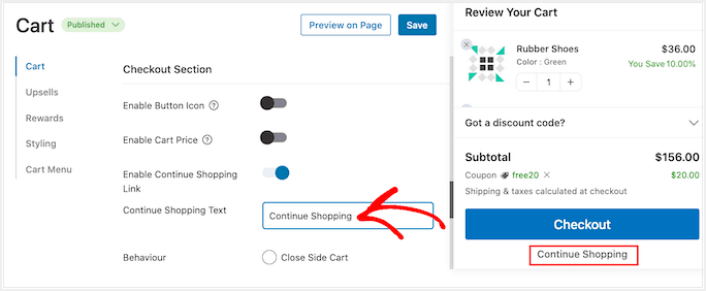
After that, decide if this link should just close the side cart or take the shopper to your WooCommerce store page.
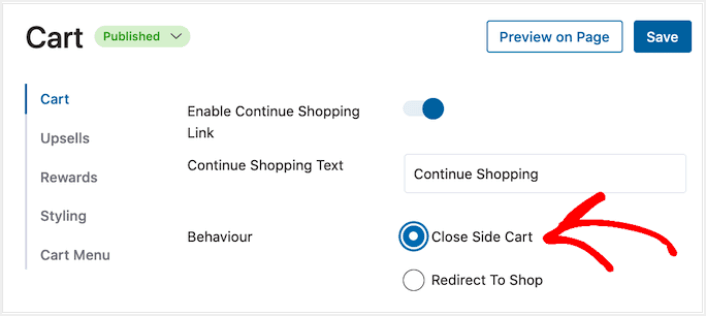
Most shoppers usually want to close the sliding cart, so we recommend selecting the Close Side Cart option.
What to do After You Add a WooCommerce Side Cart
Now that you know how to create a WooCommerce side cart, it’s time to drive traffic to your landing page. Your landing page is the start of your entire funnel. So, that should be the target of your marketing campaigns.
We recommend using push notifications to send repeat traffic to your landing pages. Push notifications are super affordable and extremely powerful marketing tools that can help you grow your business.
If you’re not 100% convinced, you should check out these resources on how to effectively use push notifications:
- 7 Smart Strategies to Boost Customer Engagement
- Are Push Notifications Effective? 7 Stats + 3 Expert Tips
- How to Set Up Abandoned Cart Push Notifications (Easy Tutorial)
We recommend using PushEngage to create your push notification campaigns. PushEngage is the #1 push notification software in the world. So, if you haven’t already, get started with PushEngage today!


