Most business owners assume that once a subscriber stops opening their emails, that lead is gone for good. The common advice is to simply remove them from your list. But I’ve found that’s not always the best solution. Just because they are ignoring their inbox doesn’t mean they’ve lost interest; they might still be visiting your website or using your app.
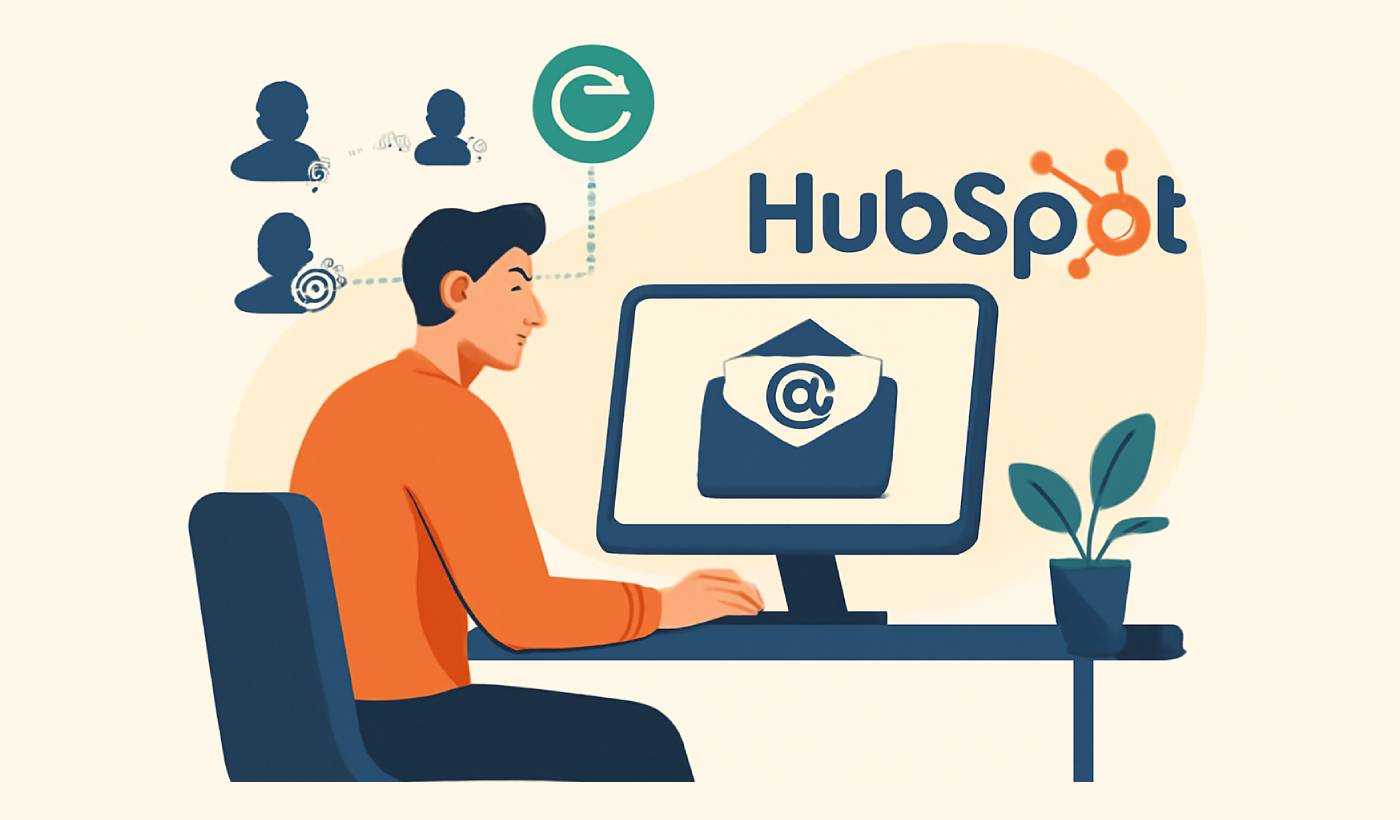
This is the perfect opportunity to re-engage them with PushEngage’s push notifications. In this tutorial, I’ll walk you through how to use this powerful tool inside your HubSpot Workflows to bring your inactive audience back.
Send Web & App Push Notifications from HubSpot!
Push notifications are a super-effective, low-cost marketing tool to help you grow your repeat traffic, engagement, and sales on autopilot.
What is Subscriber Re-engagement and Why It Matters for Your Business
Inactive subscriber re-engagement is the process of identifying email subscribers who have stopped opening your emails and creating targeted campaigns to win them back. Instead of simply removing these contacts from your list, re-engagement gives you a chance to reconnect with people who were once interested in your business.
The numbers behind email list decay are eye-opening. Studies show that email lists naturally decline by about 22.5% each year as subscribers change jobs, abandon old email addresses, or simply lose interest. This means that without active re-engagement efforts, nearly a quarter of your carefully built email list becomes worthless annually.
Here’s what makes re-engagement so valuable for your business. It costs 5-10 times more to acquire a new email subscriber than it does to re-engage an existing one. When you consider that the average cost per lead can range from $50 to $200 depending on your industry, keeping existing subscribers engaged becomes a smart financial decision.
- Re-engagement campaigns are automated email sequences designed specifically to reconnect with dormant subscribers. These campaigns typically use different messaging, timing, and incentives compared to your regular newsletters.
- HubSpot Workflows are the automation tools within HubSpot that allow you to create these re-engagement sequences. They can trigger emails, update contact properties, and integrate with other marketing tools based on subscriber behavior.
- The PushEngage integration adds a powerful multi-channel approach to your re-engagement strategy. Instead of relying solely on email (which inactive subscribers aren’t opening), you can reach them through web push notifications when they visit your website.
The Hidden Cost of Inactive Subscribers
Inactive subscribers don’t just sit quietly on your list – they actively hurt your email marketing performance. When a large portion of your list isn’t engaging with your emails, it sends negative signals to email service providers like Gmail and Outlook.
Email deliverability rates drop significantly when your open rates fall below industry benchmarks. For most industries, you want to maintain open rates above 20%. If your overall open rate drops to 15% or lower due to inactive subscribers, your emails are more likely to be ignored by subscribers.
The financial impact compounds over time. Most email service providers, including HubSpot, charge based on the number of contacts in your database. You’re essentially paying monthly fees to store contacts who provide no return on investment.
Beyond costs, inactive subscribers skew your campaign analytics. When you’re trying to measure the success of new email campaigns, a large inactive segment makes it difficult to understand what’s actually working with your engaged audience.
Why Automated Re-engagement Outperforms Manual Campaigns
The difference between automated and manual re-engagement approaches is significant in both effectiveness and time investment.
| Approach | Response Rate | Time Investment | Consistency |
|---|---|---|---|
| Manual campaigns | 8-12% | 4-6 hours per campaign | Sporadic |
| Automated workflows | 15-25% | 2-3 hours setup (one-time) | Continuous |
Automated re-engagement workflows respond immediately when someone becomes inactive. Manual campaigns often happen weeks or months after subscribers have already mentally moved on from your brand.
The timing advantage is crucial. Research shows that re-engagement attempts are most effective within the first 30 days of inactivity. After 90 days of no engagement, success rates drop by more than 60%.
Automated systems also allow for progressive messaging. You can start with gentle “we miss you” emails and gradually escalate to more direct “confirm your subscription” messages based on continued non-response.
How to Identify Inactive Subscribers in HubSpot
Before you can re-engage inactive subscribers, you need to clearly identify who they are. This section will show you exactly how to segment inactive users in HubSpot, so you can target them with specific re-engagement campaigns.
The key to successful re-engagement is understanding that “inactive” means different things for different businesses. A daily newsletter might consider someone inactive after 7 days of no opens, while a monthly newsletter might wait 60 days before flagging subscribers as dormant.
Setting Up Your Inactive Subscriber Criteria
Your first step is determining what “inactive” means for your specific business and email frequency. I recommend using a combination of email engagement and website activity to get the most accurate picture.
For email-focused businesses (daily or weekly sends), consider subscribers inactive if they haven’t opened an email in 30 days. For content businesses with less frequent emails, extend this to 45-60 days.
However, don’t rely solely on email opens. iOS 15 and other privacy updates have made open rates less reliable. Instead, combine multiple criteria for more accurate segmentation.
Here’s what I recommend tracking:
- No email opens in the last 30-60 days (depending on your send frequency)
- No email clicks in the last 45-90 days
- No website visits in the last 60-90 days
- No form submissions or downloads in the last 90 days
Service-based businesses should focus more heavily on website activity, since clients often visit your site when they’re ready to make a decision, even if they haven’t opened recently.
eCommerce businesses should include purchase behavior – someone who hasn’t bought anything in 6 months but visits your site regularly might need a different approach than someone who’s completely disengaged.
Creating Dynamic Lists for Automated Segmentation
Now, let’s build the actual lists in HubSpot that will automatically identify your inactive subscribers. Navigate in your HubSpot dashboard.
Click ‘Create list‘ and select ‘Contact-based‘ list. Choose ‘Active list‘ so it updates automatically as contacts meet or stop meeting your criteria.
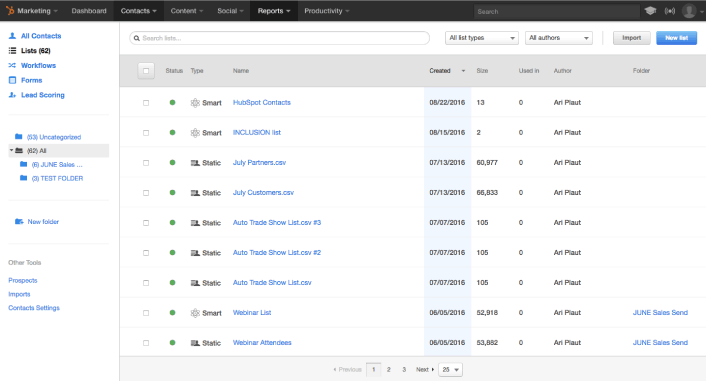
Name your list something descriptive, like “Inactive Subscribers – 30 Days,” so you can easily identify it later.
Now you’ll set up your filtering criteria. Click ‘Add filter’ and start with email engagement:
- Add filter: ‘Email’ → ‘Last marketing email open date’ → ‘is before’ → Select 30 days ago
- Add filter: ‘Email’ → ‘Last marketing email click date’ → ‘is before’ → Select 45 days ago
- Add filter: ‘Website activity’ → ‘Last page view’ → ‘is before’ → Select 60 days ago filter logic to ‘AND’ so contacts must meet all criteria to be considered inactive. This ensures you’re not accidentally targeting someone who’s engaged through other channels.
Here’s a pro tip I’ve learned from managing multiple client lists: create separate lists for different inactivity timeframes. Having both “30-day inactive” and “90-day inactive” lists allows you to create more targeted re-engagement messages.
If your list setup isn’t working as expected, the most common issue is date filter confusion. Make sure you’re using “is before” (not “is after”) for your date criteria, and double-check that your date ranges make logical sense.
Step-by-Step: Building Your Re-engagement Workflow in HubSpot
This is where everything comes together. You’ll create an automated workflow that identifies inactive subscribers and guides them through a strategic re-engagement sequence. Each step is designed to gradually increase engagement while respecting subscriber preferences.
The key to successful workflow design is understanding both the technical setup and the psychology behind why people become inactive. I’ll show you not just what to configure, but why each setting matters for your campaign’s success.
Workflow Trigger Setup: When to Start Re-engagement
Navigate to Automation » Workflows in your HubSpot dashboard and click ‘Create workflow’. Select ‘Contact-based’ workflow since you’re targeting specific subscribers.
Choose ‘Start from scratch’ to have full control over your workflow logic. Name your workflow something clear like “Email Re-engagement – 30 Day Inactive.”
For your enrollment trigger, select ‘List membership’ and choose the inactive subscriber list you created in the previous section. This means anyone who meets your inactivity criteria will automatically enter this workflow.
Here’s where timing becomes crucial. Set your enrollment to ‘Only enroll contacts when they first meet the criteria.’ This prevents contacts from going through the workflow multiple times if they become inactive again later.
I recommend adding suppression criteria to prevent over-communication:
- Contacts who have unsubscribed from marketing emails
- Contacts marked as ‘Do not contact’
- Contacts who have opened an email in the last 7 days (they may have re-engaged naturally)
You can also suppress contacts already in other active workflows to avoid overwhelming them with multiple campaigns simultaneously.
Under the ‘Settings’ tab, set re-enrollment to ‘Allow contacts to be re-enrolled’ but add a delay of at least 90 days. This gives previously re-engaged contacts time to demonstrate consistent activity before potentially entering the workflow again.
Designing Your Workflow Logic and Timing
Your workflow structure should follow a strategic escalation pattern. Start with gentle, value-focused messages and gradually become more direct about confirming subscription preferences.
Here’s the psychological reasoning behind effective timing: Day 1 catches people who just had a busy period, Day 7 reaches those who need a stronger nudge, and Day 14 targets a final compelling reason to stay engaged.
I recommend this three-touch sequence:
Email 1 (Day 1): “We miss you” – Focus on value and what they’re missing
Email 2 (Day 7): “Exclusive content” – Offer something special to re-engage
Email 3 (Day 14): “Confirm subscription” – Direct but friendly final attempt
Between each email, add a ‘Delay’ action. Set Email 1 to send immediately when someone enters the workflow. Add a 7-day delay before Email 2, and another 7-day delay before Email 3.
After each email, add an ‘If/then branch’ to check if the contact has opened the email or clicked any links. If they have, move them to a ‘Goal’ action that marks them as successfully re-engaged and removes them from the workflow.
This prevents re-engaged subscribers from receiving unnecessary follow-up messages and helps you track workflow success rates.
Setting Up Workflow Actions and Conditions
Now let’s configure the specific actions and conditions that make your workflow intelligent and responsive to subscriber behavior.
For each email in your sequence, use the ‘Send email’ action and create dedicated re-engagement email templates. I’ll cover the messaging strategy in the next section, but make sure each email has a clear, compelling subject line and focuses on subscriber value.
After each email send action, add a ‘Delay for a set amount of time’ action. But here’s the important part: also add conditions that check for positive engagement.
Create an ‘If/then branch’ with these conditions:
- If contact has opened any marketing email in the last 7 days, OR
- If contact has clicked any link in the last 7 days, OR
- If contact has visited your website in the last 7 days
If any of these conditions are true, send the contact to your ‘Goal’ action. This immediately re-engaged subscribers from the workflow and marks them as a win.
For contacts who don’t meet the re-engagement criteria, continue them through to the next email in your sequence.
After your final email (Email 3), add one more ‘If/then branch’ to check for engagement. Contacts who still haven’t engaged should move to a final action that either:
- Updates their contact property to “Unresponsive – Consider removal”
- Moves them to a different list for very infrequent communications
- Removes them from your active marketing emails (but keeps them in your database)
I don’t recommend automatically unsubscribing unresponsive contacts, as this can create compliance issues. Instead, significantly reduce email frequency or move them to a quarterly newsletter list.
Integrating PushEngage for Multi-Channel Re-engagement
While most re-engagement strategies focus solely on email, adding push notifications creates a powerful multi-channel approach. Since your inactive subscribers aren’t opening emails, reaching them through web push notifications when they visit your website can be highly effective.
PushEngage integrates seamlessly with HubSpot workflows, allowing you to trigger personalized push notifications based on contact properties and behaviors. This technical setup is designed to be straightforward for non-developers while providing sophisticated targeting options.
Connecting PushEngage to Your HubSpot Workflow
First, you’ll need active accounts with both PushEngage and HubSpot. If you haven’t set up PushEngage yet, install and activate the plugin (see our beginner’s guide for plugin installation).
In your PushEngage dashboard, navigate to Settings » Integrations and look for the HubSpot integration option. Click ‘Connect to HubSpot’ to begin the authentication process.
You’ll be redirected to HubSpot’s authorization page. Log in with your HubSpot credentials and click ‘Grant access’ to allow PushEngage to connect with your HubSpot account.
Back in PushEngage, you should see a confirmation that your HubSpot account is successfully connected. If most common issues are:
- Using different email addresses for your PushEngage and HubSpot accounts
- Browser cookies or cache interfering with the authorization process
- Pop-up blockers preventing the authorization window from opening
Clear your browser cache and try the connection process again if you encounter any errors.
Once connected, return to your HubSpot workflow editor. You’ll now see PushEngage actions available in your workflow action menu under ‘External integrations’ or ‘Connected apps’.
The integration allows you to trigger push notifications at any point in your workflow, just like sending an email. You can add push notification actions between email sends or use them as alternative touchpoints for subscribers who haven’t opted into email notifications.
Setting Up Personalized Push Notification Triggers
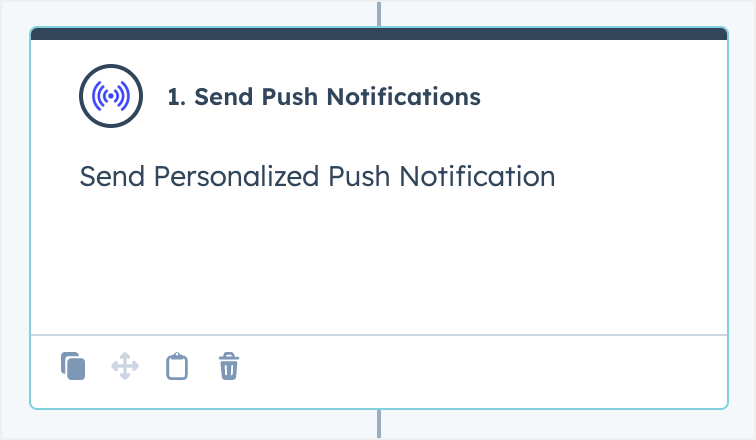
Now let’s add push notification actions to your re-engagement workflow. In your workflow editor, click the ‘+’ icon to add a new action after your first re-engagement email.
Select ‘PushEngage’ from the available integrations and choose ‘Send Push Notification’. This opens the push notification editor where you can craft your message.
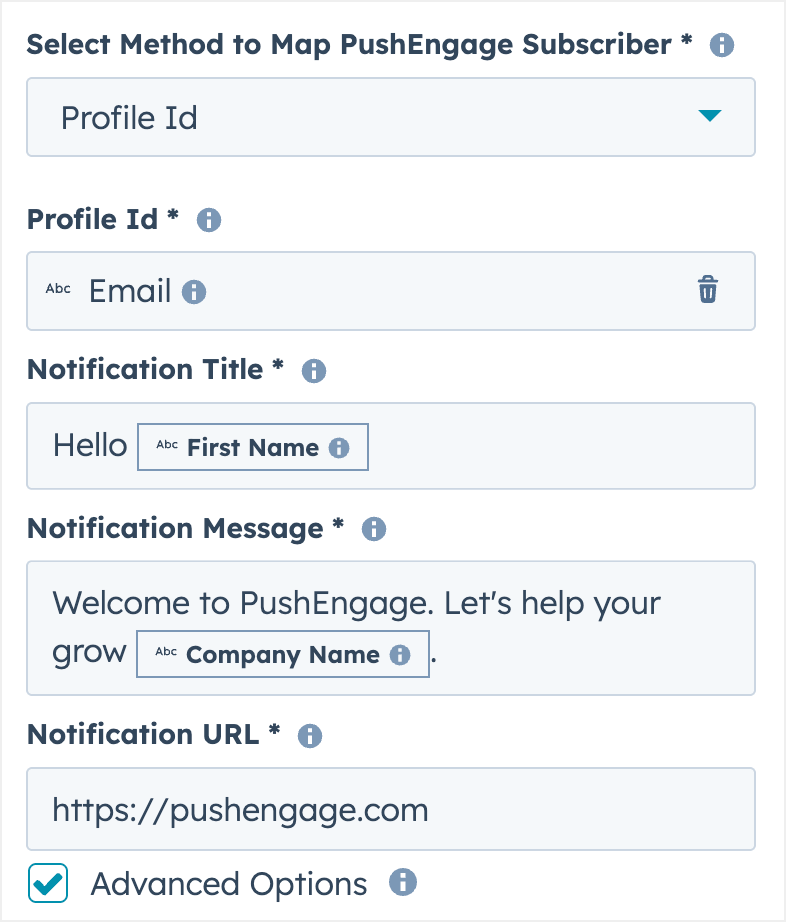
Your push notification should complement, not duplicate, your email messaging. Since push notifications have character limits (typically 90-120 characters for the message body), focus on creating urgency or curiosity.
Here are some effective re-engagement push notification examples:
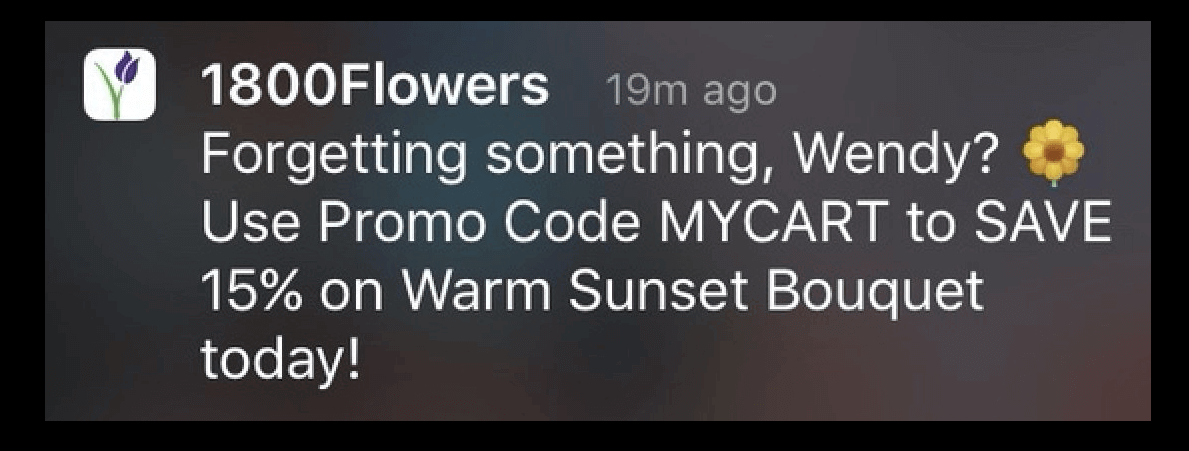
After Email 1: “Still there? We’ve got something special waiting for you 👀”
After Email 2: “Don’t miss out – your exclusive content expires soon!”
Before Final Email: “Last chance to stay updated with [Your Brand Name]”
Use HubSpot contact properties to personalize your push notifications. Click the personalization token icon in the push notification editor to insert:
- First name: “Hey {first_name}, we miss you!”
- Company name: “Exclusive {company} industry insights inside”
- Last engagement date: “It’s been a while since {last_email_open_date}”
Set your push notification timing carefully. I recommend sending push notifications 2-3 days after your re-engagement emails. This gives subscribers time to see and potentially act on the email first, while the push notification serves as a gentle follow-up reminder.
Add conditional logic to your push notifications just like your emails. Create an ‘If/then branch’ after each push notification to check if the contact clicked through to your website. Engaged visitors should move to your success goal, while non-responders continue through the workflow.
For detailed push notification best practices beyond re-engagement, check out our Complete Guide to Website Push Notifications.
Crafting High-Converting Re-engagement Messages
The success of your re-engagement campaign largely depends on your messaging strategy. After testing hundreds of re-engagement emails across different industries, I’ve found that the most effective messages focus on value, create gentle urgency, and make it easy for subscribers to re-engage.
Your re-engagement messages need to address why someone became inactive in the first place. Common reasons include email fatigue, irrelevant content, or life changes that shifted their priorities. Your messaging should acknowledge these possibilities while providing compelling reasons to re-engage.
Email Re-engagement Message Templates That Work
Here are four proven email templates you can customize for your re-engagement workflow. Each template addresses different psychological triggers and subscriber motivations.
Template 1: The “We Miss You” Approach
Subject: We miss you, {first_name}
Hi {first_name},
I noticed you haven’t opened our emails in a while, and I wanted to reach out personally.
Your insights and engagement have always been valuable to our community, and it’s just not the same without you.
I understand inboxes get overwhelming. If our content isn’t hitting the mark for you right now, I’d love to know what would be more helpful.
Here are some of our most popular recent articles that other subscribers loved:
• [Article Title 1]
• [Article Title 2]
• [Article Title 3]
Would any of these be useful for you? Just click to check them out.
If you’d prefer different content or email frequency, just reply and let me know. I read every response personally.
Thanks for being part of our community,
[Your Name]
Template 2: The Exclusive Value Offer
Subject: Something special for you, {first_name}
{first_name}, I have something exclusive for our long-time subscribers.
Since you joined our list, we’ve helped thousands of people [achieve specific result]. I want to make sure you’re getting the most value from your subscription too.
Here’s an exclusive resource I created just for subscribers like you:
[Compelling Lead Magnet Title] – usually $47, free for subscribers
This [resource type] covers:
✓ [Specific benefit 1]
✓ [Specific benefit 2]
✓ [Specific benefit 3]
[Download Your Free Copy]
P.S. This exclusive offer is only available to email subscribers and expires in 7 days.
Best,
[Your Name]
Template 3: The Survey/Feedback Approach
Subject: Quick question, {first_name}
Hi {first_name},
I’m working on making our emails more valuable, and I need your help.
Could you take 30 seconds to let me know what you’d most like to hear about?
[Take Our 2-Question Survey]
As a thank you, everyone who completes the survey gets early access to our upcoming [resource/course/tool].
Your feedback directly shapes what we create, so your input really matters.
Thanks in advance,
[Your Name]
Template 4: The Final Confirmation
Subject: Should we say goodbye, {first_name}?
{first_name},
I’ve sent you a couple emails recently, but haven’t heard back from you.
I respect your time and don’t want to clutter your inbox if our content isn’t valuable to you right now.
If you’d like to keep receiving our emails, just click here: [Stay Subscribed]
If not, no worries at all. You can unsubscribe using the link below, or simply ignore this email and we’ll remove you from our active list.
Thanks for the time you’ve been part of our community.
All the best,
[Your Name]
Each template works because it acknowledges the subscriber’s current state, provides clear value, and makes the next step obvious and easy.
Push Notification Message Best Practices
Push notifications have unique constraints and opportunities compared to email. With only 90-120 characters for your message body and 30-50 characters for your title, every word must count.
The most effective re-engagement push notifications create curiosity or urgency without being pushy. They should feel like a helpful reminder rather than aggressive marketing.
Effective Push Notification Examples:
Title: “We miss you!”
Message: “Check out what you’ve been missing – new content inside”
Title: “Quick question”
Message: “30-second survey = exclusive early access to our new tool”
Title: “Still interested?”
Message: “Tap to confirm you want to keep getting our updates”
Ineffective Push Notification Examples:
Title: “URGENT: Don’t lose access!”
Message: “Click now or be removed from our list forever!!!”
Title: “You’re missing out”
Message: “Everyone else is getting our content but you – click here”
Keep your push notification timing respectful. Send them during normal business hours (9 AM – 5 PM) in your audience’s time zone. Avoid weekends unless your audience specifically engages with weekend content.
Use action-oriented language but avoid aggressive urgency. Words like “discover,” “check out,” “see what’s new,” and “quick update” perform better than “urgent,” “limited time,” and “act now.”
Progressive Re-engagement: Escalating Your Messaging Strategy
Your re-engagement sequence should follow a logical escalation pattern. Each message should be slightly more direct than the previous one, while still maintaining a helpful, respectful tone.
Message 1 (Day 1): Focus on value and what they’re missing. Assume they’ve been busy and gently remind them of your content’s benefits.
Message 2 (Day 7): Offer something exclusive or ask for feedback. This message acknowledges they may have missed the first email and provides a stronger incentive to re-engage.
Message 3 (Day 14): Be direct about subscription confirmation. This final message makes it clear that continued non-engagement will result in reduced email frequency.
If someone re-engages at any point in your sequence, immediately move them to a “welcome back” workflow that delivers on whatever promise got them to re-engage. This reinforces their decision to stay subscribed and increases the likelihood of continued engagement.
For subscribers who don’t respond to any of your re-engagement attempts, consider these next steps:
- Move them to a quarterly newsletter list
- Reduce their email frequency to monthly instead of weekly
- Tag them for removal after 6 months of continued inactivity
- Keep them in your database but exclude them from regular marketing emails
Measuring and Optimizing Your Re-engagement Campaign Performance
Measuring your re-engagement campaign success requires tracking specific metrics that show both immediate response and long-term subscriber value. Unlike regular email campaigns, re-engagement campaigns should be evaluated on their ability to restore long-term subscriber engagement, not just immediate opens and clicks.
I recommend tracking performance over 90 days after your re-engagement campaign to get a complete picture of its effectiveness. Some subscribers may not engage immediately but become active again weeks later.
Key Metrics to Track in HubSpot
Here’s a comprehensive table of the most important re-engagement metrics, where to find them in HubSpot, and what benchmarks indicate good performance:
| Metric | Location in HubSpot | Good Performance | Great Performance |
|---|---|---|---|
| Campaign Open Rate | Reports > Email > Campaign Performance | 15-20% | 25%+ |
| Campaign Click Rate | Reports > Email > Campaign Performance | 2-4% | 5%+ |
| Workflow Completion Rate | Automation > Workflows > [Your Workflow] | 60-70% | 80%+ |
| Goal Achievement Rate | Automation > Workflows > Goal Performance | 8-12% | 15%+ |
| List Growth (Net) | Contacts > Lists > [Your List] Analytics | Positive growth | 2%+ monthly growth |
| Re-engagement to Purchase | Reports > Attribution > Revenue Attribution | Varies by industry | Track individual ROI |
| Long-term Engagement Rate | Custom Report (90-day window) | 10-15% | 20%+ |
| Unsubscribe Rate | Reports > Email > Campaign Performance | Under 2% | Under 1% |
The most critical metric is your Goal Achievement Rate – the percentage of inactive subscribers who successfully re-engage through your workflow. This directly measures your campaign’s primary objective.
To find detailed workflow performance, navigate to Automation » Workflows-engagement workflow name. The performance tab shows you exactly how many contacts entered each step and where they exited the workflow.
I also recommend tracking the “time to re-engagement” – how quickly re-engaged subscribers start opening regular emails again. Contacts who re-engage quickly (within 7 days) tend to remain more active long-term than those who take several weeks to respond.
Setting Up Custom Reports and Dashboards
Creating a dedicated re-engagement dashboard helps you monitor campaign performance without digging through multiple HubSpot sections. Navigate to Reports » Dashboards and click ‘Create dashboard’.
Name your dashboard “Email Re-engagement Performance” and add these essential reports:
Report 1: Re-engagement Workflow Funnel
- Report type: Funnel report
- Focus: Your re-engagement workflow steps
- Time period: Last 90 days
- This shows exactly where contacts drop out of your workflow
Report 2: Email Performance Comparison
- Report type: Email performance report
- Compare: Re-engagement emails vs. regular marketing emails
- Metrics: Open rate, click rate, unsubscribe rate
- This helps you understand if it is more or less effective than regular content
Report 3: List Health Over Time
- Report type: Contact analytics report
- Focus: Active vs. inactive subscriber trends
- Time period: Last 12 months
- This shows whether your overall list health is improving
Report 4: Revenue Attribution
- Report type: Revenue report
- Filter: Contacts who completed re-engagement workflow
- This tracks the financial impact of your re-engagement efforts
To create each report, click ‘Add report’ in your dashboard, select the report type, and configure the filters and date ranges. HubSpot’s report builder walks you through each step with clear options.
Set your dashboard to automatically refresh daily so your metrics stay current. You can also schedule weekly email summaries to be sent to key team members.
When to Sunset Unresponsive Subscribers
Deciding when to remove unresponsive subscribers permanently is one of the most challenging aspects of list management. Remove them too quickly and you lose potential future customers. Keep them too long, and they hurt your deliverability and inflate your costs.
I recommend this graduated approach based on engagement patterns:
After 90 days of inactivity: Move to re-engagement workflow
After 180 days of continued inactivity: Reduce email frequency to monthly
After 12 months of no engagement: Move to quarterly newsletter only
After 18 months of no engagement: Remove from active marketing (keep in database)
However, these timelines should be adjusted based on your business model. B2B companies with longer sales cycles might extend these periods, while e-commerce businesses might shorten them.
Before removing any subscribers, consider these legal and practical factors:
- GDPR compliance: If you have EU subscribers, you need clear legal basis for continued communication
- CAN-SPAM compliance: Ensure you’re following unsubscribe requirements and not emailing unresponsive contacts too frequently
- Business relationship: Existing customers should be treated differently than cold leads
- Data value: Some unresponsive contacts might still provide value for lookalike audience creation
When you do remove subscribers, export their data first. Contact information for unresponsive subscribers can still be valuable for creating lookalike audiences on social media platforms or for future reactivation campaigns.
Advanced Re-engagement Strategies and Troubleshooting
Once you’ve mastered basic re-engagement workflows, there are several advanced strategies that can significantly improve your success rates. These techniques address complex scenarios that power users and growing businesses often encounter.
Advanced re-engagement goes beyond simple email sequences to create sophisticated, behavior-driven campaigns that adapt to different subscriber types and engagement patterns.
Behavioral Triggers Beyond Email Engagement
While email opens and clicks are the most obvious engagement signals, your website and social media activity can provide much richer insights into subscriber intent and interest level.
Website Activity Triggers:
Set up workflows that trigger when inactive email subscribers visit specific pages on your website. Someone who hasn’t opened emails in 60 days but visits your pricing page is showing clear buying intent and should receive different messaging than someone who’s completely disengaged.
Navigate to Automation » Workflows and create a new workflow with the enrollment trigger ‘Page view’ combined with ‘List membership’ (your inactive subscriber list). This creates a highly targeted re-engagement campaign for visitors showing commercial intent.
Download and Content Engagement:
Track when inactive subscribers download resources, watch videos, or engage with your content through other channels. Create separate workflows for subscribers who are consuming your content but not engaging with emails – they may prefer different communication channels or email frequencies.
Social Media Engagement:
If you have HubSpot’s social media tools connected, create triggers based on social media engagement. Someone who stops opening emails but actively engages with your LinkedIn or Facebook content might respond better to social-first re-engagement strategies.
Purchase and Customer Behavior:
For e-commerce businesses, create advanced segments based on purchase history combined with email inactivity. A customer who hasn’t opened emails in 90 days but made a purchase 30 days ago needs a different approach than someone who’s been completely inactive for 6 months.
Common Workflow Issues and How to Fix Them
Even well-designed re-engagement workflows can encounter technical issues or performance problems. Here are the most common issues and their solutions:
Q: My workflow isn’t enrolling contacts even though they meet the criteria.
A: Check your enrollment settings and suppression criteria. The most common cause is conflicting suppression rules that exclude contacts you want to include. Also, verify that your list criteria are set correctly – contacts must be on your specified list when the workflow runs its daily enrollment check.
Q: Contacts are receiving duplicate emails from multiple workflows.
A: Add workflow membership suppression to prevent contacts from entering multiple re-engagement workflows simultaneously. Under your workflow settings, add ‘Currently in workflow’ suppression for any related workflows.
Q: My re-engagement emails have very low open rates compared to regular campaigns.
A: This is often caused by poor subject line strategy. Re-engagement emails need more personal, curiosity-driven subject lines than regular marketing emails. Also check if your re-engagement list includes very old inactive contacts – subscribers inactive for 12+ months will have much lower open rates regardless of your messaging.
Q: The workflow is completing but contacts aren’t actually re-engaging long-term.
A: This indicates a follow-up problem rather than a workflow issue. Create a “welcome back” workflow that delivers immediate value to newly re-engaged subscribers. Also review your regular email content strategy – if your regular emails aren’t engaging, re-engaged subscribers will quickly become inactive again.
Q: PushEngage integration isn’t working properly.
A: First, verify the integration connection in both HubSpot and PushEngage. Then check that your website visitors are successfully subscribing to push notifications – you can’t send push notifications to contacts who haven’t opted in on your website.
Q: My workflow performance varies significantly between different time periods.
A: This often indicates seasonal factors or list quality issues. Create separate workflows for different subscriber segments (new vs. old subscribers, different traffic sources, etc.) to identify which segments respond best to re-engagement efforts.
Scaling Your Re-engagement Strategy Across Multiple Lists
As your business grows, you may need to manage multiple brands, product lines, or customer segments with different re-engagement needs. Here’s how to create scalable, template-based workflows that maintain personalization while reducing management overhead.
Creating Workflow Templates:
Build your most successful re-engagement workflow as a master template. Use placeholder content and generic HubSpot properties that can be easily customized for different segments. Clone this workflow for each new segment and update the specific messaging, timing, and goals.
Segment-Specific Customization:
Different subscriber segments need different re-engagement approaches. B2B subscribers might respond better to industry-specific content offers, while B2C subscribers might prefer discount-based incentives. Create segment-specific email templates but use the same overall workflow structure.
Unified Reporting and Analysis:
Set up dashboard reports that aggregate performance across all your re-engagement workflows. This gives you overall program performance while still allowing drill-down analysis for specific segments. Create custom properties to tag subscribers with their re-engagement workflow source for easier reporting.
Cross-Segment Learning:
Regularly review performance across different workflows to identify messaging, timing, or incentive strategies that work well across segments. The most successful re-engagement techniques can often be adapted for other subscriber groups with minor modifications.
FAQ: Re-engaging Inactive Subscribers with HubSpot
How long should I wait before marking a subscriber as inactive?
The ideal inactivity period depends on your email frequency and industry, but I recommend 30-45 days for most businesses. If you send weekly emails, consider subscribers. For monthly emails, wait 60-90 days before starting re-engagement efforts. B2B companies with longer sales cycles can extend this to 90 days, while e-commerce businesses might start re-engagement after just inactivity.
Can I re-engage subscribers who haven’t opened emails in over a year?
Yes, but set realistic expectations for very old inactive subscribers. Contacts inactive for 12+ months typically have re-engagement rates of 2-5% compared to 15-25% for recently inactive subscribers. Focus on your most valuable long-term inactive contacts first, such as past customers or high-value leads. For subscribers inactive for over 18 months, consider moving them to a quarterly newsletter instead of aggressive re-engagement campaigns.
What’s the difference between re-engagement and win-back campaigns?
Re-engagement campaigns target email subscribers who have stopped opening or clicking your emails but are still subscribed. Win-back campaigns target customers who have stopped purchasing but may still engage with your emails. Re-engagement focuses on email activity metrics, while win-back campaigns focus on purchase behavior and customer lifecycle stages.
How do I avoid spam filters with re-engagement emails?
Use personal, conversational subject lines instead of promotional language like “URGENT” or “LIMITED TIME.” Send re-engagement emails from your regular sender address and domain to maintain consistency. Keep your email frequency reasonable – don’t send daily re-engagement emails to inactive subscribers. Most importantly, focus on providing genuine value rather than aggressive sales messaging.
Should I offer incentives in my re-engagement campaigns?
Incentives can be effective but use them strategically. Content-based incentives (exclusive guides, early access) tend to work better than discount-based incentives for long-term engagement. If you do offer discounts, make them meaningful (15% or more) and time-limited. Avoid training subscribers to only engage when you offer discounts by mixing incentive-based and value-based re-engagement messages.
How often can I send push notifications without annoying users?
For re-engagement campaigns, limit push notifications to 2-3 total messages spread over 2-3 weeks. Send them 2-3 days after your re-engagement emails as gentle follow-ups. Monitor your push notification unsubscribe rates – if they exceed 5% for re-engagement campaigns, reduce frequency or improve your messaging. Regular marketing push notifications should be limited to 1-2 per week maximum.
What if my re-engagement campaign has low response rates?
First, verify that your inactive subscriber criteria aren’t too broad – including subscribers who were never engaged will lower your response rates. Test different subject lines, sending times, and email content. Consider segmenting your inactive list by engagement history, signup source, or demographic data to create more targeted messaging. If response rates remain below 8%, focus on improving your regular email content to prevent subscribers from becoming inactive in the first place.
How do I handle GDPR compliance with re-engagement campaigns?
For EU subscribers, ensure you have a valid legal basis for continued communication – legitimate interest is usually appropriate for existing subscribers. Include clear unsubscribe options in every re-engagement email. Don’t automatically remove non-responding subscribers from your database; instead, reduce contact frequency or move them to a suppression list. Document your re-engagement process and retention periods for compliance auditing.
What to do After Setting Up Re-Engagement Campaigns in HubSpot?
Re-engaging inactive subscribers is one of the most cost-effective ways to maximize your email marketing ROI and maintain a healthy, engaged subscriber base. By implementing the automated HubSpot workflows and multi-channel strategies covered in this guide, you can recover 15-25% of your inactive subscribers while improving your overall email deliverability.
👉 Explore the integration and get started here: https://www.pushengage.com/hubspot-integration/
The key to successful re-engagement lies in understanding why subscribers become inactive and addressing those reasons with valuable, personalized messaging. Combined with PushEngage’s push notification capabilities, you create multiple touchpoints that reach subscribers when they’re most likely to re-engage with your content.
Remember that re-engagement is an ongoing process, not a one-time campaign. Regularly monitor your list health, test different messaging approaches, and refine based on performance data. With the systematic approach outlined in this tutorial, you’ll build a sustainable system that keeps your email list engaged and growing over time.
If you’re already on HubSpot and you’d like to start growing your business with multichannel marketing, you should really check out this integration.


