Are you looking for a way to send push notifications when your target audience is offline?
There’s good news and there’s bad news. And then some more good news!
Good news: You can send web push notifications to your subscribers even if they’re offline. They can still see your notifications when they come back online.
Bad news: Your subscribers can see ALL your push notifications when they come online. This includes any offers that may have expired. And this definitely includes multiple push notifications if you sent them multiple push notifications.
So, you CAN send offline web push notifications. But you’re going to either overwhelm your subscribers with too many notifications. Or, they’ll click on stuff that is no longer relevant.
Not cool!
More good news: There’s an easy way to fix this issue.
That’s right, you can actually send offline push notifications without being a pain in your subscribers’ necks. And in this article, we’ll show you how to do it.
Let’s dive in!
What Exactly Are Offline Push Notifications?
Offline push notifications aren’t a special type of campaign. It’s more of a smart way to manage your notifications so that you don’t overdo the notifications and annoy your subscribers. It’s also a great way to ensure that all your notifications get delivered.
The way this works is that you can send your subscribers a push notification anytime. You can schedule it in your or your users’ time zone or in your own time zone. And even if your subscribers aren’t online, PushEngage ensures they’ll receive it when their internet connection is restored.
By default, all PushEngage notifications stay offline until the subscriber can see them. PushEngage is the #1 push notification software in the world. So, we’ll use PushEngage to demonstrate everything in this article.
The biggest advantage of offline notifications is that you get incredible delivery rates. The average push notifications delivery rate is 55% with an average open rate of 15%.
Take a minute to compare those numbers with an email campaign where 1 out of 5 emails never makes it to your inbox.
So, we highly recommend that you get started with push notifications right away.
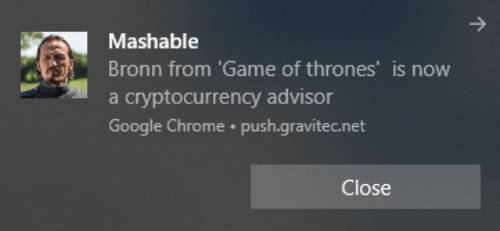
What Offline Notifications Look Like
Offline push notifications look like any other push notification:
That’s really not the issue.
The issue is that while offline notifications were designed to be sent in a way that doesn’t annoy your subscribers, this is usually what ends up happening:
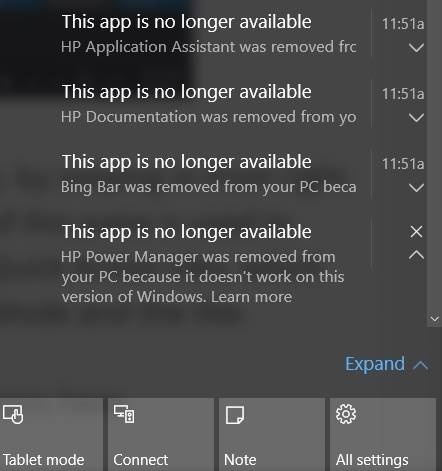
That’s way too many push notifications for anyone to see when they come online.
Why does this happen?
It’s simple: The sender forgot to create an expiry option.
Setting an expiry option ensures that your subscribers only see notifications that you WANT them to see. In other words, you can set a time limit after which your push notifications expire and they won’t be visible in the notifications tray even if it was delivered.
Let’s take a quick look at how you can send offline push notifications with an expiry limit.
How to Send Offline Push Notifications the Right Way
Now that we understand a little bit about how offline push notifications work and what they are, let’s jump into creating one the right way.
Step #1: Set Up Your PushEngage Account
Head over to the PushEngage home page and click the Get Started button:

You can select the free plan to try out PushEngage, or choose a paid plan if you’re serious about growing your business. The paid plans come with more campaign options and the ability to build even bigger subscriber lists.
Once you’ve signed up for an account, head over to the PushEngage dashboard and go to Settings » Site Settings » Installation Settings:
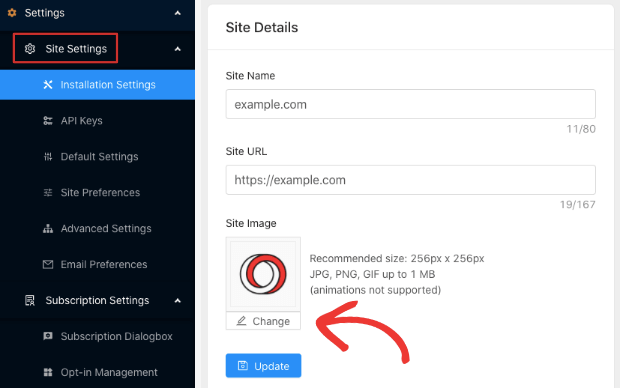
This is where you configure your site details and branding. Go ahead and set a logo and site URL for your push notifications. You should do this right now so that you can test your push notifications properly.
Step #2: Create a New Push Notification
Head over to your PushEngage dashboard and go to Notifications » Create » New Notification:
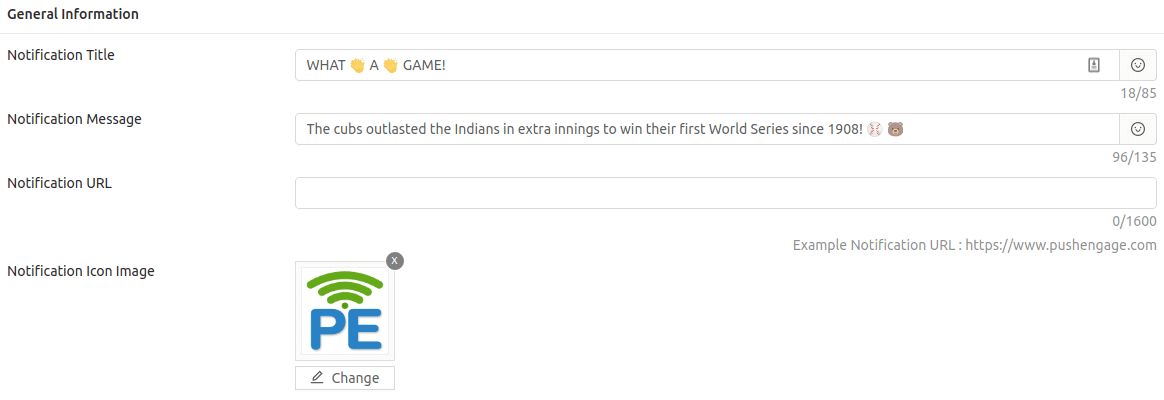
As you can see, that’s where you draft the title and text for your notification and you can also use emojis in your push notifications.
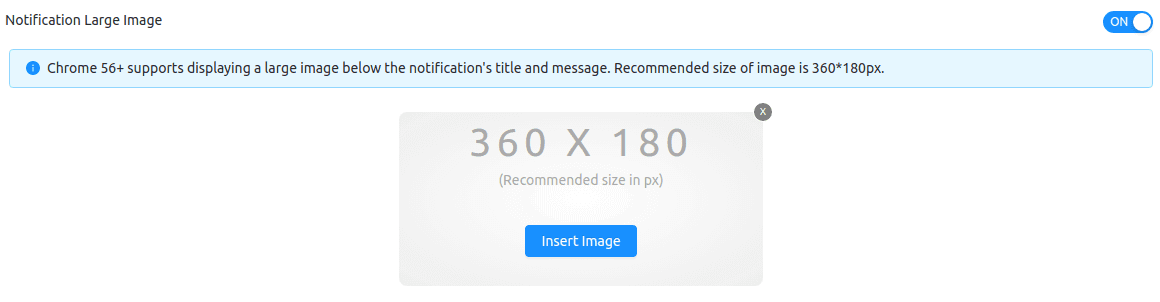
Next, head over to the Notification Large Image and add an image here:
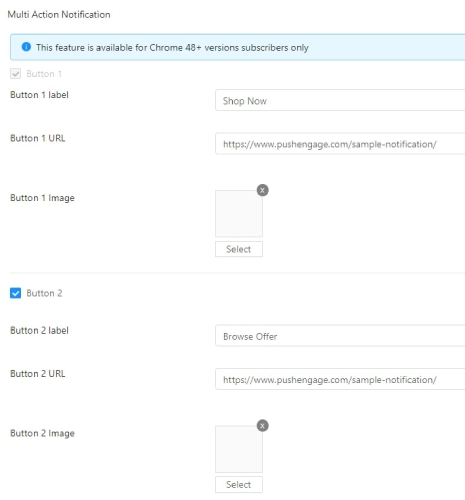
You can also add a couple of buttons in the Multi-Action Notification section:
Then, you’ll want to scroll further down and schedule your push notification:
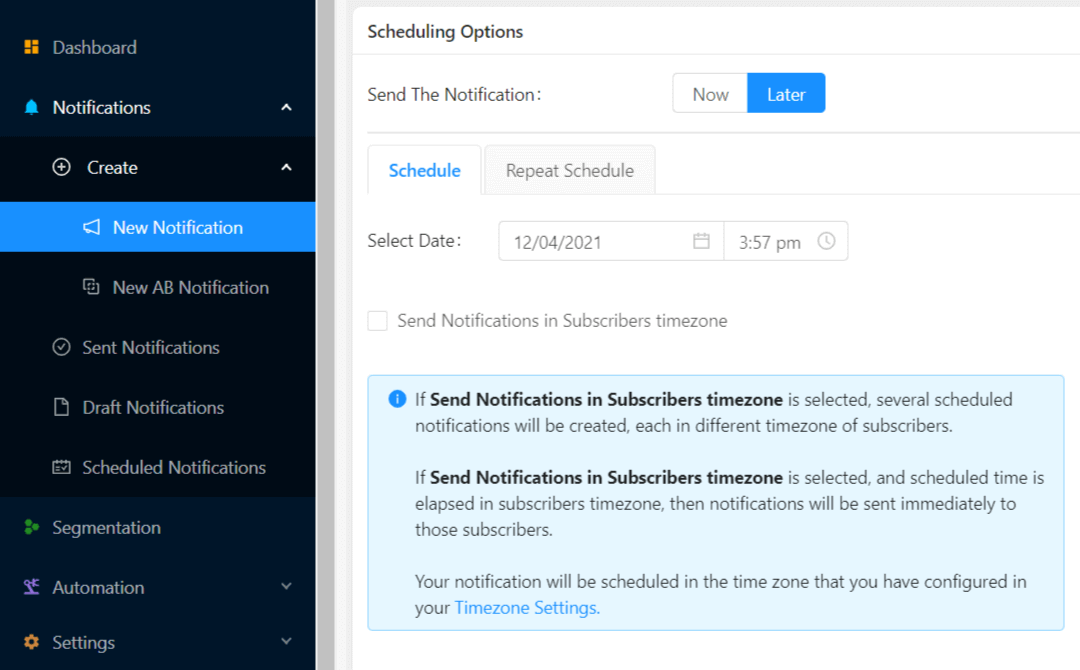
When you create a new notification, head to the Scheduling Options section and click on the checkbox that says Send Notifications in Subscriber Timezone if you want to send the notification at a time when you know they’ll be online.
But hey, no worries even they’re not online! Offline push notifications, remember?
Speaking of which, let’s set an expiry limit on your push notification and you’re all set.
Step #3: Set a Notification Duration
In the same view, go to Notification Duration:
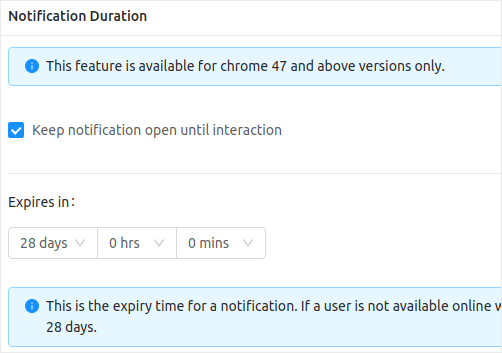
And set a time limit after which your push notification expires. The default value for this is 28 days, but that’s not recommended, especially if you’re promoting a limited-time offer.
But you’re actually all done now! You just created an offline push notification with an expiry limit.
Wrapping Up
That’s all for this one, folks.
If you’re new to push notifications, you should check out some creative push notifications for inspiration and start sending your own push notifications. Push notifications are extremely affordable and they enable you to send extremely powerful marketing campaigns.
And if you’re getting started with push notifications, there’s no better software to use than PushEngage. PushEngage is the #1 push notification software in the world. So, if you haven’t already, get started with PushEngage today!


