
Looking for a tutorial on how to take a cloud WordPress backup?
Backups can save your business from crashing and dying many times over. Sometimes you wreck your site, sometimes hackers do it for you! But if you take cloud backups, your entire business is safe and secure. And, you can get back online super fast and easy.
The only question is… which WordPress backup plugin do you use? Can it take backups to your favorite cloud service? What’s the right way to take cloud backups?
In this article, we’ll show you how to take a cloud WordPress backup. And we’ll do it using a simple plugin so that you don’t have to get into coding yourself.
Let’s dive in.
Why Take a Cloud WordPress Backup?
Ever thought about what happens if your website suddenly crashes or gets hacked? Scary, right? That’s where a cloud WordPress backup can come in as your digital safety net.
PushEngage is the #1 push notifications plugin in the world. Get it for free!
Let’s dive into why taking a cloud backup of your WordPress site is a no-brainer.
1. Always Have a Plan B: Imagine you’re working on your site and poof – something goes wrong. With a cloud backup, it’s like having a ‘undo’ button for your entire site. You can restore your site back to normal in no time.
2. Keep Your Data Safe from Threats: The internet can be a wild place with hackers lurking around. Cloud backups keep a copy of your site safe and sound, away from the reach of these online baddies.
3. Updates Gone Wrong? No Problem!: We’ve all been there – updating a plugin or theme and suddenly your site looks like a Picasso painting. Cloud backups allow you to revert back to the version before the update chaos.
4. Easy Peasy Access: The best part about cloud backups? You can access them from anywhere, anytime. Whether you’re sipping a latte in a café or chilling at the beach, your site’s backup is just a few clicks away.
5. Automatic and Hassle-Free: Set it and forget it! Most cloud backup services offer automated options. This means your site gets backed up regularly without you having to lift a finger.
6. Space Saver: Storing backups on your own server can eat up space. Cloud backups are like having an extra garage for your digital stuff, keeping your server roomy and speedy.
In short, taking a cloud backup for your WordPress site is like having a digital safety net. It’s about peace of mind, knowing that no matter what happens, your online presence is secure and just a restore away. Better safe than sorry, right?
How to Create a Cloud WordPress Backup
The simplest way to create a cloud WordPress backup is to use a simple and easy WordPress backup plugin. We recommend using Duplicator Pro to do it:
Duplicator Pro is the best WordPress backup and migration plugin in the market.
With Duplicator, you can:
- Create secure, scheduled backups
- Save your backups to a cloud storage of your choice
- Restore your site with one click
- Migrate sites as large as 100 GB seamlessly
- Protect and archive your backups with AES-256 encryption
But that’s not all. Duplicator offers complete WooCommerce backups so that your online store is well protected.
And one of the most amazing features we’ve ever seen in any backup plugin is the site templates feature.
If you’re likely to create multiple sites with the same plugins, themes, and functions, you can use Duplicator to create a site template and launch new websites instantly.
Since it’s part of the Awesome Motive suite of plugins, it’s tested to work seamlessly with the best WordPress plugins in the world.
Step #1: Install and Activate the Duplicator Pro Plugin
Once you buy Duplicator Pro from the website, go ahead and download the plugin from your account page. Then, install it like any WordPress plugin. If you’re never done it before, check out this tutorial on how to install a WordPress plugin.
Before you start using Duplicator, you’ll need to activate your license key. To do this, go to Settings » Licensing:
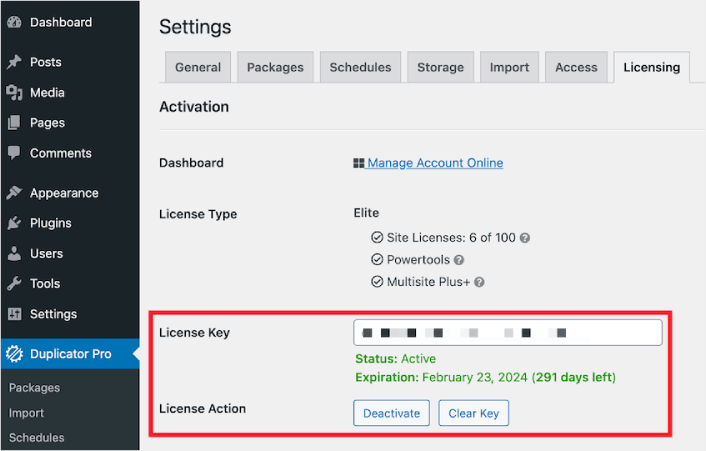
Paste the license key you received with your purchase. Finally, hit Activate.
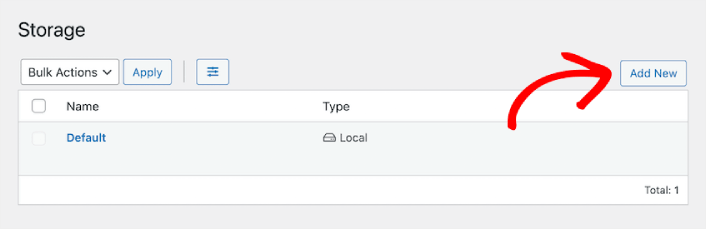
Step #2: Connect a Cloud Service
Head over to Duplicator Pro » Storage. Here, you’ll see that the default backup location is your local server. To set up cloud WordPress backups, click on Add New:
Here, you can select the cloud service you want:
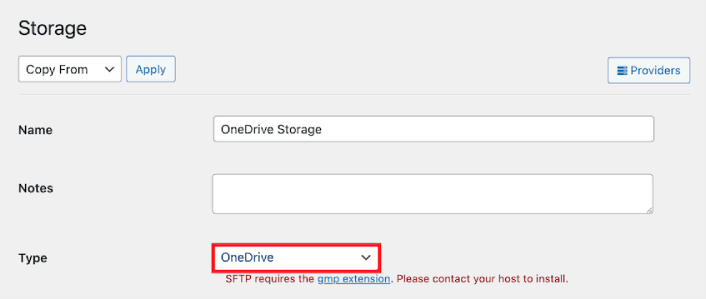
You can choose from a whole list of cloud services to store your backups including:
- Google Drive
- Dropbox
- OneDrive
- Amazon S3
- Backblaze B2
- Wasabi
- Google Cloud
- DreamObjects
- Vultr
- DigitalOcean Spaces
- Cloudflare R2
- Local server
- FTP
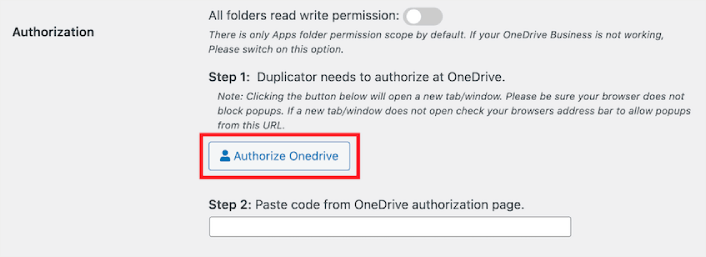
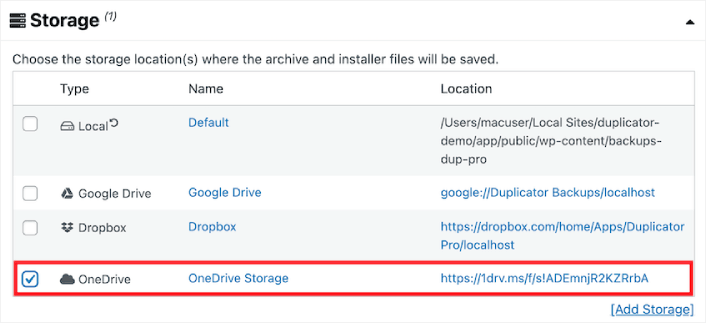
For this tutorial, we’re using Microsoft OneDrive to take backups. After you select your provider, you’ll need to authorize Duplicator to save backups onto your cloud account. Scroll down to the Authorization section and click on Connect to OneDrive (or the different service you chose):

Next, click on Authorize OneDrive to finish setting up the connection:
Finally, allow access on your third-party service:
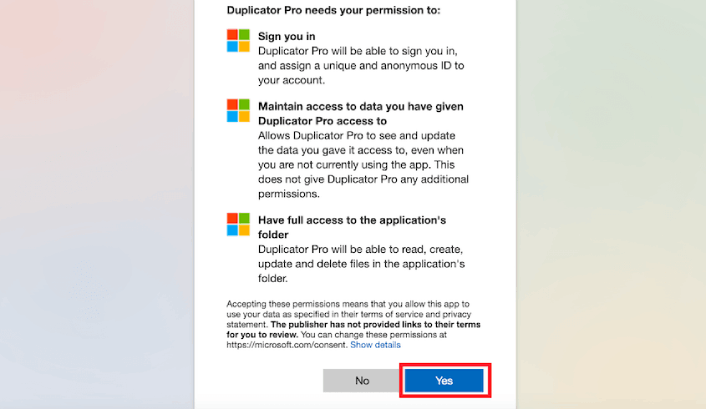
You’ll get an authorization code from your cloud service. All you need to do is paste the code into the Duplicator Pro plugin.
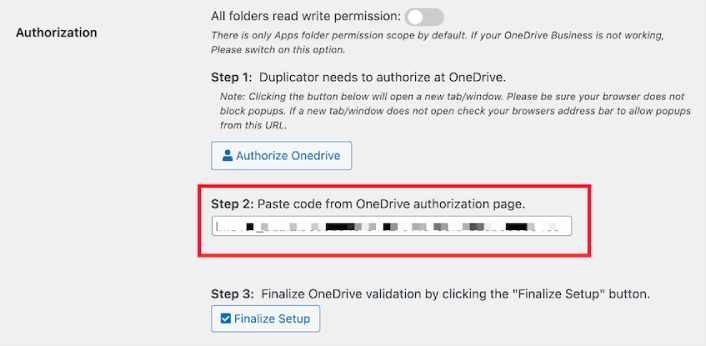
When you’re done, click on Finalize Setup.
Step #3: Create a Cloud WordPress Backup
With Duplicator, you’re basically making a neat package of your site. It grabs all your themes, plugins, the core WordPress files, and even your database tables, and wraps them up in one tidy zip file. Think of it as putting all your website’s treasures in a treasure chest.
Once your site’s all packed up, Duplicator takes over and sends this package straight to the cloud. It’s like magic! You don’t have to do a thing – Duplicator does the heavy lifting for you.
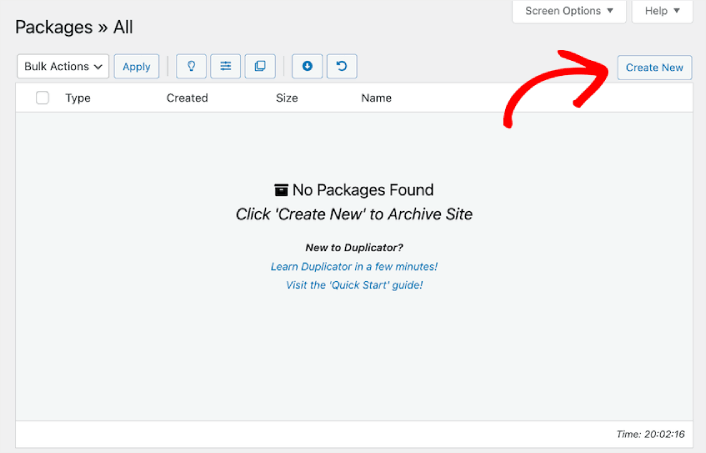
To get started, head over to Duplicator Pro » Packages » Create New:
Go ahead and give your backup package a name.
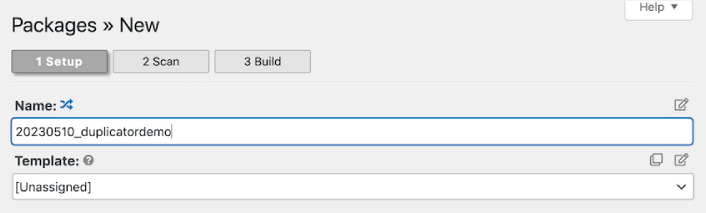
And then, select your cloud service for storage.
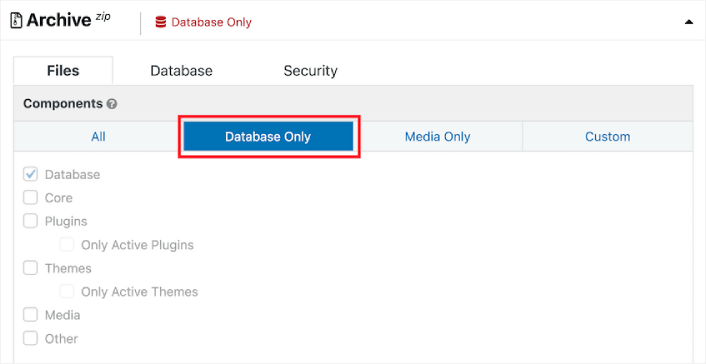
You can take different kinds of backups using Duplicator such as:
- Media only backup
- Database backup
- Full backup
And even a custom backup to backup specific parts of your site.
Next, Duplicator will scan your entire site. You’ll see all Good notices if your site can be backed up successfully:
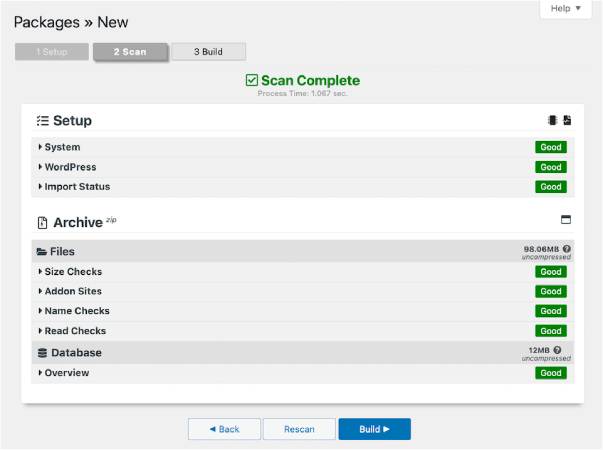
When it’s done, hit Build.
What to do After You Take a Cloud WordPress Backup
That’s all for this one, folks!
Now that you know how to take a cloud WordPress backup, it’s time to get back to the business end of your website. Backups are meant to buy you peace of mind. So, you should get back to optimizing your site to increase conversions.
And if you’re looking for a simple, affordable way to grow your repeat traffic and conversions, we recommend using push notifications. Push notifications can help you bring in more repeat traffic and site engagement. You can also create automated push notification campaigns that generate sales.
Not convinced? Check out these resources:
- 7 Smart Strategies to Boost Customer Engagement
- Are Push Notifications Effective? 7 Stats + 3 Expert Tips
- How to Set Up Abandoned Cart Push Notifications (Easy Tutorial)
- How to Add a Web Notifications WordPress Plugin to Your Site
We recommend using PushEngage to create your push notification campaigns. PushEngage is the #1 push notification software in the world. So, if you haven’t already, get started with PushEngage today!


