
Looking for a way to check your WordPress analytics without having to learn complicated ?
In this article, we’re going to show you how to set up Google Analytics for your WordPress site the right way:
- Even if… you’ve never done it before
- Even if… you’ve tried to set up Google Analytics and failed at it
- Even if… you’ve installed Google Analytics, but the reports were too complicated to use
And we’ll help you do it in a way that works every time. So, if you’re running multiple WordPress sites, this article is going to save you a LOT of time.
Let’s dive right in.
Why You Need WordPress Analytics
WordPress allows you to create pretty much any type of website you like.
And if you’re running a website that serves as more than just a hobby, you’ll want to grow your traffic, engagement, and sales as quickly as possible. That’s where Google Analytics can help.
Google Analytics is the best way to get powerful insights on your site. You can get epic WordPress analytics by simply integrating Google Analytics into your WordPress site. The metrics you’ll want to focus on are going to be different for different sites depending on how the site makes you money.
If you’re a blogger or an affiliate marketer, you’ll want to know:
- How are people discovering your site?
- What kind of content do they like the most?
- Which affiliate offers get the most clicks?
And if you’re running a business site that generates leads for your service, you’ll want to know:
- How do people learn about your business?
- What percentage of your traffic converts into leads by filling up an enquiry form?
- Which of your services are most popular?
Of course, for an eCommerce site, the key metrics will also change slightly.
In any case, you’ll want to set up Google Analytics for your WordPress site. To get WordPress analytics to your site and track your visitors’ behavior, you need to install the tracking code.
Let’s check out how to set up WordPress analytics the right way.
How to Set Up Google Analytics to See WordPress Analytics
Before you can get WordPress analytics, you’ll need to set up Google Analytics first and add the Google Analytics tracking code to your site. Let’s break the whole process down into simple steps.
Step #1: Sign in to Your Google Analytics Account
To get started, you’ll need to open the Google Analytics website and click the Start for free button in the top right corner of the page:

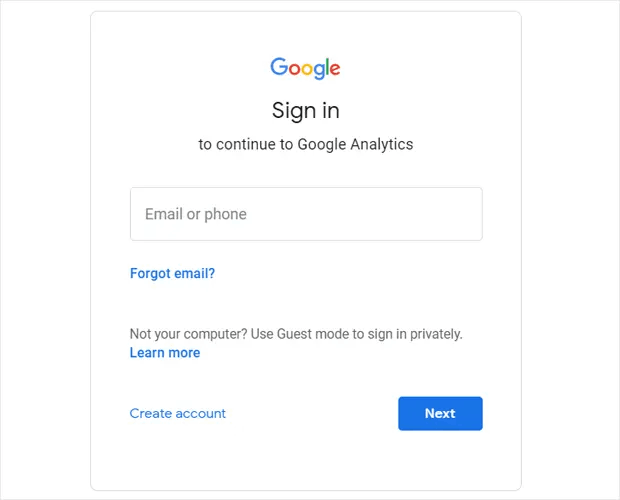
And then, sign in with your Google Account:
Step #2: Set up Your Google Analytics Account
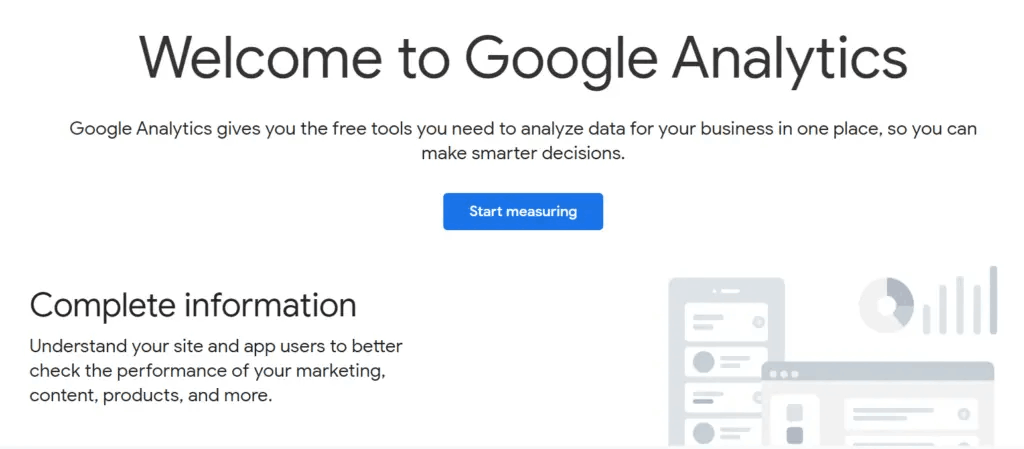
Once you sign in using your Google account, you’ll see an intermediate page that helps you create your Google Analytics account. You only see this for the first time you sign in to your Google Analytics account. Click on Start Measuring:
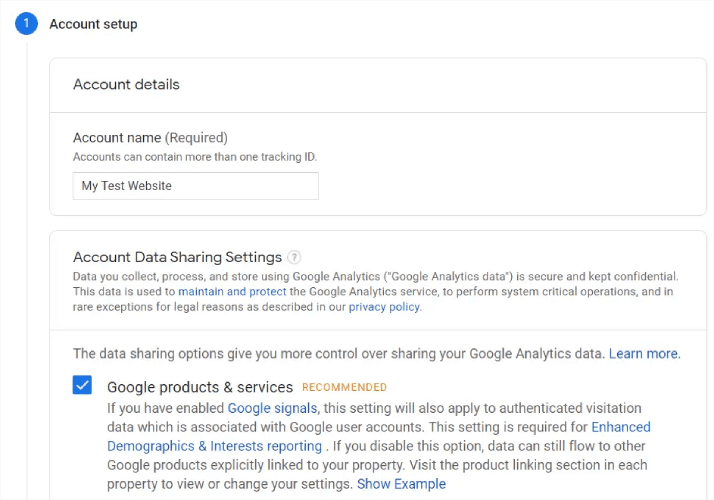
Fill in your basic account details and make sure to share your data by clicking on the checkboxes before you hit Next:
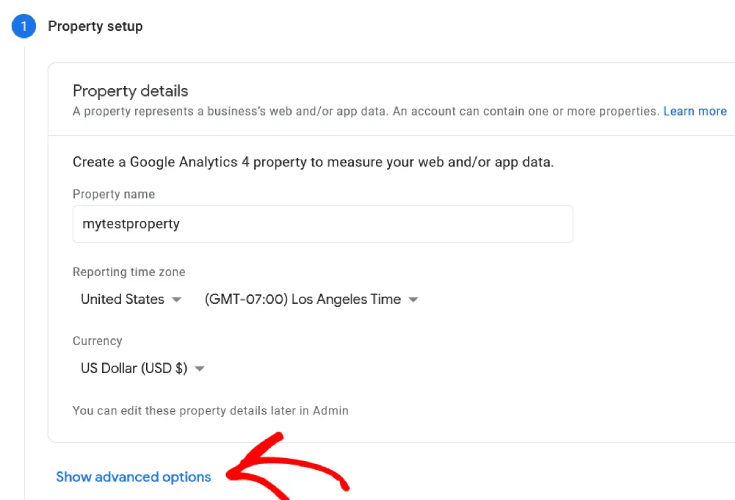
Next, you’ll have to fill in your property details. This usually includes a site or app name, a reporting time zone, and your preferred currency. When you’re done, click on Advanced Settings:
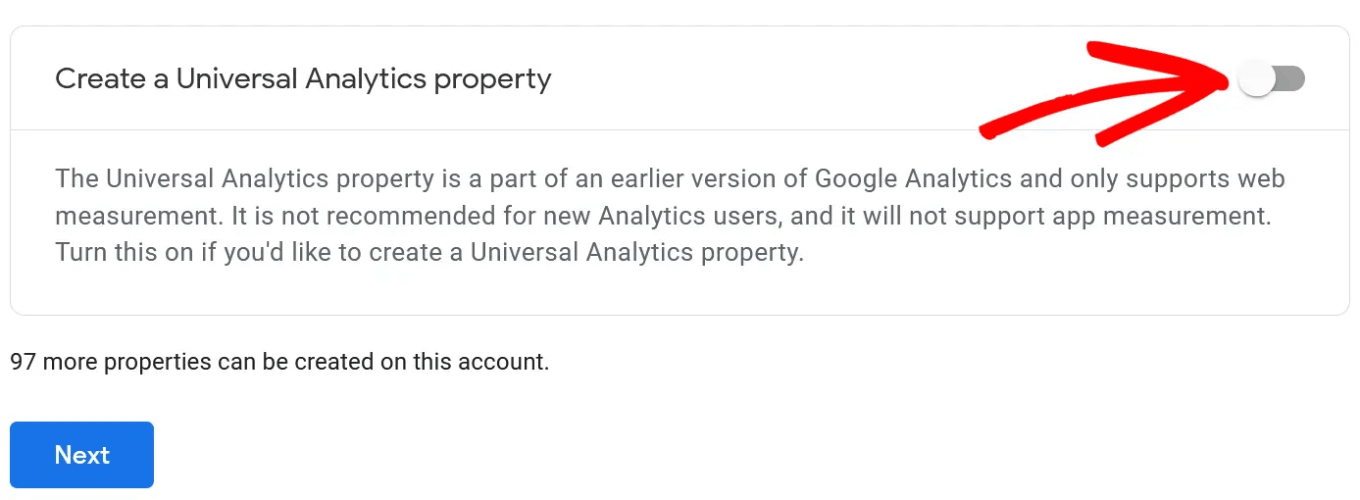
And enable the Create a Universal Analytics property option:
Next, enter the URL of your website and make sure you select the Create a Universal Analytics property only option.
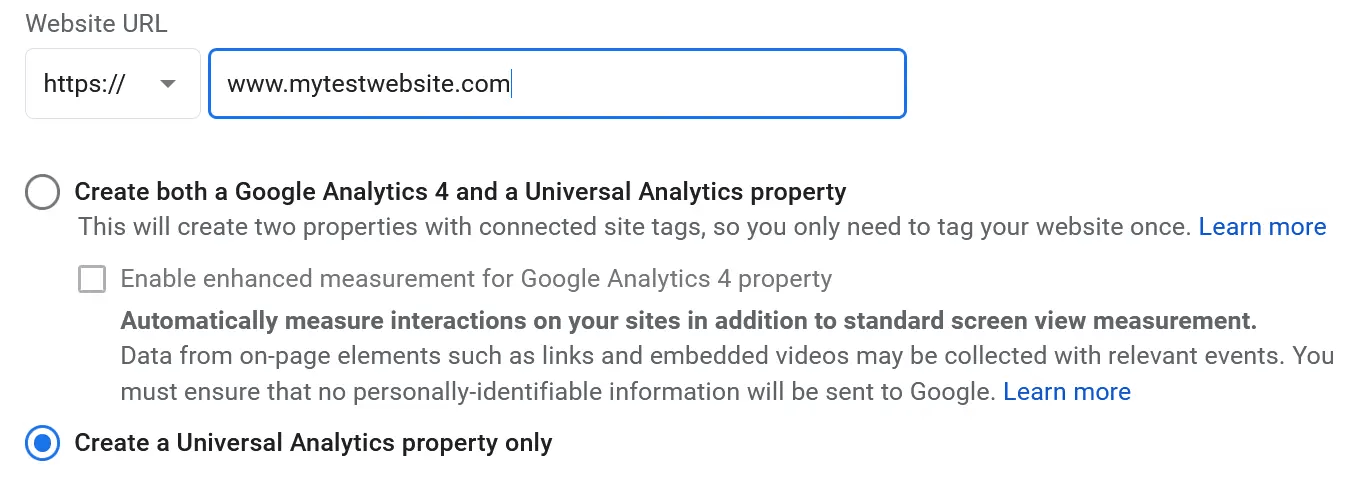
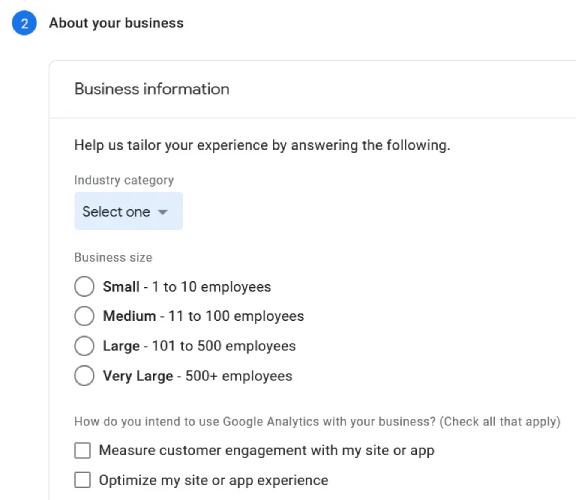
Enabling Universal Analytics will ensure that you’re able to use other tracking platforms and measure your ad performance accurately. Next, you’ll need to specify your business details:
Once that’s done, you’re almost ready to start using Google Analytics. Since Google Analytics accepts and collects user data through your website, you’ll need to accept their GDPR compliance agreement and the Terms of Service.
And that’s it! You’re done. If you followed every step exactly, you’ll be redirected to a page with your Google Analytics tracking code and ID:
Now, you’re ready to install the tracking code on your website and start getting WordPress analytics.
How to Use Google Analytics to Get WordPress Analytics
To install WordPress analytics dashboard, you’ll have to copy your tracking code and paste it into your website’s HTML <head> section. Or, you can simply use a Google Analytics plugin to get it done without using any code.
If you don’t have any experience with WordPress development, we highly recommend using one of the best Google Analytics plugins instead of trying to set everything up manually.
Step #1: Select a WordPress Analytics Plugin
MonsterInsights is the #1 WordPress analytics plugin. We’ve used the plugin ourselves and we highly recommend using MonsterInsights to get WordPress analytics.

Using MonsterInsights makes it super easy to install Google Analytics to a WordPress site. Plus, you get a bunch of cool features that allow you to get powerful insights right inside your WordPress dashboard.
Here’s a quick look at what MonsterInsights can do for you:
- Google Analytics Tracking Without Any Code
- Compatible with Any Version of Google Analytics
- Reports to Find Top-Performing Content
- Detialed Audience Insights
- eCommerce Analytics
- Form Sign Up Analytics
- Additional Insights from Custom Dimensions
- Affiliate Link Click Tracking
- GDPR Compliance
- Premium Integrations
If you need to take a close look at the features, you should really check out our review of MonsterInsights.
Step #2: Install the MonsterInsights Plugin
Go ahead and install and activate the WordPress plugin now. If you’re not sure how to do that, check out this guide on installing WordPress plugins. Once that’s done, start using the setup wizard to get started.
Start by selecting your business category:

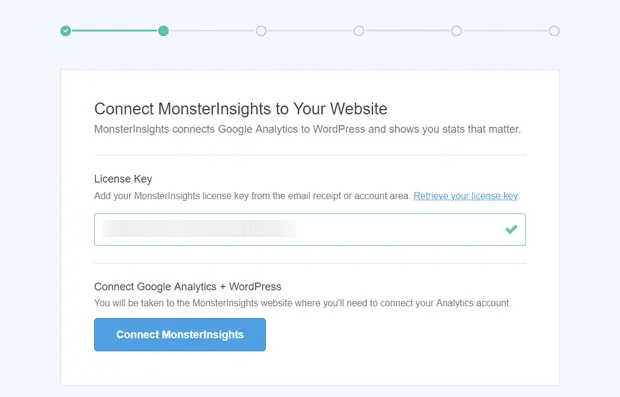
Then, connect your MonsterInsights account to your website by entering your license key:
Step #3: Connect Your Google Analytics Account with MonsterInsights
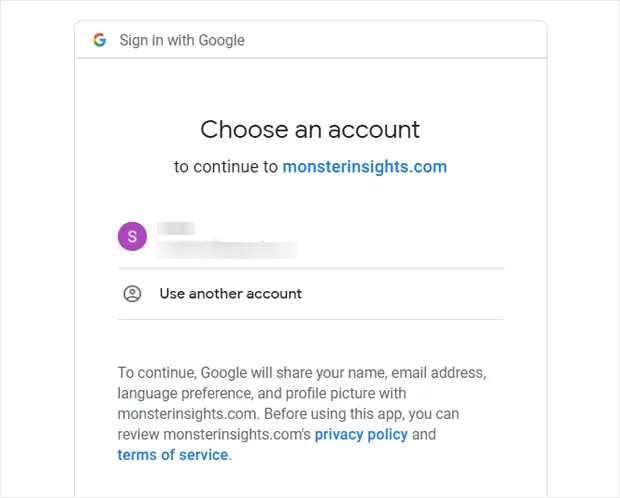
After activating the plugin, you’ll see an option to connect your Google Analytics with your MonsterInsights account. Sign in with the right Google account to continue authentication:
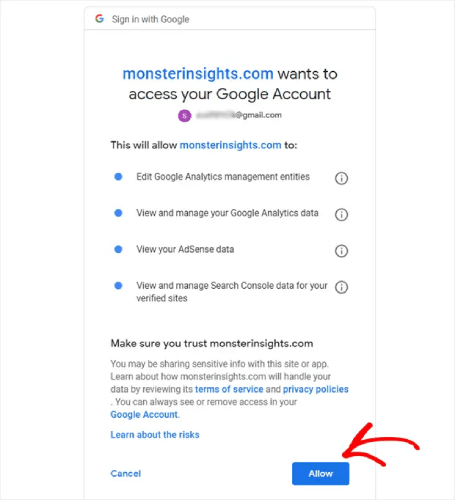
MonsterInsights will ask for the right permissions to access your Google Analytics account. Click on Allow:
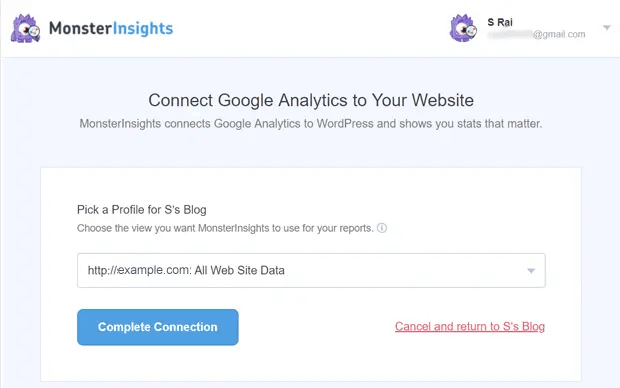
If all went well, you’ll be able to pick the Google Analytics property to connect to MonsterInsights. Select the right one and hit Complete Connection:
Step #4: Configure the MonsterInsights Plugin Settings
By now, MonsterInsights will have the right access to your Google Analytics account and will start recommending the optimal settings for you.
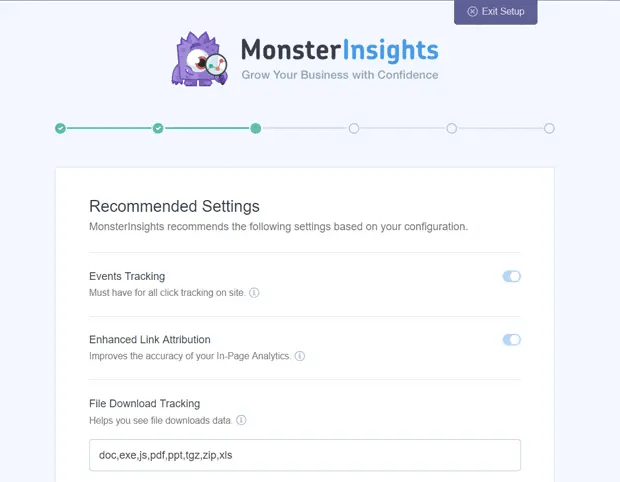
Mostly, these will include:
- Events tracking
- Enhanced Link Attribution
- File Download Tracking
- Affiliate Link Tracking
- Access to MonsterInsights’s Reports
- Automatic Plugin Updates
Once you review and configure these settings, MosnterInsights will recommend that you install some addons as well:
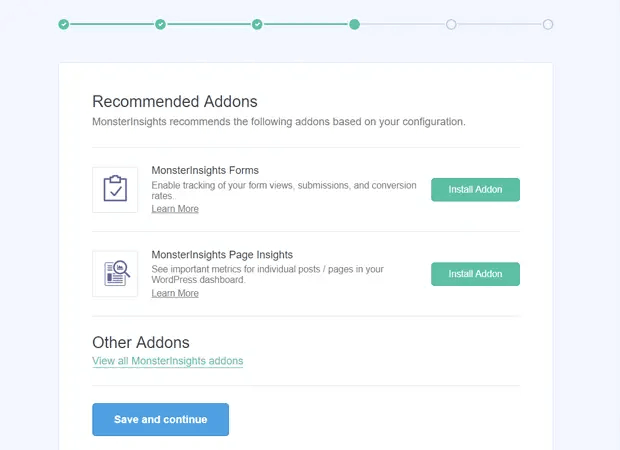
And after you click on Save and continue, MonsterInsights will recommend installing WPForms:
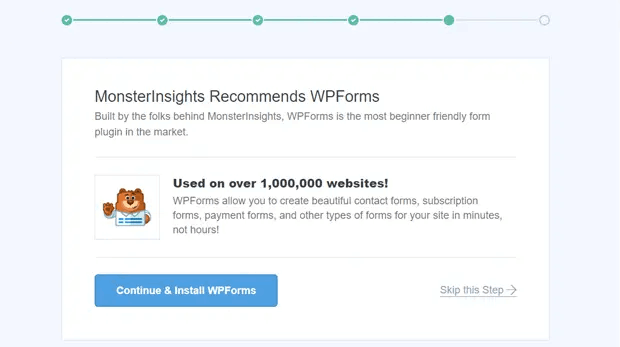
WPForms is the #1 WordPress forms plugin. It can help you create powerful forms for your WordPress site no matter what kind of business you’re running. We recommend using WPForms too.
But getting back to WordPress analytics, you’re all done with the setup. Click Finish Setup & Exit Wizard:

And in 24 hours, Google Analytics will start collecting your site’s traffic data and you’ll be able to see it in your reports.
How to See WordPress Analytics Reports in Your Dashboard
As we mentioned before, MonsterInsights allows you to see your Google Analytics reports right inside your WordPress dashboard:
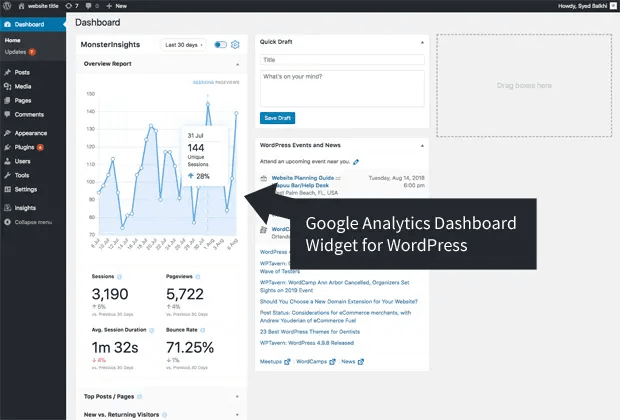
To view the full reports, you’ll need to visit Insights » Reports from your WordPress dashboard. There, you’ll see the Overview Report:
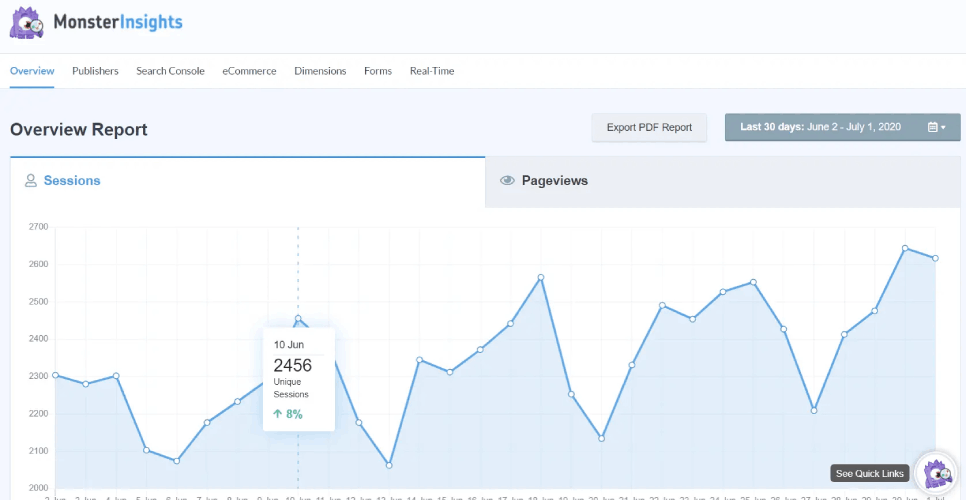
Of course, you can view the other reports as well if you have them set up. If not, check out this article on how to create and use custom Google Analytics reports.
Some of the metrics you can see from your dashboard include:
- Top landing pages: What’s the most popular content on your site?
- Link and button click tracking: Which links and buttons are getting the most clicks?
- Search console report: What search terms people are using when they find your content?
- Forms submission report: Which forms get the most impressions and conversions?
And so much more!
What to do After You Get WordPress Analytics for Your Site
That’s all for this one, folks!
If you just got started with WordPress analytics, you’ve taken the first step to growing your site’s traffic, engagement, and sales using data-driven insights. Next, you’ll want to figure out ways to increase those metrics on your site. A good place to start is to use push notifications.
Push notifications can serve as really powerful marketing tools for any type of business.
Don’t believe us? Check out these amazing resources:
- How to Install Web Notifications in WordPress
- How to Set Up WordPress Form Tracking in Google Analytics
- How to Notify Subscribers of New WordPress Posts
- Best WordPress Push Notification Plugins (Compared)
- How To Use Push Notifications On WordPress Without A Plugin
We recommend using PushEngage for your push notification campaigns. PushEngage is the #1 push notification software in the world. You can create automated push notification campaigns that make you money while you sleep. And all that from a simple, intuitive dashboard.
So, if you haven’t already, get started with PushEngage today!


