In one of our case studies, we have mentioned segmentation has helped to increase the Click Rates by 200%+ and is an essential part of push notifications strategy for any site type.
So, with PushEngage you can segment your subscribers in 6 different ways using the PushEngage Dashboard. Earlier one would need to add 2 extra lines of code to segment the subscribers on page visit but with our recent update you can do it using the PushEngage dashboard and with a single click.
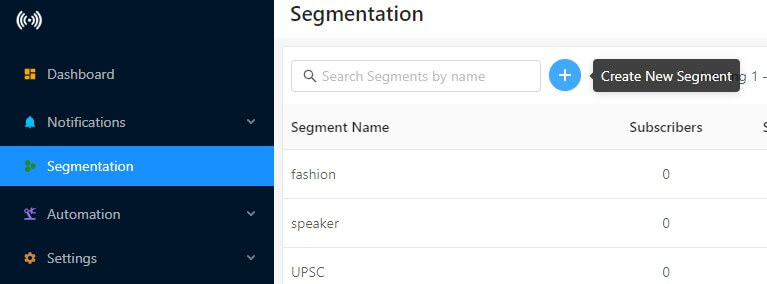
How To Segments Users on Page Visit Automatically?
Step 1 – Log in to your PushEngage Dashboard and navigate to Segmentation
Step 2 – Click on the “+” sign.
Step 3 – You will see the option to create segments.
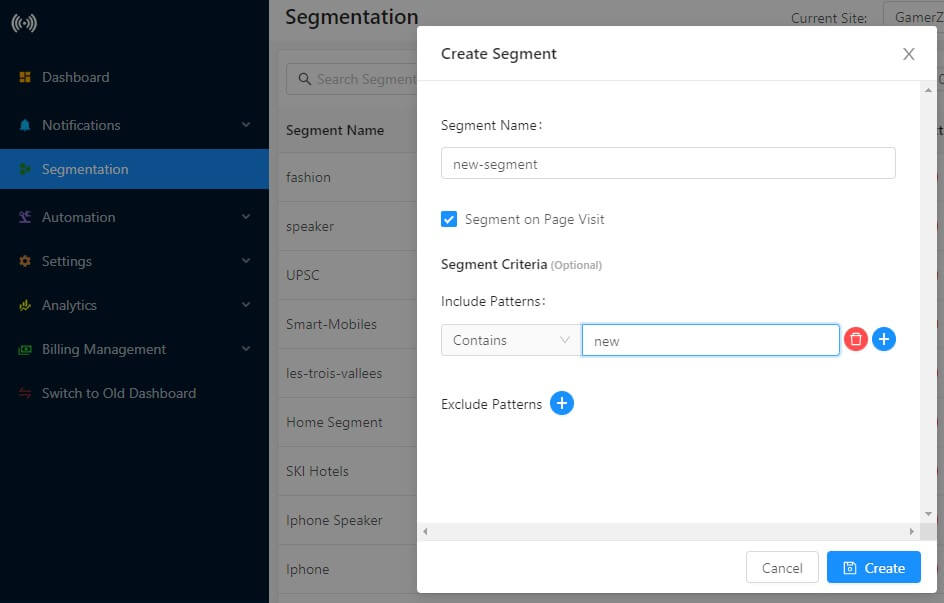
- Enter the name of the segment
- Check the box that says “Segment on Page Visit”
- Click the “+” sign on “Include Pattern”. It’s best to select “Contains” from the drop-down
- Enter the pattern or text which matches the URL
Step 4 – Once all done, click on “Create”. Segment creation is done.
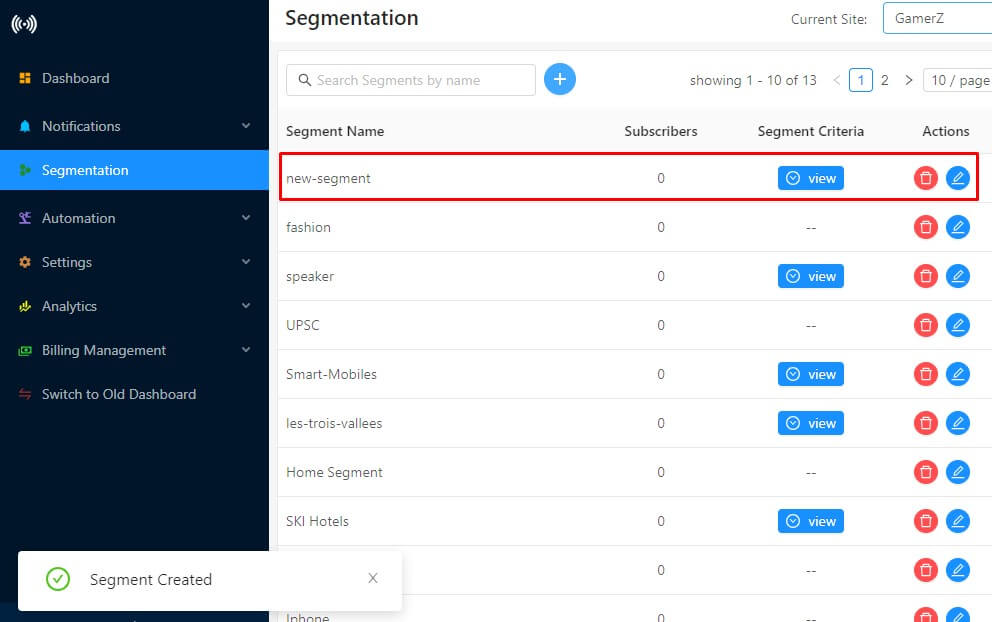
That would be it and the users will get added tot he relevant segment as soon as they visit the page.
In this way, you can segment your subscribers’ on-page visits in less than 2 minutes. This feature is available from Business Plan onwards. If you wish to take a free trial you can either contact your Account Manager or let us know by sending an email at [email protected].


very helpful information.