
Looking for a quick and easy way to create a thank you page in WordPress?
Let’s say that you have a landing page that converts visitors into leads or paying customers on repeat. Is that really the end of the customer lifecycle? No! There’s always other products and services that you can upsell. You could even ask customers who just converted to follow you on social media.
But how do you do that? You need a thank you page on your WordPress site.
So, do you need to learn how to code? Do you need an expensive designer to create a thank you page for you?
Fortunately, there’s an easy way to create a thank you page in WordPress. In this article, we’re going to help you launch a thank you page in less than 15 minutes.
Are you ready? Let’s dive in.
What’s a Thank You Page and Why Should You Care?
A thank you page is meant to thank visitors for buying a product or a service from you or even for becoming an email subscriber. In simple words, you want to reward your visitors for taking action.
Now, there’s a LOT you can do on a thank you page including:
- Showcase an onboarding series
- Give users a welcome gift or a coupon for future purchases
- Ask users to follow you on social media
- Upsell or cross-sell other products and services
And so much more!
But before you get started, remember to have a very clear and specific goal for your thank you page. Just because you can do a lot of things doesn’t mean that you should do them all on one page. More often than not, if you give your visitors too many things to click on, they won’t click on anything at all.
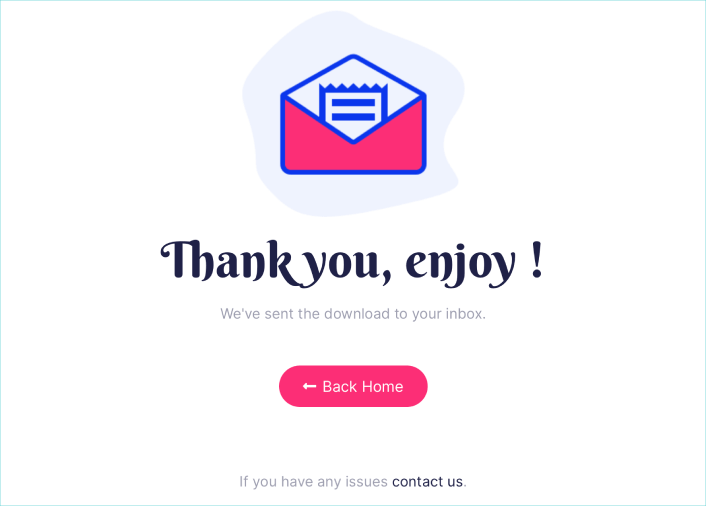
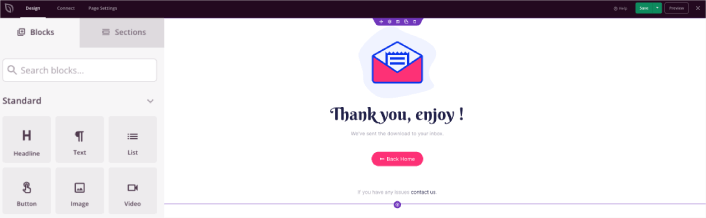
Here’s a sneak peek at the WordPress thank you page we’ll be creating in our tutorial.
Remember, these are only the most basic parts of any successful landing page. For your page, you can add a lot of other sections and create custom offers to increase your conversions.
How to Create a Thank You Page in WordPress
Now that you know what to create, it’s time to launch your thank you page in WordPress. We highly recommend using SeedProd to create your landing pages.

SeedProd is the best WordPress landing page builder. It’s perfect for businesses, bloggers, and website owners looking to build high-converting landing pages without any development skills.
With SeedPreed, you get pre-built templates for high-converting landing pages that you can publish instantly. This includes templates for:
- Sales pages
- Coming soon pages
- 404 pages
- Maintenance pages
- Squeeze pages
- Login pages
- Thank you pages
- Webinar pages
- Video pages
And lots more!
Step #1: Install and Activate SeedProd
First, you’ll want to get the SeedProd Pro plugin and activate it. If you’re not sure how to do that, check out this article on how to install a WordPress plugin. Then, go to SeedProd » Settings on your WordPress dashboard and activate the Pro version:

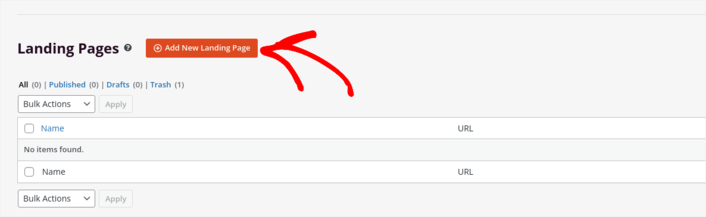
Next, head to SeedProd » Pages for an overview of SeedProd’s landing page dashboard. This is where you can see the different types of landing pages you can create using SeedProd:

Keep in mind that these are all special pages with pre-built functionality and design templates. For a sales landing page, you don’t want to use ANY of these special landing pages. Instead, you’re going to create a custom landing page.
Scroll further down and click the Add New Landing Page button to get started:
Step #2: Create a New Thank You Page in WordPress
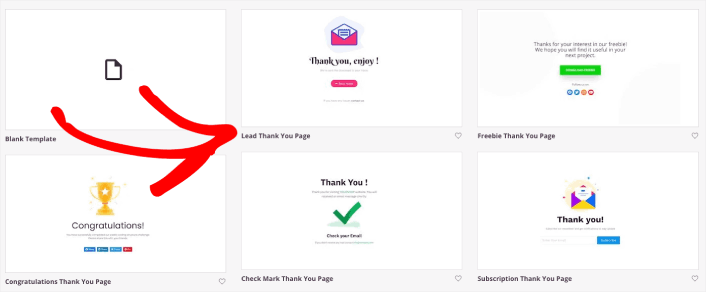
After clicking the Add New Landing Page button, you’ll see SeedProd’s library of landing page templates. These are professionally designed landing page templates that are completely responsive.
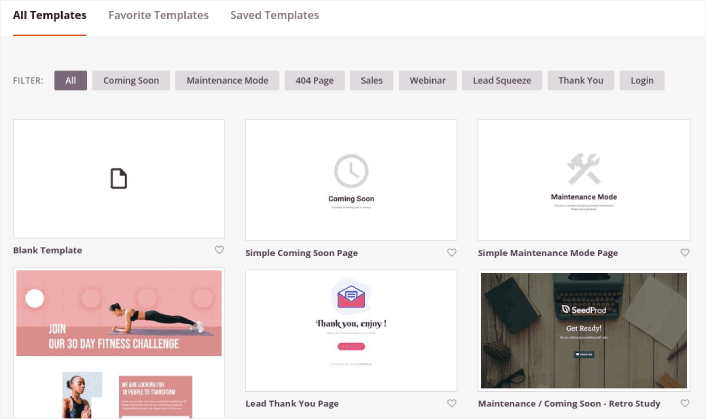
Next, you can select one of these templates to help you get started. Remember, the template is just a starting point. you can customize everything about the page later on. For now, find a template that you think will fit. When the templates page opens, you can click Sales to filter the list:
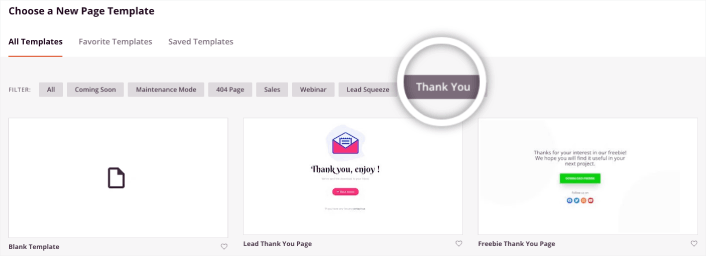
For this guide, we’ll select the Lead Thank You Page. Go ahead and click on it now.
Net, we’re going to customize the landing page.
Step #3: Customize Your Thank You Page Design
SeedProd’s visual builder allows you to customize your landing page using drag-and-drop content blocks.
You can create a fully customized header for your thank you page in a matter of minutes. You can even add custom elements to convince and convert your traffic. For instance, you can create a video module and embed a YouTube video to convince your visitors to buy your product or service.
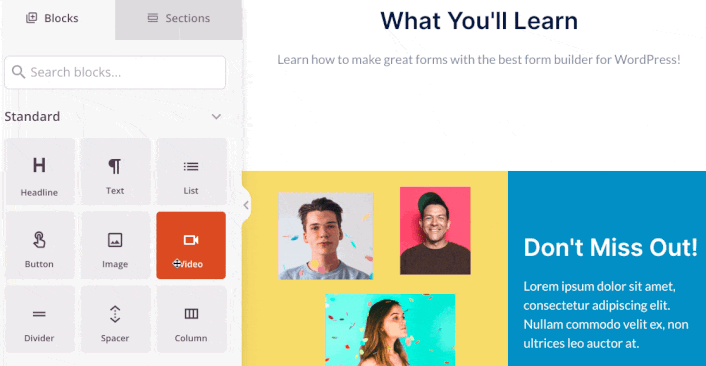
It’s also super easy to add a section with a brief description of your product or service . Head over to the Sections tab in the visual builder and under the Hero section, you’ll find several pre-built templates that you can import with a single click.
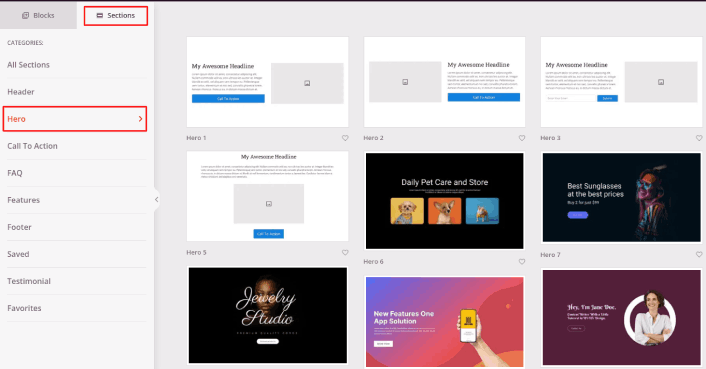
Go ahead and select one that you like.
Don’t worry about the colors or the content. You can edit all of it. What you should look for is a layout that goes well with your template.
You can customize the hero section the same way we did earlier by choosing a different image and changing the headline and description. While you’re at it, add a call-to-action button that nudges visitors to buy from you.

It’s so simple! When you’re done customizing your thank you page, go ahead and hit the Save button.
Step #4: Configure Your Page Settings
After you’re done designing your thank you page, click the Connect tab at the top of your page builder, and select your email marketing provider to collect leads on your site.
NOTE: This step is only if you want your customers to opt for another service. So, if you’re trying to upsell a service, you can skip connecting the email marketing service.

Then, click the Page Settings tab at the top of your screen.

Here, you can add an SEO plugin and a Google Analytics plugin to your thank you page. You can even set up custom tracking codes such as a Facebook Pixel or a Pinterest pixel to track ad performance.
Step #5: Publish Your Thank You Page in WordPress
Now let’s go ahead and publish your design. To do this, click the dropdown arrow next to the save button and click Publish.
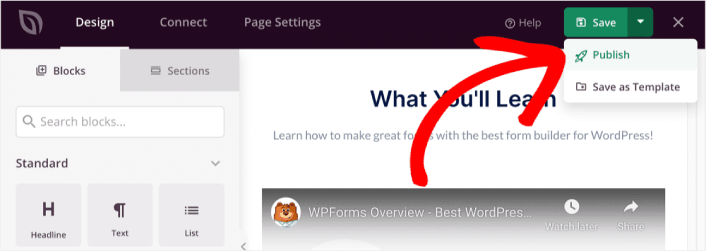
You can then click the See Live Page button to see how it looks.
Congratulations! You just published your very first thank you page.
What to do After You Build a Thank You Page
Now that your thank you page is live, it’s time to work on your traffic, engagement, and sales. You should try using push notifications on your site. Push notifications are a great marketing tool that can help you grow your business.
Take a look at these epic resources and you’ll know what we mean:
- 7 Smart Strategies to Boost Customer Engagement
- Are Push Notifications Effective? 7 Stats + 3 Expert Tips
- How to Set Up Abandoned Cart Push Notifications (Easy Tutorial)
We recommend using PushEngage to create your push notification campaigns. PushEngage is the #1 push notification software in the world. So, if you haven’t already, get started with PushEngage today!


