Notice: There is no legacy documentation available for this item, so you are seeing the current documentation.
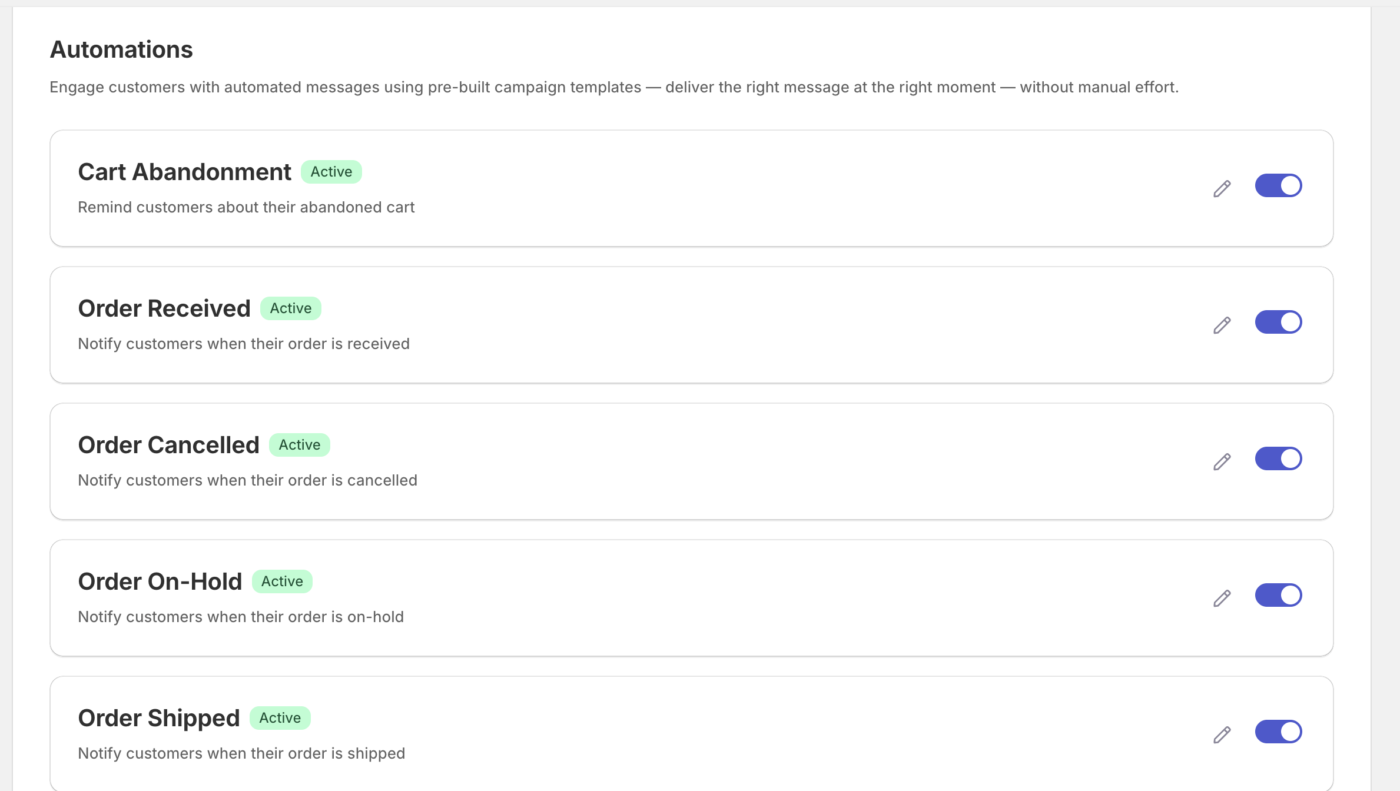
WhatsApp automations send messages to your customers automatically when order events happen in your Shopify store, such as an order being received, shipped, or refunded, plus cart abandonment recovery. Each automation uses an approved WhatsApp template and sends through your connected WhatsApp Cloud API. This guide shows you how to turn on and configure WhatsApp automations in the PushEngage Shopify app.
Before You Start
- Install and connect PushEngage on your Shopify store.
- Connect the WhatsApp Cloud API before you enable any automation. Check Setting Up WhatsApp Cloud API to Enable Messaging on Shopify.
- Have your approved WhatsApp message templates ready. WhatsApp requires Meta-approved templates for automated messages, and you select one for each automation.
How WhatsApp Automations Work
Each automation maps a Shopify order event to a WhatsApp message. You turn on the automations you want, choose whether to message the customer, the store admin, or both, and pick an approved template for each recipient. You then map the template’s variables to Shopify order and customer details so each message is personalized.
| Automation | When it sends |
|---|---|
| Cart Abandonment | After a shopper leaves items in their cart past a cutoff time you set. |
| Order Received | When a new order is placed. |
| Order Cancelled | When an order is cancelled. |
| Order On Hold | When an order is placed on hold. |
| Order Shipped | When an order is marked as shipped. |
| Order Updates | When an order is updated. |
| Order Refunded | When an order is refunded. |
Turn On a WhatsApp Automation
1. Go to WhatsApp » Automations. Find the automation you want and open it to edit.

2. Turn on Send notification to customer, Send notification to admin, or both.
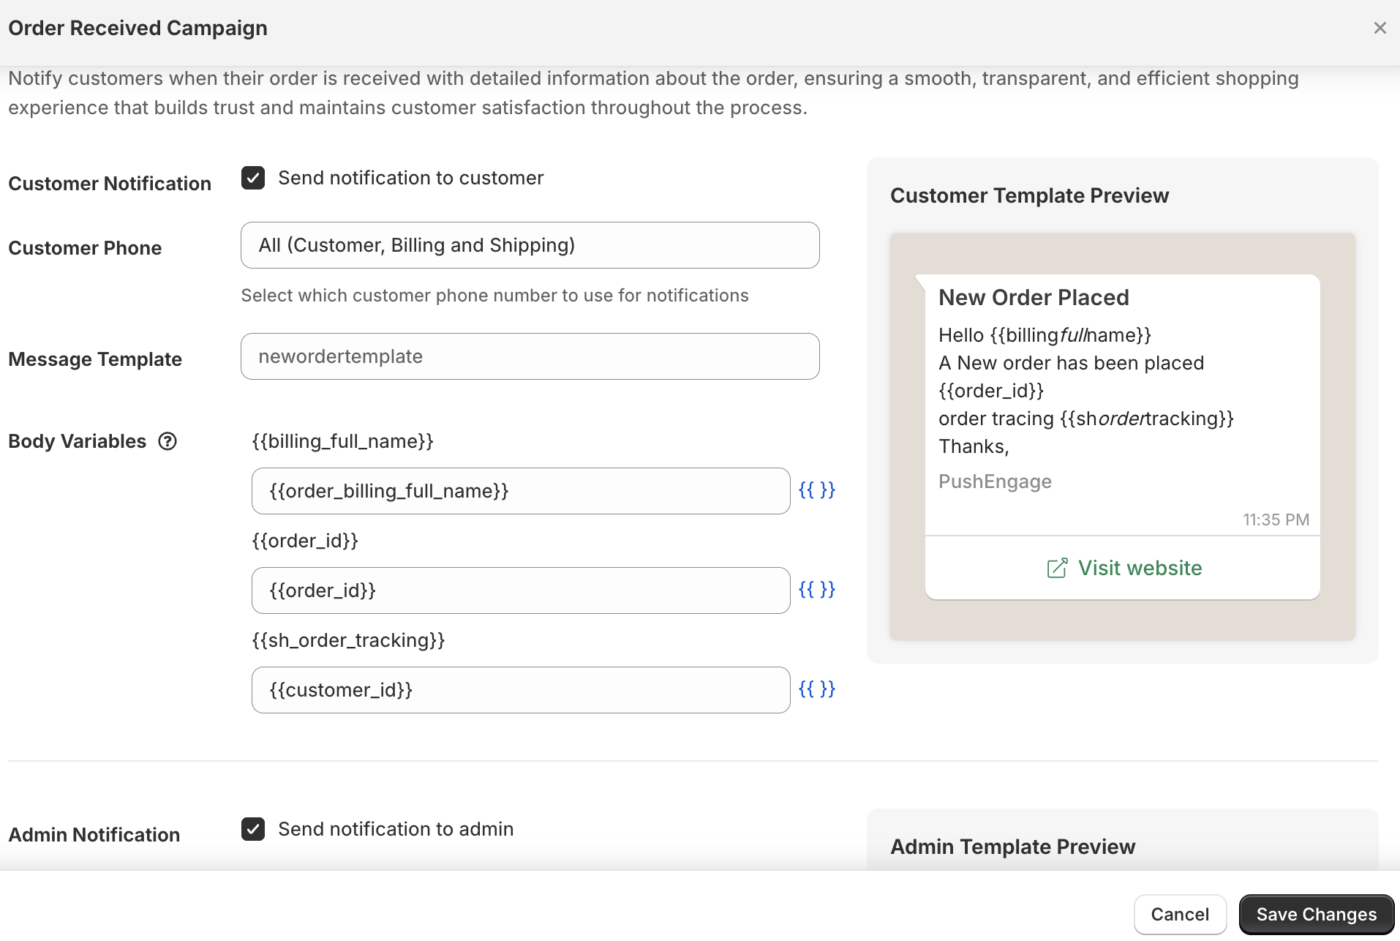
3. Select an approved WhatsApp template for each recipient you enabled. Map the template variables to Shopify order and customer details.
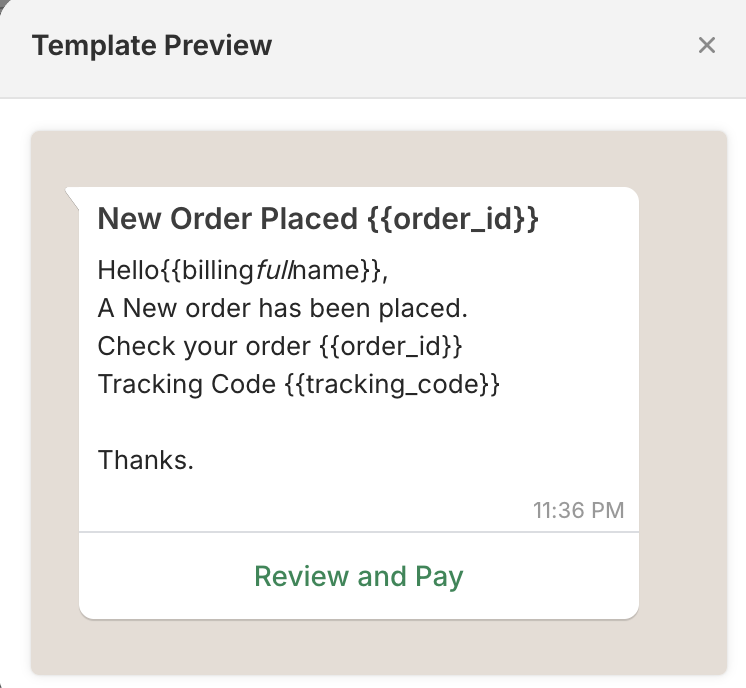
5. Save the automation to make it live.
Map template variables
WhatsApp templates use numbered or named variables. Map each variable to a Shopify detail, such as the customer name, order ID, shipping address, or order total, so every message is filled in with the right values. Fill in every variable the template uses, or the automation cannot save.
Manage Templates
Open the Templates tab to see the WhatsApp templates available on your connected account. Automations can only use approved templates, so create and approve templates in your WhatsApp Business setup in Meta. Only once these templates are approved then you can go ahead and enable these for customers.
Frequently Asked Questions
Why can I not enable any automation?
You need the WhatsApp Cloud API connected first. Until your account is connected, the automations stay unavailable, so complete the Cloud API setup and then return to the Automations tab.
Why is my template not listed?
Automations only use approved WhatsApp templates. If a template is missing, confirm it is approved in your WhatsApp Business account, then reopen the Templates tab to sync the latest list.
Can I message both the customer and my team?
Yes. Each automation lets you send to the customer, the admin, or both. Turn on the recipients you want and select a template for each, so shoppers get order updates while your team gets notified of activity.
How is the cart abandonment message triggered?
When a shopper adds items to their cart and does not complete checkout within the cutoff time you set, PushEngage sends the Cart Abandonment WhatsApp message using the template you selected.
If you run into any issues, please feel free to contact us by clicking here. Our support team will be able to help you.


