
If you’re selling to a global audience, there’s one silent revenue leak you’re probably not tracking: customers reaching out when no one is available to reply.
- Miss a question from a shopper in New York while your team is asleep in Bangalore? Lose a sale.
- Miss a lead from Sydney because your agents are offline? Lose a booking.
- Miss a support request from London while your team is at lunch? Lose trust.
PushEngage’s new Agent Availability Schedules for WordPress and WooCommerce solve this by giving you a simple way to ensure someone— from any time zone — is always “available” in the chat widget.
In this guide, we’ll walk through:
- Why agent scheduling is critical when selling internationally
- How PushEngage’s availability features work
- A practical system to cover global time zones with a small team
- A full tutorial on how to set up agent schedules inside WordPress
- Tips to maximize conversions and customer satisfaction
Let’s dive in.
Send Multichannel Messages Today!
Push and WhatsApp messaging are super effective, low-cost marketing tools to help you grow your repeat traffic, engagement, and sales on autopilot.
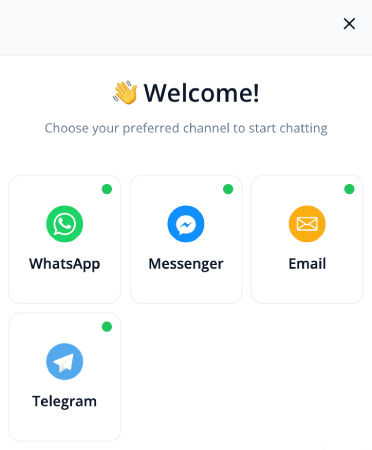
Why Agent Scheduling Matters for Global Stores
Visitors make decisions quickly—especially on mobile. When they see “Agent Online”, they’re far more likely to ask pre-purchase questions, request support, or book a demo.
But when they see “All Agents Offline”, two things happen:
- Drop-offs increase — users don’t want to wait.
- Support tickets increase — you get more emails instead of live chat questions.
Proper scheduling solves all of that by:
- Matching agent availability with customer behavior
- Ensuring coverage across multiple time zones
- Eliminating silent gaps in your support cycle
- Improving the perception of 24/7 service
- Routing questions to the right person at the right time
Even if you only have 2–3 agents, a smart schedule can create the effect of 24/7 availability.
How PushEngage’s Agent Schedules Work
With PushEngage’s new WordPress & WooCommerce chat widgets, each agent can set:
- Workdays (e.g., Mon–Fri, or custom days)
- Work hours (with timezone settings)
- Time zone (critical if you have a distributed team)
- Role-based profiles (Sales, Billing, Support, etc.)
- Automatic offline handling (show an offline message when no one is available)
Once schedules are configured:
- The widget automatically displays whichever agent is currently “Online”
- If multiple agents are online, visitors can choose
- If no one is online, your offline fallback message appears
This makes your chat widget feel dynamic, intelligent, and always ready.
A Simple Time Zone Coverage Plan (Even for Small Teams)
Here’s an example schedule for a team of three agents in different time zones:
| Agent | Location | Hours (Local) | Approx. Global Coverage |
|---|---|---|---|
| A | India (IST) | 9 AM – 5 PM | APAC + Early EU |
| B | Europe (CET) | 8 AM – 4 PM | EU + Early US |
| C | US (EST) | 9 AM – 5 PM | Full US + Late EU |
With this structure:
- EU is covered almost the entire day
- US mornings overlap with EU evenings
- APAC mornings overlap with EU mornings
- You generate ~18–20 hours of daily live coverage automatically
Small team → large presence.
Now, let’s set it up inside your website.
How to Set Up Agent Schedules in PushEngage (WordPress Tutorial)
This section walks you step-by-step through the actual setup inside PushEngage.
Step 1: Open Your WordPress Dashboard & Go to PushEngage
- Log into WordPress
- Navigate to: PushEngage » Chat Widgets and click on Create a New Chat Widget
- Add channels to your chat widget and scroll down to Enabled Channels
- Click the edit icon next to the channel to update agent details
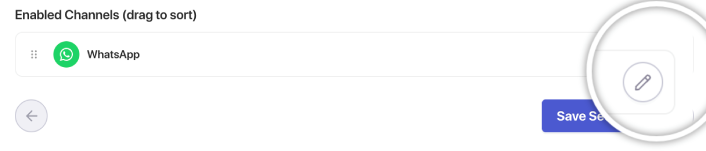
This is where your agent list lives.
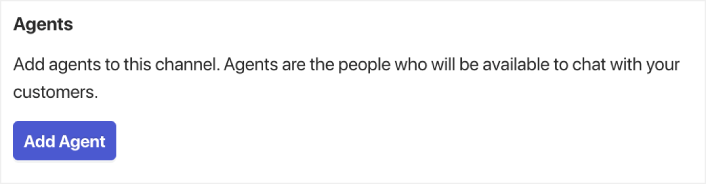
Step 2: Add or Edit an Agent
Click Add Agent or select an existing agent to edit.
Each agent profile includes:
- Agent Name
- Agent Photo
- Designation (Sales, Support, Billing, etc.)
- Contact Preference (Live chat, WhatsApp, Email, etc.)
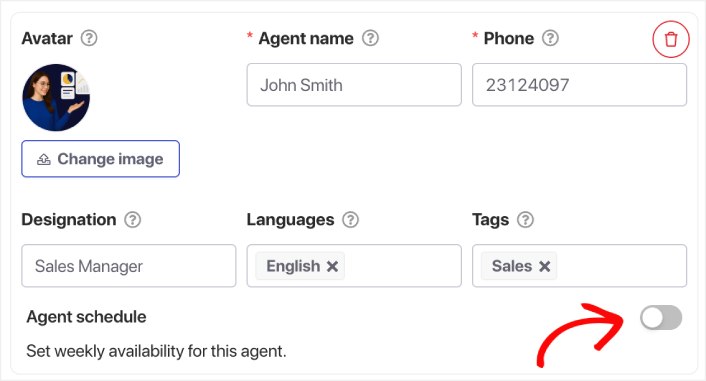
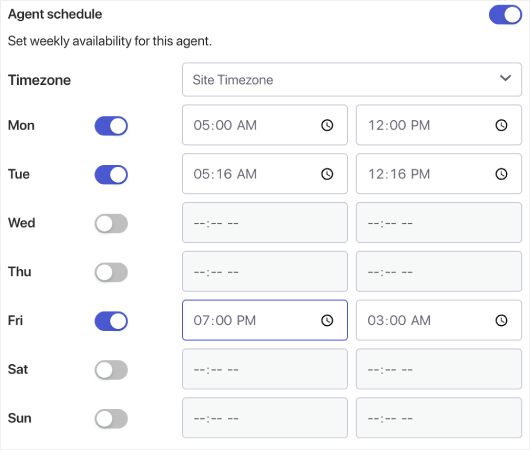
Scroll down to the Agent Schedule section and turn on the toggle button.
PRO TIP: You can select languages for each agent as well. So, if you need to offer multilingual chat support, the option’s right there and it’s super easy to set up.
Step 3: Choose the Agent’s Time Zone
This is critical for global coverage.
Select the agent’s current time zone, not yours.
Examples:
- IST for India
- EST or CST for US teams
- GMT or CET for European teams
This ensures their schedules activate at the right moment.
Step 4: Set the Days They Work
Select the days the agent should be shown as “Online”:
- Monday–Friday
- Weekends only
- Custom combinations
- Split shifts
PushEngage allows full flexibility.
Step 5: Add Working Hours
Under the Work Hours section:
- Enter start time (e.g., 9:00 AM)
- Enter end time (e.g., 5:00 PM)
You can also:
- Create multiple time blocks (e.g., split shift: 9–1 and 4–9)
- Adjust for seasonal hours
- Add exceptions for special dates
PushEngage converts these into your widget’s availability in real time.
Step 6: Save and Repeat for All Agents
Once the schedule is set, click Save Agent. Repeat for each agent in each time zone to complete the coverage map.
Step 7: Test the Widget
Important step.
- Open your site in an incognito window
- Change your device/system time zone
- Observe which agent shows up
This confirms your schedules are firing correctly.
Best Practices for Maximizing Global Coverage
✔ Create overlapping windows
Have at least 1–2 hours where two agents’ schedules overlap. This gives smoother handoff and reduces offline gaps.
✔ Add an Offline Fallback Message
This can be a lead form, email capture, or WhatsApp chat option.
✔ Assign roles based on time zones
- APAC agent handles sales for early zones
- EU agent handles general support
- US agent handles billing + late support
✔ Don’t try to force 24/7 manually
Smart scheduling looks natural; forced scheduling breaks trust.
✔ Review chat patterns
Check when visitors most frequently initiate chats and adjust schedules accordingly.
Set It Once, Cover Every Time Zone Automatically
With PushEngage’s Agent Availability Schedules, you can simulate near-24/7 coverage without hiring a massive team.
- Customers always see someone online
- Response times drop
- Pre-purchase conversions rise
- Support feels faster and more reliable
- Your store feels global-ready
Once the schedules are set, your team can operate more efficiently—and your customers get the experience they expect.
If you haven’t already set up agent profiles and schedules in PushEngage, now’s the time.
Not convinced? Check out these amazing resources on push notification campaigns:
- How to Increase Hotel Sales in Low Season
- How to Do Multichannel Marketing for Hotels in 2026
- How to Convert Subscribers To Buyers Using Web Push Notifications
- How to Notify Subscribers of New WordPress Posts
- How to Send Back-in-Stock Notifications to Get More Sales
- How to Clean Up Push Notifications Subscriber Lists (Easy)
- How to Automatically Send RSS Push Notifications
- How to Use Push Notifications to Promote a News Site
- How to Use Cross Selling Push Notifications to 2x Your Sales
- How to Use Browse Abandonment Push Notifications (4 Steps)


