Notice: There is no legacy documentation available for this item, so you are seeing the current documentation.
Connecting with your customers should be easy. This guide will show you how to use the PushEngage Chat Widgets to allow your website visitors to start a conversation with you on their favorite social media and messaging apps.
What is an On-Site Chat Widget?
The Chat Widget is a single, customizable widget that you can add to your website. When a visitor clicks on it, they are presented with a list of communication channels you’ve enabled. This allows them to instantly connect with you on platforms they already use every day, such as WhatsApp, Facebook Messenger, Instagram, TikTok, and many more.
Using a multichannel chat widget can significantly improve your customer communication and lead generation.
Setting up Chat Widget
Navigate to Installed Plugins, click on PushEngage
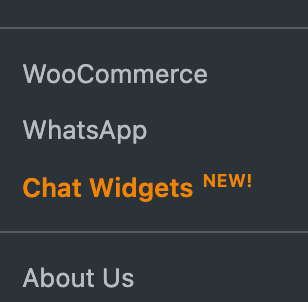
You can then click on the Chat Widgets option from the navigation bar.
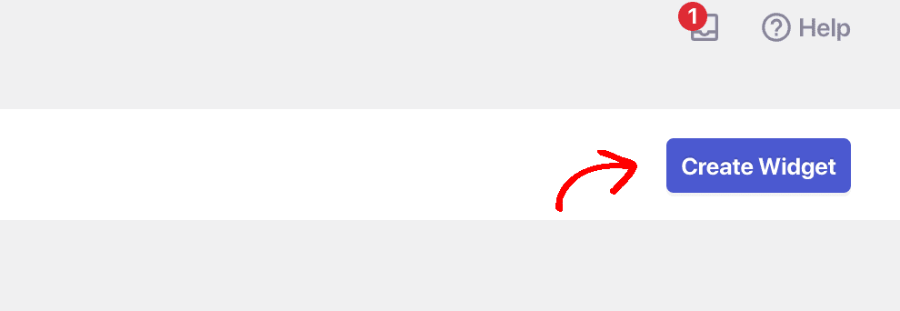
Click on Create Widget button.
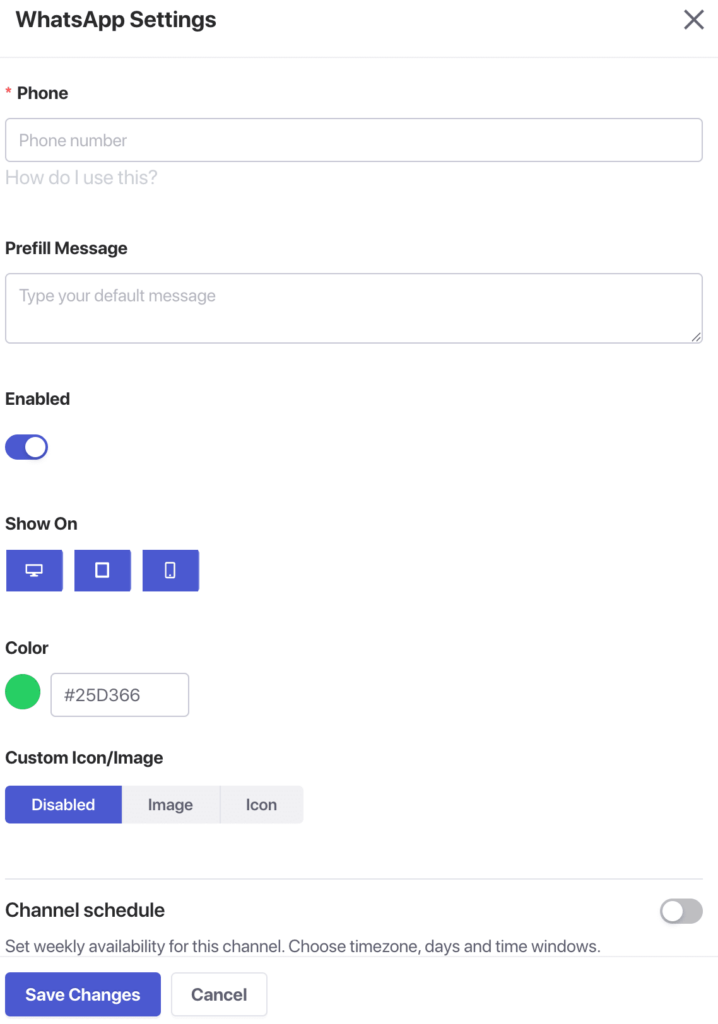
Choose Your Channels
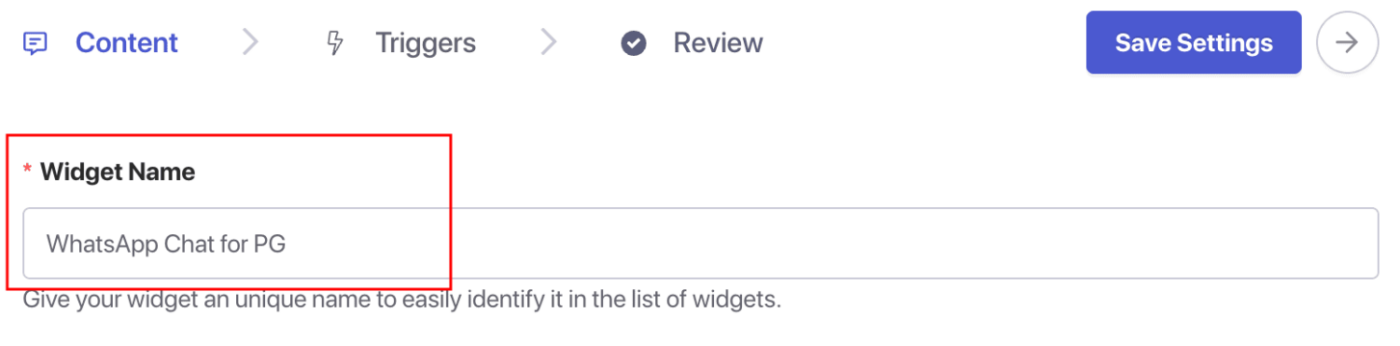
First, you can add the Widget Name, once you have chosen the name. You can go ahead and choose the channels you want to add for the customer to start the conversation.
Once you have selected a channel or multiple channels, you can fill in the required details.
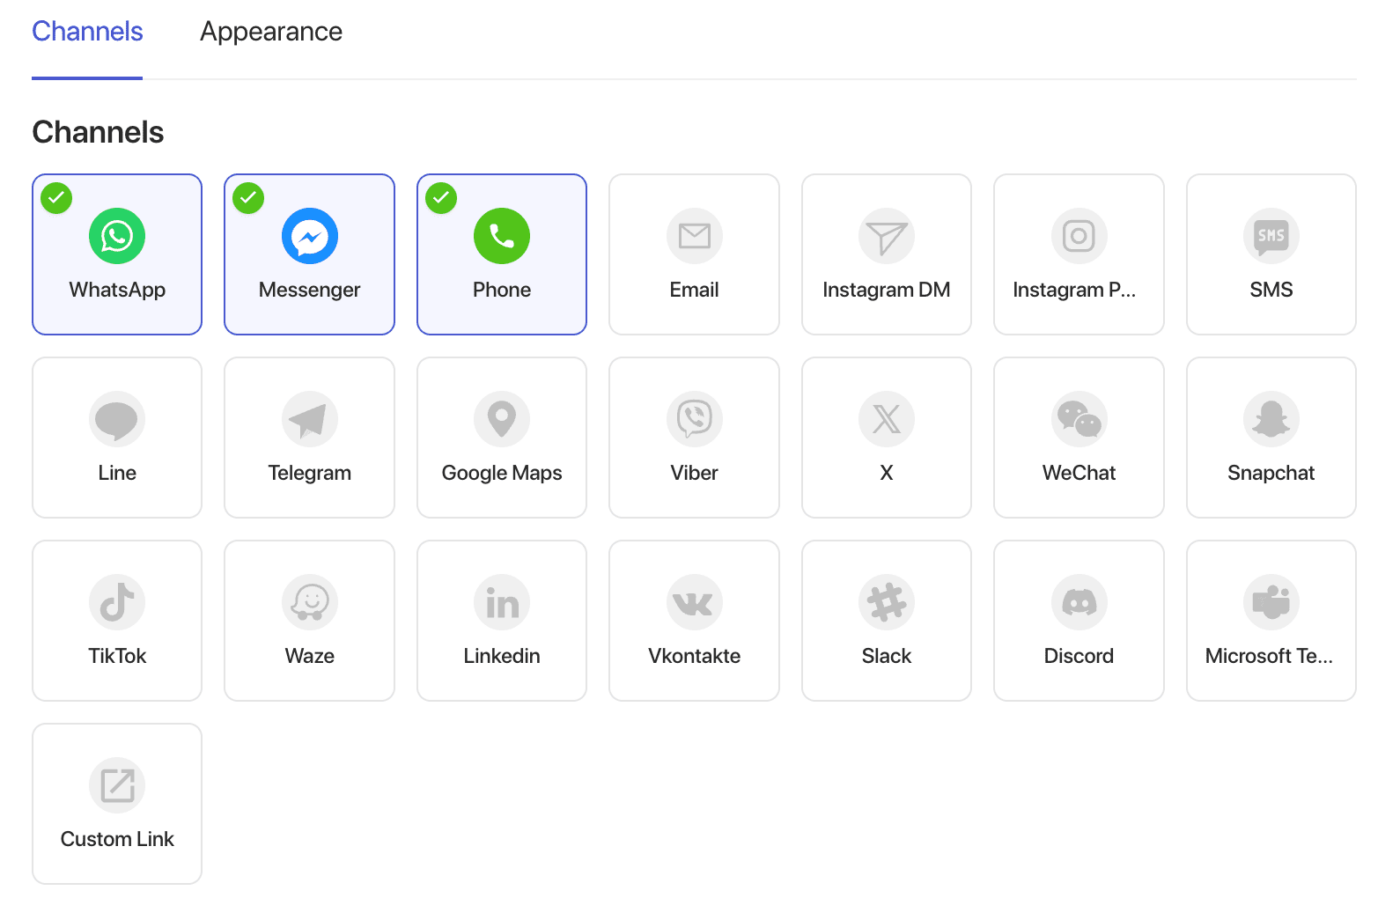
The details would be different for each one. If you are going ahead with WhatsApp, you will have to add the WhatsApp Phone Number of the Business Owner. If you choose Instagram Message, you will have to link your profile.
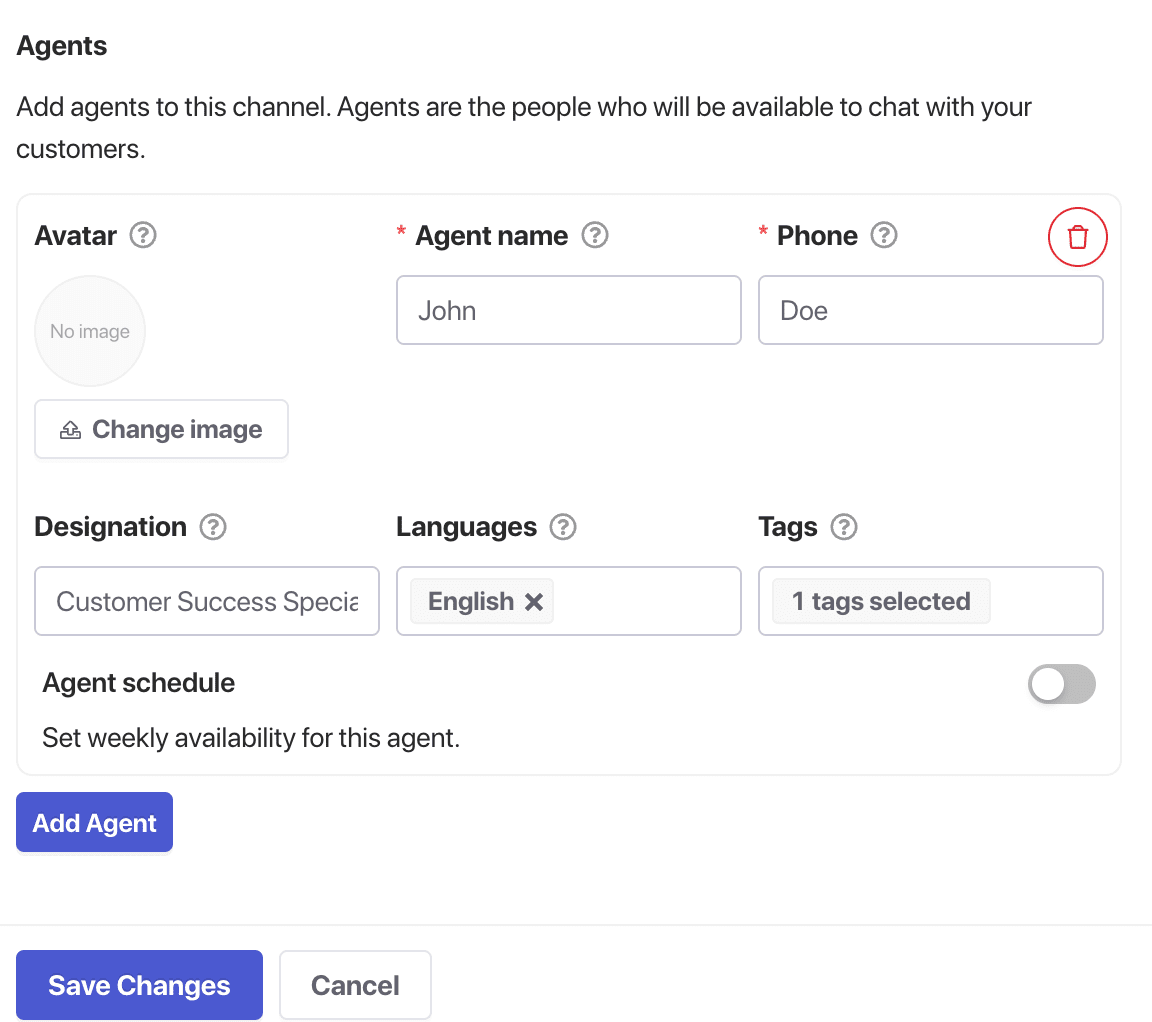
Add Agents to Personalize Chat
When you scroll down to Agents section, you can add profiles for your team members, including their name, title, and a photo. This gives your widget a personal touch and lets customers know who they are talking to.
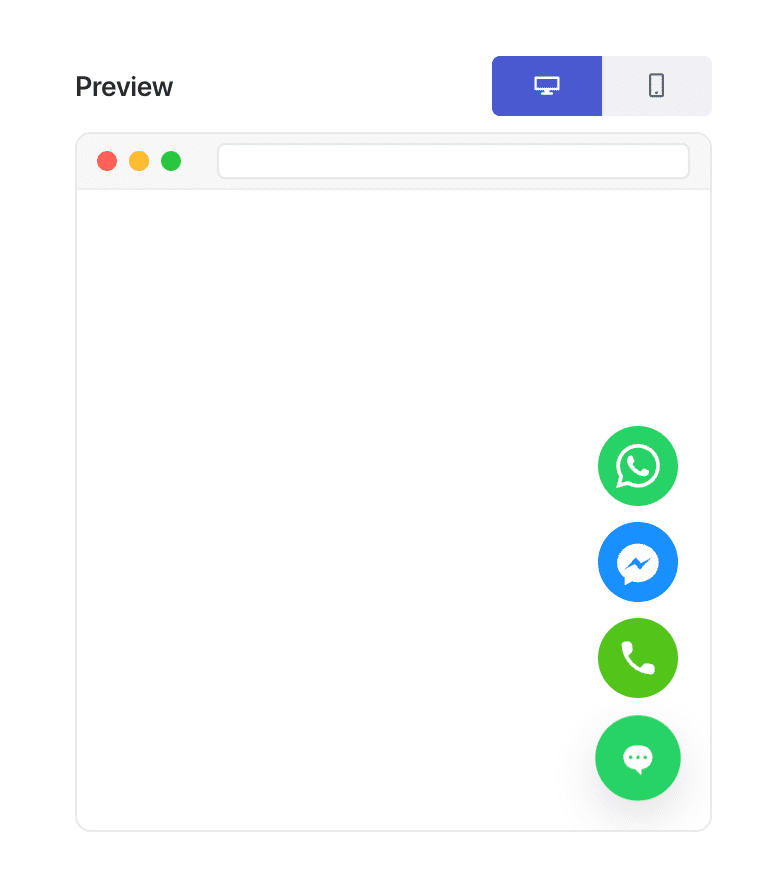
You can add as many channels as you need, including Messenger, TikTok, SMS, Instagram Message, X, Slack, Discord, and more. The preview on the right will update in real-time.
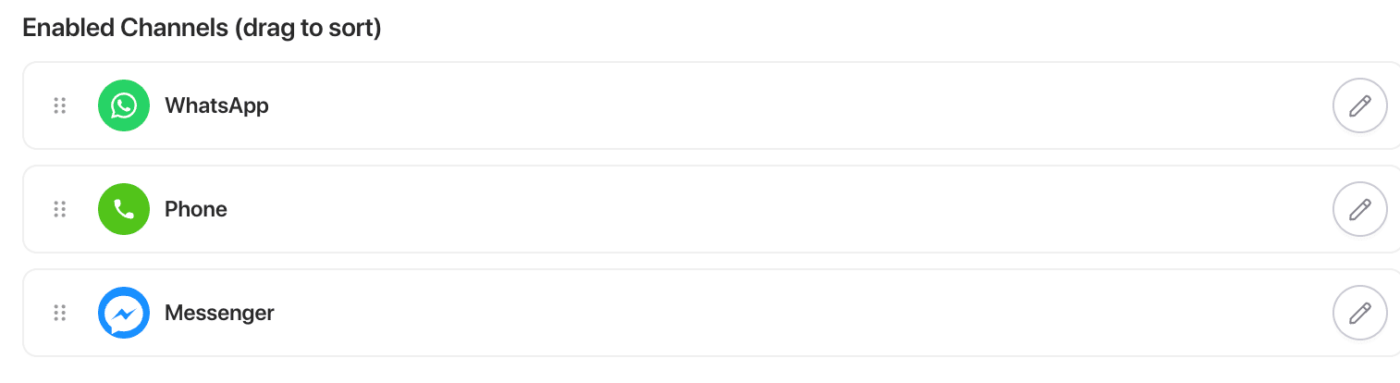
You’ll see a list of Enabled Channels, which you can easily reorder within the widget using drag and drop, based on your marketing communication priorities.
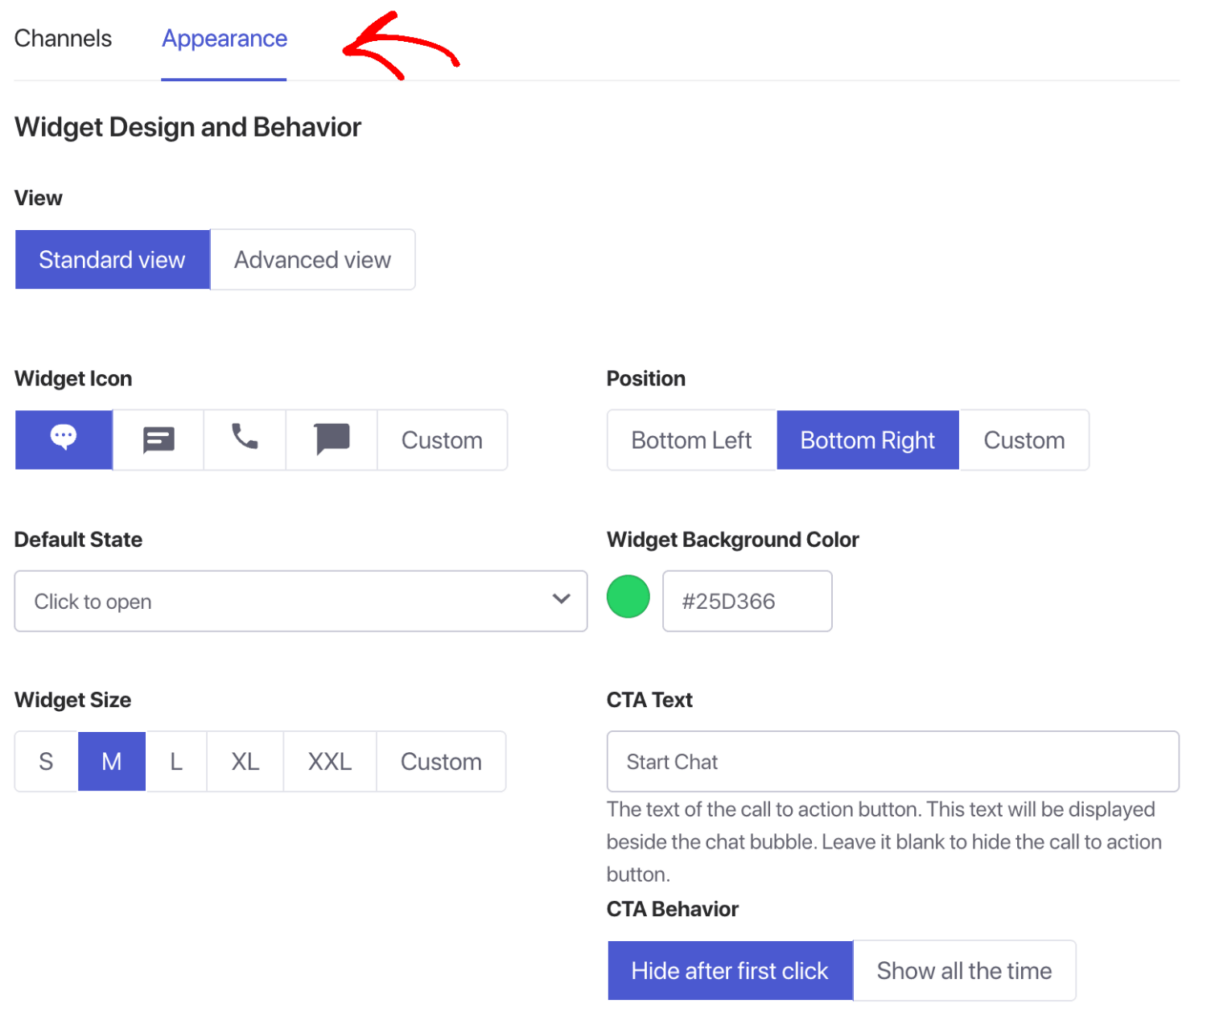
Setting up Widget Appearance
Navigate to the Appearance tab. Here, you can change the widget’s color to match your brand, adjust its on-screen position, size, font and even add the animations effect to suit your brand style.
The Advanced view will help you with the style of your widget as well.
Apart from the standard view, in Advanced view you also have the option to Enable the Google Analytics to track the visitors generated through these widgets.
Add Background blur effect so when user starts chatting, the focus is only on the widgets.
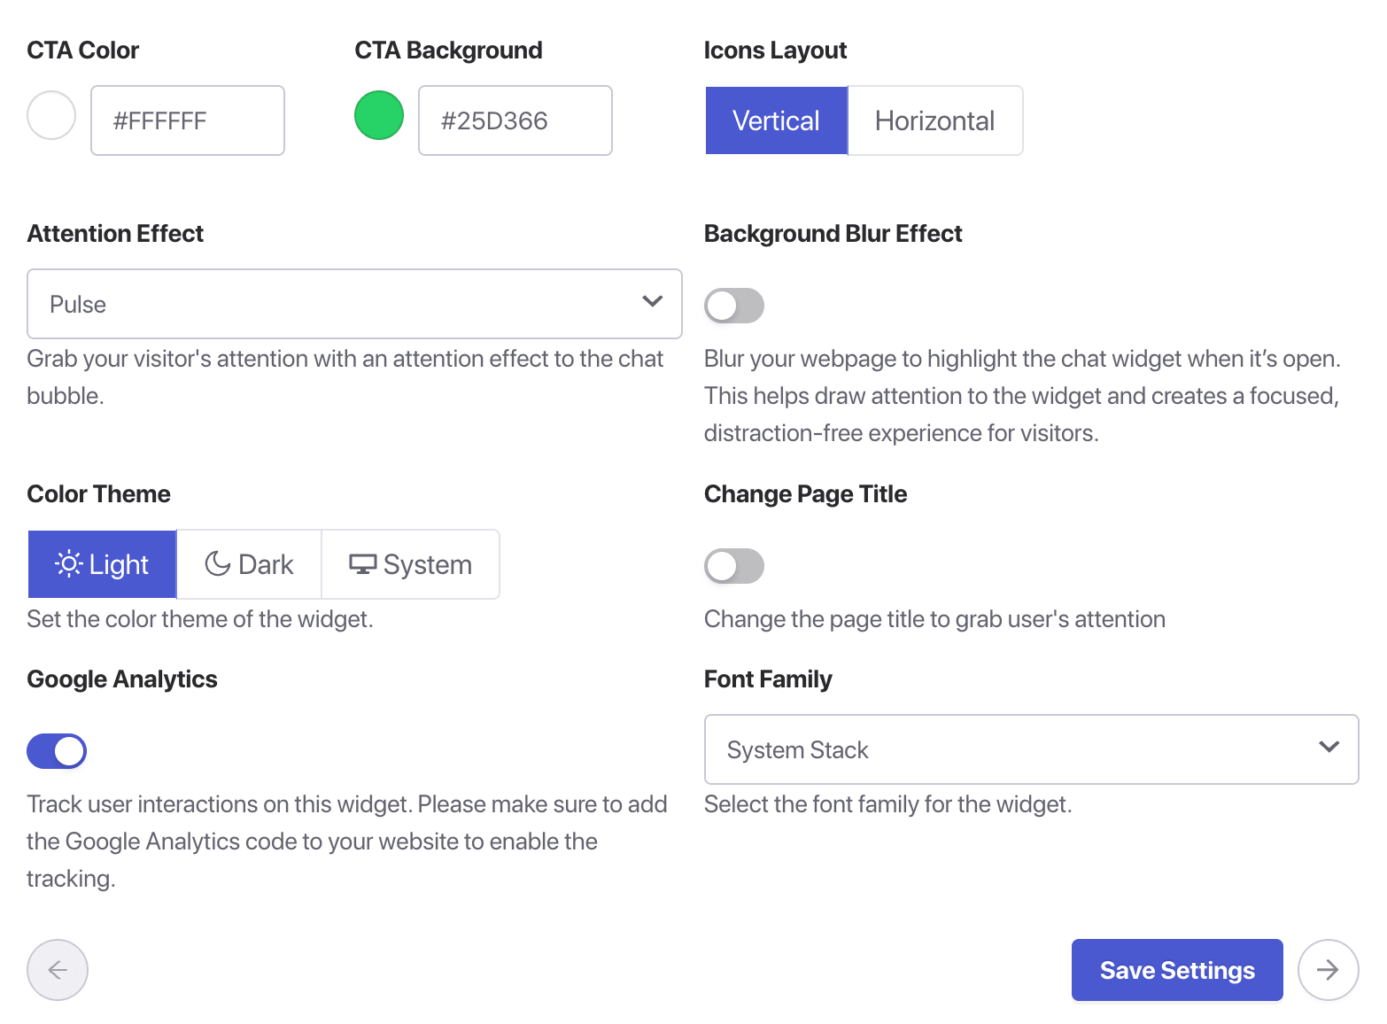
You can also add Custom CSS to override default design & customize your widget.
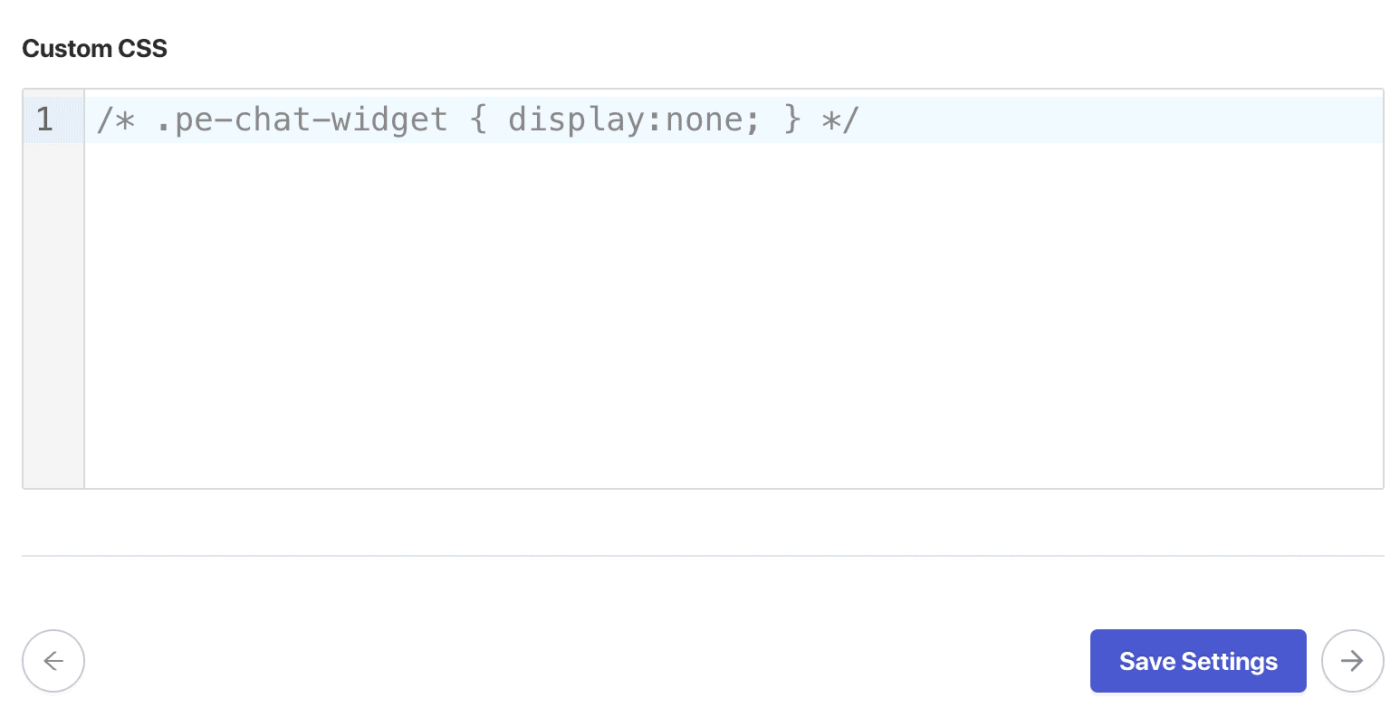
Once you have clicked on Save Settings, you can move to Triggers section.
Configure Display Triggers
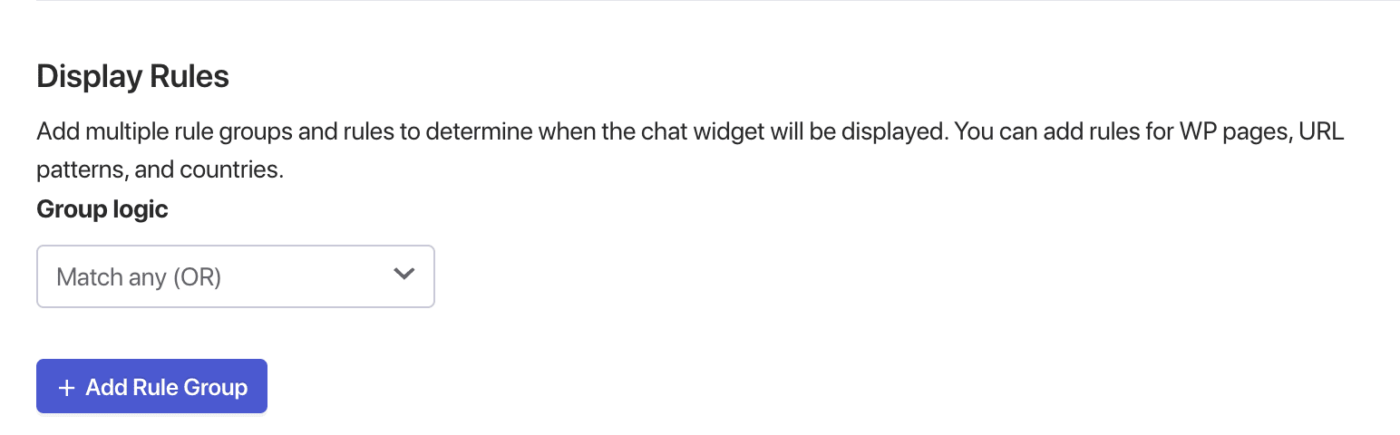
Go to the Triggers tab to control when and where the widget appears. You can have it show immediately on page load, after a few seconds, or even when a user is about to leave your site using the Exit-Intent trigger. You can also target specific URLs to show the widget only on relevant pages.

Here you can set up on which trigger type the widgets show up on your page. It can be after few seconds, after a certain scroll percentage or on Exit Intent.

You can also add rules for Targeting if you do not wish to show them on all pages.
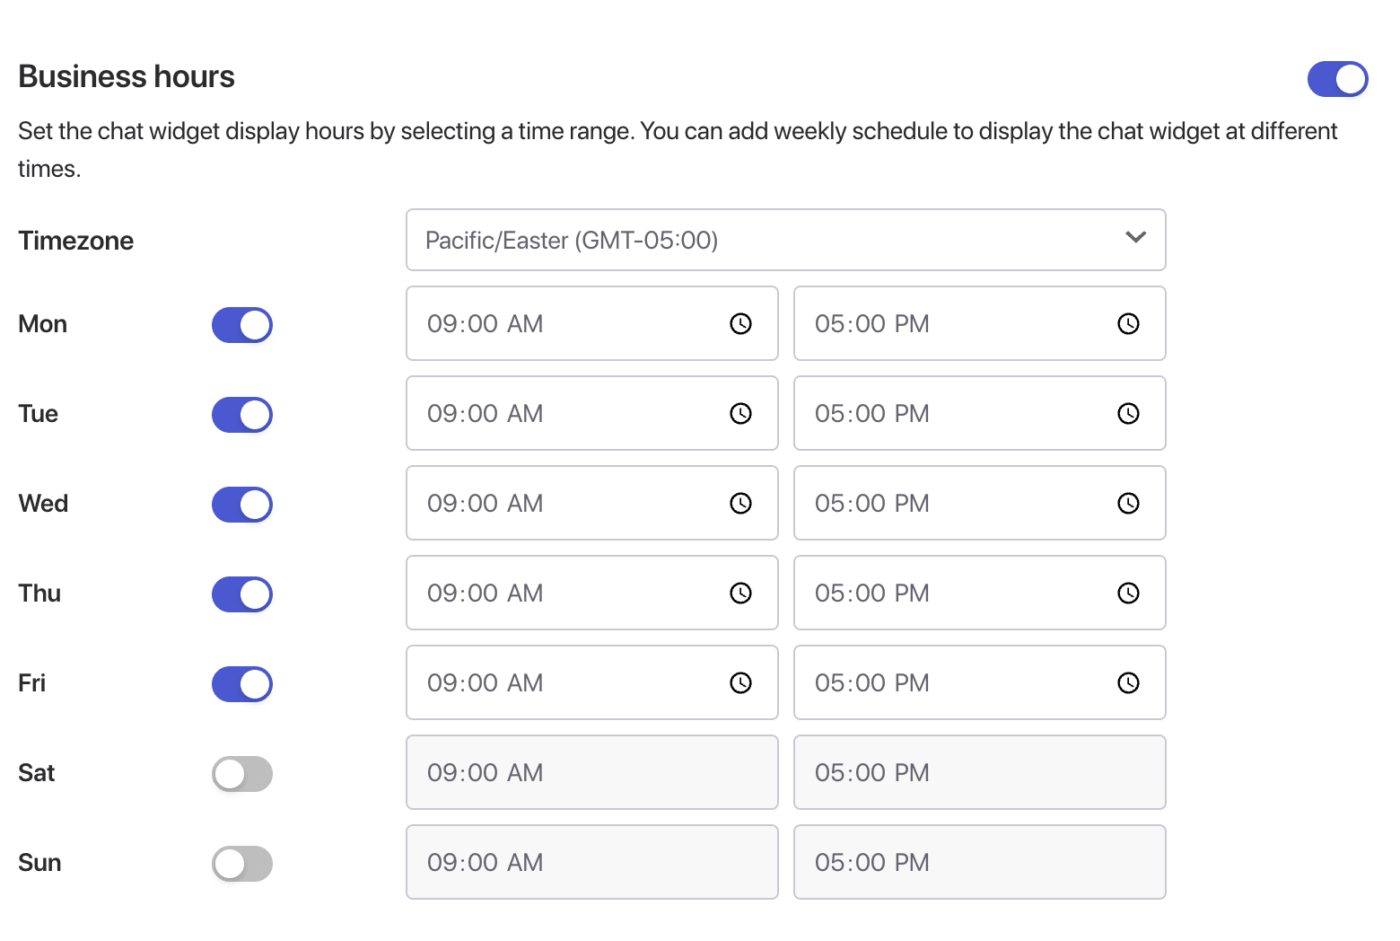
Furthermore, you will be able to schedule the duration display of this widget along with specific Business Hours.

You can do a final review of your setup. Once you are happy with the setup, click the Save Settings button. The widget will now be live on your site.

If in case you run into any issues, please feel free to contact us by clicking here. Our support team would be able to help you.


