Notice: There is no legacy documentation available for this item, so you are seeing the current documentation.
PushEngage makes it easy to target your audience based on page visits and the actions they take on the website by sending them personalized notifications. Now, you don’t have to depend only on API and you’re expected to be well-versed with coding to segment your subscriber base. It can be done using the PushEngage dashboard easily.
How to Create a Segment
To create segments, you need to Navigate to Audience » Segments.
Once you are here, then you can click on Create New Segment.
How to Segment Subscribers Automatically on Page Visit
Now you need to set up the rules and add the right conditions.
Enter the Segment Name and add the description if you want your team members to be aware of the reason why you are adding these segments.
After that start adding the Segment Criteria.
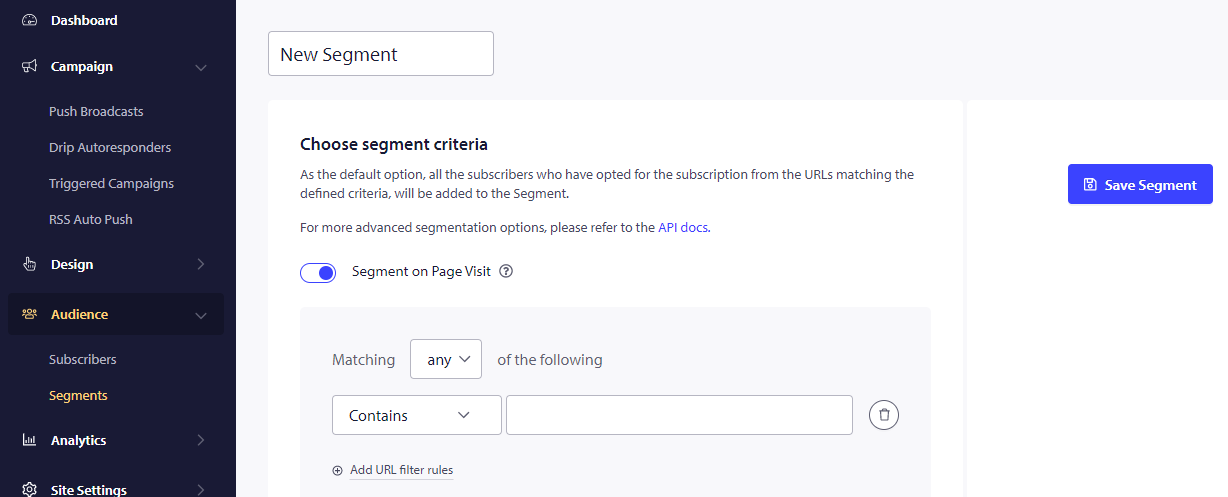
Ensure to enable the Segment on Page Visit Button, as only then will you be able to segment the already subscribed visitors based on the page they visit.
Inclusion and Exclusion Rules
There are three rules for Contains, Exact Match & Starts, which can be used per the requirement or the Page URL’s.
You also have the option to exclude specific URLs using these rules to complete a segment rule.
This is the most basic type of segmentation; apart from the page visits, you can also segment based on actions and events happening on your website.
Other Types of Segments
1. Geo Location based segmentation
2. Default segmentation options – Device & Browser.
3. Custom segmentation using Javascript API
Here is a guide if you want to understand how to send campaigns to the audience using these segments.
If you run into any issues, please contact us by clicking here. Our support team would be able to help you


