Looking for a simple way to add push notifications to your Instapage?
That’s a really great idea. Instapage is a website builder that enables you to create instant web pages. It’s super easy to create a website and start selling a product or a service.
But once your site is live, how do you get traffic? How do you build engagement? How do get more sales?
That’s where push notifications can be super effective as a marketing tool because they can generate repeat traffic and sales without having to run paid ads. You can also create automated campaigns to boost engagement and sales with very little effort.
In this article, we’re going to show you step-by-step how you can add push notifications to an Instapage site in less than 10 minutes.
Plongeons dans le vif du sujet.
How to Install Push Notifications on Instapage
Adding push notifications to an Instapage site is quite simple. Just follow the steps in this article. If you follow every step, by the end of this article, you should be able to send push notifications like this one:

Allons-y !
Étape n°1 : Configurer votre compte PushEngage
Rendez-vous sur la page d'accueil de PushEngage et cliquez sur le bouton Commencer :

You can try out PushEngage for free. If you’re running a small blog that needs repeat traffic and engagement, that’s probably good enough. But if you’re serious about sales, you should get the Enterprise package and unlock the automated campaigns.
Une fois que vous avez créé votre compte PushEngage, rendez-vous sur votre tableau de bord PushEngage et allez dans Paramètres » Paramètres du site » Paramètres d'installation :
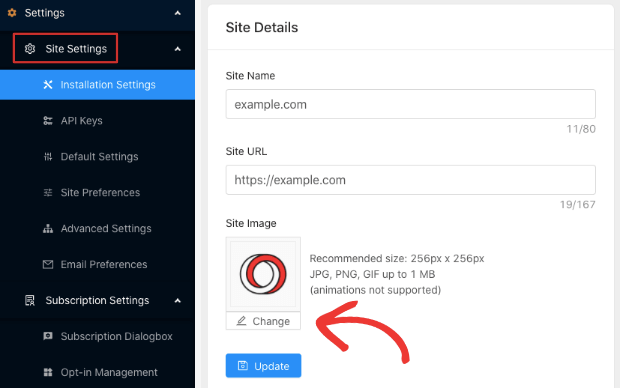
Vous pouvez y définir votre logo, le nom de votre site et l'URL de votre site. Il est très important de régler ces éléments dès maintenant afin de pouvoir tester toute votre configuration plus tard.
Étape n°2 : Obtenir le code d'installation de PushEngage
Pour installer les notifications push, vous devrez obtenir un code d'installation depuis votre tableau de bord PushEngage. Rendez-vous dans Paramètres » Paramètres du site » Paramètres d'installation :
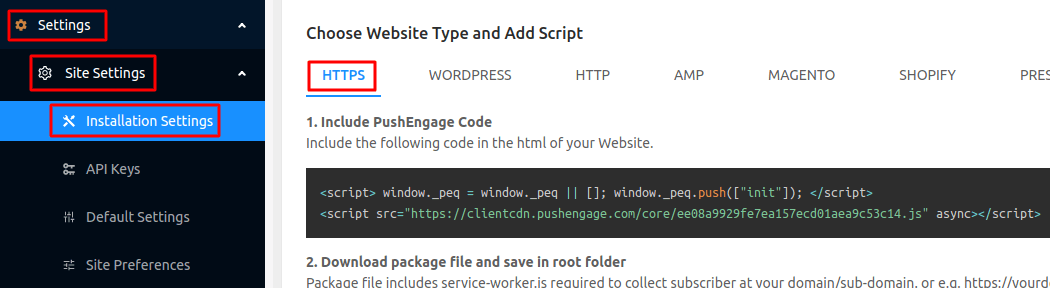
Selon que votre site dispose ou non d'un certificat SSL installé, allez dans l'onglet HTTP ou l'onglet HTTPS pour obtenir votre code d'installation.
Copiez cet extrait de code Javascript. Vous en aurez besoin bientôt.
Step #3: Place the Installation Code in Your Instapage Site
Log in to your Instapage dashboard and in the site builder, head over to Settings and click on Javascript:
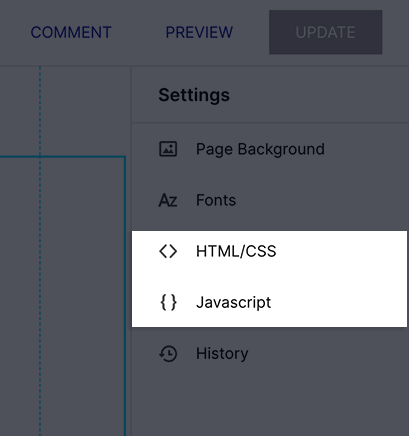
Then, simply paste the code snippet you got from your PushEngage dashboard in the popup window:
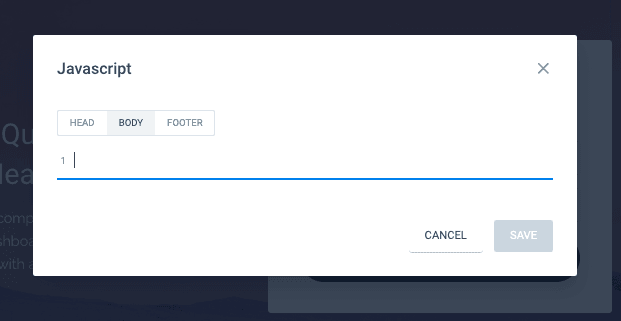
This is typically where you would place your Google Analytics code, Facebook Pixel, and other tracking code as well. When you’re done, hit Save.
Étape n°4 : Configurer l'opt-in PushEngage
Maintenant, retournez à votre tableau de bord PushEngage. Allez dans Paramètres » Paramètres d'abonnement » Boîte de dialogue d'abonnement » Modifier :
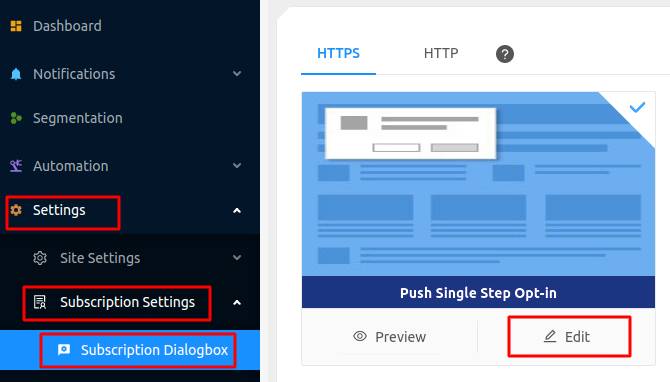
L'idée ici est de donner à vos visiteurs une bonne raison de s'abonner. Si vous avez besoin d'aide à ce sujet, consultez notre article sur comment créer un opt-in de notification push personnalisé.
Et si vous souhaitez des modèles pour commencer, vous devriez consulter cet article sur les opt-ins de notification push à haute conversion.
Étape n°5 : Créer votre première campagne
Now that your Instapage site can send push notifications, you should create an actual campaign.
Étant donné que vous allez probablement vendre un produit sur votre page de destination, configurons un rappel de panier abandonné pour votre boutique.
Une campagne de panier abandonné aide à générer des revenus supplémentaires en convertissant les paniers abandonnés. C'est un simple rappel qui vend beaucoup de produits en mode automatique. C'est donc une excellente campagne pour soutenir toute page de destination qui génère des ventes directes.
Rendez-vous simplement sur votre tableau de bord PushEngage et allez dans Automatisation » Panier abandonné » Créer un répondeur automatique de panier :
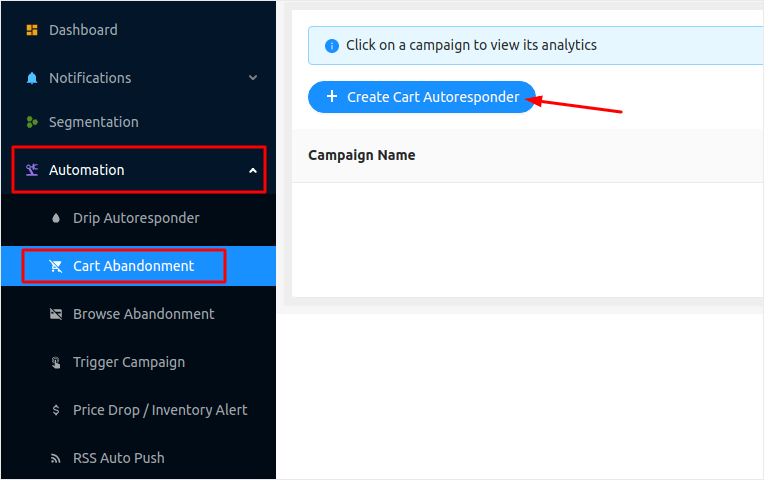
Si vous débutez dans la création de campagnes marketing automatisées, vous pouvez simplement suivre notre article sur comment configurer une campagne de notification push de panier abandonné. Suivez chaque étape et vous pourrez configurer des notifications push comme celle-ci :
Et juste au cas où vous vous demanderiez, vous n'avez pas besoin d'être une marque de renommée mondiale pour que vos campagnes de notifications push soient efficaces. En fait, PushEngage a été créé pour aider les petites entreprises à se développer grâce aux notifications push.
Mais avant de commencer à promouvoir votre page de destination, vous devriez corriger tout problème avec votre processus d'abonnement aux notifications push. Consultez cet article sur les tests de vos notifications push. Si tout fonctionne parfaitement, vous avez terminé !
Conclusion
C'est tout pour cette fois, les amis !
You just added push notifications to your Instapage site. Then, you created a powerful push notification campaign to boost your growth. All that, in less than 10 minutes!
Check out how to create automated push notification campaigns as well. Most push campaigns are simple and effective. So, we recommend setting up multiple campaigns for your site. Here are a few great ones to start with:
- Comment envoyer automatiquement des notifications push RSS
- Comment configurer les notifications push d'abandon de panier à l'aide de GTM
- Comment programmer les notifications push facilement [Guide de 5 min.]
Et si ce n'est pas déjà fait, commencez avec PushEngage. PushEngage est le logiciel de notification push n°1 au monde. Vos campagnes sont donc entre de bonnes mains.


