Are you looking for a detailed, step-by-step guide to creating Black Friday push notifications that convert?
Sure, you can send out a simple push notification broadcast. But will that work? We’ve figured out a rock solid process to help you get more sales from holiday season. And we’ve tested it out multiple times with multiple brands.
In this article, we’re covering how we create push notifications for PushEngage’s Black Friday Sale. And how you can do the same thing as well. We’re going to check out what you need to get started, how you would create the campaigns, and what an ideal schedule would look like.
Ça vous dit ? Plongeons.
Before You Get Started with Black Friday Push Notifications
Push notifications are a marketing tool that helps you to connect with web visitors even after they leave your website. You can send targeted notifications to your push subscribers and even personalize your notifications for difference customer segments. But which push notification service should you choose?
We recommend using PushEngage to send push notification campaigns.

PushEngage est le meilleur service de notifications push au monde. Et nous ne parlons pas seulement de la version gratuite. Il vous permet de vous connecter avec les visiteurs après qu'ils aient quitté votre site avec des messages push ciblés.
PushEngage est notre premier choix pour les services et outils de notifications push car il est :
- Il est si facile à utiliser
- Efficace sur les sites HTTP et HTTPS
- Il est livré avec un constructeur visuel qui nécessite peu ou pas de codage pour être configuré
- Configurez facilement des campagnes de notifications push entièrement automatisées pour tout type de site
- Dispose de plusieurs options pour envoyer des notifications push personnalisées afin d'augmenter les taux de clics
- Équipé du suivi d'objectifs personnalisé, des paramètres UTM et d'analyses avancées
Et ce n'est qu'un aperçu. Consultez la liste complète des fonctionnalités de PushEngage avant d'aller plus loin. La partie la plus incroyable de PushEngage est qu'il dispose d'un plan gratuit à vie que vous pouvez essayer avant de prendre une décision d'achat.
Pro Tip: Check out our article on push notification cost analysis before you buy any service.
Une fois que vous avez créé votre compte, rendez-vous sur le tableau de bord PushEngage et suivez les instructions :

Cliquez sur Paramètres du site » Détails du site et cliquez sur le bouton Cliquez ici pour les instructions de configuration :

Cliquez sur l'onglet WordPress et cliquez sur le bouton Installer le plugin WordPress PushEngage pour installer le plugin sur votre site web.

Le plus intéressant : Lorsque vous avez créé votre compte PushEngage, vous avez déjà synchronisé votre site web avec votre compte PushEngage. Cliquez donc sur le lien d'installation dans le tableau de bord PushEngage pour installer automatiquement le plugin WordPress PushEngage sur votre site web.
And you’re done! You have successfully set up a web notifications WordPress plugin on your website. website. You don’t have to login to your WordPress admin panel at all. For a more detailed guide, check out our article on how to install web notifications on WordPress.
Before you start creating Black Friday push notifications, you should also check out these resources to help you get started.
- Comment ajouter un plugin WordPress de notifications web à votre site
- Comment ajouter votre icône de notification push (la méthode facile)
- 7 meilleures pratiques de notification push pour obtenir du trafic instantané
- Comment activer les inscriptions en une seule étape pour les notifications push
- [Annonce] PushEngage dispose désormais d'un regroupement avancé d'audiences
I highly recommend using these resources to get started with PushEngage quickly.
How to Create Your Push Notification Campaign
Now that we have a basic understanding of how PushEngage works, let’s create our campaign. Currently, PushEngage only offers the Audience Group feature for Push Broadcasts.
So, in your PushEngage dashboard, go to Campaign » Push Broadcasts to create your push notifications.

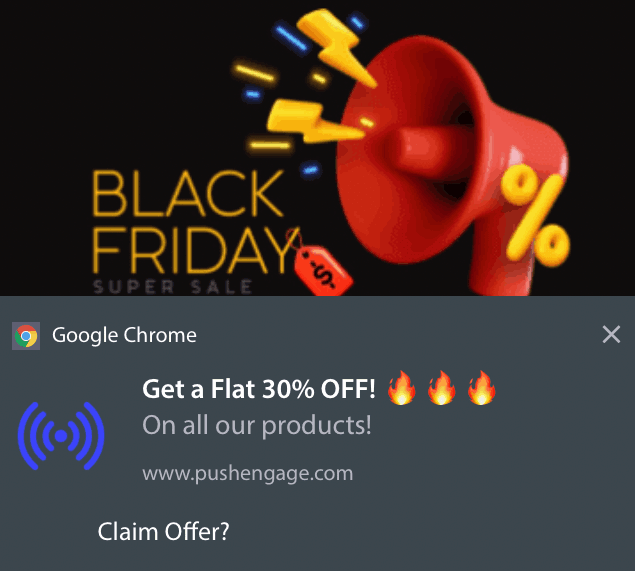
Next, follow our step-by-step process to create a powerful Black Friday Sale. If you follow every step, you should have powerful push notifications like this one:
Step #1: Draft Your Push Notification Content
Your push notification content will include:
- A Notification Title
- A Notification Message
- A URL to redirect to
- A Large Image for the Notification
- Call-to-Action Buttons
- A notification expiration limit
Start with the basic content of your notification first:
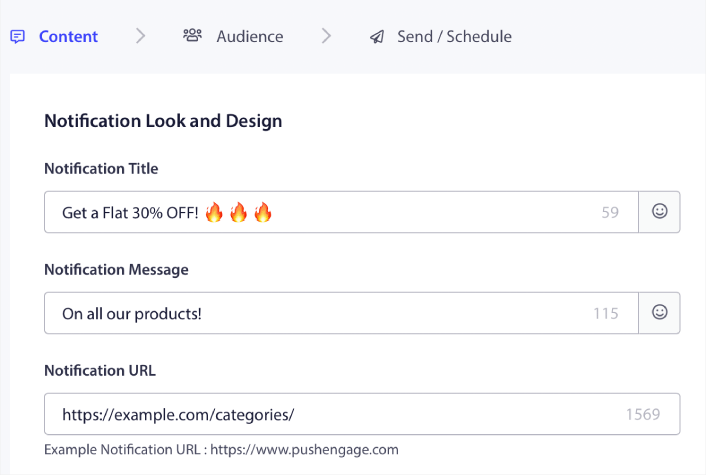
Notice the use of emojis in the Notification Title. We recommend using emojis in the title and the message for all your push notifications for higher open rates. You can A/B test your notifications as well for better performance.
Step #2: Add a Large Image to Your Notification
It’s difficult to stand apart from a bunch of notifications in the Notification Tray. That’s why you need a Large Image to make your notifications pop:
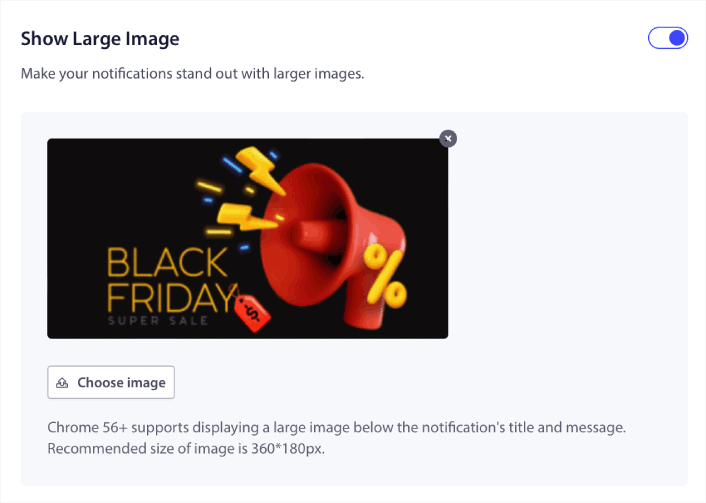
You can use PNG and JPEG formats for images.
Step #3: Add CTAs for Higher Click Rates
We’ve seen that using custom call-to-action buttons increase the click rates on your notifications. So, we highly recommend using the Multi Action Notification option to create a custom CTA:
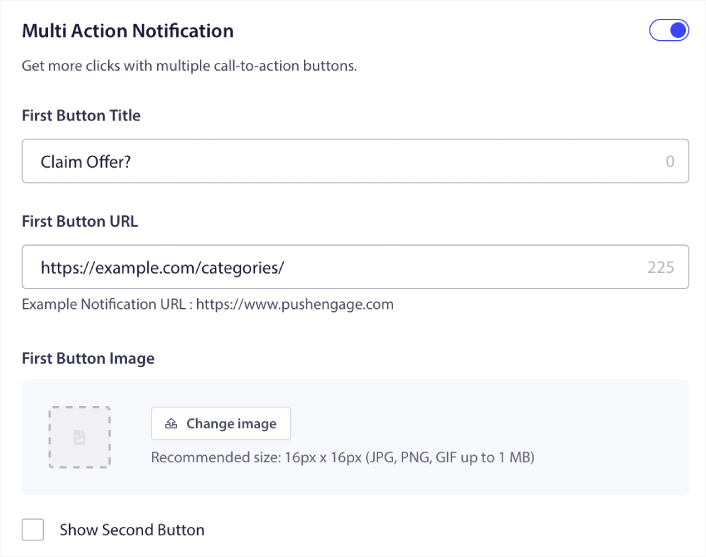
You can add at most two CTAs. If you want, you can create a split test with one CTA or two. In our experience, it’s usually best to use multiple CTAs unless you are super focused on ONLY one action.
One thing you want to be careful about is push notification character limits. Everything in push notifications has a character limit based on your subscriber’s browser and device. If your notifications are too wordy, they simply won’t show up the right way.
Step #4: Set Notification Duration
The Notification Duration is a time limit after which your push notification expires. After expiry, your subscriber won’t be able to see the notification even if it was delivered to them.
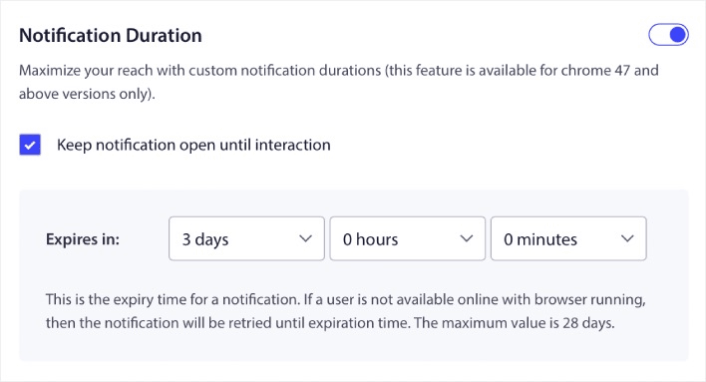
Setting a Notification Duration is a great practice for all sales. This way, your subscribers won’t get flooded with a bunch of notifications.
Pro Tip: Make sure to set the right duration for a Flash Sale. If your subscribers click through to an offer that’s already expired, they will be very unhappy.
Step #5: Select Your Audience Group
Now that you have your content in place, it’s time to find the right audience for your notifications.
How to Send Your Notification to All Subscribers
We want the maximum reach for 3 notifications:
- Early Black Friday Announcement
- Black Friday Flash Sale
- Cyber Monday Sale
So, we’re sending those 3 notifications to everyone. In the Audience tab, select Send to All Subscribers:

How to Retarget Subscribers Who Didn’t Click the Broadcast to Everyone
If you’re not sending the notification to all subscribers, you’ll need to create an Audience Group.
Go to Audience » Audience Groups and click Create New Audience Group:

To target subscribers who didn’t click the last notification, you’ll need to filter by Last click date:
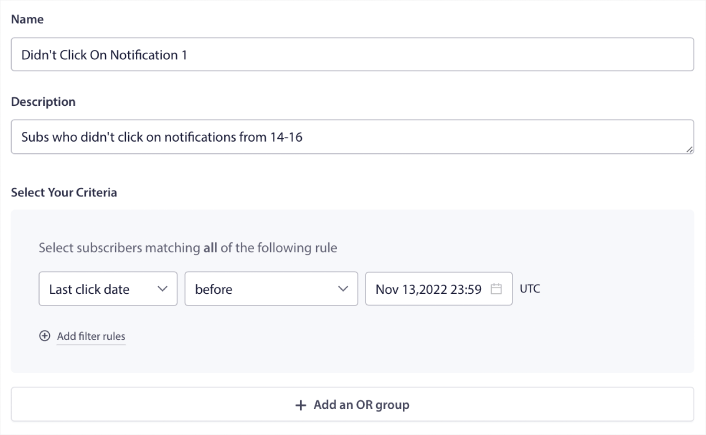
Filter by last click date before the date you sent your previous notification. So, if you sent the last push notification on 14th November, filter for subscribers who clicked on notifications only before 13th November at midnight.
NOTE: Unlike an email campaign, you can’t actually filter by click rate on the last notification. The closest approximation is to filter for clicks in a date range.
When you’re done, click on Save Notification.
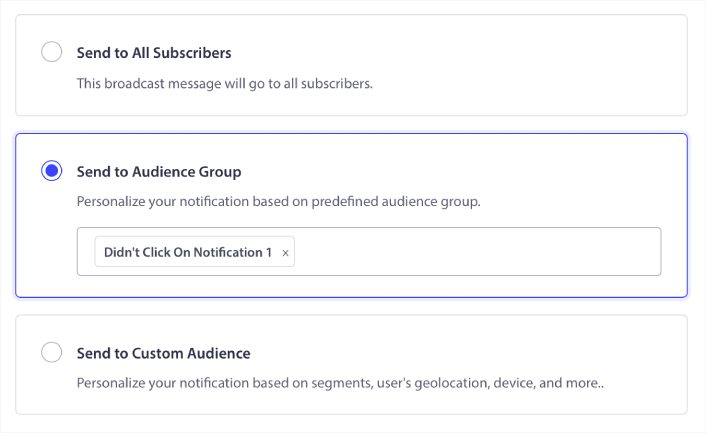
Then, head back to your push notification broadcast and select Send to Audience Group. From the dropdown, select your Group:
How to Retarget Subscribers Who Clicked the Broadcast to Everyone
If you want to target subscribers who did click on your last notification, you can create another Audience Group.
Filter your subscribers by Last click date after the date you sent your previous notification AND before the date you want to send your next notification:
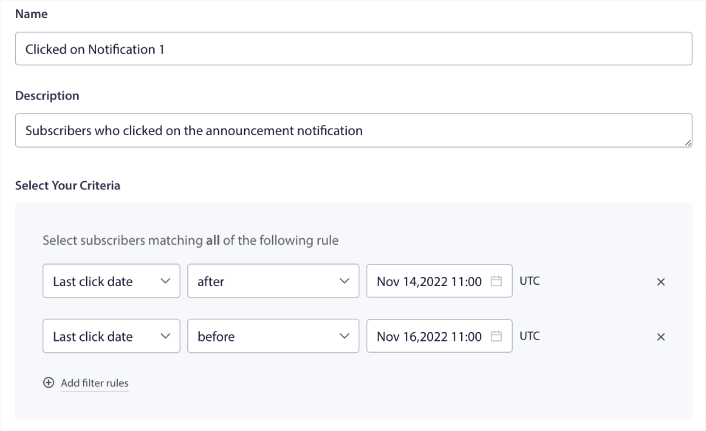
You can add AND criteria to your filter by clicking on Add filter rules. A filter like this is great for cross-selling push notifications.
Step #6: Schedule Your Push Notification
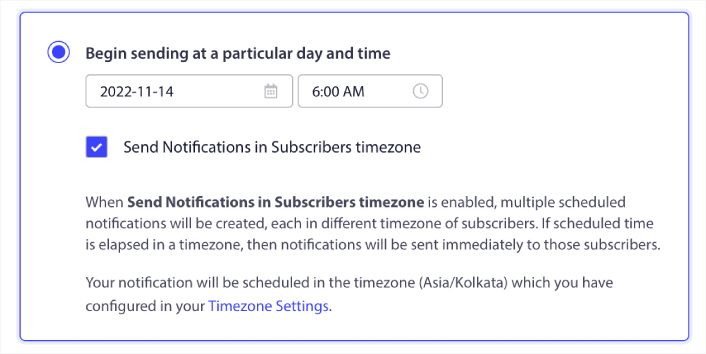
In the Schedule tab, select the Begin sending at particular day and time for granular scheduling options.
We’re sending the notification at 11:00 AM. Since browser push notifications get shown no matter when you actually sent the notification, you can send it even earlier if you want.
Since my default Timezone Setting is not in EST, I’m using the Send Notifications in Subscribers timezone option:
Don’t forget to test your notifications by clicking the Test Notification button. When you’re done, click Schedule Notification.
What’s the Ideal Black Friday Push Notifications Schedule
There’s no one right or wrong schedule with holiday campaigns. But we follow a very strict schedule and it works:
- 3 notifications for an early Black Friday sale
- 1 notification for Black Friday
- 1 notification for Small Business Saturday
- 1 notification for Cyber Monday
- 1 notification for Cyber Monday Extended sale
And retargeting push notifications to target the subscribers who clicked on them or didn’t. Let us know how that works for you. In the meantime, check out these resources:
- Comment augmenter les clics sur vos notifications push avec la curiosité
- Comment personnaliser chaque notification push
- Comment vous démarquer avec des médias riches dans vos notifications push
- Comment réactiver les abonnés push dormants
- Comment utiliser les notifications push pour tenir les clients informés
- Comment utiliser les emojis dans vos notifications push pour des taux de clics plus élevés
- Comment augmenter les conversions en créant un sentiment d'urgence
Et si ce n'est pas déjà fait, commencez avec PushEngage dès aujourd'hui.


