Notice: There is no legacy documentation available for this item, so you are seeing the current documentation.
The subscription opt-in or Popup Modal can now customize and also include a segment checkbox so that the website visitor can get a chance to go ahead and decide if they want to be notified for all campaigns or only selected segments.
The Different Styles of Subscription Opt-in
There are various styles in Subscription Popup that could convert your visitors to your web push subscribers and customers.
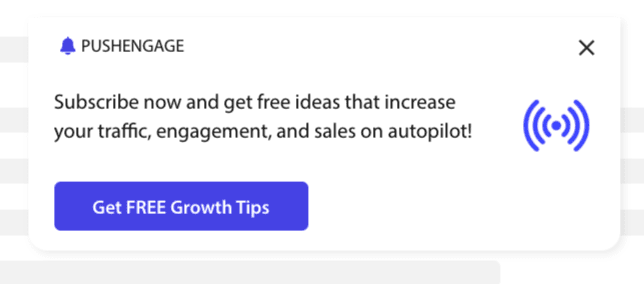
Sleek Opt-in Box: This style has a sleek design and only one button rather than two.
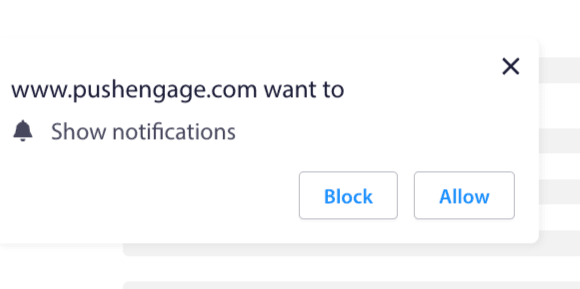
Safari Style Box: This is a classic double-step opt-in with two buttons to click on Allow or Deny, which can be customized.
Bell Placed Bar: This small bell tells you to subscribe or block. The small bell icon in the bottom corner can be customized but takes up less screen space, allowing people to subscribe to the push notifications.

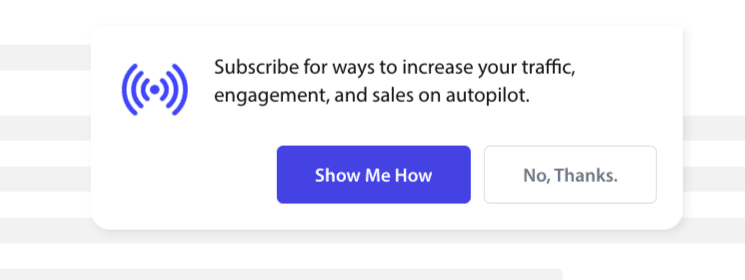
Floating Bar: This Popup style spreads across the screen and will be placed at the bottom. You can add longer text to the Design popup.

Push Single-Step Opt-in: A single-step permission box, that does not allow you to customize or add any personalized message.
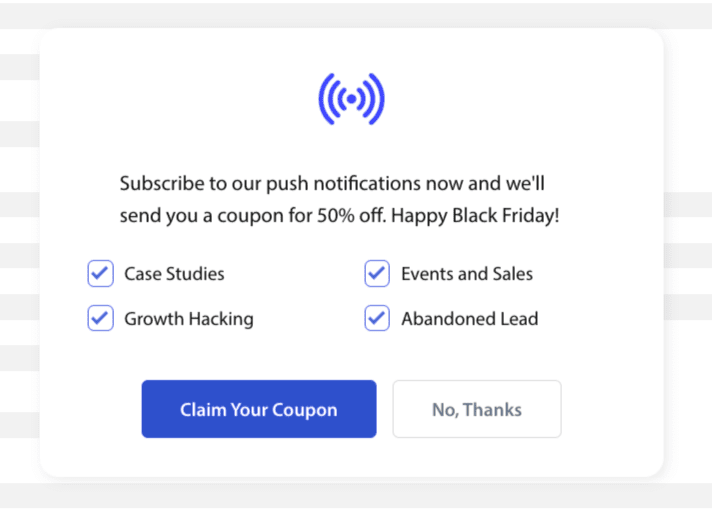
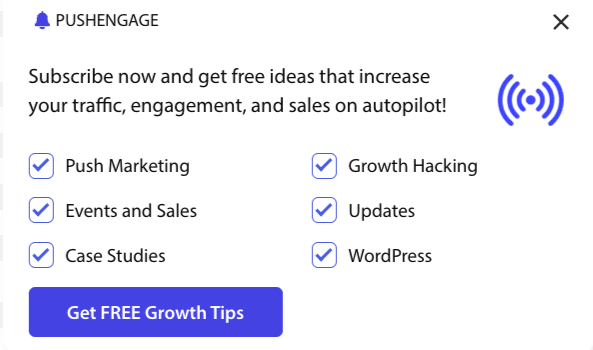
Large Safari Style Box : A box that appears in the middle of the screen and allows you to add segments.
Note: All the subscription popup styles can be edited or customized except for Single Step Opt-in. The Push Single Step Opt-in is the browser’s default style and cannot be edited or customized
Adding Segments to Subscription Opt-in
You can choose the style you want to opt in to and click Edit. Under Popup Design, you should Enable All Segments.
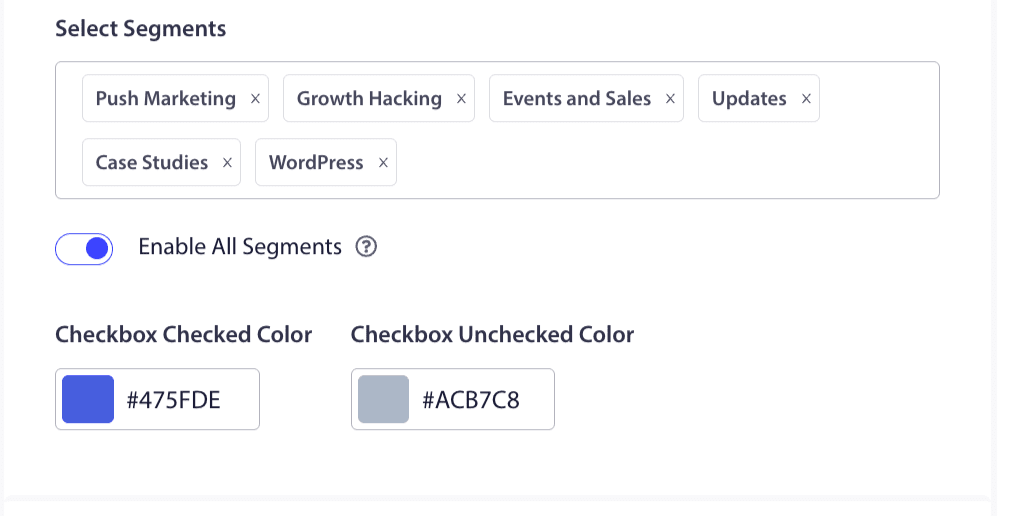
You can choose the segments from the dropdown and check if the preview is what you want it to look like. You also have the option to customize the color of the checkboxes so you can align them with your Brand’s colors. This is how your preview would look like –
Understanding options to enhance the functionality
Enable Opt-in Subscription Rules
This popup modal will be displayed across all the pages the global targeting rule allows. However, you can add these pop-ups on specific web pages if you wish.
Enable Subscription Overlay
An overlay is an option that highlights people to click on allow, indicating users to click on allow the button to receive push notifications.
Enable Reminder Prompt:
Browsers like Chrome, and Edge are based on website visitors’ previous behavior if they click on Block often. They enable a quieter UI, a bell icon in the address bar. It is an optimized version of the subscription pop-up for people who usually deny notifications. This reminder can be shown on a desktop only. It is to educate people to still subscribe to web push campaigns.
Subscription pop-up:
This is the toggle button to disable or enable showing the opt-in on the pages installed with the code. If you turn off this toggle, you will stop collecting subscribers.
Understanding Display Options
This screen will help you optimize how the subscription pop-up want to be displayed.
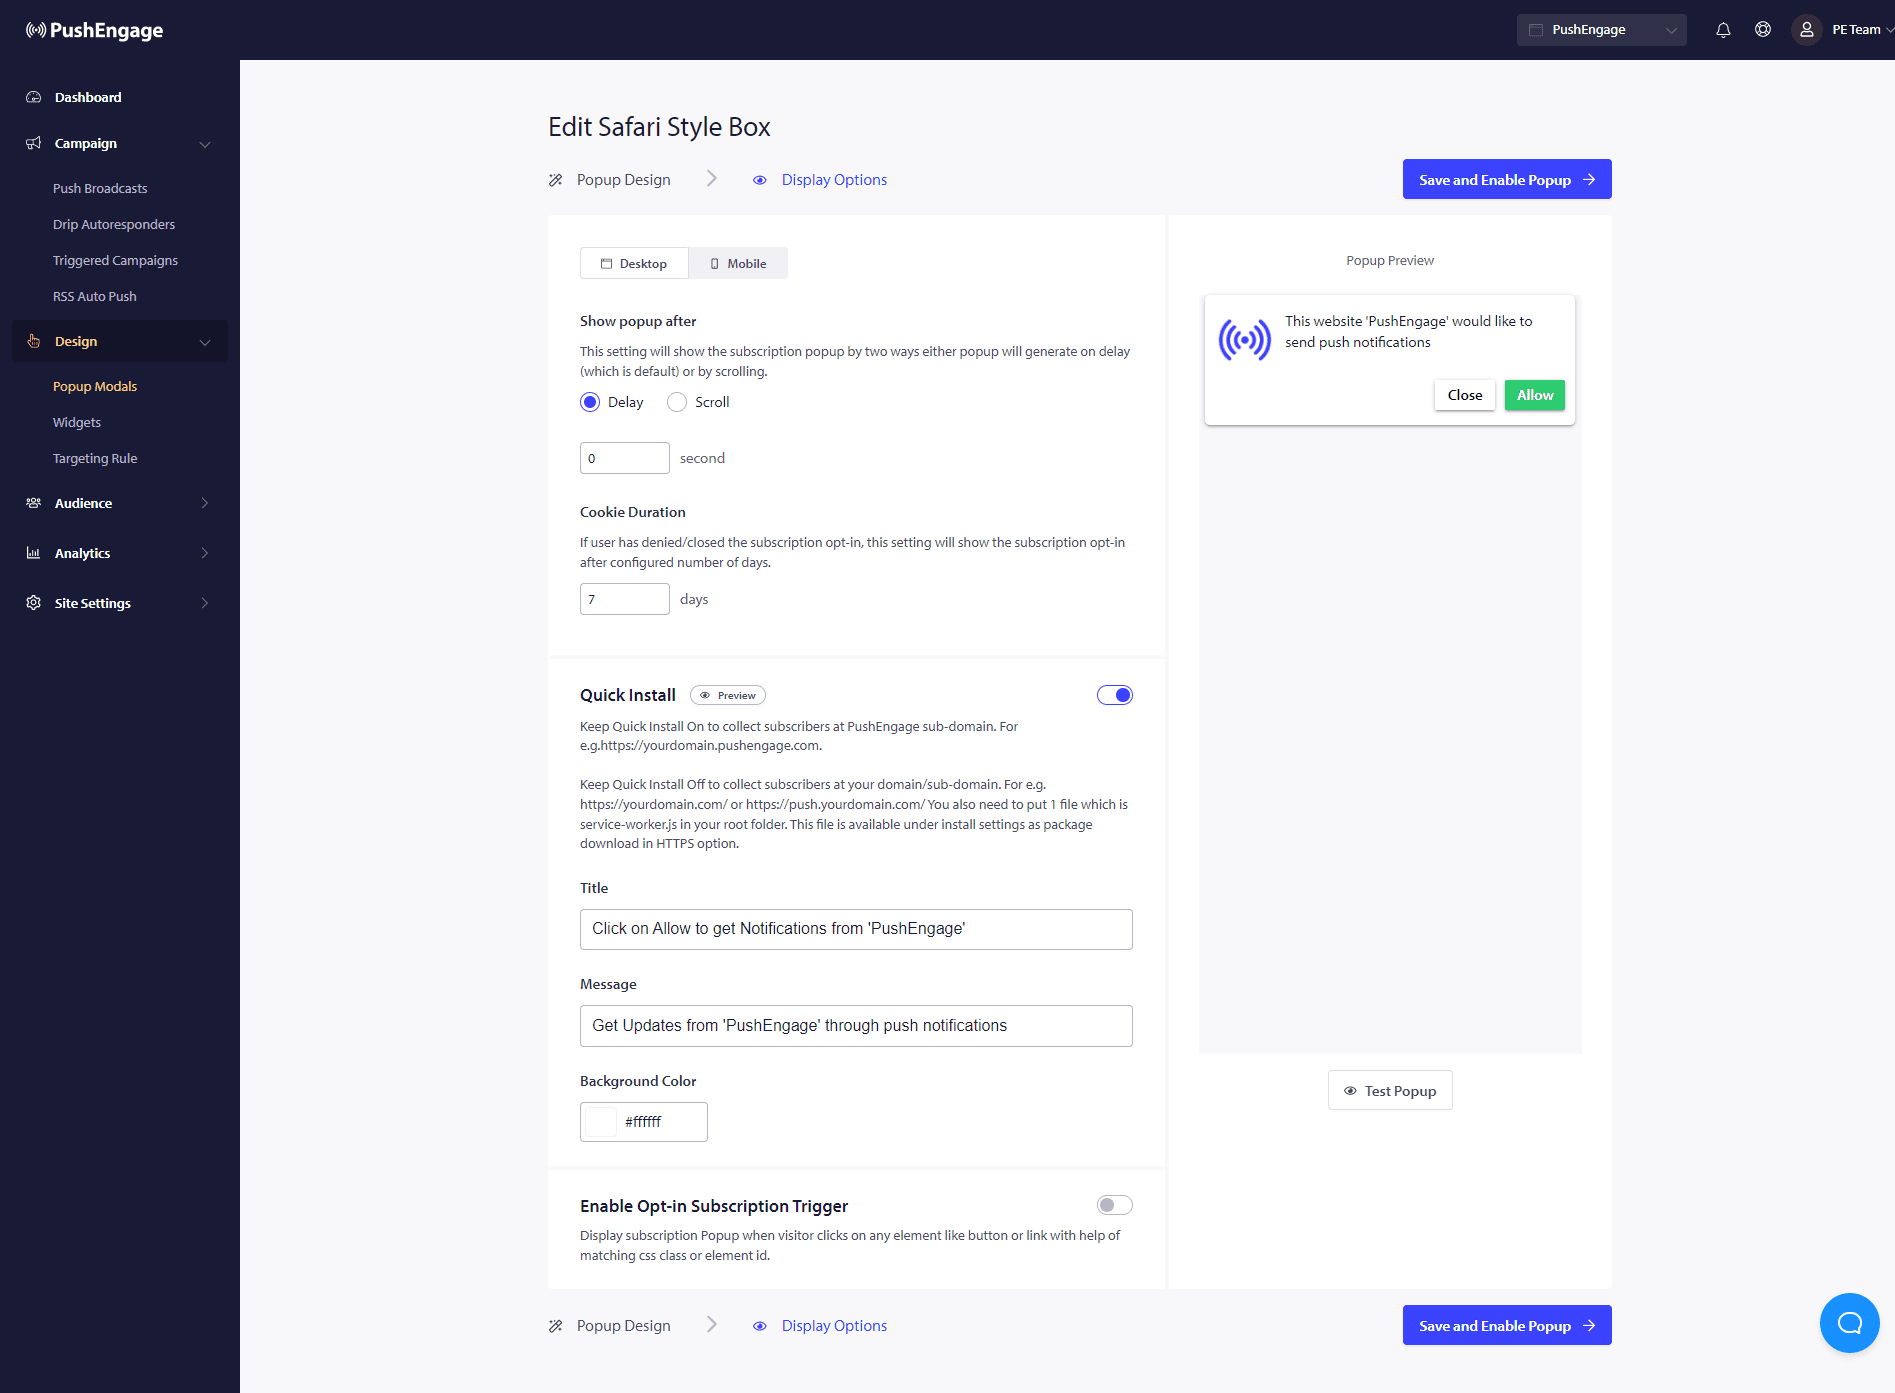
Quick Install :
We recommend keeping this option always off. So subscribers are collected on your domain. This option is only for people who are not able to add service workers to their website and collect subscriptions on their domain.
Enable Opt-in Subscription Trigger:
Apart from page load, the pop-up can be triggered on any other event like when the visitor clicks on any button or link with the help of a matching CSS class or element ID. The popup can be triggered without making changes to the codebase.
Show Opt-in:
This is where you can set the rule to either show the opt-in after a delay or after scrolling a certain percentage of the page.
- Delay – After how long should the subscription popup show up? We recommend that the best practice is to have it under 5 seconds or maximum 10 seconds.
- Scroll – You can decide that the subscription popup can be triggered if a visitor has scrolled X percentage of the screen.
- Cookie Duration – If a person cancels and decides to allow neither/block the subscription popup, you can define the reset cookie duration. After those many days, the visitor can see the popup again.
That is it. Once you have customized the subscription pop-up as per your need, you can save the changes.
You are now ready to see your website visitors getting converted as web push subscribers.
If in case you run into any issues, please feel free to contact us by clicking here. Our support team will be able to help you.


