Notice: There is no legacy documentation available for this item, so you are seeing the current documentation.
This PushEngage integration allows you to send Web & App Push Notifications to your users directly from HubSpot. You can trigger notifications based on your HubSpot Workflows, letting you automate push campaigns tied to user actions, segmentation, or funnel stages. Whether you want to engage users based on their activity, nurture leads, or send timely updates, PushEngage enables you to send the right message at the right time without leaving your HubSpot dashboard.
Before You Start
- A PushEngage account with Web and/or App Push capabilities enabled. You can even integrate HubSpot with Free PushEngage Plan.
- A HubSpot account with right permissions, which is Super Admin or App Market Integration Permissions.
If you have not already installed the PushEngage on your website. Here is how you can set up web push notifications and app push notifications with PushEngage. Once you have push notifications installed on your website or app, you can look at integrating HubSpot for sending push campaigns.
Please note that you will have to add code so you can collect web or app push subscribers through PushEngage but your sending will be automated through HubSpot workflows.
Mapping Unique identifier to your PushEngage subscribers
In HubSpot, you can use two types of mapping IDs: Subscriber ID and Profile ID.
You will need to map a unique identifier, which can be any HubSpot property, to your PushEngage subscribers. This ensures that subscriber data is correctly synchronized between PushEngage and HubSpot.
Retrieving Subscriber ID to add as HubSpot Property
You can refer to this API documentation to understand the usage and details about retrieving and assigning as any of your contact property.
getSubscriberId().then(successFunctionCallback).catch(errorFunctionCallback);
This is how the above code snippet can be used –
PushEngage.push(function () {
  PushEngage.getSubscriberId()
    .then(function (subscriberId) {
      console.log(subscriberId);
    })
    .catch(function (error) {
      console.log(error.message, error.details);
    });
});
Adding HubSpot Property as Profile ID
You can refer to this API documentation to understand how you can assign a HubSpot Property as Profile ID in PushEngage and use it to send out push notifications.
setProfileId(profileId)
  .then(successFunctionCallback)
  .catch(errorFunctionCallback);
This is how the above code snippet can be used –
var profileId = '[email protected]';

PushEngage.push(function () {
  PushEngage.setProfileId(profileId)
    .then(function (response) {
      console.log(response);
    })
    .catch(function (error) {
      console.log(error.message, error.details);
    });
});
Connecting PushEngage with HubSpot
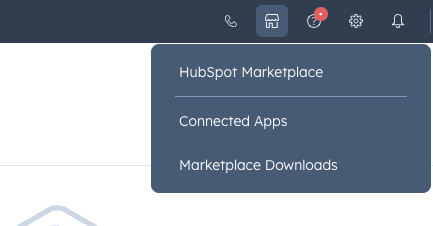
You need to Install PushEngage. You can navigate to top navigation bar and choose HubSpot Marketplace Icon.
Furthermore, you can search for PushEngage and click Install Button.
Once you have activated it, and if you have the right permissions, you will see an option to connect your HubSpot App & PushEngage account.
You can choose the site you want to connect with your HubSpot account.
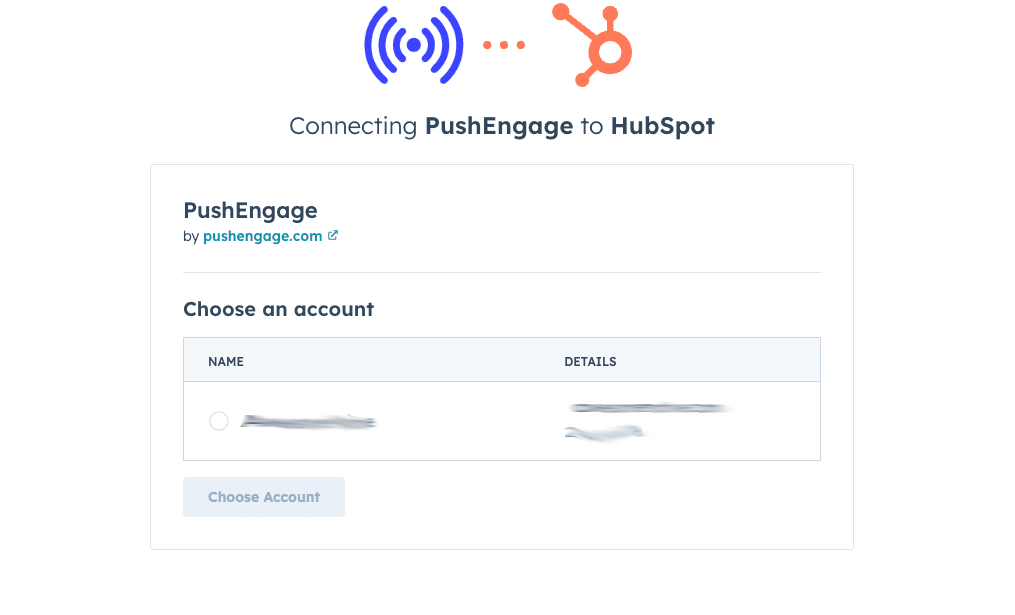
You can choose which website do you want to connect from your PushEngage account to HubSpot.
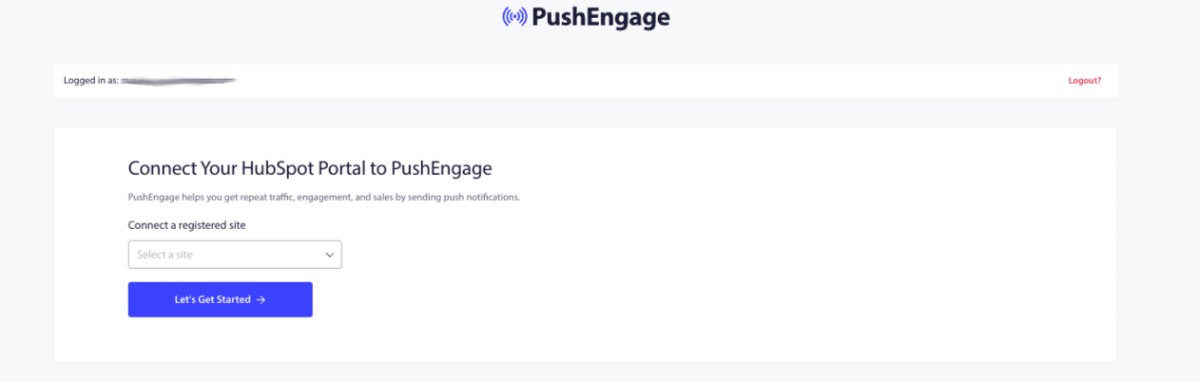
It’s very easy to connect PushEngage account to HubSpot workflow. Once you have connected this account, you will be redirected to HubSpot Dashboard.
Defining Workflow within HubSpot
In HubSpot, go to Automation » Workflows.
You can either create the Workflow from scratch or choose from Templates.
Choose a trigger it could be contact enrolled in list, property change or form submit.
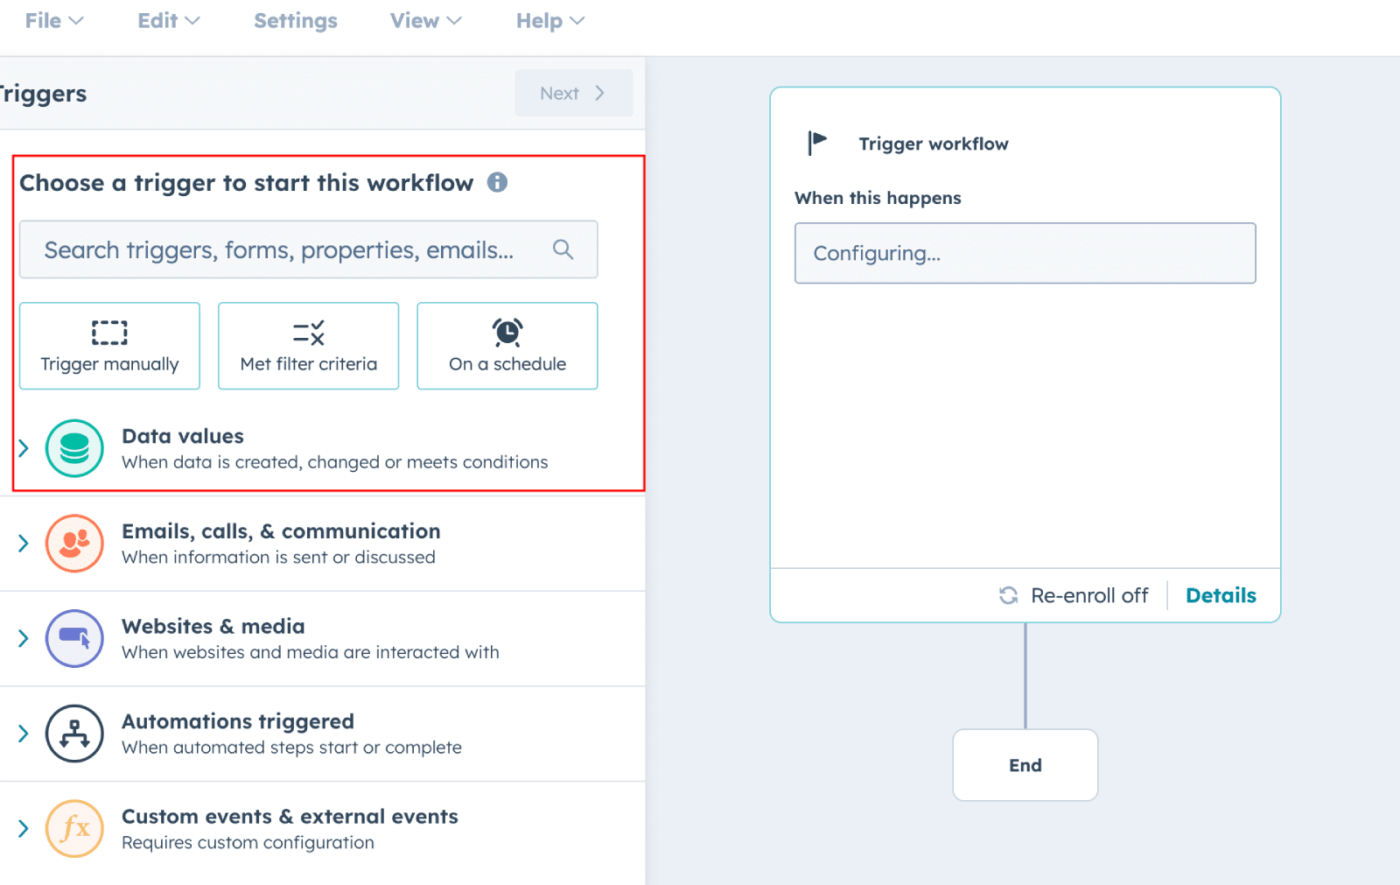
You will have to decide Trigger point and also the criteria, once this is set you can go ahead and Save & Activate the workflow.
Once you have added Trigger, based on Trigger you should be choosing the Action that needs to be taken.
You can search for PushEngage under Integrated Apps. This is how it should look like –
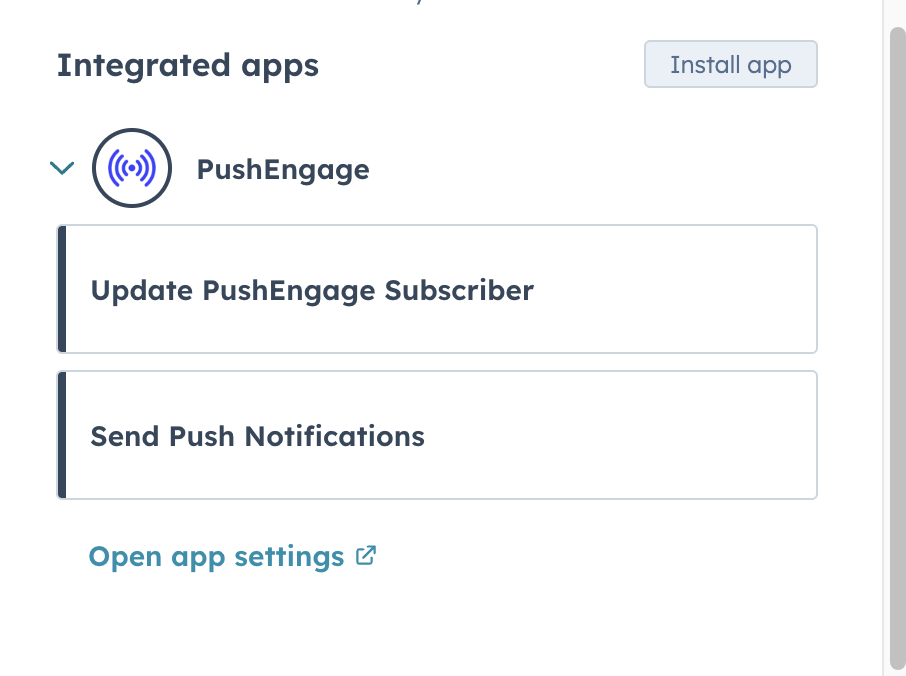
There are two actions you can add to your HubSpot Trigger. Either you can Update a PushEngage Subscriber or Send a Push Notification.
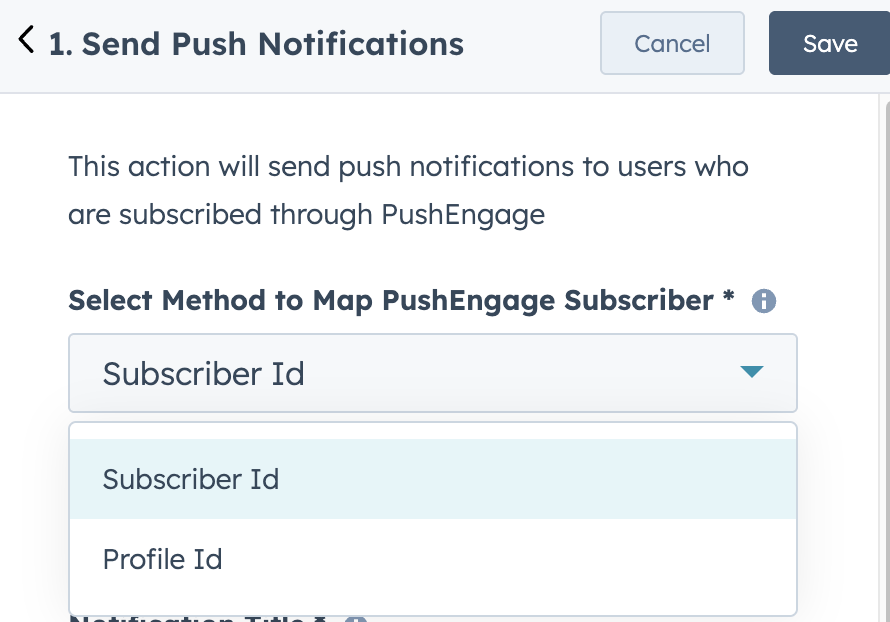
We will be using Send a Push Notification as an example. Once you choose any Action you will be asked to select a Mapping ID.
There are two mapping ID’s available. Subscriber ID & Profile ID any ID that you choose has to be mapped with any HubSpot Properties.
We have added Merged Contacts ID as mapping field here. If you have chosen a different property, you can choose that as mapping identifier.
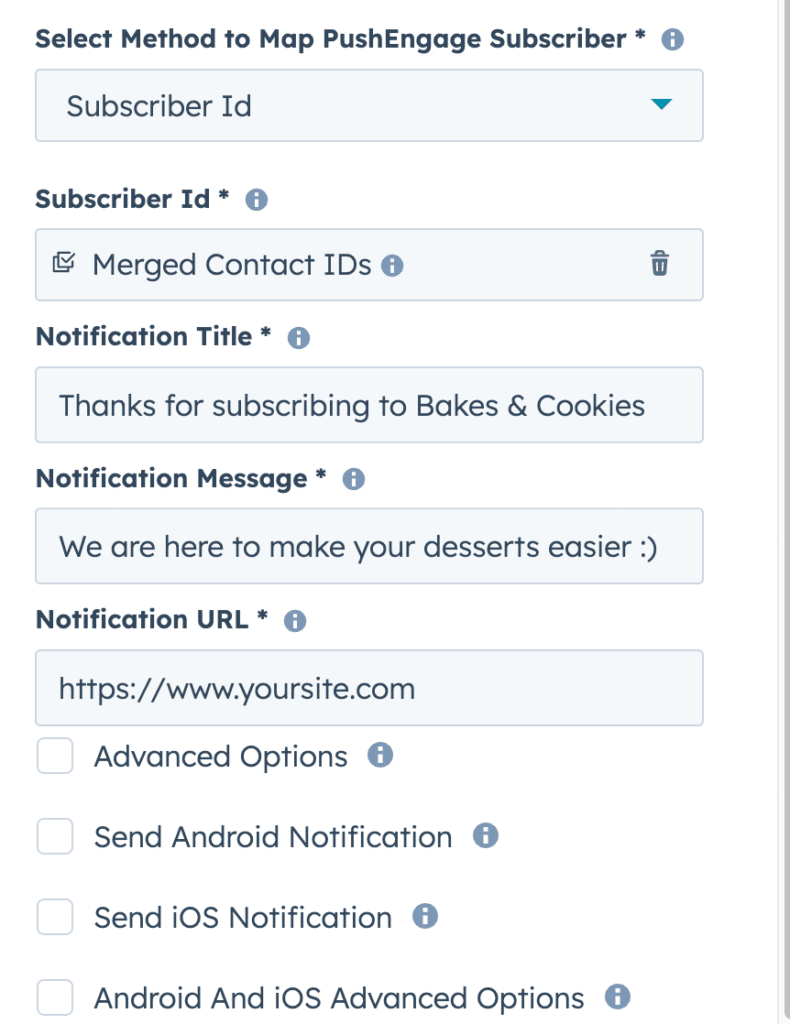
You will see a list of Sending Options with PushEngage here, and you can choose anyone of them to send out a push notification campaigns either to your web subscribers or even Mobile App Subscribers.
Sending a Push Notification
When you are sending within HubSpot workflow. You have the ability to choose custom properties within Notification Title & Message.
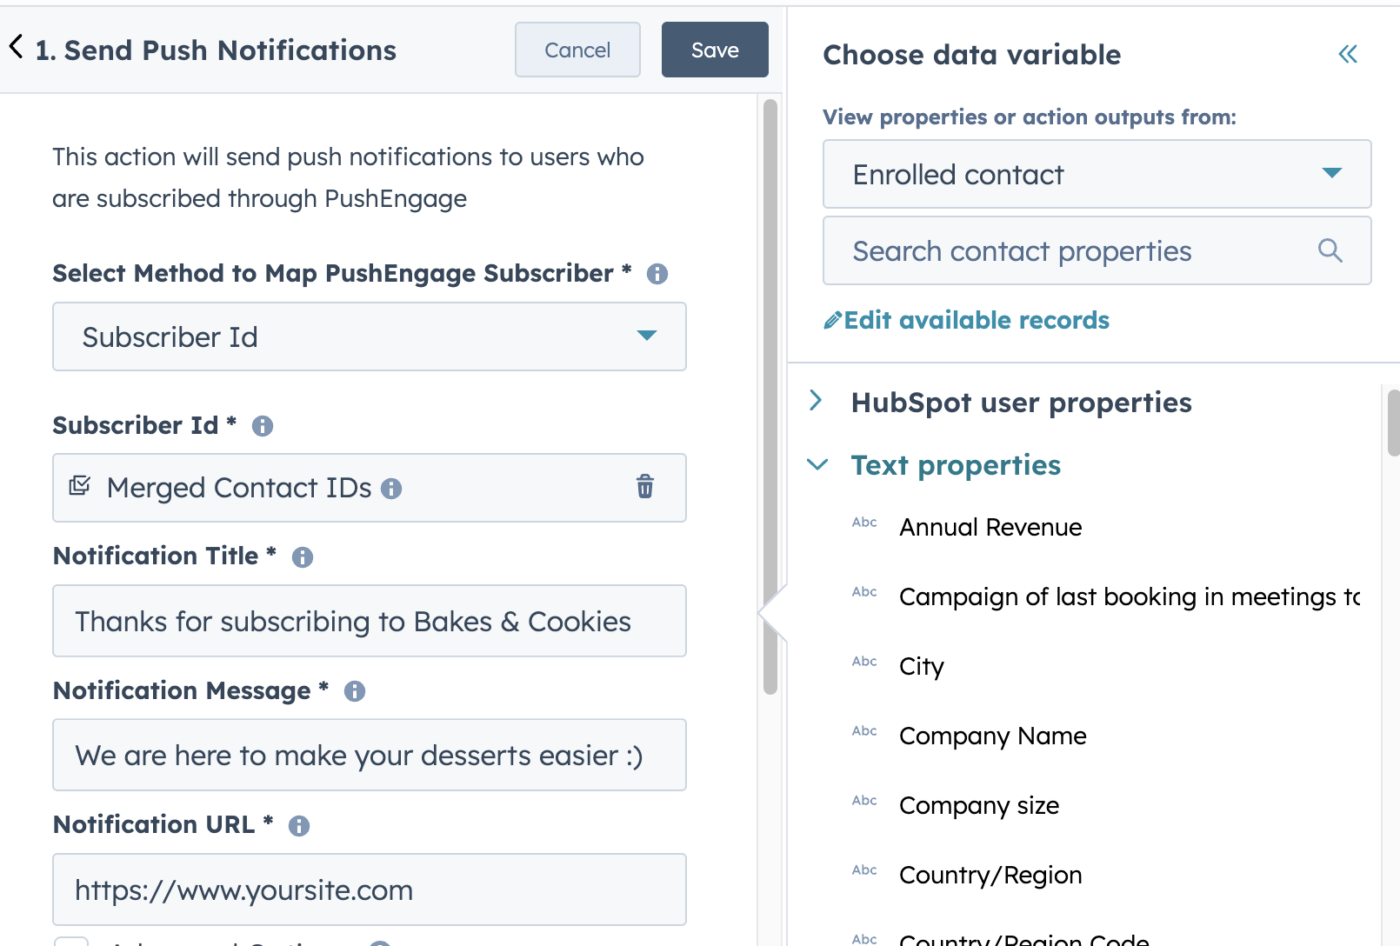
For now, we have used a simple text message in title & notification, but you can variables to this message as well.
You also have the ability to use Advanced Options where you can send additional product images to make your push campaigns rich.
It is also possible to send out a push notification with one click to your App Push Subscribers. You can add Deep Link, Priority and Collapse ID along with defining channels all within HubSpot.
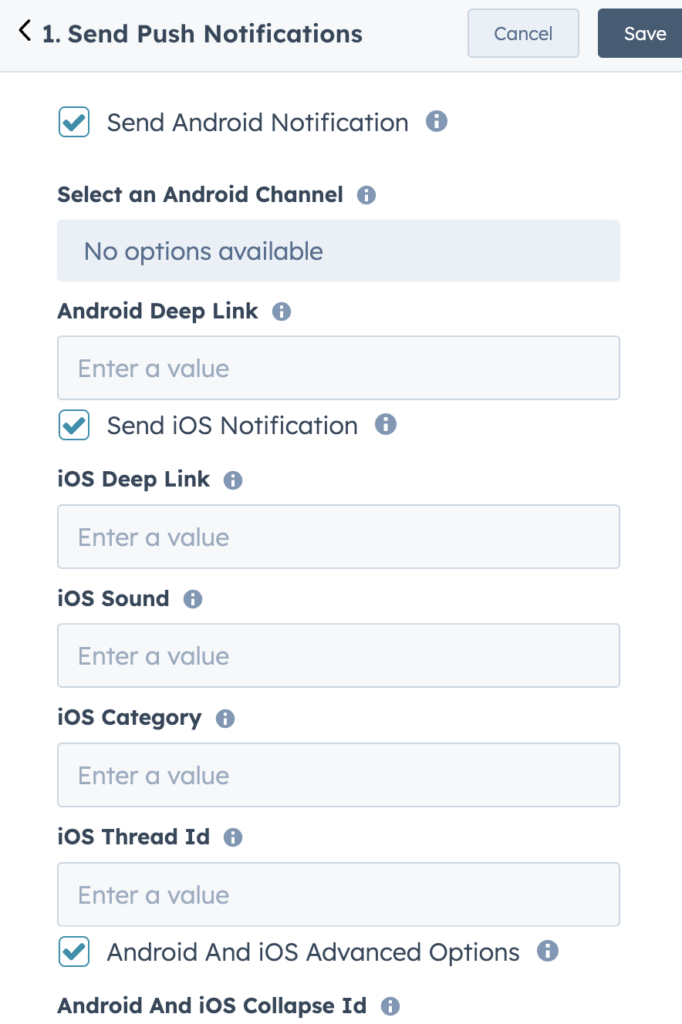
Once you have drafted the campaign, you can click on the Save the Push Notifications button and enable the workflow to send out the push notification.
This is how your completed Workflow would look like for a record created and push notification configured to be sent within HubSpot dashboard.
If you run into any issues, please feel free to contact us by clicking here. Our support team will be able to help you.


