Notice: There is no legacy documentation available for this item, so you are seeing the current documentation.
PushEngage allows you to convert your website visitors to web push subscribers. A subscriber is anyone who would click on allow on the subscription popup you configure on your website. A web push campaign does not capture personal information like email or phone number. However, you get to reach out to your subscribers even when they are not on your website.
Installing PushEngage
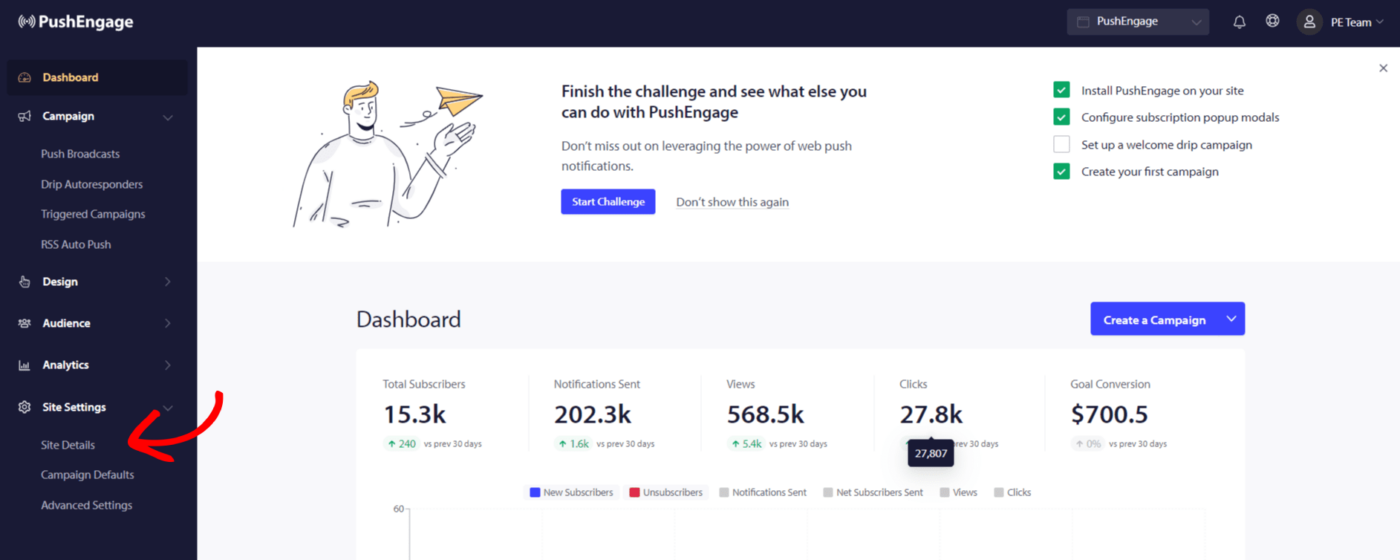
1. To complete the PushEngage installation navigate to Site Settings » Site Details.
2. You need to enter then Site information – Site name, the logo of your brand, and ensure the site URL is correct.
Now you can move towards updating the correct time zone, as the scheduled campaign will use this time zone. You need to enable the geolocation.
You can generate an API key if you can use API integration anytime soon. Although this can be done later also, this is only an optional step.
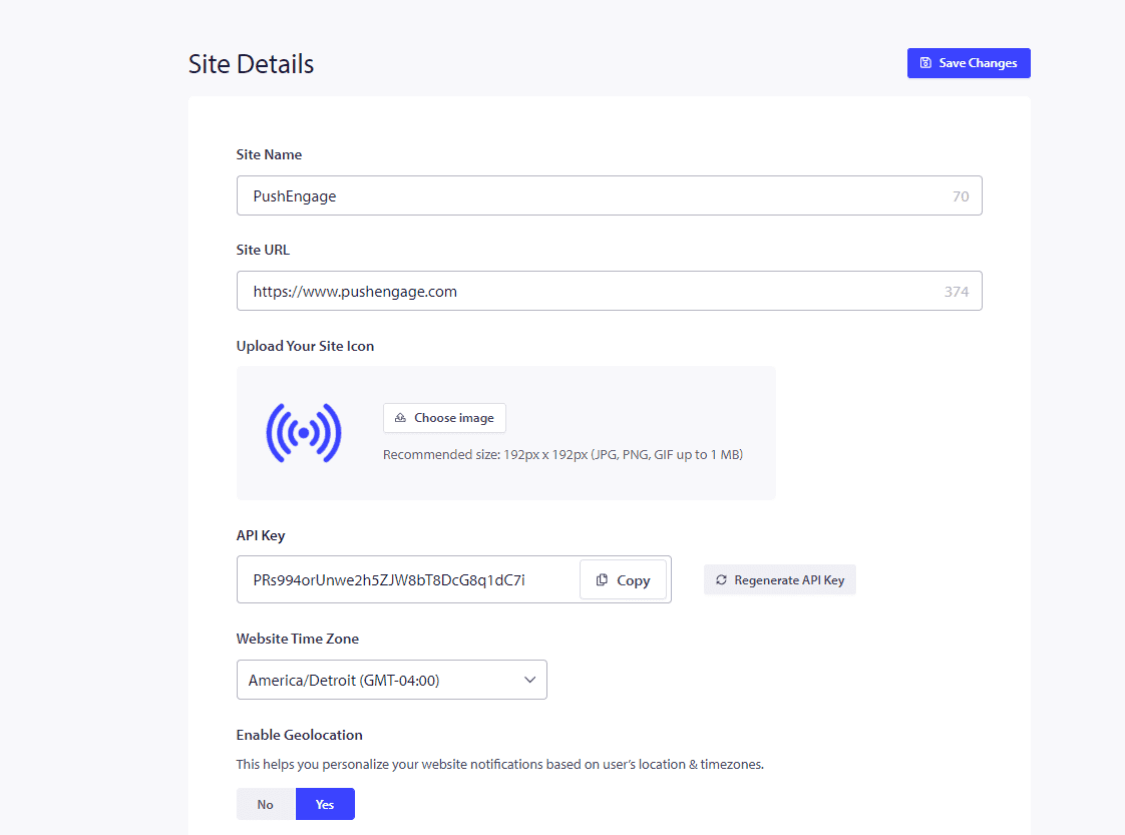
Once done, click on Click Here for Setup Instructions.
3. If you have paid plans, ensure to remove PushEngage Branding. You can check this box and save changes.

4. Select your site type from the option mentioned and follow the shared steps to complete the installation.
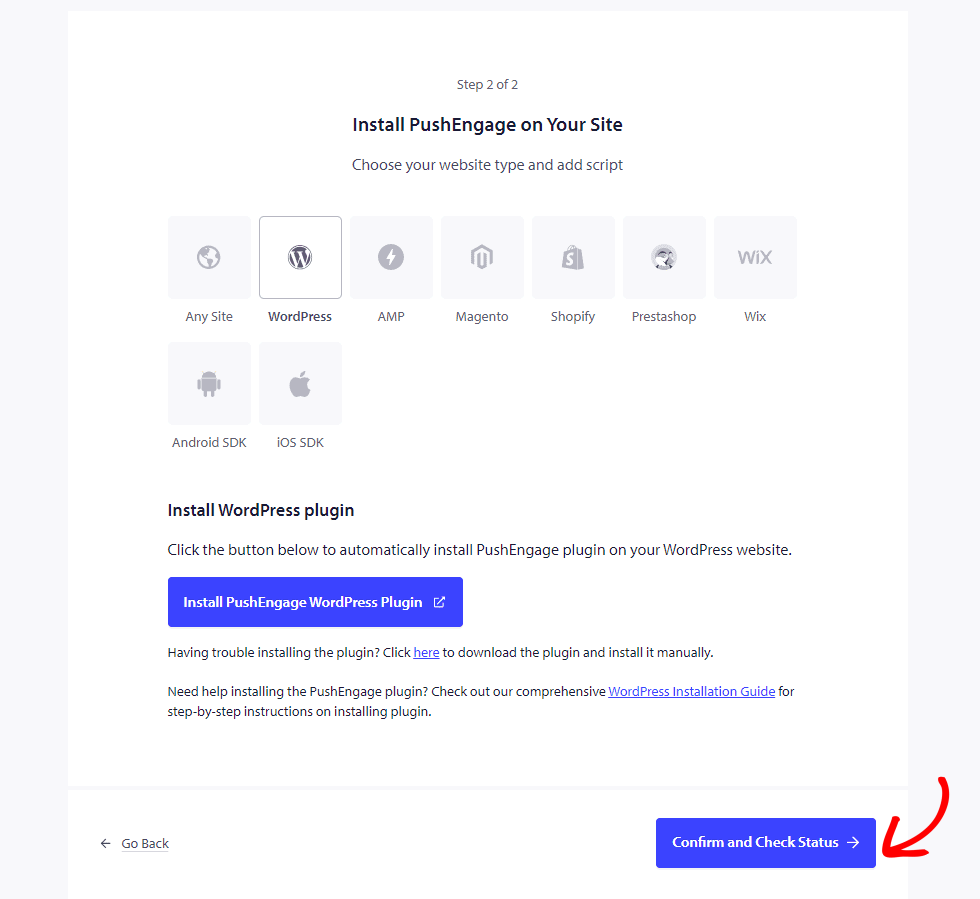
If the platform on which your site is hosted is not mentioned, copy the installation code and add it to your website’s HTML. If you have access to your root directory, please download the service-worker.js file and add it to the root directory so it is publicly accessible.
If you don’t have access to the root directory, you can skip adding the service-worker.js file. You can add the code and use any double-step opt-in to collect subscribers.
Once this is done, click on Confirm and Check Status and save the settings.
Selecting the Subscription Opt-in
Now that you have completed adding the code. You can configure the subscription opt-in.
You can navigate to Design » Popup Modals.
You can choose either of the Subscription Dialogbox styles by switching on the Toggle button.
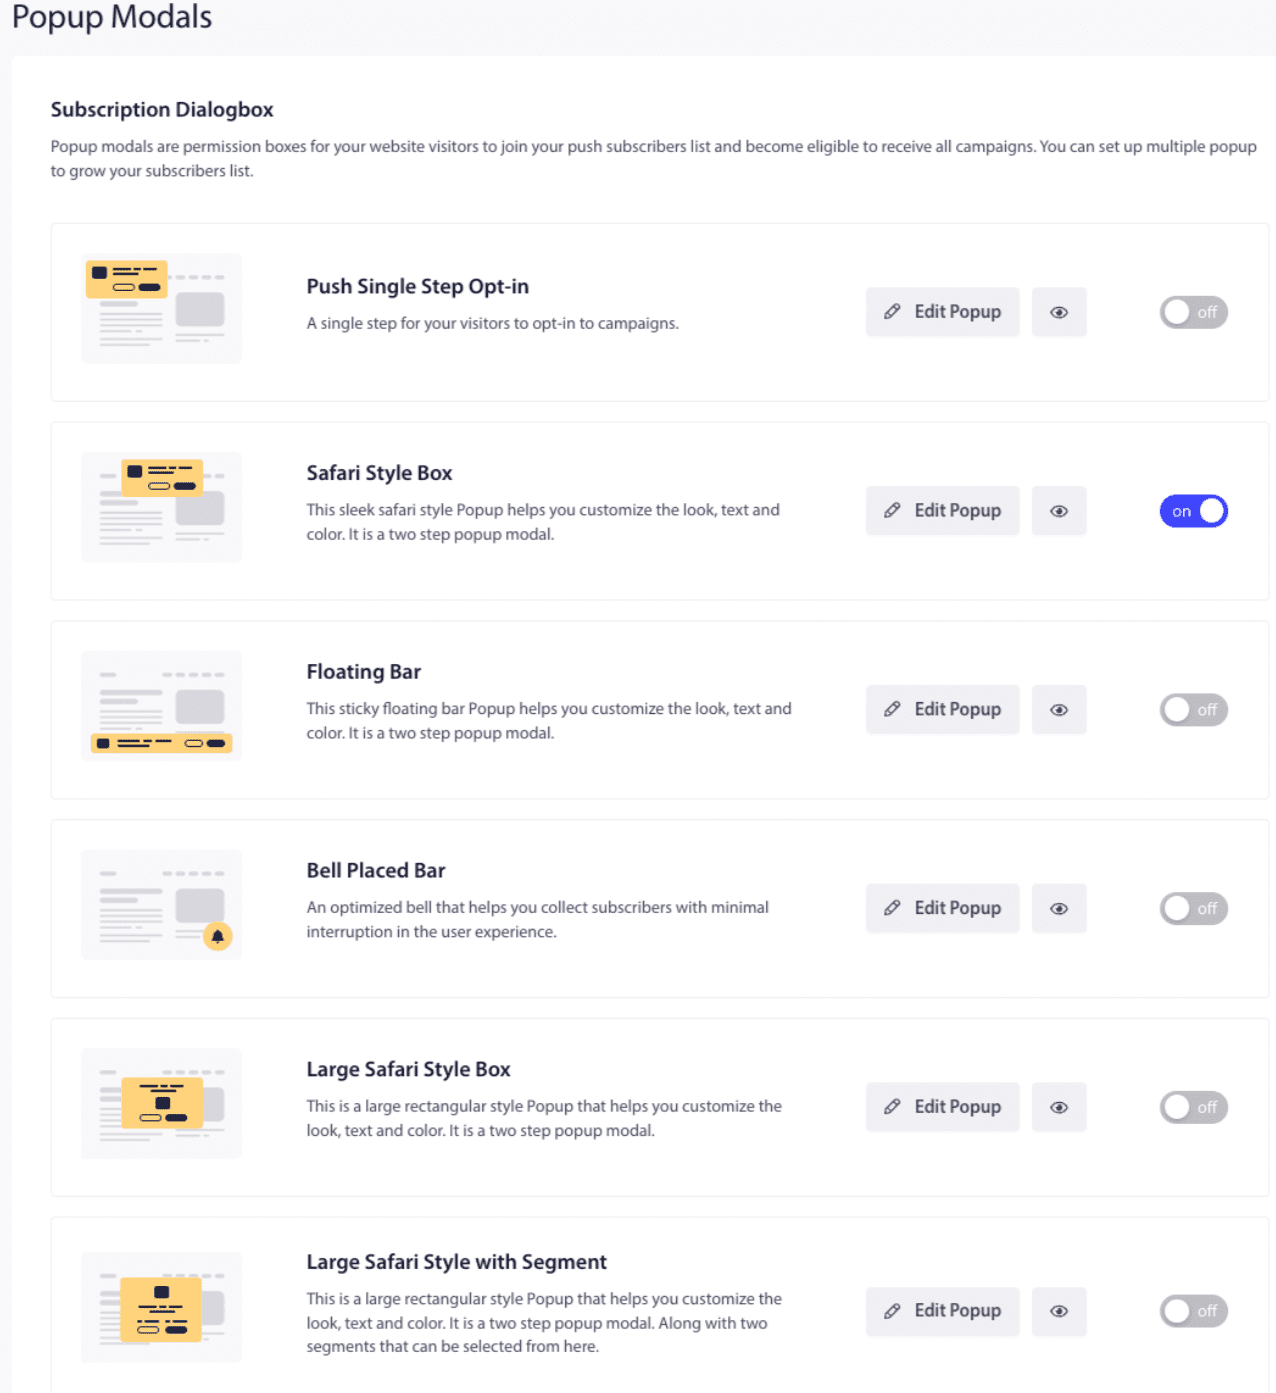
You can then design the Opt-in styles to suit your business requirements. Push Single Step Opt-in is a one-step subscription; the others are Double Step Opt-in, which allows visitors to customize but requires two steps to become subscribers.
Once you have completed the editing, click on Save.
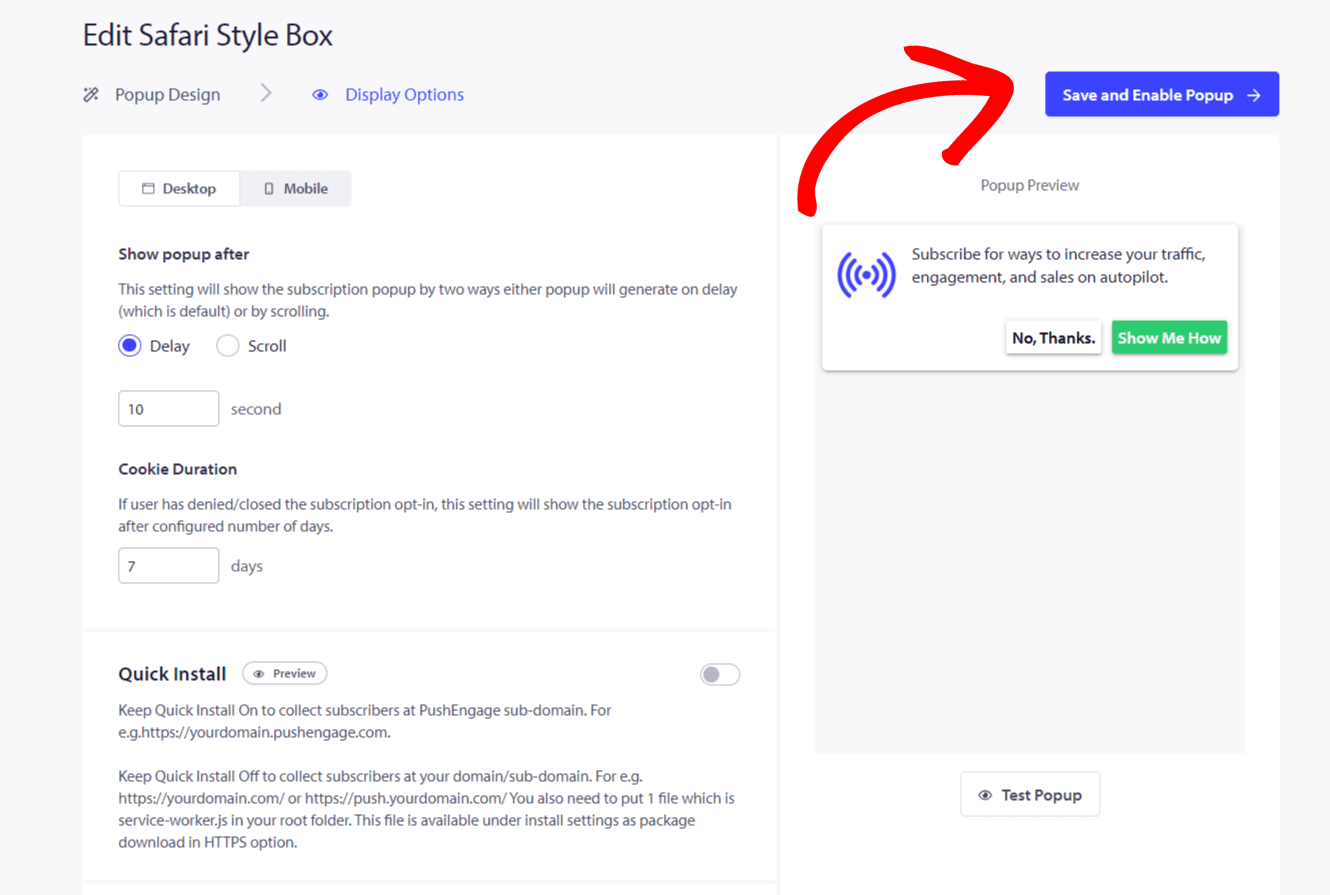
After styling the Popup, you can move to Choose Display Options tab. Once all the settings have been configured, you can Save and Enable Popup.
Now that everything is set up. You should test yourself on how the popup looks on your website.
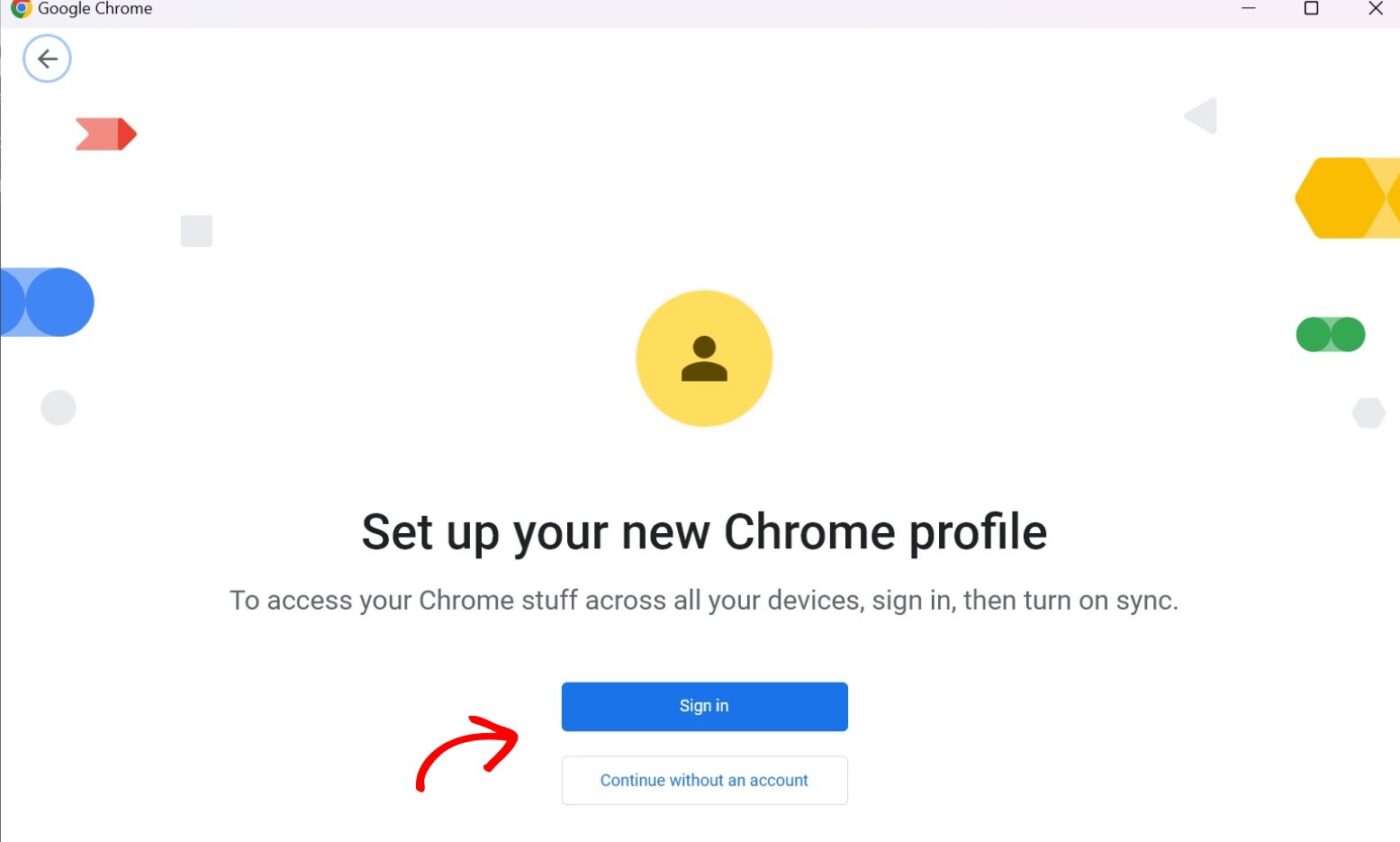
Adding Yourself as the First Subscriber to Test
1. Adding a new profile to your Chrome/any other browser. Please navigate to the Avatar/Photo icon for Chrome and click Add. Your new profile will open once you have added a name and selected an icon.
2. Visit your website in the newly created profile; you should see the Subscriber Opt-in you selected.
3. You can click on allow. Please ensure you have allowed push notifications in your operating system and browser settings.
Once you see the subscribers growing in your Dashboard, you can start designing the campaigns and reaching out to subscribers.
If you run into any issues, please contact us by clicking here. Our support team will be able to help you.


