Notice: There is no legacy documentation available for this item, so you are seeing the current documentation.
Apple has released iOS and iPadOS 16.4, which supports web push notifications for web apps added to the Home Screen on iPhone and iPad devices. In this guide, we help you set up your website to send notifications to iPhone and iPad users visiting your website.
Unlock Unlimited Reach on iOS Devices. Don’t Miss the Momentum.
Get set up today and bring your site visitors back before they forget you. Start free, send smarter, and grow with a plan that fits your site.
Web Push Notifications are available for Safari browser, Google Chrome, and Edge on iPhone and iPad with iOS and iPadOS 16.4. iOS requires the user to add your website to their Home Screen and then open the Web App by tapping its icon. The web app opens like any other native app on iOS or iPadOS instead of opening in a browser. Users can grant permission to receive push notifications and then manage those permissions in Notifications Settings just like any other app on iPhone and iPad.
Before You Start
You require a few things to have the web push campaigns running on iOS devices.
- Your web app must serve a Web Application Manifest file (manifest.json) with its display member set to standalone or fullscreen.
- The users must be on iOS or iPadOS 16.4 or later.
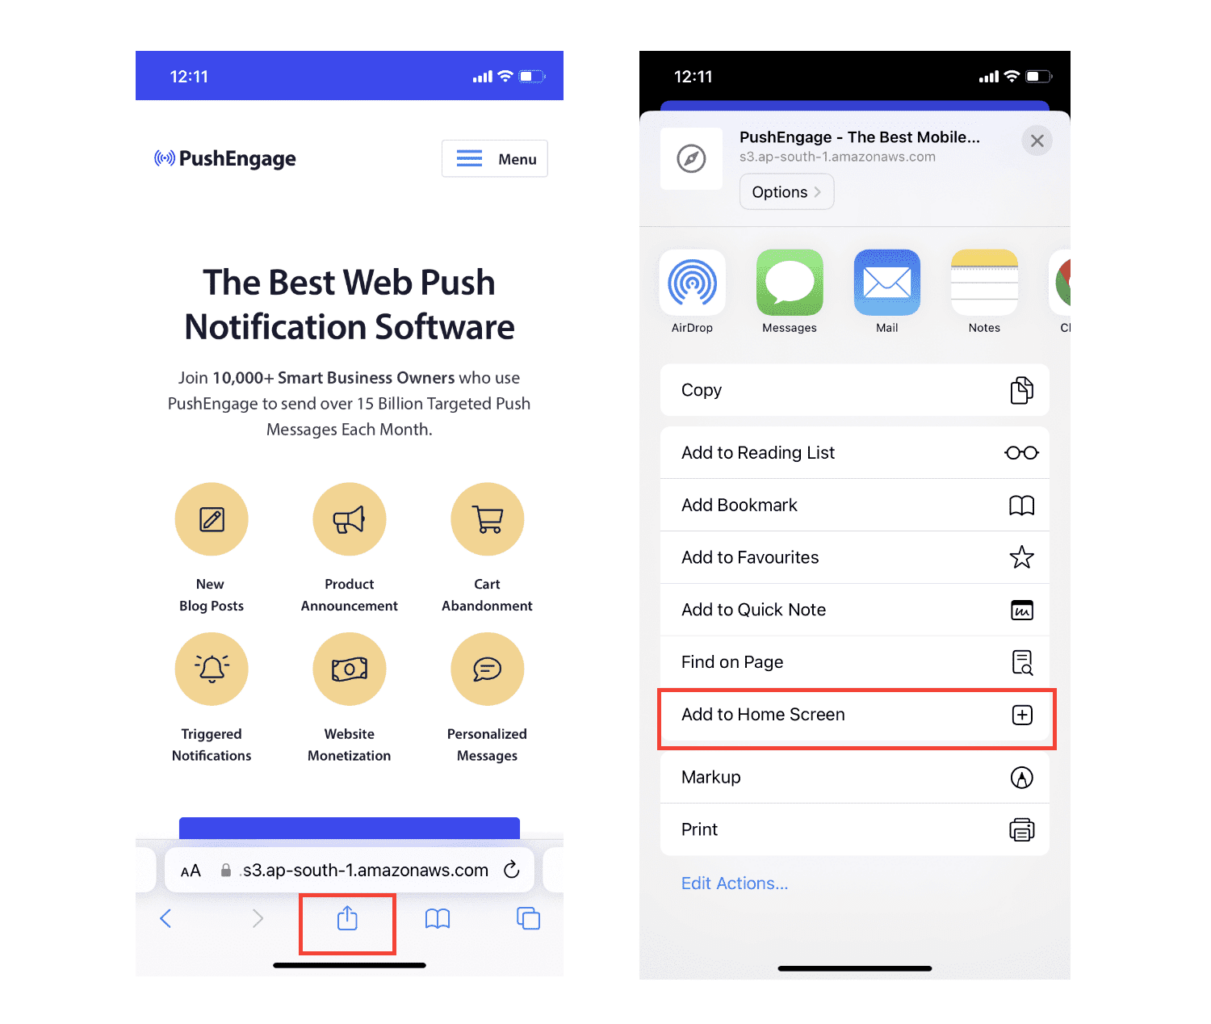
- The user needs to install the web app to their Home Screen by tapping the Share button to open the Share menu, and then tapping “Add to Home Screen”.
- A user gesture, such as a click or tap on a button is required to show the native permission prompt and allow the permission to receive push notification.
If your website is already a Progressive Web App (PWA), you do not need to make additional updates to prepare for iOS/iPadOS Web Push. If unsure whether your website is a PWA, check with your development team or use Lighthouse in Chrome DevTools.
Setting up your Website for iOS and iPadOS Web Push Notification
Follow the steps to enable and send push notifications to Safari on iPhone and iPad:
- 1. Add a Web App Manifest file to your website.
- 2. Integrate PushEngage on your website.
- 3. Deploy and test your website manifest.
- 4. Test Subscription Dialog Box modal and permission prompt.
1. Add a Web App Manifest file to Your Website
The web app manifest is a JSON file that tells the browser about your Progressive Web App (PWA) and how it should look and behave when installed on the user’s desktop or mobile device. It contains metadata such as your web app’s name, description, icons, color scheme and the URL that should be opened when the app is launched.
You can use any online tool to generate a manifest file quickly. The manifest file can have any name but is commonly named manifest.json and should be uploaded to the root directory of your website. If you need help adding code to your WordPress site, try the WPCode plugin.
A typical manifest looks something like this:
{
	"name": "PushEngage",
	"short_name": "PushEngage",
	"start_url": "/",
	"display": "standalone",
	"theme_color": "#3b43ff",
	"background_color": "#ffffff",
	"icons": [
		{
			"src": "icon/icon-128x128.png",
				"sizes": "128x128",
				"type": "image/png"
		},
		{
			"src": "img/icon-192x192.png",
			"sizes": "192x192",
			"type": "image/png"
		},
		{
			"src": "img/icon-512x512.png",
			"sizes": "512x512",
			"type": "image/png"
		}
 	]
}
Note: The value of display member in the manifest must be set to either standalone or fullscreen.
After creating the manifest file, reference the manifest in the HTML page of your website using a <link> tag in the <head> section of the page.
For Example:
<link rel="manifest" href="/manifest.json">
2. Integrate PushEngage on Your Website
The next step is to integrate PushEngage on your website to handle registering and installing Service Worker on the page.
If you have not completed the installation, here is the guide to installing PushEngage. If you are a WordPress user, you can use PushEngage WordPress Plugin, which will handle the service worker registration.
You can follow the steps mentioned here if you already have your service worker and need to merge it with PushEngage’s service worker.
3. Deploy and Test Your Website Manifest
Once you have uploaded the manifest and integrated the PushEngage, the next step is to test your web app to ensure that your web app manifest was implemented correctly. You can test your website on various devices and browsers by adding it to your home screen.
Follow these steps:
- 1. Open the website in Safari browser running on iOS 16.4 or later
- 2. Click on the “Share” button to open the share menu.
- 3. Click on the “Add to Home Screen” option.
- 4. Save the app on your Home Screen.
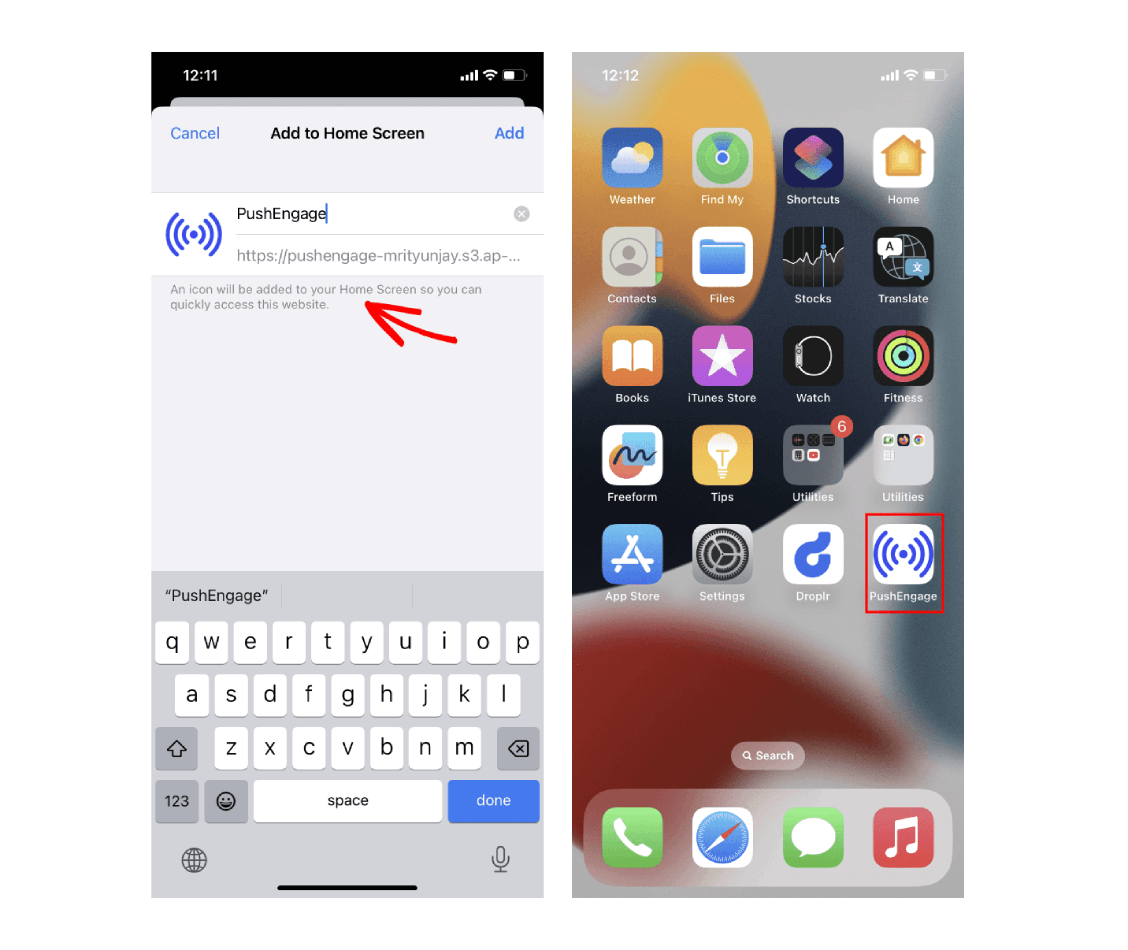
If your website has been successfully configured for web push, it will open the web app like any other app on iOS or iPadOS instead of opening in a browser and acting merely as a shortcut.
You should inform your user by showing a banner on the app screen, prompting the user to add your app to the home screen of their iOS device and subscribe to the web push notifications.
4. Test Subscription Dialog Box
A Home Screen web app on iOS and iPadOS requires direct user interaction, such as tapping on a button on the page to display the Subscription Dialog Box for permission. Follow these steps to test that the permission prompt is working:
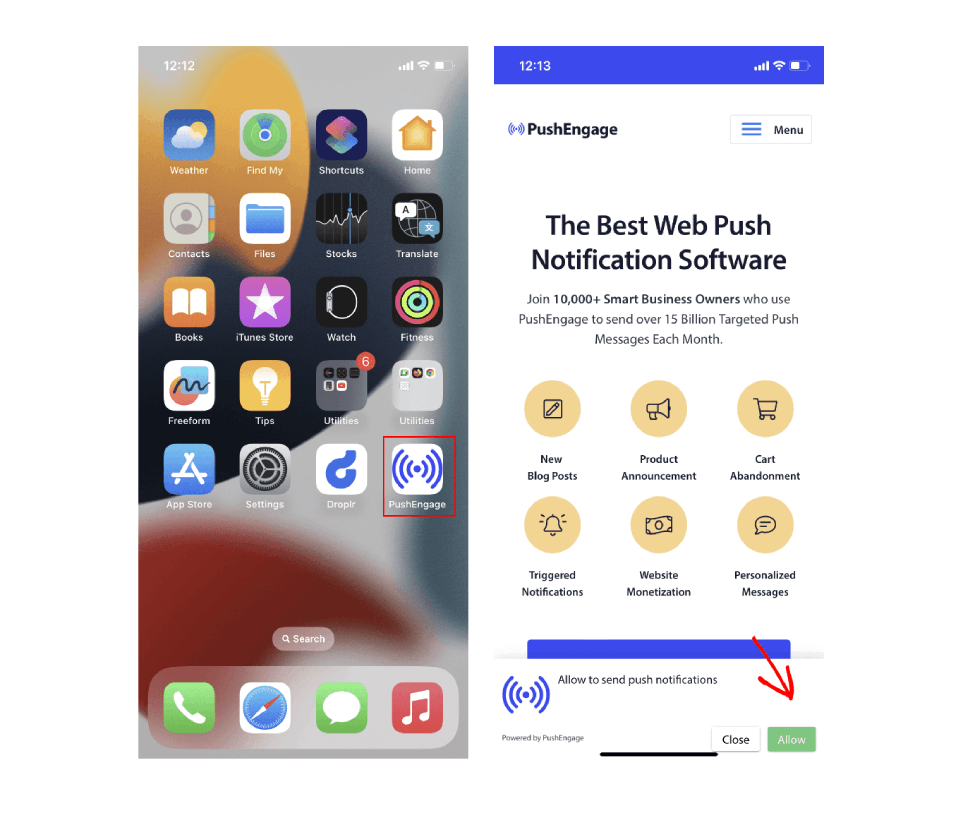
- 1. Open the web app by tapping the app icon from the home screen on your device.
- 2. Wait for the PushEngage Subscription Dialog Box to appear on the page.
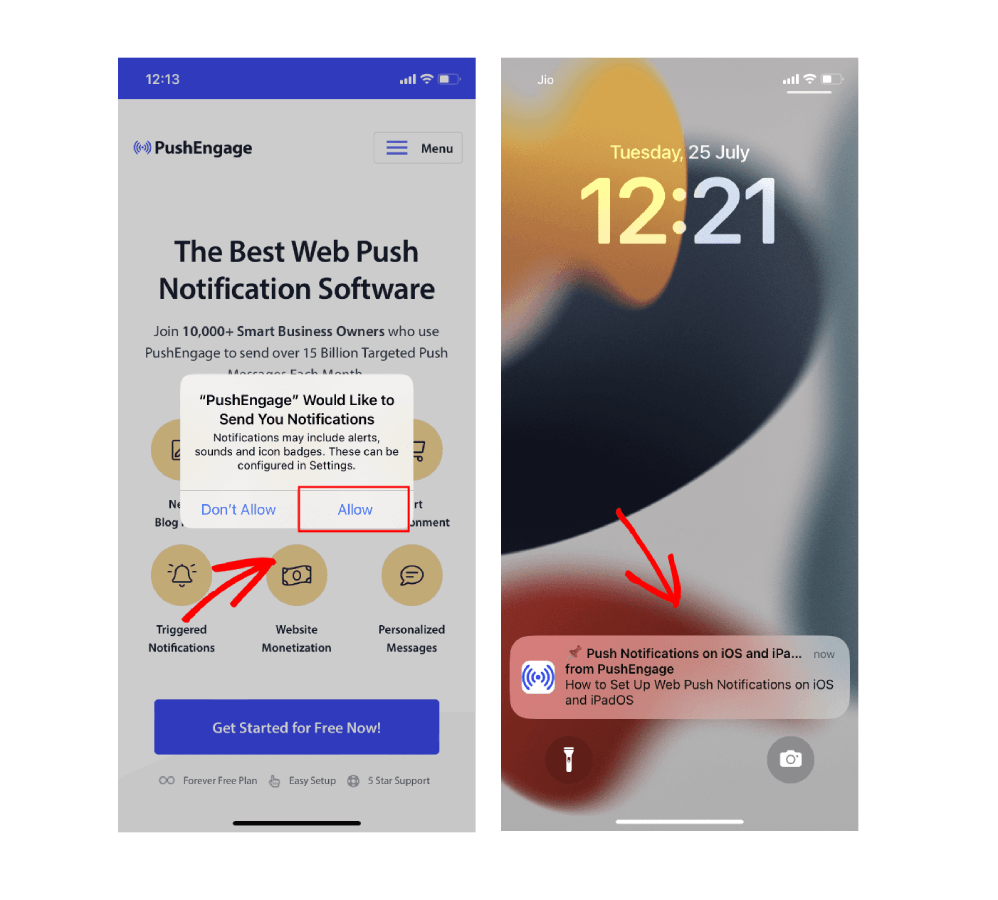
- 3. Click the “Allow” button on the PushEngage Popup modal to display the permission prompt.
- 4. Click the “Allow” button on the permission prompt.
Note : The Subscription dialog box will only appear if your website is HTTPS and the app has been launched from the home screen. You can customize the design and behavior of the Subscription Dialog Box from the PushEngage dashboard.
Send Web Push Campaign to iOS and iPadOS users
Once you have completed the above steps required for iOS and iPadOS web push notifications, you can now begin sending a push notification using the PushEngage dashboard.
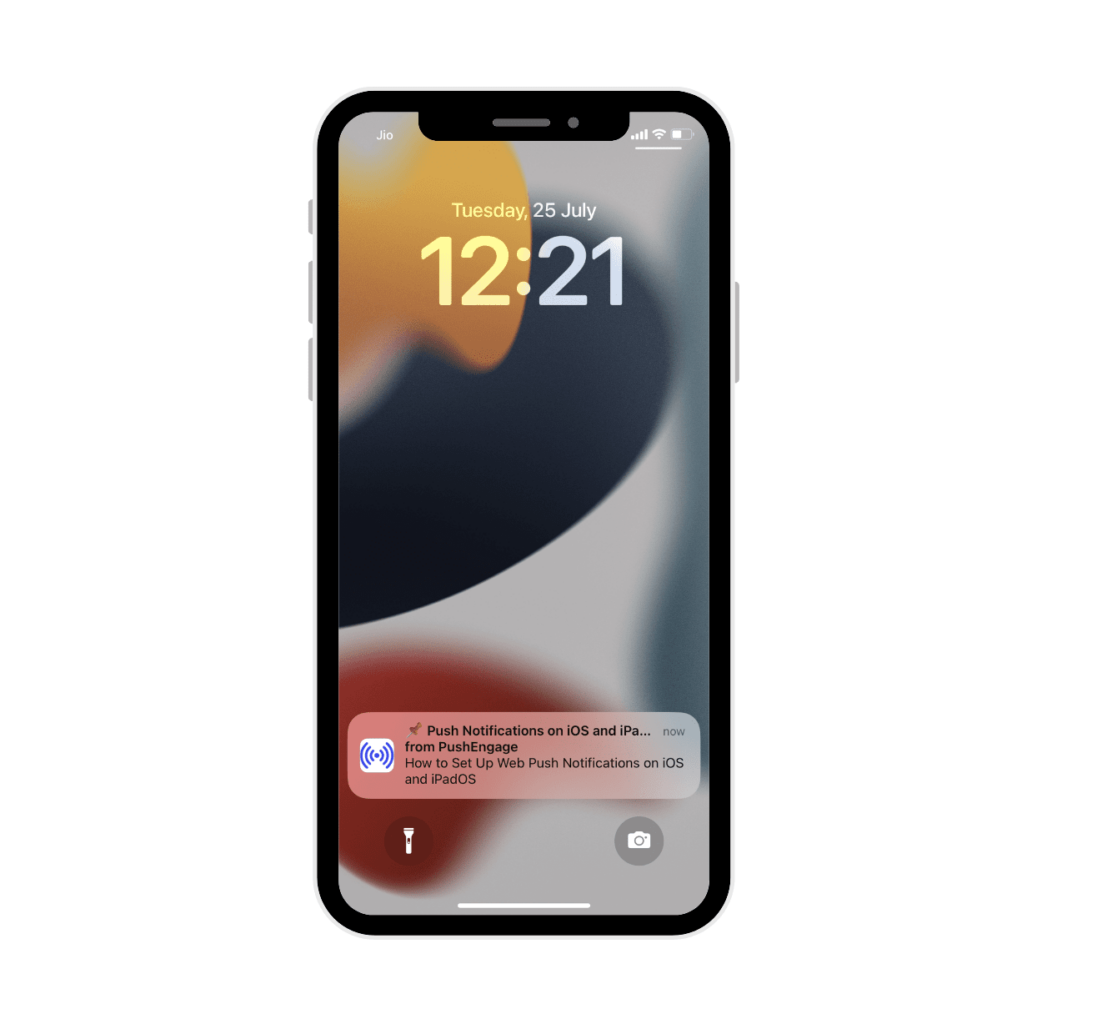
Web Push Notifications on iOS works similar to other native apps. Web Push notifications are displayed on the screen as a heads-up notification, in the notification center and also on the lock screen. Users can also manage their notification preferences from iOS Settings. Once you click on the notification, it will take you to the desired landing page within the web app.
The Structure of an iOS Web Push Notification
iOS Safari push notifications do not currently support rich media, animated GIFs or videos. Once these features are added, we will enable them as well. Please follow the guidelines below to craft your notifications for iOS users.
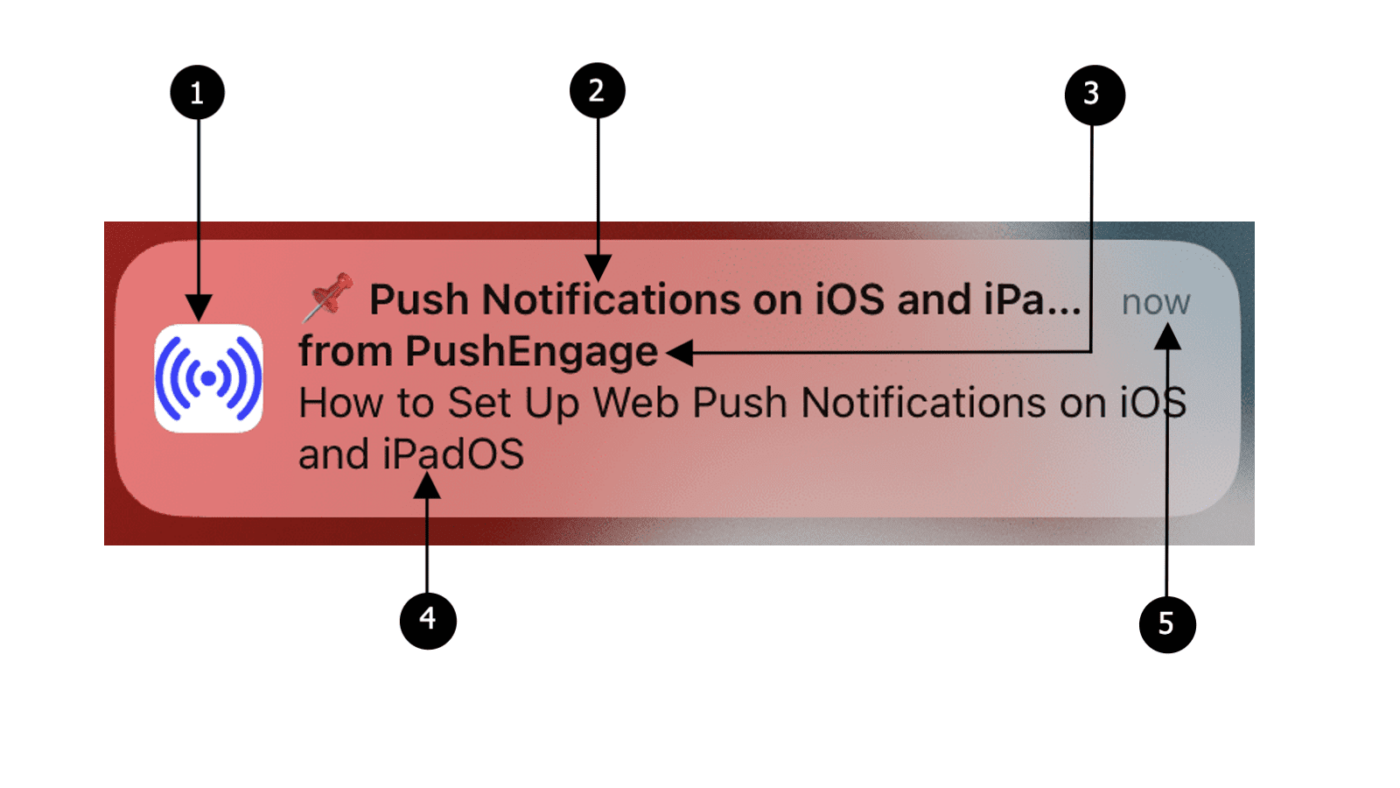
Web push notifications on iOS and iPadOS include the following elements:
- 1. Icon – The icon specified in the manifest file. It can’t be changed for individual messages.
- 2. Title – The title is restricted to 30-40 characters, after which it gets truncated.
- 3. App Name – The app name is given in the manifest file and cannot be changed for individual messages.
- 4. Message – The text is restricted to 120-150 characters, after which it gets truncated.
- 5. Timestamp – This shows how long ago the notification was delivered to the device.
This is all you need to start collecting subscribers and sending campaigns to your iPhone & iPad users.
If you run into any issues, please contact us by clicking here. Our support team will be able to help you.


