Notice: There is no legacy documentation available for this item, so you are seeing the current documentation.
The Custom Subdomain feature is for collecting web push notification subscribers through another domain. It’s designed for specific situations where the standard setup isn’t possible of adding service worker to your website’s root or sub-folder as well.
This guide will walk you through what the feature is, when to use it, and how to implement it step-by-step.
When Should You Use a Custom Subdomain?
This feature is the perfect solution if you find yourself in one of these two scenarios:
- Platform Limitations: Your website is built on a platform (like Webflow, ClickFunnels or Blogspot) that doesn’t allow you to upload files to your site’s root directory. This prevents the standard installation of the PushEngage service worker file on your root folder, and forcing you to collect subscribers on our subdomain. So if you are willing to host a separate domain for adding subscriptions, you can use this feature.
- Centralized Subscriptions: You operate multiple domains or subdomains and want to collect and manage all your push subscribers under a single, centralized domain. This simplifies subscriber management and branding.
The Custom Subdomain feature works by using an intermediate page on a subdomain that you control. This page handles the subscription process, allowing you to bypass platform file restrictions and centralize your audience. This should be an HTTPS URL. This is where your subscription will happen and it will be visible in each push campaign.
Please note, if you are willing to use this feature, you cannot go ahead and use Push Single Step Optin. You will use any of the available double step Optin only
Setting Up Custom Subdomain
Enable Custom Subdomain in Your Settings
First, you need to tell PushEngage which subdomain you intend to use.
- Navigate to your PushEngage Dashboard.
- Go to Site Settings » Advanced Settings.
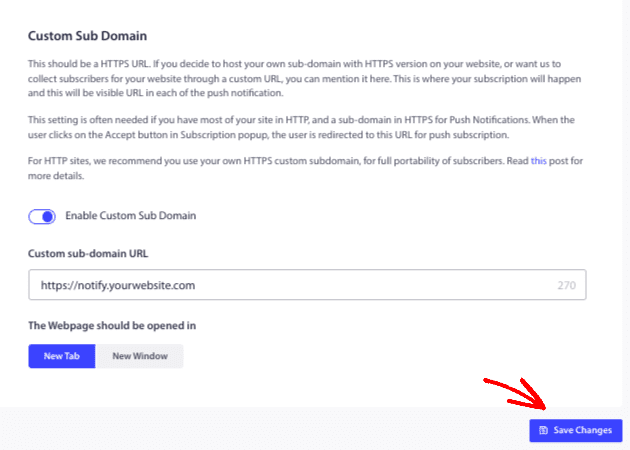
- Find the Custom Sub Domain for Subscription option.
- Toggle the switch to enable it.
- In the text box, enter the full URL of the subdomain you will be using (e.g.,
https://notify.yourwebsite.com). You can choose whether you want the added domain to open up in a new window or tab.
Making Updates to Installation Code
Step 1 : Add the Installation Code to Your Main Site (Site A)
This code needs to be placed on your main website. It will trigger the subscription opt-in prompt for your visitors.
- Copy the code snippet below.
- Paste it just before the
</head>tag on every page of your main website where you want to collect subscribers. - Replace
'YOUR APP ID'with your actual App ID. You can find your App ID by navigating to Site Settings » Installation Settings in your dashboard.
Code for Site A (Main Site):
<script>
(function(w, d) {
  w.PushEngage = w.PushEngage || [];
  w._peq = w._peq || [];
  PushEngage.push(['init', {
      appId: 'YOUR APP ID'
  }]);
  var e = d.createElement('script');
  e.src = 'https://clientcdn.pushengage.com/sdks/pushengage-web-sdk.js';
  e.async = true;
  e.type = 'text/javascript';
  d.head.appendChild(e);
})(window, document);
</script>
Step 2 : Add the Installation Code to Your Custom Subdomain (Site B)
This special version of the code needs to be placed on the intermediate page of your custom subdomain.
- Copy the code snippet below.
- Paste it just before the
</head>tag on your custom subdomain’s main page (e.g.,index.html). - Replace
'YOUR APP ID'with the same App ID used in Step 2.
This code includes the parameter isSubscriptionOnSubDomain:true. This line is crucial because it prevents the subscription opt-in from appearing on your subdomain itself, as its only purpose is to process the subscription.
Code for Site B (Custom Subdomain):
<script>
(function(w, d) {
  w.PushEngage = w.PushEngage || [];
  w._peq = w._peq || [];
  PushEngage.push(['init', {
      appId: 'YOUR APP ID',
      isSubscriptionOnSubDomain:true
  }]);
  var e = d.createElement('script');
  e.src = 'https://clientcdn.pushengage.com/sdks/pushengage-web-sdk.js';
  e.async = true;
  e.type = 'text/javascript';
  d.head.appendChild(e);
})(window, document);
</script>
Step 3: Place the Service Worker File on Your Subdomain
The PushEngage service worker file is what enables the push notifications from your own domain.
- Download the
service-worker.jsfile from your PushEngage dashboard under Site Settings » Installation Settings. - Upload this file to the root directory of your Site B (Custom Subdomain).
- Ensure the file is publicly accessible. You can test this by visiting
https://your.subdomain.com/service-worker.jsin your browser. You should see the code of the file, not a 404 error.
Enable Quick Install for Your Opt-in Style
This is a mandatory final step. For the custom subdomain method to work, the Quick Install feature must be enabled for your opt-in. This setting ensures that the subscription happens through a pop-up window that utilizes your custom subdomain.
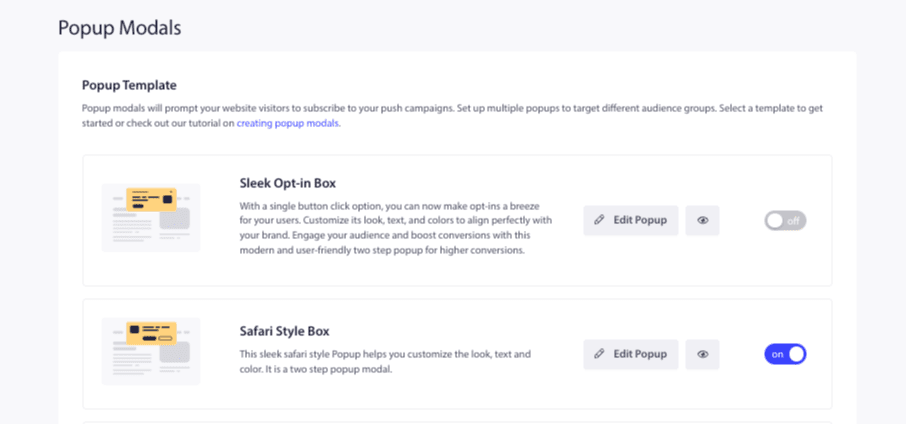
1. In your PushEngage Dashboard, navigate to Design » Popup Modals.
2. Choose the popup modal you are comfortable using on your site and click to edit them.
3. Inside the opt-in editor, ensure the Quick Install toggle is enabled.
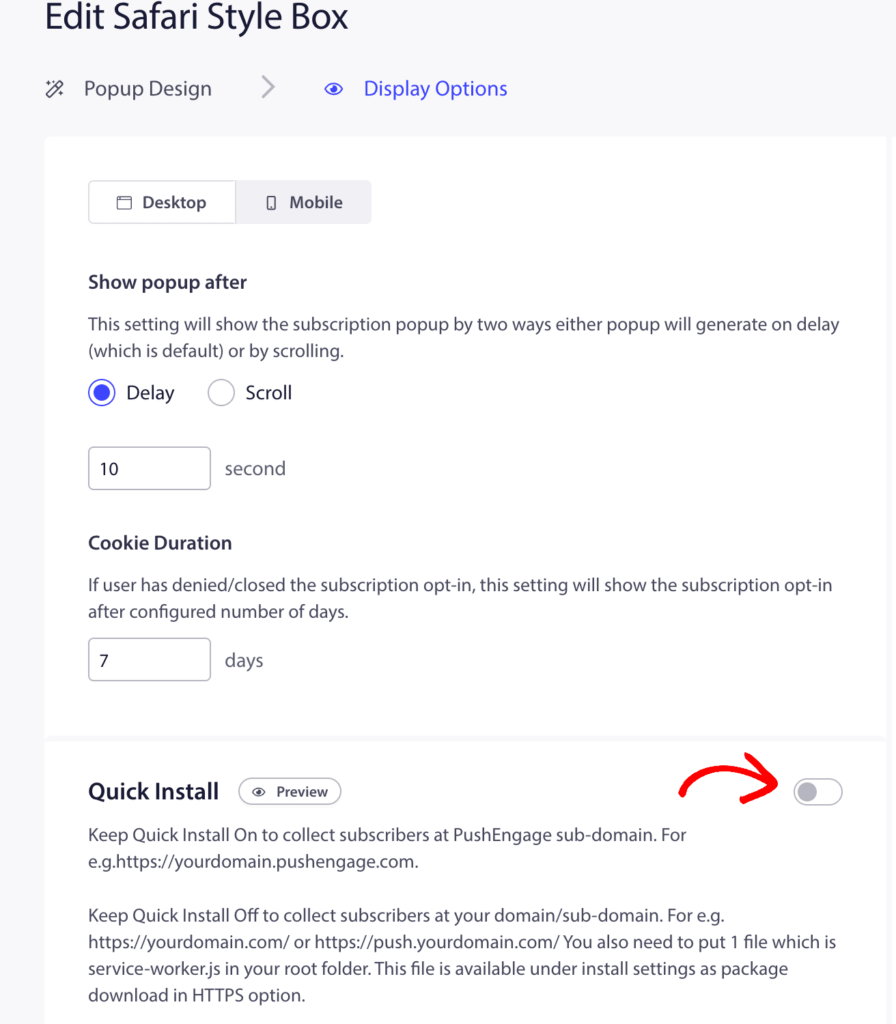
4. Save your changes.
Please note: Quick Install must always be enabled for the opt-in styles used on your site. If it is disabled, the custom subdomain will not be used, and the subscription process will fail.
That’s it! Once you’ve completed all these steps, your website will be ready to collect push notification subscribers using your custom subdomain. When a visitor on your main site clicks to subscribe, they will be seamlessly subscribed via your subdomain page.
If you run into any issues, please feel free to contact us by clicking here. Our support team will be able to help you.


