
Not every visitor is ready to chat the moment they land on your website. In fact, showing a chat widget too early often leads to lower engagement and higher bounce rates.
A smarter approach is to trigger chat only when the visitor has scrolled 50% of the page—a signal that they’re engaged, interested, and more likely to interact.
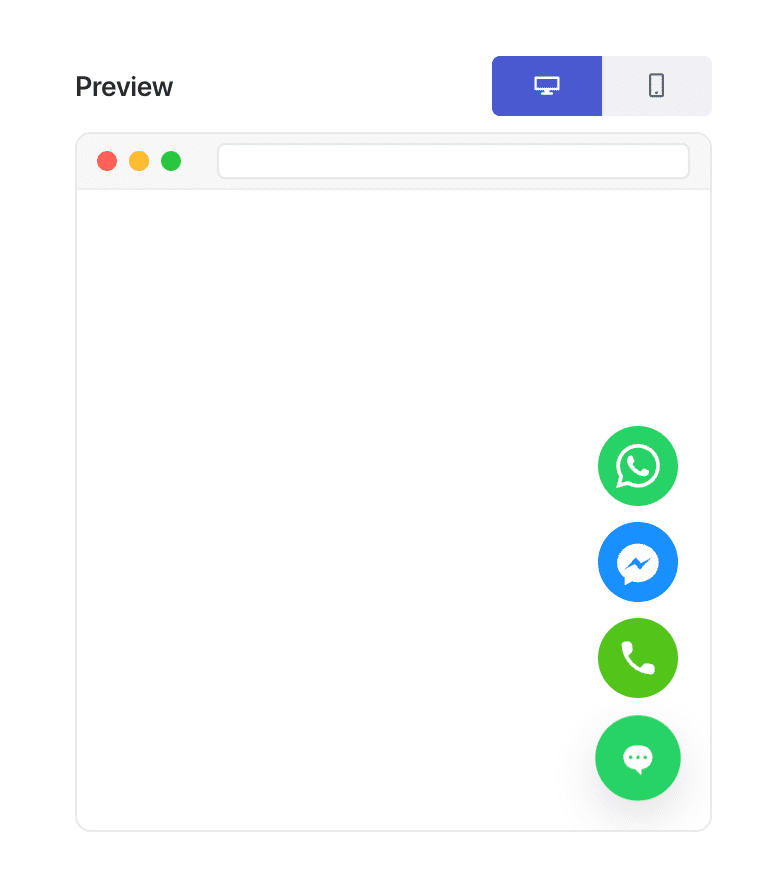
PushEngage’s chat widget makes this incredibly easy.
This quick guide will walk you through why scroll-based triggers work and how to set them up in just a few clicks.
Отправляйте многоканальные сообщения уже сегодня!
Push-уведомления и сообщения WhatsApp — это сверхэффективные и недорогие маркетинговые инструменты, которые помогут вам автоматически увеличить повторный трафик, вовлеченность и продажи.
Why a 50% Scroll Trigger Works
A visitor who reaches 50% of a page has shown clear intent. They’ve invested time, absorbed your content, and signaled curiosity.
A 50% trigger helps you:
- Avoid interrupting readers too early
- Catch visitors when they’re fully warmed up
- Increase chat open rates
- Improve lead quality
- Reduce agent workload from low-intent chats
This is especially effective for:
- Long blog posts
- Product comparison pages
- Ultimate guides
- Страницы часто задаваемых вопросов
- Tutorials
How PushEngage Handles Scroll-Based Chat Triggers
PushEngage includes built-in Behavior Rules for chat widgets. These rules determine when a chat widget appears based on visitor actions.
One of the most useful is: Show When Visitor Scrolls X%
This allows you to delay the widget until any scroll threshold you choose—50% being one of the best-performing settings for informational or content-heavy pages.
Эта гибкость — именно то, что делает возможной «персонализацию на основе типов страниц».
How to Trigger Your Chat Widget at 50% Scroll (Step-by-Step)
Step 1: Create or Edit a Chat Widget
In your WordPress dashboard:
Go to PushEngage » Chat Widgets and click Create New Widget or Edit an existing one.
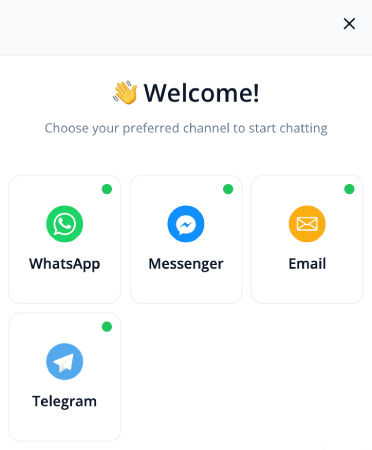
Set up your message, channels, and design as usual.
Step 2: Open the Behavior Tab
Inside the widget editor, go to Triggers. This controls when the widget appears.
From the trigger dropdown, choose Display after scroll %:
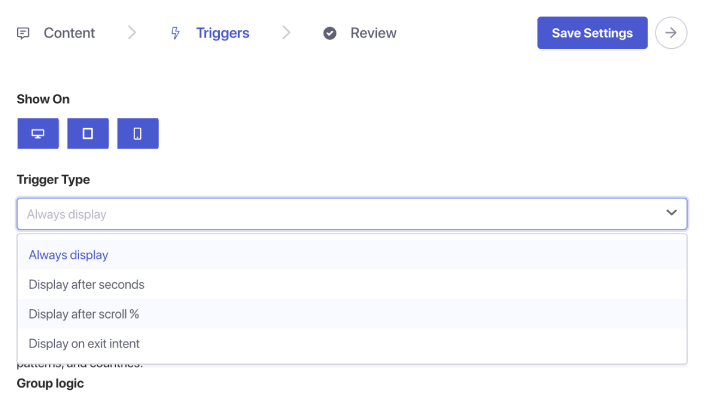
You’ll see a percentage input box appear. Set the scroll depth to 50%. This tells PushEngage to wait until a user has scrolled halfway down the page before displaying the chat widget.
Step 3: Save and Publish
Click Save Widget.
Then ensure the widget is enabled and targeted to the pages you want. Your chat widget will now trigger exactly at the 50% scroll point on every assigned page.
Pro Tip: Combine Scroll Trigger + Page Targeting
Scroll-based triggers become even more powerful when paired with targeting rules.
You can show the widget:
- Only on blog posts
- Only on WooCommerce product categories
- Only on long-form content
- Only for returning visitors
- Only on pricing pages
Just go to the Triggers tab and set page conditions.
Best Practices for 50% Scroll Chat Triggers
To get the best results:
1. Don’t combine 50% scroll with instant triggers
It defeats the purpose of intent-based engagement.
2. Keep the message helpful, not pushy
Примеры:
- “Need help understanding this page?”
- “Want personalized recommendations?”
- “Have a question? I’m here to help!”
3. Avoid using multiple scroll-triggered widgets at once
One widget per page keeps the experience clean.
4. Test on both mobile and desktop
Scroll depth can feel different across devices.
Что делать после настройки виджетов чата
A 50% scroll trigger is one of the simplest ways to show chat at the perfect moment—after the visitor is engaged but before they leave.
With PushEngage’s behavior rules, setting this up takes less than a minute and immediately improves the quality and intent of incoming chats.
With PushEngage, you can set this up in minutes — and immediately start seeing better engagement, higher conversions, and more efficient agent workloads.
- Клиенты всегда видят кого-то онлайн
- Время ответа сокращается
- Конверсии перед покупкой растут
- Поддержка кажется быстрее и надежнее
- Ваш магазин готов к работе на мировом рынке
Как только расписания будут установлены, ваша команда сможет работать более эффективно, а ваши клиенты получат ожидаемый опыт.
Если вы еще не настроили профили агентов и расписания в PushEngage, сейчас самое время.
Не убедились? Ознакомьтесь с этими замечательными ресурсами по многоканальным маркетинговым кампаниям:
- Как увеличить продажи отелей в низкий сезон
- Как использовать многоканальный маркетинг для отелей в 2026 году
- Как превратить подписчиков в покупателей с помощью push-уведомлений в браузере
- Как уведомлять подписчиков о новых записях в WordPress
- Как отправлять уведомления о наличии товара для увеличения продаж
- Как очистить списки подписчиков push-уведомлений (легко)
- Как автоматически отправлять RSS-push-уведомления
- Как использовать push-уведомления для продвижения новостного сайта
- Как использовать push-уведомления для перекрестных продаж, чтобы удвоить продажи
- Как использовать push-уведомления об отказе от просмотра (4 шага)


