Looking for a way to create push button notifications and collect push notification subscribers?
Мы понимаем. Иногда гораздо удобнее иметь некоторую гибкость в способах привлечения подписчиков.
Не волнуйтесь. Мы позаботились об этом.
In this article, we’re going to show you step-by-step how to create your own push button notifications.
Готовы? Давайте начнем.
How to Create Push Button Notifications in WordPress
Before you create push button notifications in WordPress, you need to create a landing page to collect push subscribers. We highly recommend using SeedProd to create your landing pages.

SeedProd is the best WordPress landing page builder. It’s perfect for businesses, bloggers, and website owners looking to build high-converting landing pages without any development skills.
With SeedPreed, you get pre-built templates for high-converting landing pages that you can publish instantly. This includes templates for:
- Продающие страницы
- Страницы «Скоро открытие»
- Страницы 404
- Страницы обслуживания
- Страницы захвата
- Страницы благодарности
- Страницы вебинаров
- Страницы видео
И многое другое!
Шаг № 1: Установите и активируйте SeedProd
Сначала вам нужно будет приобрести плагин SeedProd Pro и активировать его. Если вы не знаете, как это сделать, ознакомьтесь с этой статьей о том, как установить плагин WordPress. Затем перейдите в раздел SeedProd » Настройки на панели управления WordPress и активируйте Pro-версию:

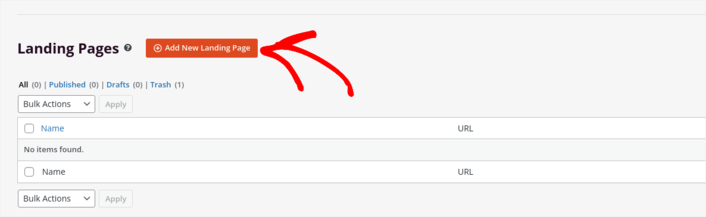
Далее перейдите в раздел SeedProd » Страницы для обзора панели управления целевыми страницами SeedProd. Здесь вы можете увидеть различные типы целевых страниц, которые вы можете создать с помощью SeedProd:

Keep in mind that these are all special pages with pre-built functionality and design templates. For a landing page, you don’t want to use ANY of these special landing pages. Instead, you’re going to create a custom landing page.
Scroll further down and click the Add New Landing Page button to get started:
Step #2: Create a New Landing Page for Push Button Notifications
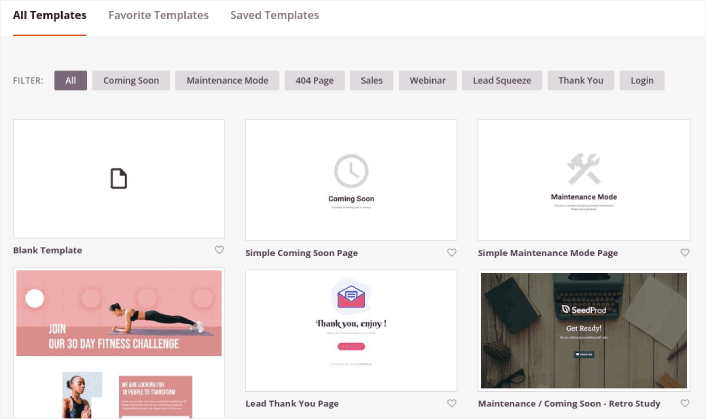
After clicking the Add New Landing Page button, you’ll see SeedProd’s library of landing page templates. These are professionally designed landing page templates that are completely responsive.
Next, you can select one of these templates to help you get started.
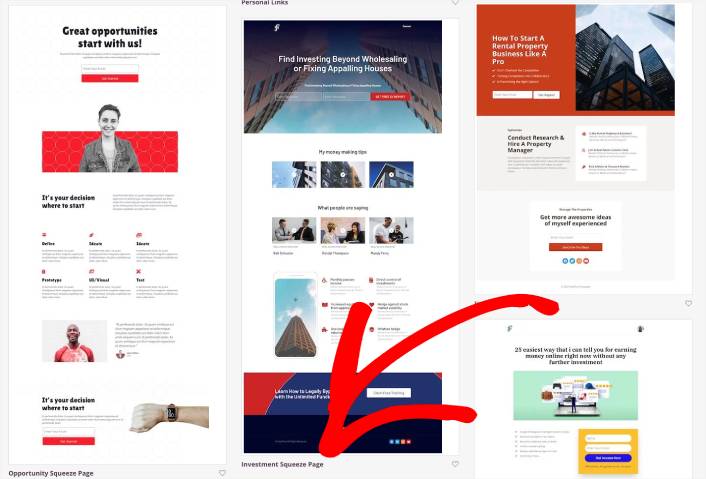
Remember, the template is just a starting point. you can customize everything about the page later on. For now, find a template that you think will fit. When the templates page opens, you can click Squeeze Page to filter the list:

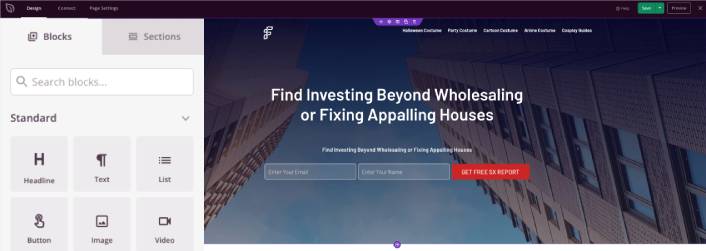
For this guide, we’ll select the Investment Squeeze Page.
A squeeze page has only one objective. It’s to “squeeze” you just enough to get your email address. Know anyone in the investment and personal finance space? Yeah, they can squeeze for sure!
Go ahead and click on it now.
Next, we’re going to customize the landing page.
Step #3: Customize Your Landing Page Design
SeedProd’s visual builder allows you to customize your landing page using drag-and-drop content blocks.
You can create a fully customized header for your landing page in a matter of minutes. You can even add custom elements to convince and convert your traffic. For instance, you can create a video module and embed a YouTube video to convince your visitors to buy your product or service.
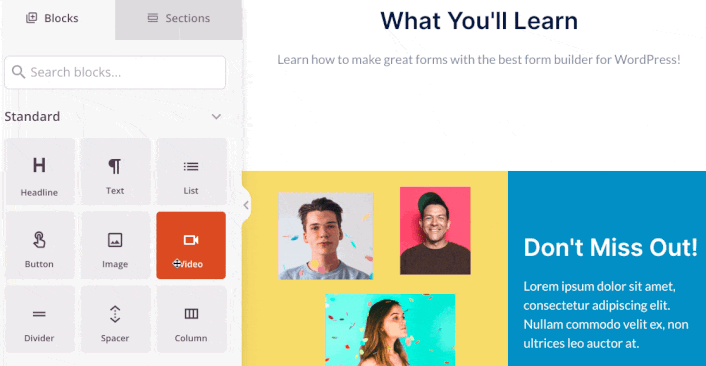
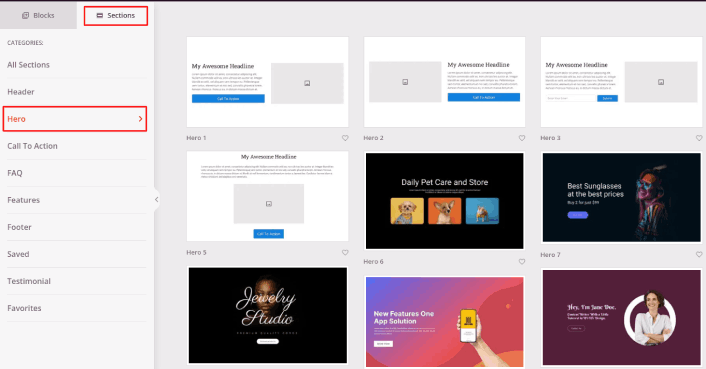
It’s also super easy to add a section with a brief description of your product or service . Head over to the Sections tab in the visual builder and under the Hero section, you’ll find several pre-built templates that you can import with a single click.
Go ahead and select one that you like.
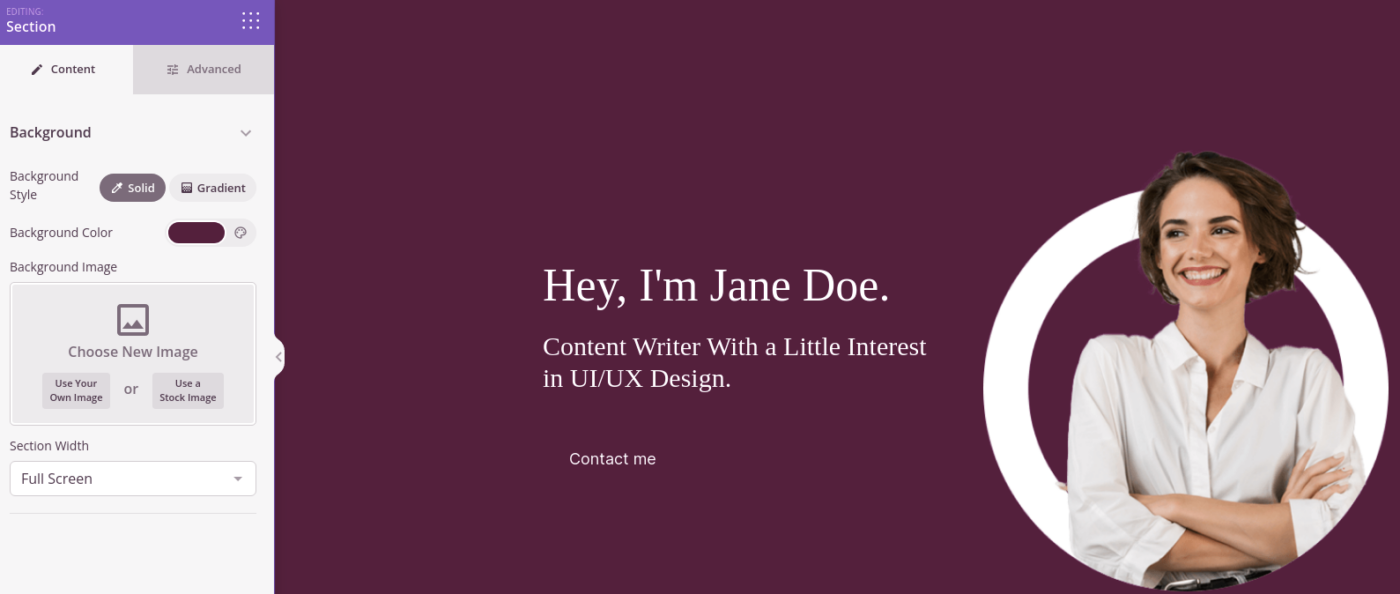
Don’t worry about the colors or the content. You can edit all of it. What you should look for is a layout that goes well with your template.
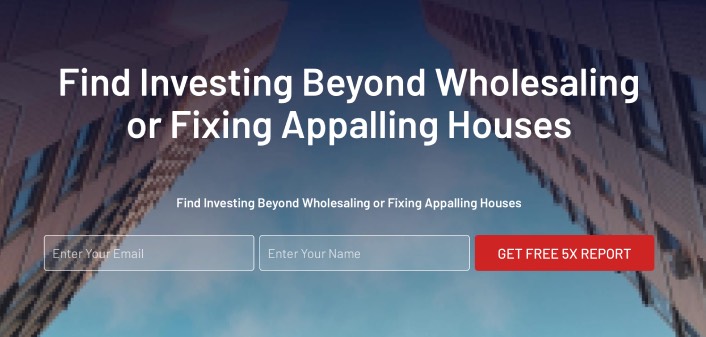
You can customize the hero section the same way we did earlier by choosing a different image and changing the headline and description. While you’re at it, add a call-to-action button that nudges visitors to buy from you.
Next, from the Sections tab, select the Testimonial heading, and choose a design you like. And just like that, you have a testimonials section on your landing page.
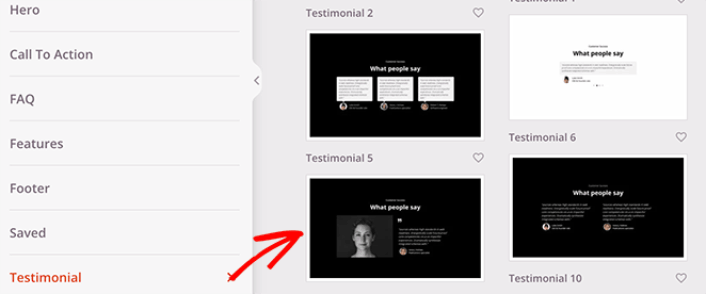
It’s so simple!
Step #4: Add a Push Button Notifications to Your Landing Page
You can also add a click to subscribe button to collect push notification subscribers. Push notifications are a great way to increase your repeat traffic, get more engagement and even sell official merch if you have some.
In SeedProd, just drag and drop the Custom HTML module from the sidebar.
We’ve put the subscribe button directly underneath the email signup form in the first fold.
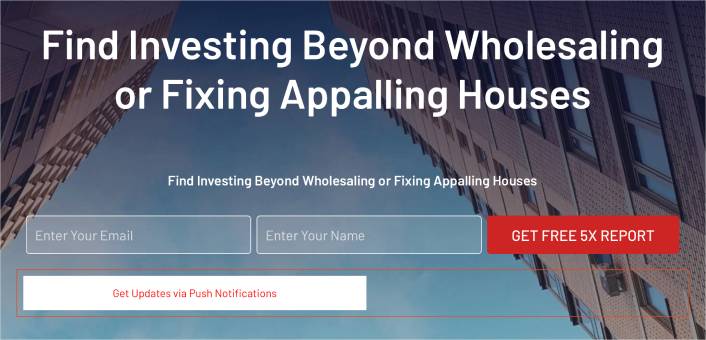
But you can insert the button anywhere you like.
For this part, you need some experience with HTML and CSS. Or, you can copy this code and paste it into your Custom HTML block:
<button onclick="subscribeOnClickButton()" style="border: none; padding-left: 5%; padding-right:5%; text-align: center; display: inline-block; color: blue;">Get Updates via Push Notifications</button>That’s a standard button in HTML with very little styling. The only fancy bit is the onclick function in the code. It basically means that your visitors can click on the button to subscribe to something. Now, we need to give the button some extra code to allow your visitors to subscribe to push notifications.
Перейдите на главную страницу PushEngage и нажмите кнопку Начать:

PushEngage — это плагин для push-уведомлений № 1 в мире.
Push-уведомления помогают вам автоматически увеличивать трафик вашего сайта и вовлеченность. И если вы управляете интернет-магазином, PushEngage также помогает вам увеличить продажи, помогая создавать автоматические push-уведомления для электронной коммерции.
Вы можете начать бесплатно, но если вы серьезно относитесь к развитию своего бизнеса, вам следует приобрести платный план. Кроме того, прежде чем покупать какую-либо службу push-уведомлений, ознакомьтесь с этим руководством по стоимости push-уведомлений.
Вот краткий обзор того, что вы получаете с PushEngage:
- Высококонверсионные автоматизированные кампании
- Несколько опций таргетинга и планирования кампаний
- Отслеживание целей и расширенная аналитика
- Интеллектуальным A/B-тестированием
- Шаблоны кампаний push-уведомлений
- Мощные опции сегментации
- Выделенный менеджер по успеху
Вы увидите, что PushEngage — это, без сомнения, лучший выбор, если вы хотите увеличить трафик, вовлеченность и продажи для своего бизнеса. И если у вас ограничен бюджет, вы всегда можете немного проявить креативность с вашими push-уведомлениями.
ПРИМЕЧАНИЕ: Если у вас сайт на WordPress, вам следует установить и активировать плагин PushEngage для WordPress.
Затем выберите бесплатный план, чтобы попробовать PushEngage, или выберите платный план, если вы серьезно относитесь к развитию своего бизнеса. Платные планы включают больше опций для кампаний и возможность создавать еще большие списки подписчиков.
В вашей панели управления PushEngage перейдите в раздел Настройки сайта » Детали сайта и нажмите кнопку Нажмите здесь для инструкций по настройке. В разделе Любой сайт вы получите код установки:

ВНИМАНИЕ: Вам нужно скопировать код, который вы получите из вашей панели управления. Код уникален для каждого пользователя PushEngage. Вы не сможете скопировать код из изображения и собирать подписчиков push-уведомлений.
Как только у вас появится код в панели управления PushEngage, добавьте этот фрагмент кода в свой код:
<script> window._peq = window._peq || [];</script> <script>
function subscribeOnClickButton(){
window._peq.push(['subscribe',{}.pe,function(res){
if(res.statuscode==1)
{
// Code to return response
console.log(res);
}
}]);
}
</script>
Ваш итоговый код должен выглядеть примерно так:
<script src="https://clientcdn.pushengage.com/core/02a6e92667ae2279fcba8932356c1d93.js" async></script>
<script> window._peq = window._peq || [];</script> <script>
function subscribeOnClickButton(){
window._peq.push(['subscribe',{}.pe,function(res){
if(res.statuscode==1)
{
// Code to return response
console.log(res);
}
}]);
}
</script>
You’ll want to add this code to the HTML block in your landing page after the code for the button. It should look something like this:

Feel free to customize the styles for the button any way you please. When you’re done customizing your landing page, go ahead and hit the Save button.
Step #4: Configure Your Page Settings
After you’re done designing your landing page, click the Connect tab at the top of your page builder, and select your email marketing provider to collect leads on your site.

Затем нажмите на вкладку Настройки страницы в верхней части экрана.

Здесь вы можете добавить SEO-плагин и плагин Google Analytics на вашу целевую страницу. Вы даже можете настроить пользовательские коды отслеживания, такие как пиксель Facebook или пиксель Pinterest, для отслеживания эффективности рекламы.
Step #5: Publish Your Landing Page in WordPress
Now let’s go ahead and publish your design. To do this, click the dropdown arrow next to the save button and click Publish.
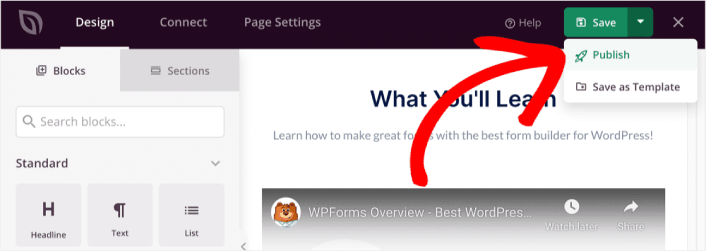
You can then click the See Live Page button to see how it looks.
Congratulations! You just published your very first landing page.
What to do After You Add Push Button Notifications to Your Site
Now that your landng page is live, it’s time to work on your traffic, engagement, and sales. You should try using push notifications on your site. Push notifications are a great marketing tool that can help you grow your business.
Посмотрите на эти эпические ресурсы, и вы поймете, что мы имеем в виду:
- 7 умных стратегий для повышения вовлеченности клиентов
- Эффективны ли push-уведомления? 7 статистических данных + 3 совета экспертов
- Как настроить push-уведомления о брошенной корзине (простое руководство)
Мы рекомендуем использовать PushEngage для создания ваших кампаний push-уведомлений. PushEngage — это программное обеспечение для push-уведомлений №1 в мире. Так что, если вы еще этого не сделали, начните использовать PushEngage сегодня!


