
Looking for a quick and easy way to create a WordPress checkout page?
Let’s say that you have a landing page that converts visitors into leads or paying customers on repeat. But then, you need to make sure that your visitors can actually pay for your product or service and actually complete the checkout process.
So, do you need to learn how to code? Do you need an expensive designer to create a checkout page?
Fortunately, there’s an easy way to create a WordPress checkout page. In this article, we’re going to help you launch a checkout page in less than 15 minutes.
準備はいいですか?始めましょう。
What’s a WordPress Checkout Page and Why Should You Care?
A checkout page is meant to convert visitors interested in buying a product or a service from you into a paying customer.
But before you get started, remember to have a very clear and specific goal for your checkout page. Just because you can do a lot of things doesn’t mean that you should do them all on one page. More often than not, if you give your visitors too many things to click on, they won’t click on anything at all.
By default, WooCommerce creates a checkout page for every eCommerce site. And that’s fine if you’re just starting out. But if you want to optimize your checkout page for higher conversion rates, that’s super difficult to do. Then, there are cart abandonment issues.
The best way to combat that is to create a custom WordPress checkout page. With a custom page, you can add:
- Testimonials and social proof to increase trust
- Related products and services to boost revenue
- Custom checkout forms to reduce buyer hesitation
- Additional payment options
- Custom WooCommerce checkout fields
Now that you know the benefits of creating a custom checkout page in WordPress, let’s move on to finding out how to do it.
How to Create a WordPress Checkout Page
Now that you know what to create, it’s time to launch your WordPress checkout page. We highly recommend using SeedProd to create your landing pages.

SeedProd is the best WordPress landing page builder. It’s perfect for businesses, bloggers, and website owners looking to build high-converting landing pages without any development skills.
With SeedPreed, you get pre-built templates for high-converting landing pages that you can publish instantly. This includes templates for:
- 販売ページ
- 近日公開ページ
- 404ページ
- メンテナンスページ
- スqueezeページ
- ログインページ
- ありがとうございますページ
- ウェビナーページ
- ビデオページ
そして、さらに多くの機能があります!
ステップ#1:SeedProdのインストールと有効化
まず、SeedProd Proプラグインを入手して有効化します。方法がわからない場合は、WordPressプラグインのインストール方法に関するこの記事をご覧ください。次に、WordPressダッシュボードのSeedProd » Settingsに移動して、Proバージョンを有効化します。

次に、SeedProdのランディングページダッシュボードの概要を確認するために、SeedProd » Pagesに移動します。ここで、SeedProdを使用して作成できるさまざまな種類のランディングページを確認できます。

Keep in mind that these are all special pages with pre-built functionality and design templates. For a sales landing page, you don’t want to use ANY of these special landing pages. Instead, you’re going to create a custom landing page.
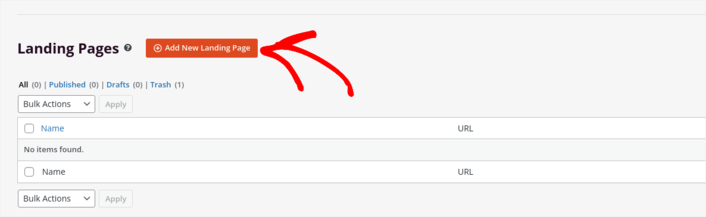
さらに下にスクロールして、新しいランディングページを追加ボタンをクリックして開始してください。
Step #2: Create a New WordPress Checkout Page
新しいランディングページを追加ボタンをクリックすると、SeedProdのランディングページテンプレートライブラリが表示されます。これらは、完全にレスポンシブな、専門的にデザインされたランディングページテンプレートです。
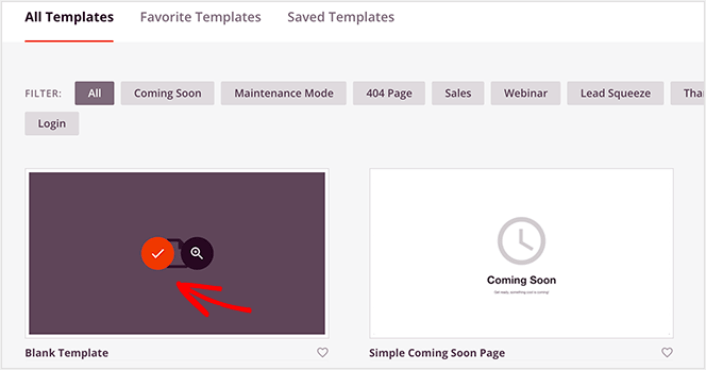
Next, you can select one of these templates to help you get started. Remember, the template is just a starting point. you can customize everything about the page later on. For now, find a template that you think will fit. We’re using the Blank Template for this tutorial, but you can select any template you like.
Step #3: Customize Your WordPress Checkout Page Design
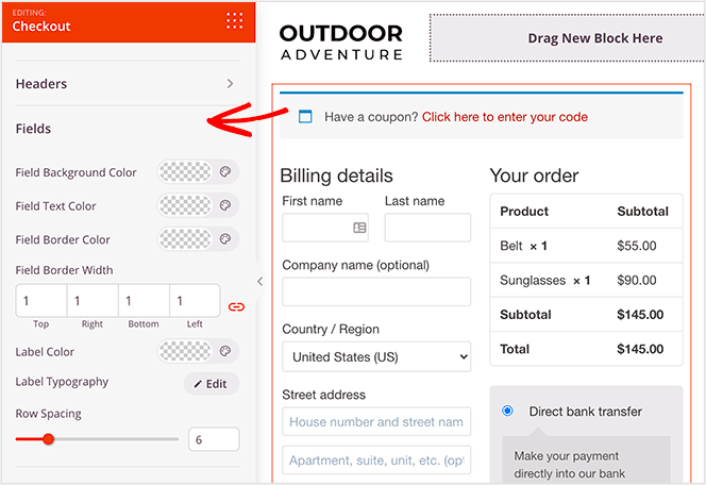
SeedProdのビジュアルビルダーを使用すると、ドラッグアンドドロップのコンテンツブロックを使用してランディングページをカスタマイズできます。
You can create a fully customized header for your thank you page in a matter of minutes. You can even add custom elements to convince and convert your traffic. For instance, you can create a video module and embed a YouTube video to convince your visitors to buy your product or service.
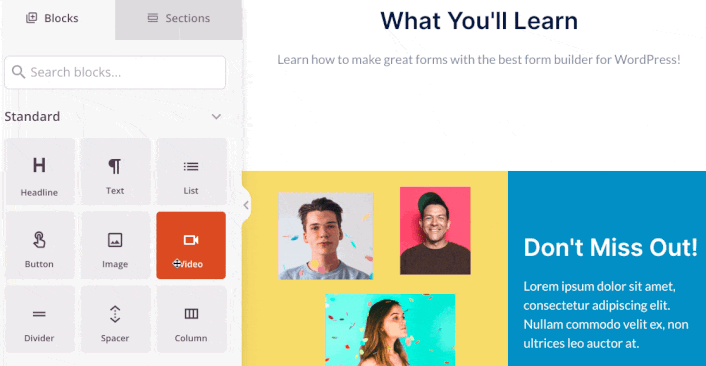
It’s also super easy to add a section with a brief description of your product or service . Head over to the Sections tab in the visual builder and under the Hero section, you’ll find several pre-built templates that you can import with a single click.
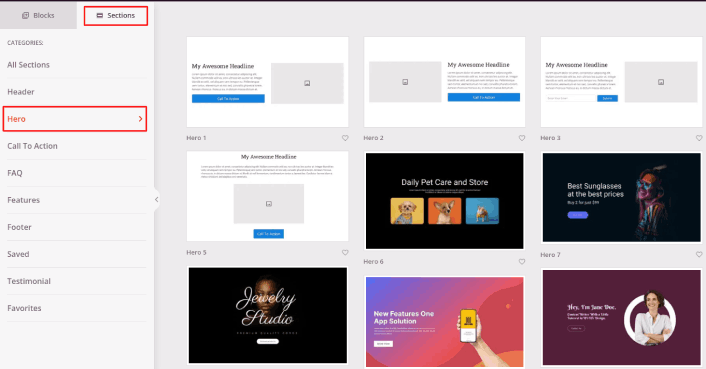
Go ahead and select one that you like.
Don’t worry about the colors or the content. You can edit all of it. What you should look for is a layout that goes well with your template.
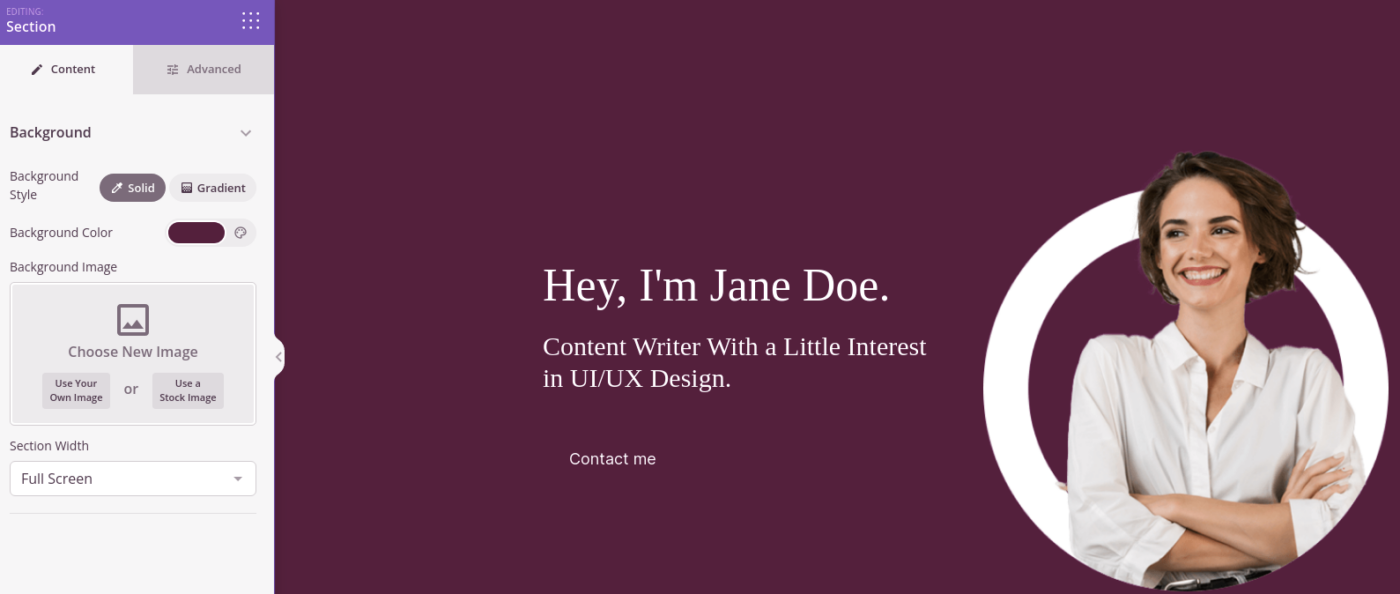
You can customize the hero section the same way we did earlier by choosing a different image and changing the headline and description. While you’re at it, add a call-to-action button that nudges visitors to buy from you.
It’s so simple! When you’re done customizing your thank you page, go ahead and hit the Save button. To add popular products, choose the Best Selling Products block from the WooCommerce section and drag it onto your page.
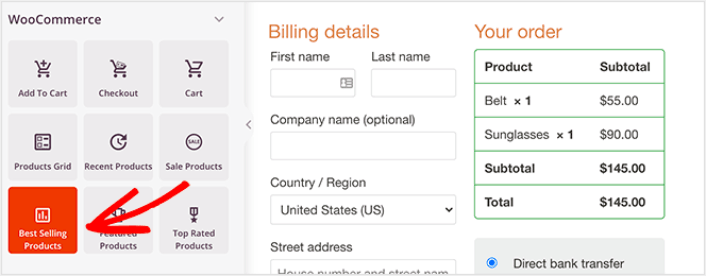
It’s a good idea at this point to drag over the headline block and change it to something like “Popular Products”. That way, people know exactly what they’re looking at.
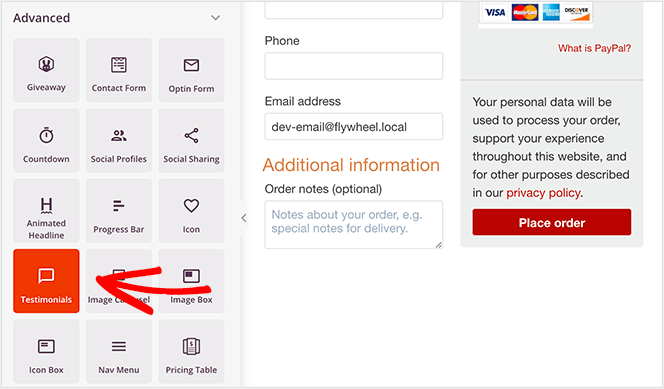
You can also add testimonials to boost your conversion rates. Just head to the Advanced blocks and drag the Testimonials block over to your checkout page.
Instead of the default WooCommerce checkout page, you now have a high-converting WordPress checkout page tailored to your audience.
Step #4: Configure Your Page Settings
After you’re done designing your thank you page, click the Connect tab at the top of your page builder, and select your email marketing provider to collect leads on your site.
NOTE: This step is only if you want your customers to opt for another service. So, if you’re trying to upsell a service, you can skip connecting the email marketing service.

次に、画面上部にある「ページ設定」タブをクリックします。

Here, you can add an SEO plugin and a Google Analytics plugin to your thank you page. You can even set up custom tracking codes such as a Facebook Pixel or a Pinterest pixel to track ad performance.
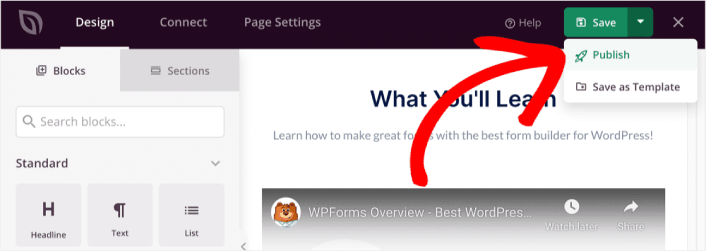
Step #5: Publish Your WordPress Checkout Page
Now let’s go ahead and publish your design. To do this, click the dropdown arrow next to the save button and click Publish.
Then, assign your new WordPress checkout page to WooCommerce. This involves changing the default WooCommerce settings and adding the URL for your new page.
To configure this setting, go to WooCommerce » Settings and click on the Advanced tab. Then next to the Checkout Page heading, search for the page you just made.
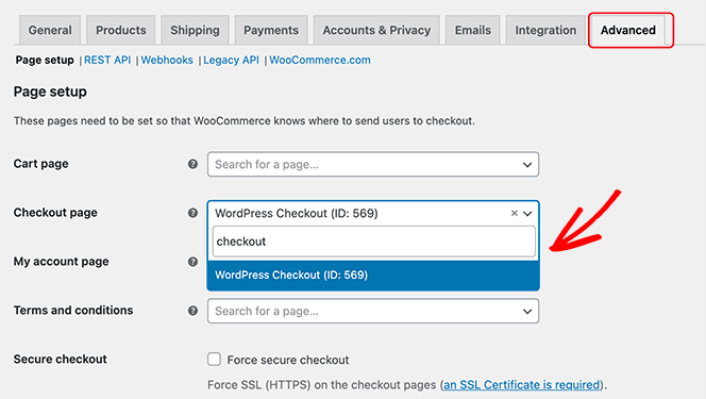
Now, when a visitor clicks ‘Proceed to checkout,’ they’ll go to your new, high-converting checkout screen you just made.
What to do After You Build a WordPress Checkout Page
Now that your thank you page is live, it’s time to work on your traffic, engagement, and sales. You should try using push notifications on your site. Push notifications are a great marketing tool that can help you grow your business.
これらの素晴らしいリソースをご覧ください。きっと意味がわかるはずです。
プッシュ通知キャンペーンを作成するためにPushEngageの使用をお勧めします。PushEngageは世界No.1のプッシュ通知ソフトウェアです。まだお済みでない場合は、 今すぐPushEngageを使い始めましょう!


