
Do you want to embed YouTube live streams in your WordPress blog posts?
Live streams are the ultimate tool for you to engage with your community and grow your following. If you can couple that with your website traffic, you can get the best of both worlds.
The sad thing about live streams is that once they’re done, YouTube doesn’t always push it to new viewers unless they’re making a lot of money out of ads. So, showcasing your live streams on your WordPress site is a nice way to add views to your older streams as well.
You’re probably worried about having to handle the HTML code to embed videos. WordPress actually makes it super easy to embed videos from video hosting sites like YouTube, Vimeo, Facebook, Twitter, and many others. But live streams are a whole other beast.
In this article, we’re going to show you step-by-step how to embed YouTube live streams in WordPress.
Plongeons dans le vif du sujet.
How to Embed a YouTube Live Stream in WordPress
Unlike regular YouTube videos, live streams are usually longer and allow viewers to interact directly with the creator in real time.
You can use WordPress video embed plugins to embed a YouTube live stream on your site. A plugin can help you automatically embed all of your YouTube channel videos and live streams in a customizable gallery format.
We recommend using Smash Balloon to embed your YouTube live streams.
Smash Balloon est un plugin WordPress simple qui vous permet d'afficher vos flux de médias sociaux sur votre site sans utiliser aucun code. L'affichage de vos flux sociaux sur votre site est un excellent moyen de convertir votre trafic web en abonnés sur les médias sociaux et de les maintenir engagés pendant longtemps.
La meilleure chose à propos de Smash Balloon est qu'il n'y a aucun codage impliqué. Tout ce que vous avez à faire est d'installer le plugin, puis de connecter vos pages de médias sociaux à votre site.
Vous pouvez utiliser Smash Balloon pour :
- Use your hashtag feeds on your site as social proof
- Dsiplay interactive Twitter feeds to boost website engagement
- Intégrez vos vidéos YouTube sur votre site pour augmenter vos abonnés YouTube
- Ajoutez des avis authentiques de votre page d'entreprise Facebook sur votre site pour augmenter les conversions
And lots more! Check out our review of Smash Balloon or just get started.
Step #1: Install YouTube Feed Pro
First thing you need to do is install the YouTube Feed Pro plugin.
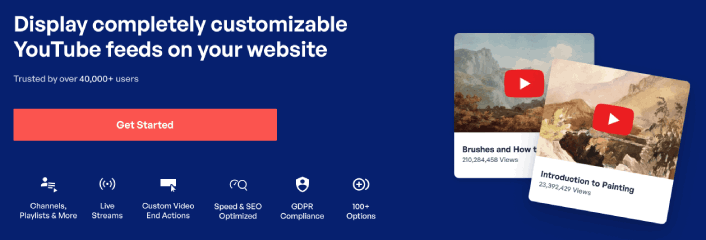
The YouTube Feed Pro plugin is meant to especially embed YouTube videos to your WordPress site. For more details, see our step by step guide on how to install a WordPress plugin.
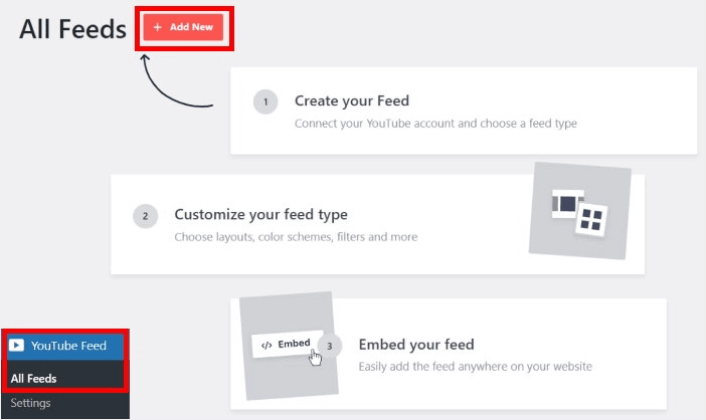
Step #2: Create a YouTube Live Stream Feed
Head over to YouTube Feed » All Feeds menu from your WordPress dashboard and click on the Add New button:
Select the Live Streams option for now and then click on the Next button.
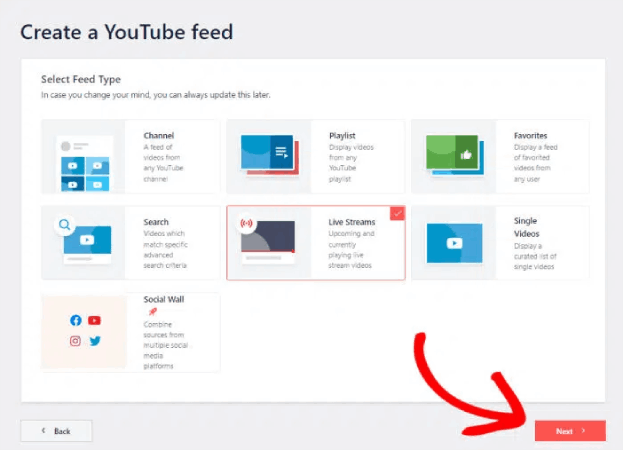
Now, you can set up your website to automatically pull your live streams from your YouTube channel and display them on a page.
Step #3: Connect YouTube to Your WordPress Site
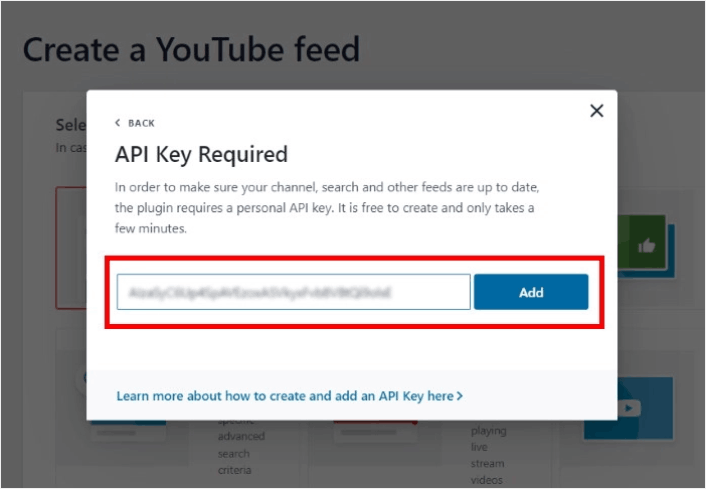
The easiest way to connect your YouTube channel to your WordPress site is to use your YouTube API Key. If you don’t have an API key yet, you can take a look at this step-by-step guide for creating your YouTube API Key.
Once you do that, copy the YouTube API key and open your WordPress site. Now paste your API key into the popup there and then click on Add.
Next, go to your YouTube channel and take a look at the URL for your channel. You’ll need to copy the code that comes after “/channel/” or “/user/” on the URL.
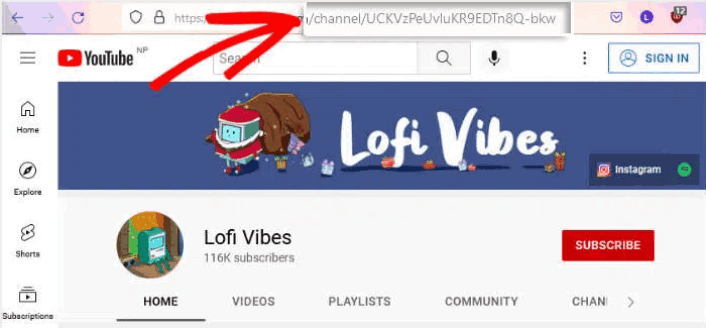
After copying the code, go back to your website and then paste it into Add Channel ID for Livestream field.
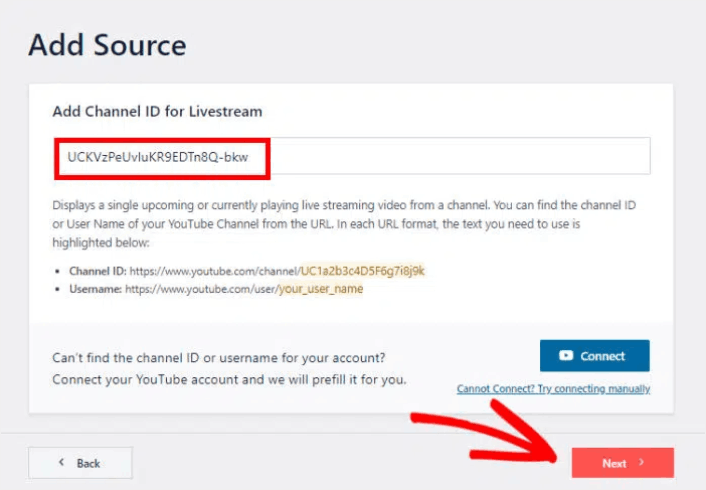
Then, simply click on the Next button.
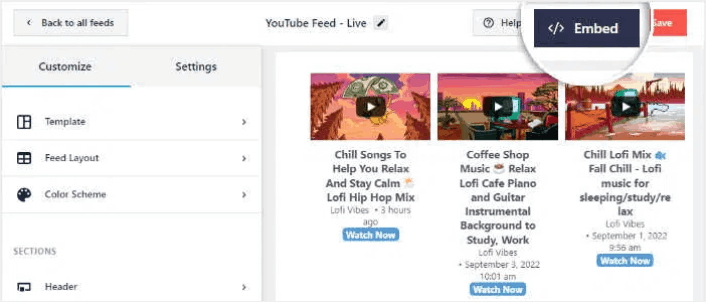
Step #4: Customize Your Live YouTube Feed
Finally, we’re going to customize how your embedded feed looks on your site. It’s super easy. The plugin asks you to choose a pre-built template for your feed. You have 8 different feed templates to choose from:
- Default
- Carousel
- Cards
- List
- Gallery
- Latest video
- Showcase carousel
- Widget
Simply select the layout that you want to use and then click on Next.

You’re can now use the plugin’s live feed editor to customize your live streams in detail.
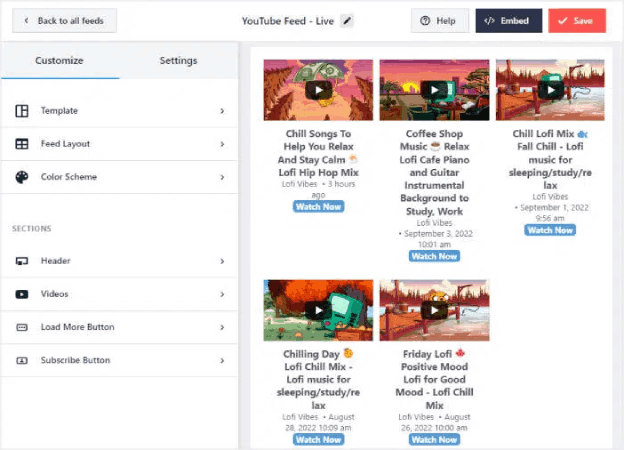
Once you’re ready to start designing your feed, click on the Feed Layout tab on the sidebar menu. Or, to change the color palette for your embed, you can click on the Color Scheme tab. When you’re done customizing your feed layout, remember to hit Save.
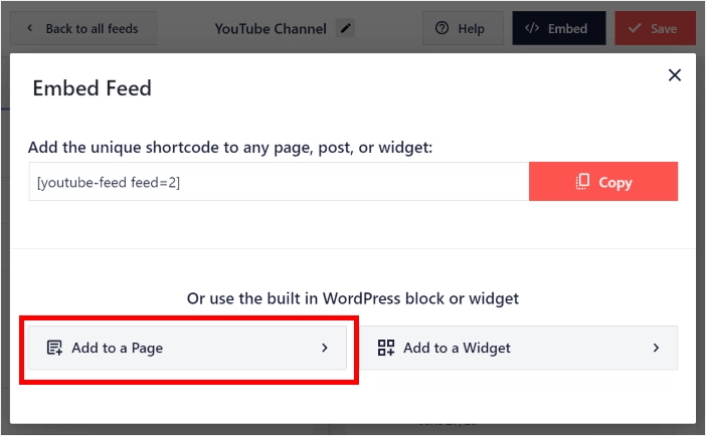
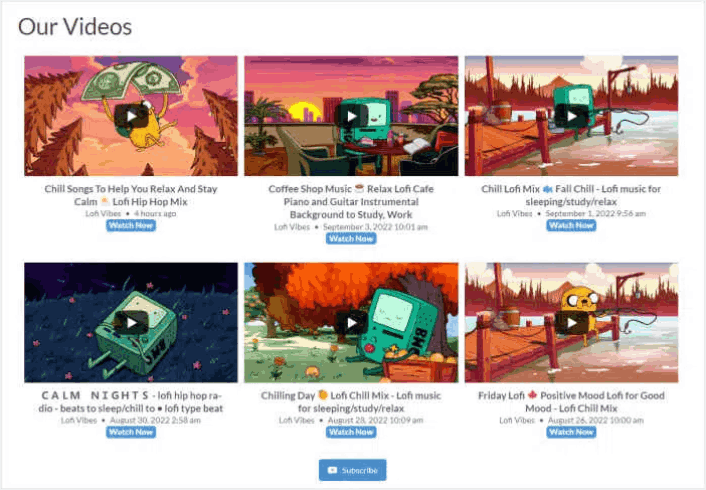
Step #5: Embed YouTube Live Stream Feed on WordPress
With YouTube Feed Pro, you can start embedding your YouTube feeds directly from the live feed editor. To do that, first, click on the Embed button at the top.
YouTube Feed Pro will then show you a popup with the embed options for this live feed. For now, select the Add to a Page option on the popup.
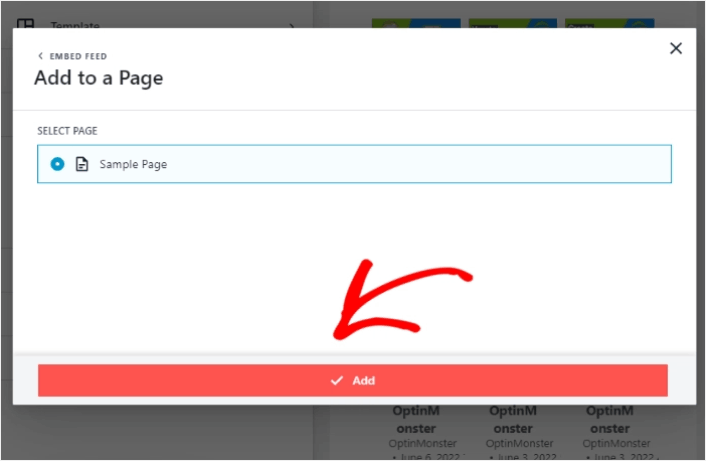
Now select your WordPress page from the list and then click on Add to continue.
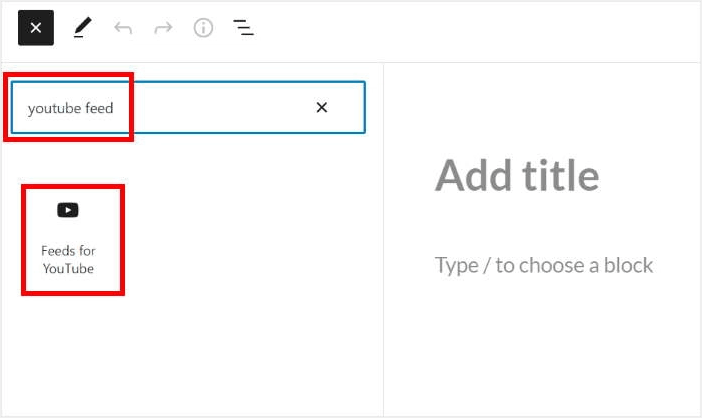
You’ll see the Gutenberg page editor open up for that page. All you have to do now is add a new block and select the YouTube Feed block.
Click on the Update button and your YouTube live streams will be online on your site.
And that’s it, you’re done!
What to do After You Embed a YouTube Live Stream
That’s all for this one, folks! By now, you’ve managed to embed a YouTube live stream in WordPress. You should also check out how to embed Instagram photos in WordPress. And how to set up a viral giveaway to supercharge your social media following.
After that, all that’s left is generating traffic to your site so that your contact forms can get to work. A simple way to do that is to start using push notifications. Sending push notifications is a great way to generate repeat traffic for your site. If that’s something you’re interested in, you should check out these articles as well:
- Coût des notifications push : Est-ce vraiment gratuit ? (Analyse des prix)
- Comment obtenir plus de trafic vers votre blog WordPress (9 méthodes faciles)
- Comment augmenter votre taux d'opt-in pour les notifications push Web (7 méthodes)
- Comment ajouter un plugin WordPress de notifications Web à votre site
Nous vous recommandons d'utiliser PushEngage pour envoyer vos notifications push. PushEngage est le logiciel de notification push n°1 au monde. Donc, si ce n'est pas déjà fait, commencez dès aujourd'hui avec PushEngage.


