Notice: There is no legacy documentation available for this item, so you are seeing the current documentation.
You are at a great start to growing your business by re-engaging your customers. If you have a Blogger website, all you have to do is complete the installation explained in simple steps in the article below:
To integrate PushEngage with Blogger, you must copy-paste the Core JS code in the head section of your blogger site.
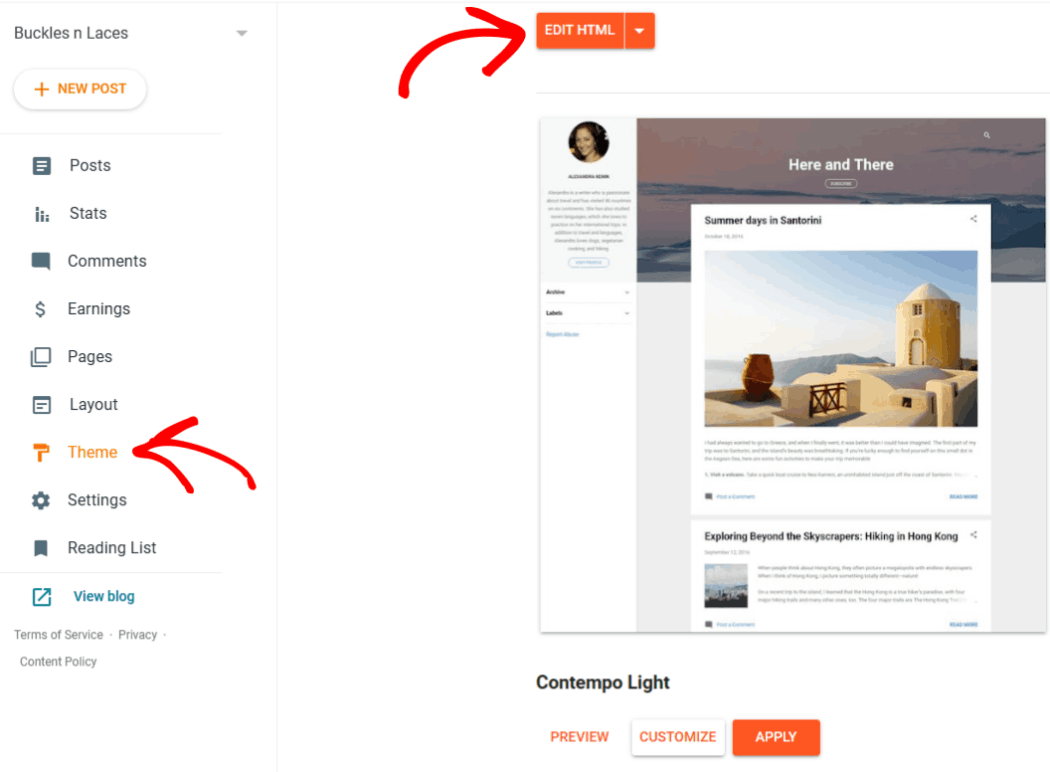
Go to Blogger Theme. Scroll up and click on Edit HTML. Click Edit HTML, and it will open the HTML page.
Step #1: To install push notifications, you’ll need to get an installation code. In your Site Settings » Installation
Choose Any Site and select Platform from the dropdown. You can use the JavaScript code to start sending push notifications.
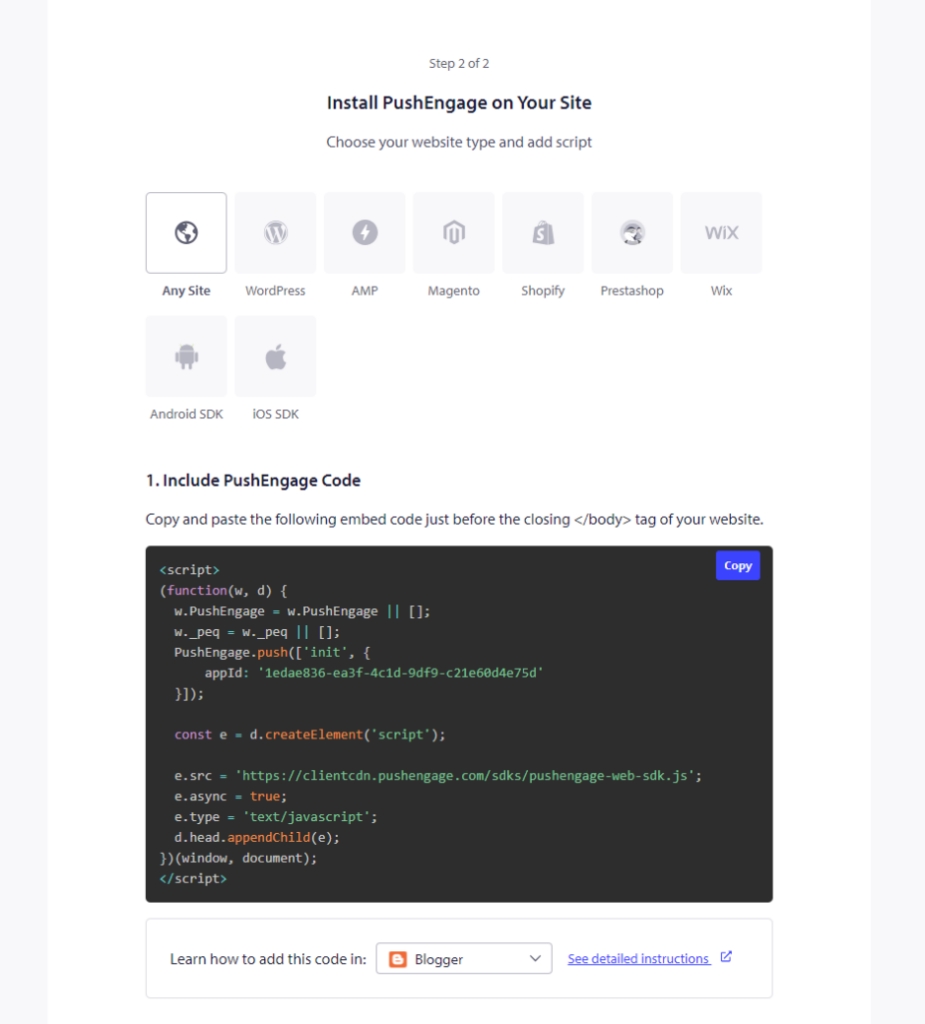
And in the code editor, paste your PushEngage JavaScript code snippet inside the <head> section of the HTML as shown below & click on the Save button.

HTTPS website Installation:
If you have an HTTPS landing page, that’s all. You can check the preview, and Push notifications will be enabled on your website.
Note: A Blogger website does not allow access to the root directory. Due to this, Single-step Opt-in cannot be used for them. so, you can use any two-step style Opt-in.
Step #2 Configuring the PushEngage Opt-In
You can choose different types of Push Notification Opt-in.
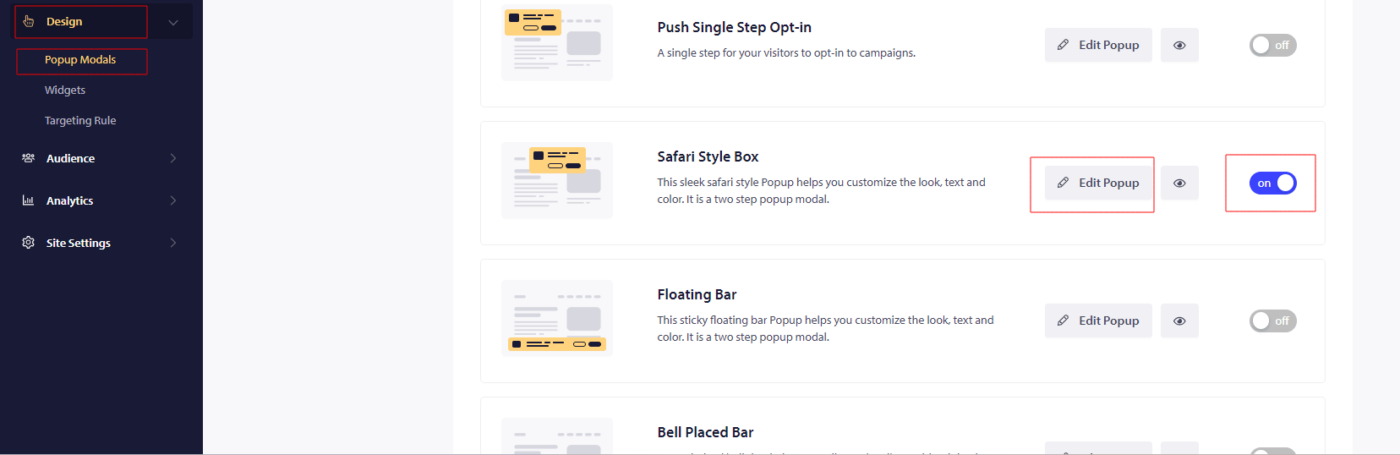
From your PushEngage dashboard, navigate to Design » Popup Modals » Click on Edit Widget on the selected opt-in style.
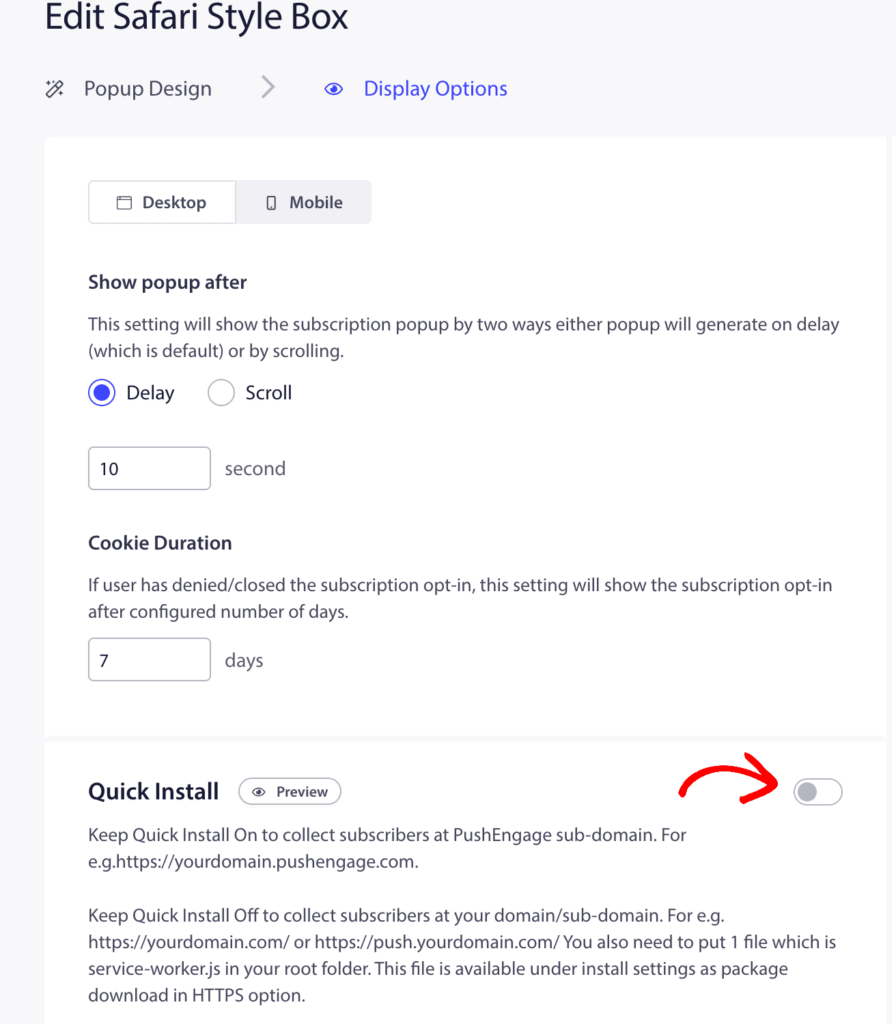
From here, you can customize your push notification opt-in. As you cannot add service worker, you will have to collect subscribers on PushEngage’s subdomain. You can do that by turning on Quick Install feature.
Enable Quick Install
Navigate to Design » Popup Modals.
Select any popup and click on Edit. Move to Display Options
Enable the toggle on for Quick Install.
This is it, and now you can start collecting subscribers using PushEngage on Blogger.
If you run into any issues, please feel free to contact us by clicking here. Our support team would be able to help you.


