Notice: There is no legacy documentation available for this item, so you are seeing the current documentation.
With PushEngage, subscribers have the right to opt out of the notifications received through auto-responders and trigger notifications.
Opting out of web push notifications is always the user’s choice, they have the permissions in their control through browsers setting but PushEngage also provides an easy way of unsubscribing as well just in case they are finding it difficult to unsubscribe through browser settings.
Note: This widget only appears for subscribed users. This means people who are already receiving push campaigns. People who have not clicked on allow will not see the unsubscription widget.
Keeping the GDPR Compliance for Web Push Notifications You can enable an easy way to opt-out from PushEngage notifications by navigating to Design > Widgets > Unsubscribe Widgets.
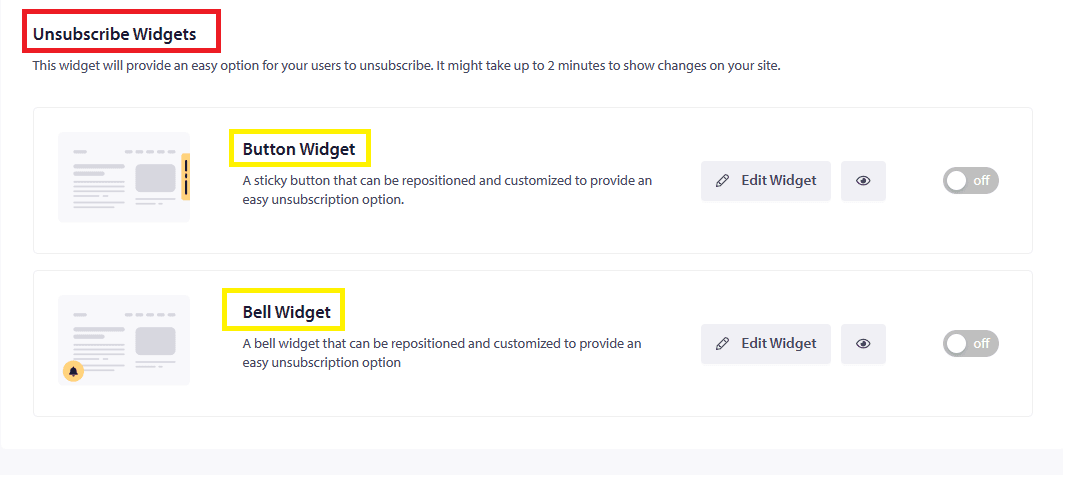
Styles of unsubscription widgets
There are two styles of Unsubscription widgets :
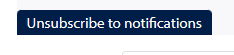
1) Button Widget: It will appear as a Button. The user can click on this button to unsubscribe from your Push Notification.
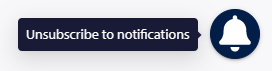
2) Bell Widget: It will appear as Bell on your page. On a single click, the user will be able to unsubscribe from your push notification.
With the help of the Edit option available in the dashboard, we can even customize the messaging of your Unsubscribe Widget.
Customizing your widget
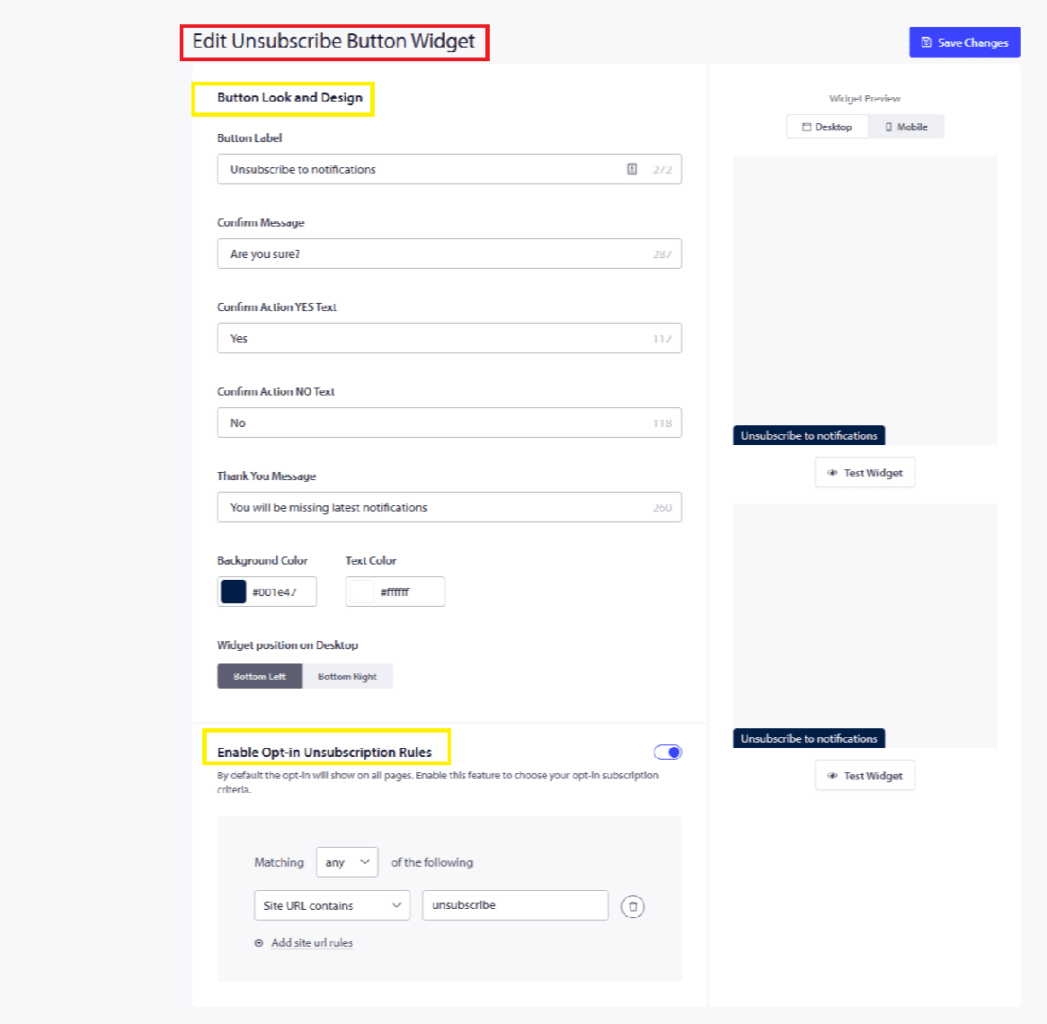
You can Edit the Button Look & Design. Here you can change the text under Button Label, customize the background color and the text color.
How to style your widget?
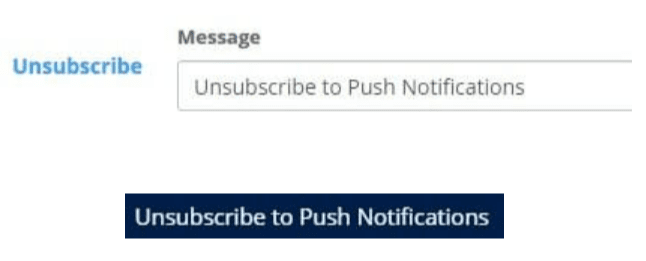
Button Label: Title appears on the Unsubscribe Button. You can edit the text message to make it more clear to the user.
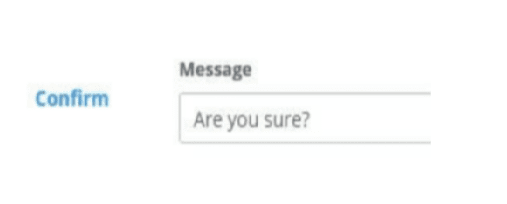
Confirm Message: This message appears when the user clicks on Unsubscribe Button.
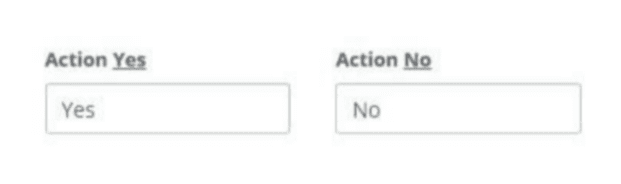
Confirm Action YES Text & Confirm Action YES Text: You can suggest the action name like Yes/ No or Unsubscribe/ Don’t Unsubscribe. Your subscriber will take action accordingly.
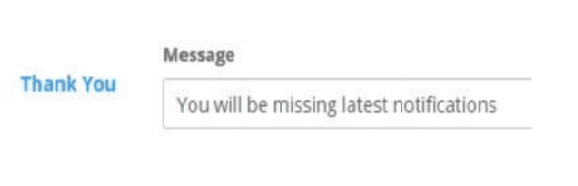
Thank You Message: This appears at the end once your subscriber clicks on the Button.
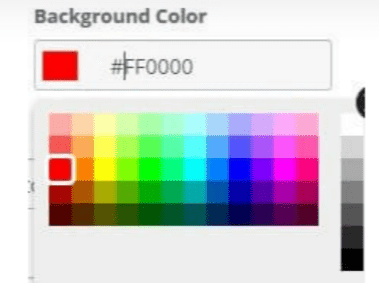
Background Color & Text Color:You can even customize the background color of your un-subscription opt-in. Once done save it and the same would reflect on your un-subscribe opt-in.
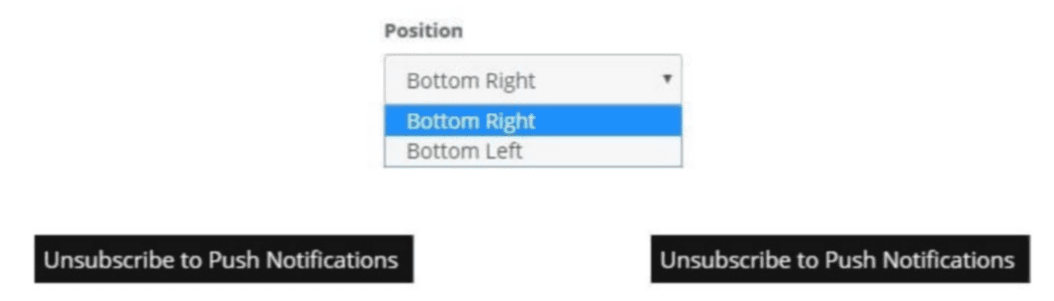
Widget position on Desktop:You can choose where to show the opt-in for un-subscription. The Opt-in can appear on the bottom left or the bottom right corner of your page.
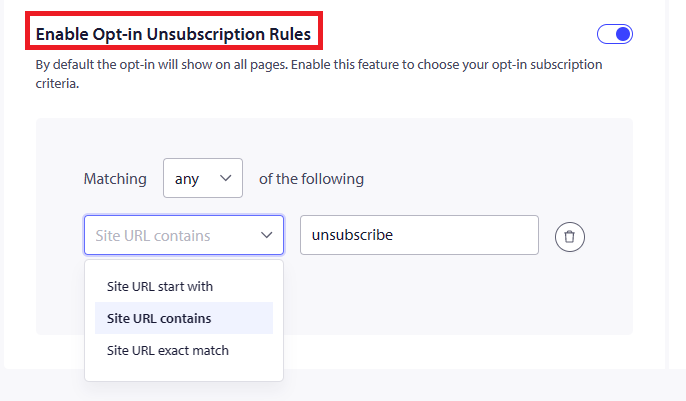
How can you customize display rules?
This helps you to select where you want to display the Unsubscription options to users.
- All Page: Unsubscribe Widget will appear on all pages of your website to subscribed users.
- Custom Pages: Select the URL pattern for the pages where you want to show Unsubscribe Widget. This option is advisable as you want to make unsubscription easy but at the same time not very easy. If you have this added on custom pages your team can send over to people complaining.
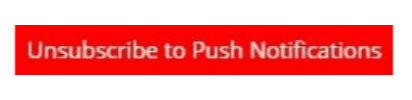
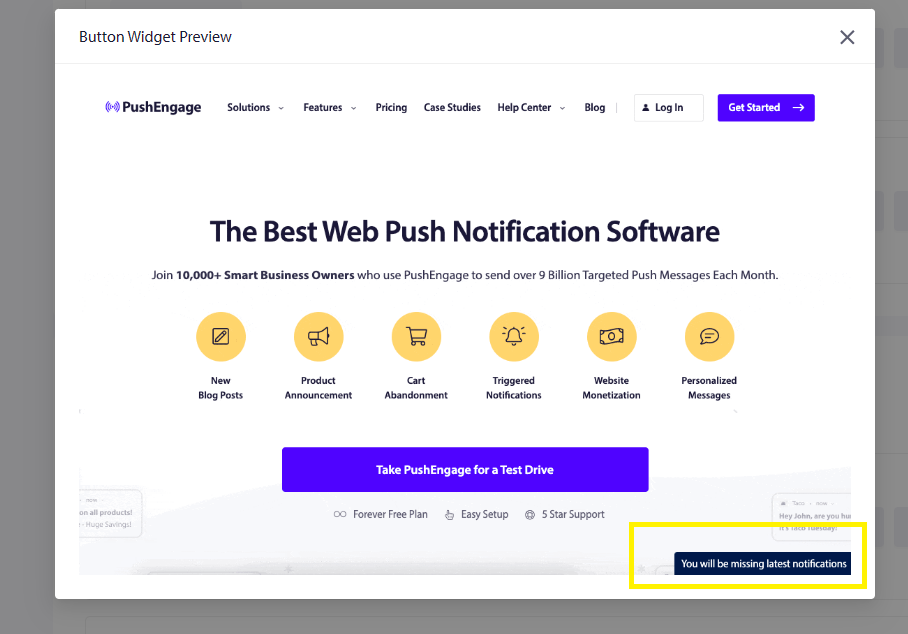
Below mentioned Screenshot shows the Preview of the Unsubscribe Button Widget
Once all the settings are done, click on Save. The Unsubscribe Widget will become active on your website.
If in case you run into any issues, please feel free to contact us and our support team will be able to help you.


