Notice: There is no legacy documentation available for this item, so you are seeing the current documentation.
Shoppers add items to their shopping cart but leave the website before completing the checkout. Because it is closely tied to customer conversion rates and revenue, the cart abandonment rate is a crucial business metric for businesses to track. A high cart abandonment rate is a typical sign of difficulty in your checkout procedure or customer experience.
To recover the falling cart, we have Cart Abandonment Campaigns to remind the subscribers about the product they added to the cart.
Before You Start
Trigger Campaigns are helpful to build personalized journeys not only for templates that are available like Cart abandonment, browse abandonment, price drop or inventory alert but in fact, any event-based campaigns can be built using this feature.
In this guide, you will learn how to set up cart abandonment campaigns with PushEngage.
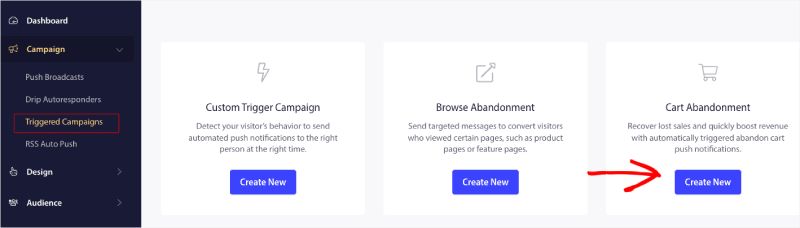
You need to log in to your dashboard and navigate to Campaign » Triggered Campaigns. Select Cart Abandonment Campaign, and click on Create New.
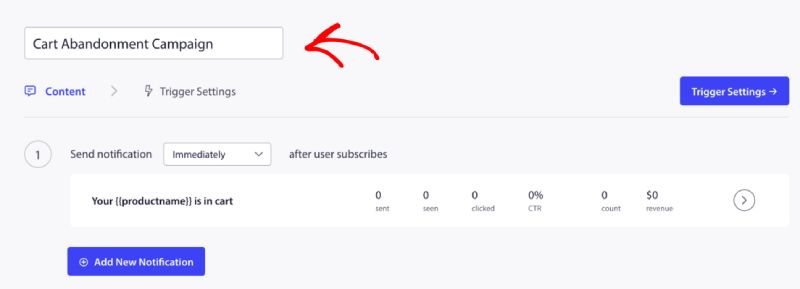
Here you can enter the Campaign Name.
Note: When you add a campaign name, it will also remain the same in your code. So correct campaign name is important as that cannot be changed later once the campaign is published.
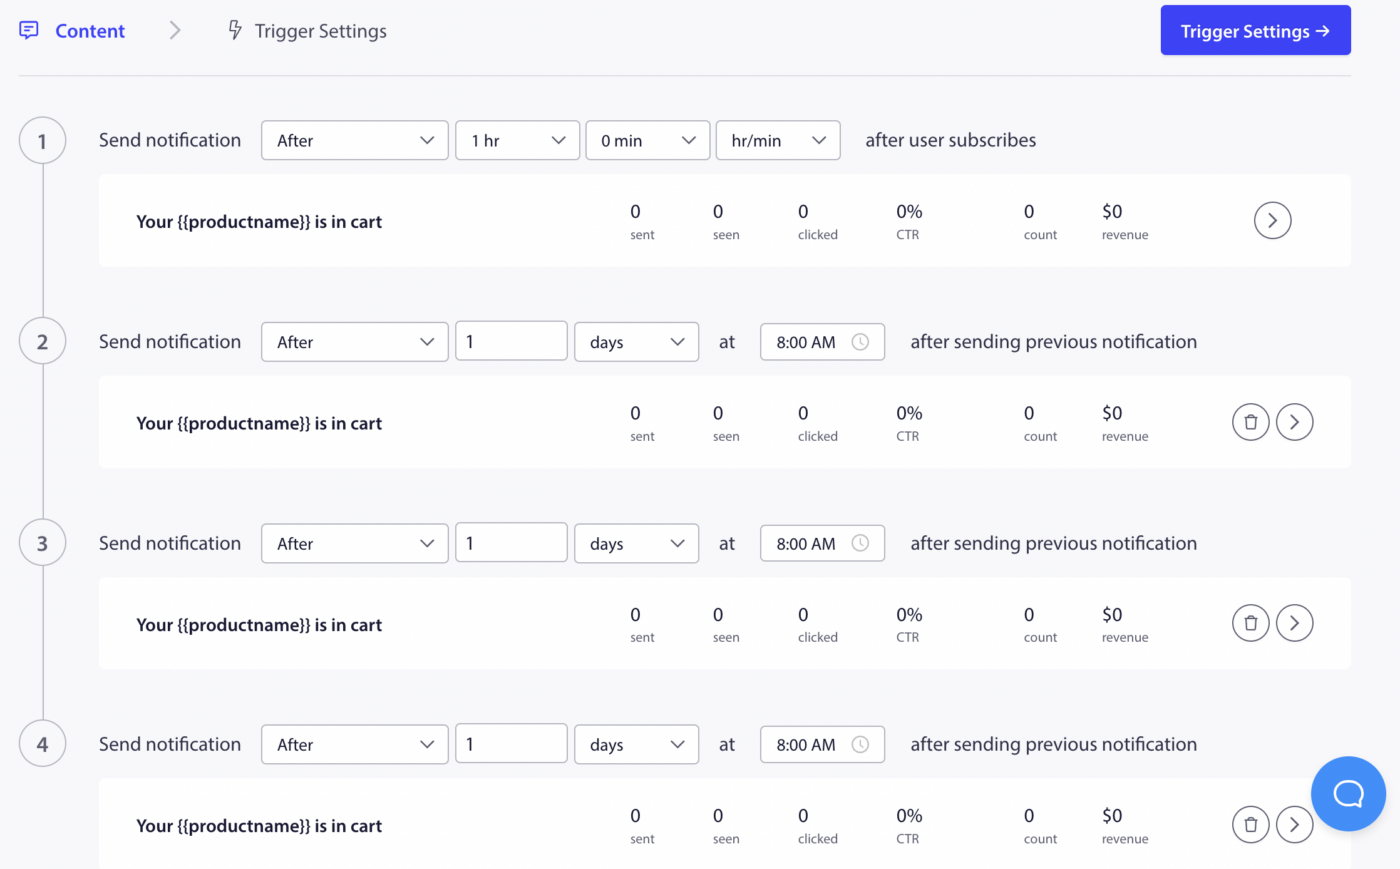
The next step is to configure the journey schedule – You can select either of the options immediately, after n hours and minutes, or after a certain day.
Usually, we do not recommend having the time scheduled for immediately. You should have at least a 15 or 30 mins gap for the first campaign in the series.
When setting up a series, you can have at least three campaigns. You can change the message or title but ensure that you are not changing variables if you are willing to use these variables in the campaign.
The default variables that are added in code as per the campaign are – {{productname}}, {{price}} and {{notificationurl}}
Managing Trigger Settings
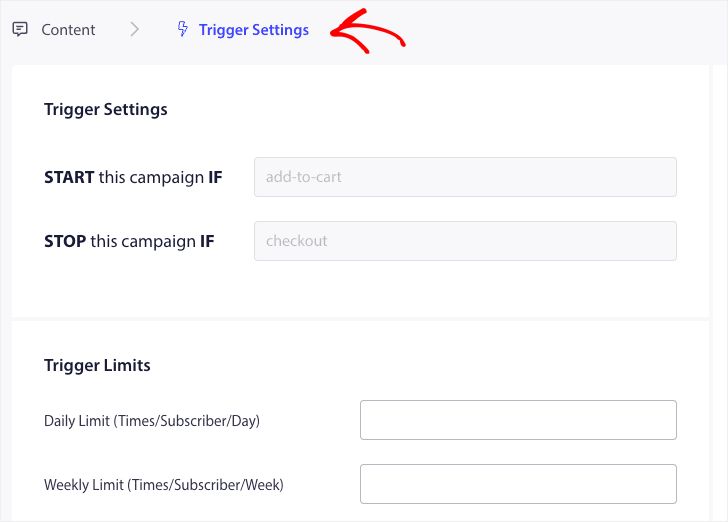
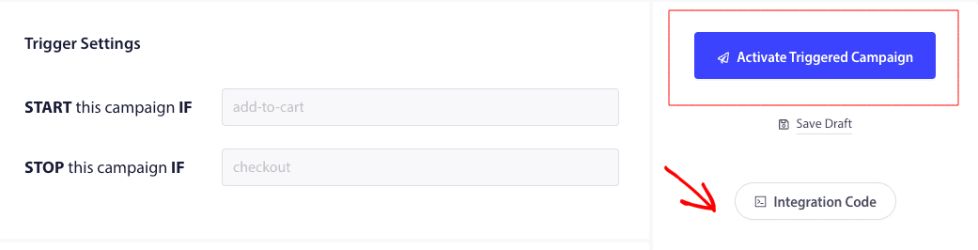
Once you have added notification content, you can move to Trigger Settings.
Here the triggers are predefined. The campaign starts if a person adds the product to the cart and doesn’t complete the checkout. If he completes the checkout, he won’t receive the cart abandonment notification. But these are just events defined; they cannot be executed unless placed on the website.
The triggers here are Start Campaign If – add-to-cart and Stop Campaign If – checkout.
The next step is to add the daily and weekly trigger limits. This will define the total number of notifications a subscriber may receive daily and weekly. For example – 2 notifications are daily, then it should be 14 weekly; this way, the frequency will be capped even if more than two products are abandoned.
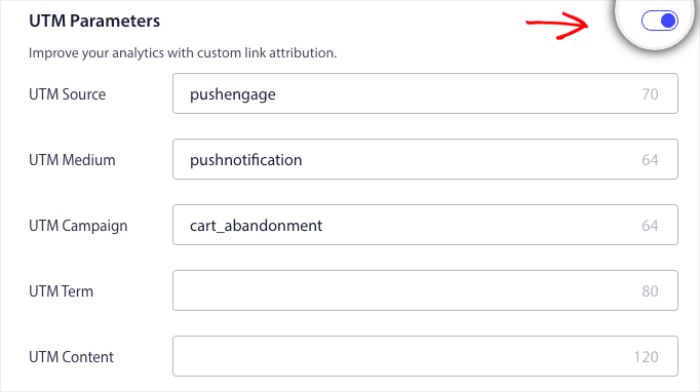
For tracking analytics in Google Analytics, you can enable the UTM Parameters, where you can setup specific names so that these campaigns are easily recognizable in the reports.
The next step is to click the Integrate Code button, copy the code and send it to your development team. Then you can fire it on the add to cart and checkout trigger events.
Understanding Code and Personalized Variables
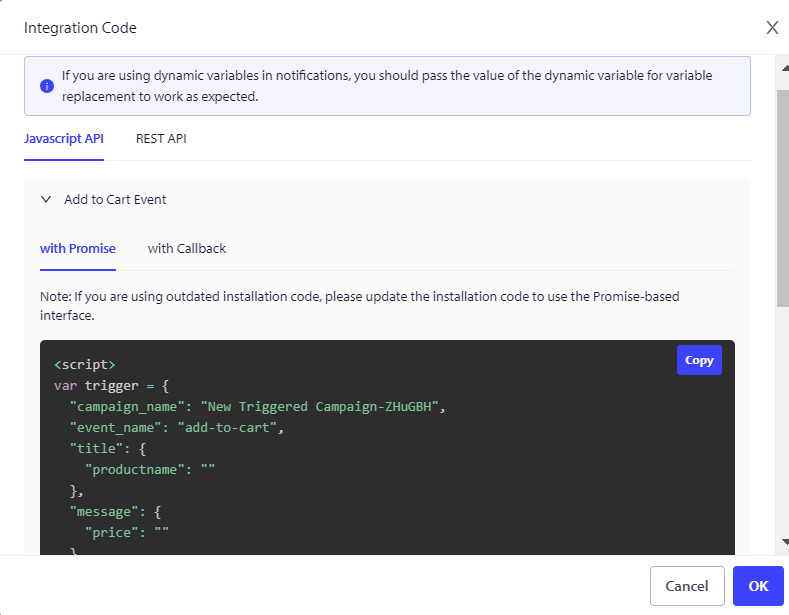
The product name, price, and notification URL have to be passed dynamically with the help of your product team. So, for example, if a person abandons a Handbag, they get a notification specifically about the Handbag being abandoned.
The code is in two parts the first part is the Start Event, and the second part is the Stop Event –
1. Add to Cart
2. Checkout
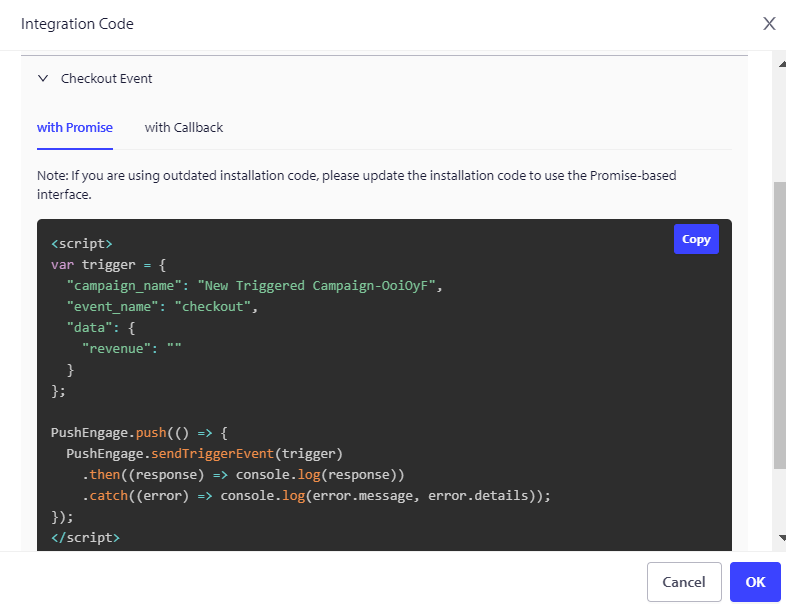
When a subscriber abandons any product in the cart, the add-to-cart section will ensure that campaigns are scheduled in our backend. If a subscriber completes the checkout by purchasing the product, all the campaigns against them will be discarded. Hence adding code in both places is important.
We also recommend adding the stop event code to the empty cart/remove product event on the website, so even if a person goes ahead and removes it they do not receive the personalized cart abandonment campaigns.
We also have a Goal Tracking pixel, which must be placed on the final conversion event for goal tracking.
Troubleshooting Cart Abandonment Campaign
- The campaign name must be the same in the code and the PushEngage dashboard.
- PushEngage installation code should be present where the cart abandonment campaign code is present else. The notifications will not get executed.
- Ensure that the campaign is active in the dashboard after you have placed the code on your website.
- You need to be a web push subscriber of your website; otherwise, you cannot test if you are getting cart abandonment campaigns on your system.
If you run into any issues, please feel free to contact us by clicking here. Our support team would be able to help you


