Notice: There is no legacy documentation available for this item, so you are seeing the current documentation.
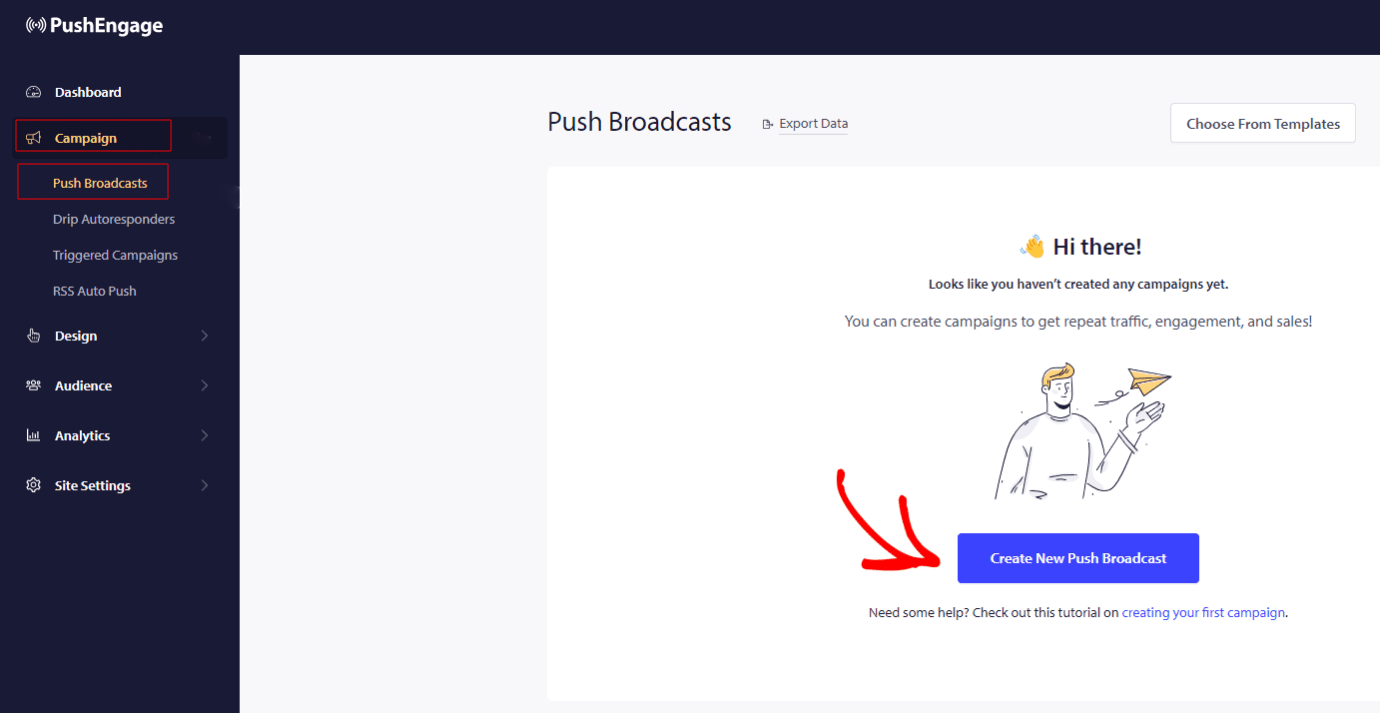
Welcome on board! You are ready to start engaging your subscribers by sending them Push broadcasts for your website.
This article will show you step by step process to create & send broadcast messages to your subscribers.
Before we create the campaign
To start creating campaigns, make sure that you have completed the installation on your websites. Until you have the subscribers collected for your website, the campaigns reach no one. Refer to this link to complete the installation if you haven’t already. You can then come back to create the campaigns.
You can start sending out the campaigns to the subscribers that you would have collected so far. You can broadcast messages that can be sent to all subscribers or a segmented set of subscribers. Segmentation is available in our Business plan & above.
Below are some points related to the broadcast messages that you can send:
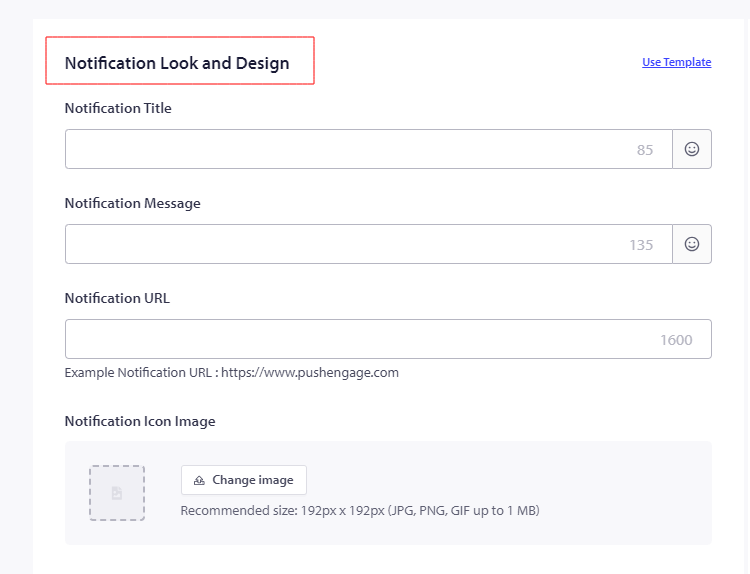
- You can create any Broadcast message of up to 135 characters (including emojis 😊)
- Add a title of up to 85 characters
- An image of up to 1MB
- Landing URL (192px x 192px) – This is the URL that opens on clicking on the broadcast message.
Campaign Design while broadcasting messages
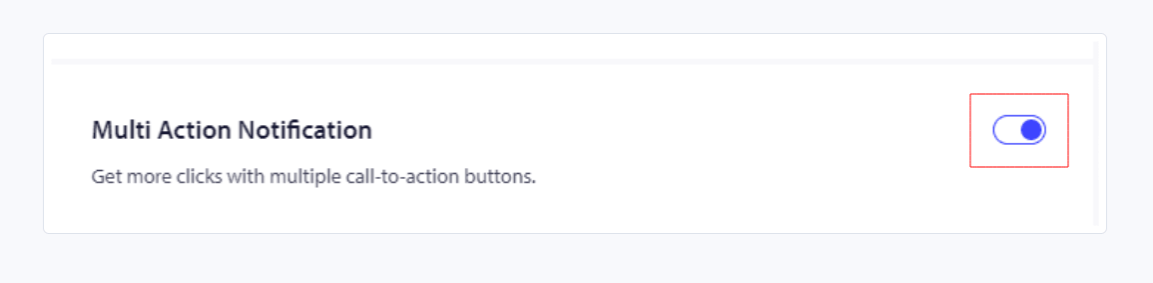
Multi-Action Notification: You can make a Multi-Action Notification by enabling the buttons. These buttons are additional call-to-action for your campaigns. We always recommend having an additional call to action as it helps you in getting higher engagement with your campaigns.
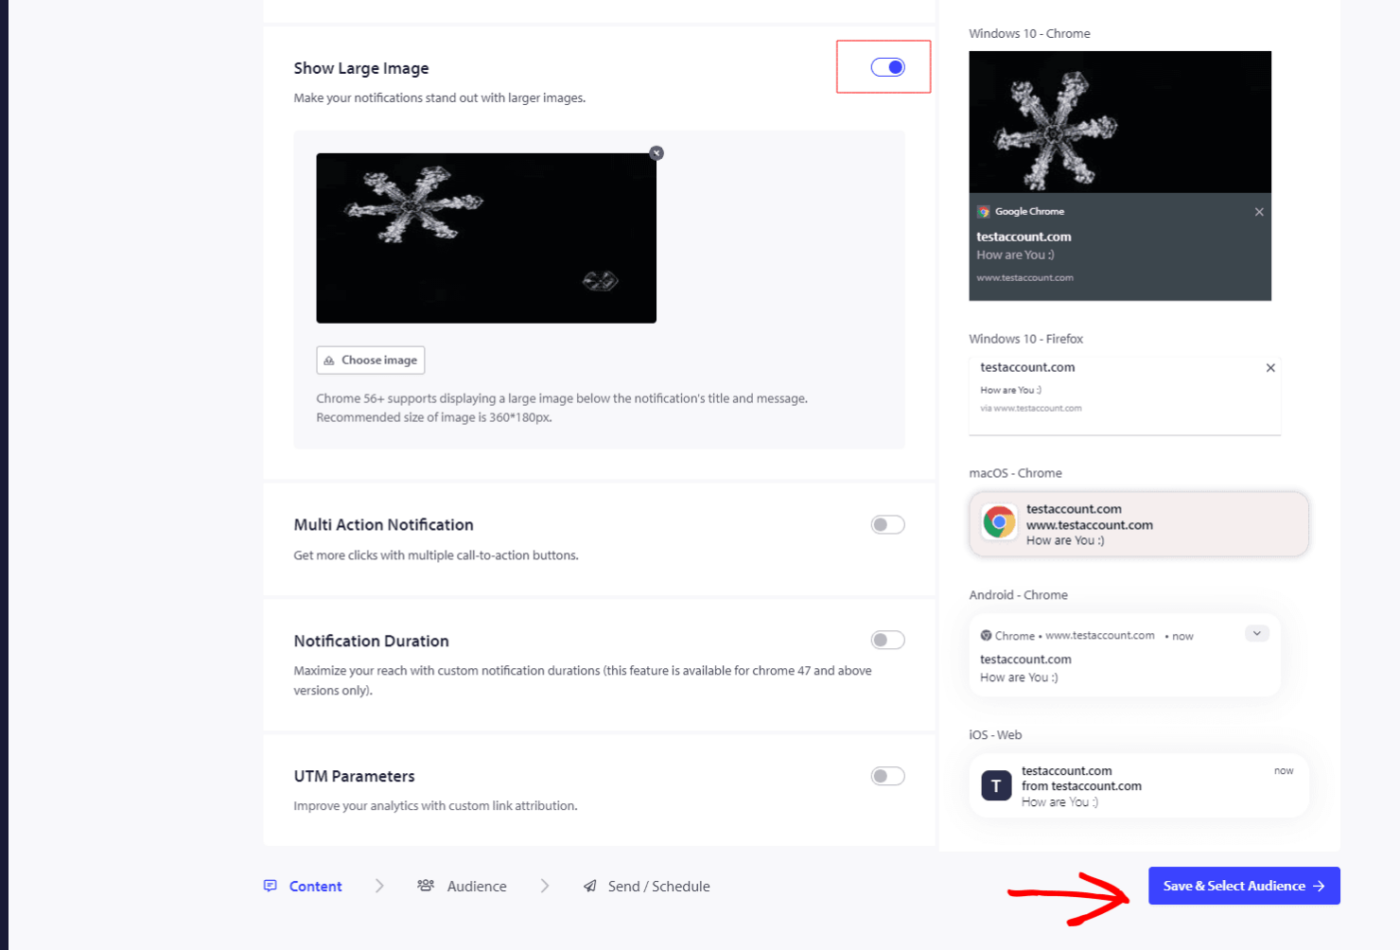
Large image: Adding a Large Image while sending the notifications can capture the attention of the viewers & increase the click rate. Here, you can upload an image only up to the size of 360×180 px for Desktop and 360X80 px for mobile devices.
Campaign Behaviour, Tracking & Audience
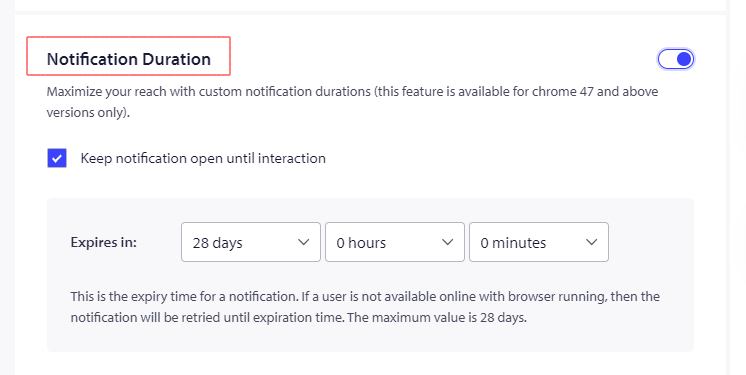
Notification Duration: You need to set the Duration of all the notifications before sending, in order to avoid overwhelming your subscribers with notifications. This not only pours your subscribers with loads of notifications but also paves the way to an increase in unsubscribes. You can set the expiry of the notification to a maximum of 28 days.
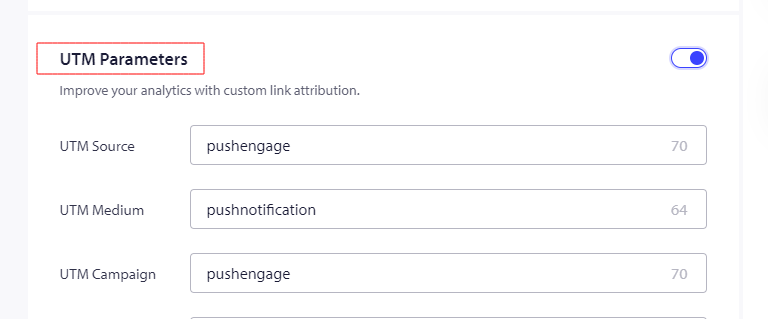
UTM parameters for Google Analytics Tracking: Adding UTM parameters lets you analyze data in Google Analytics. When you send out notifications, setting yup UTM parameters will help to capture the data that populate in GA. You can mention the mandatory fields – UTM Source, UTM Medium & UTM Campaign as shown in the below example.
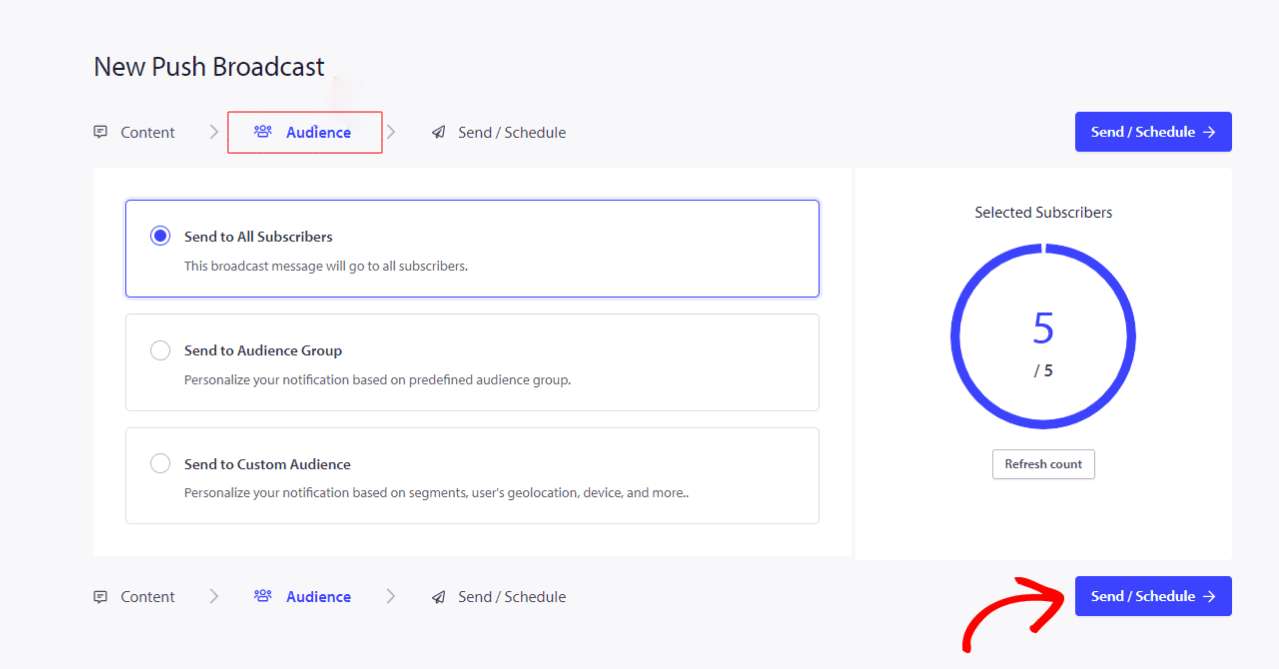
Select Audience: The feature to select the Audience is available in the Business plan & above.
Selecting Audience lets you send targeted notifications, which in turn increases the views & clicks for the notifications sent.
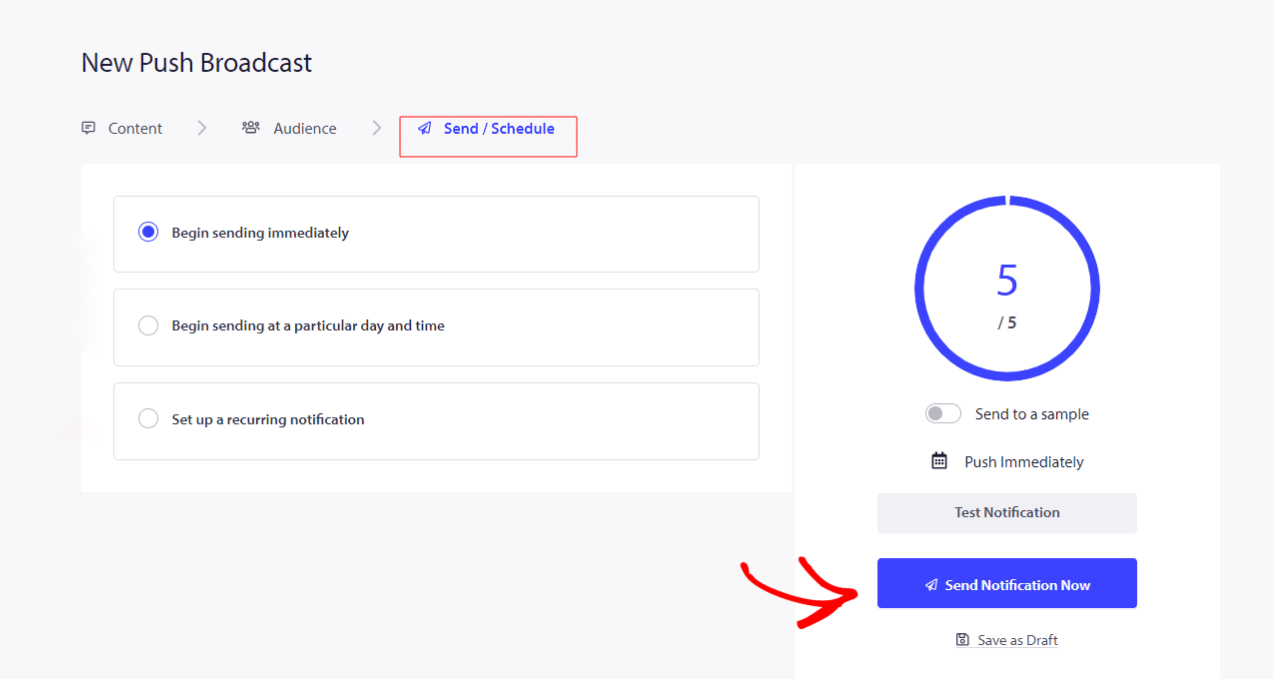
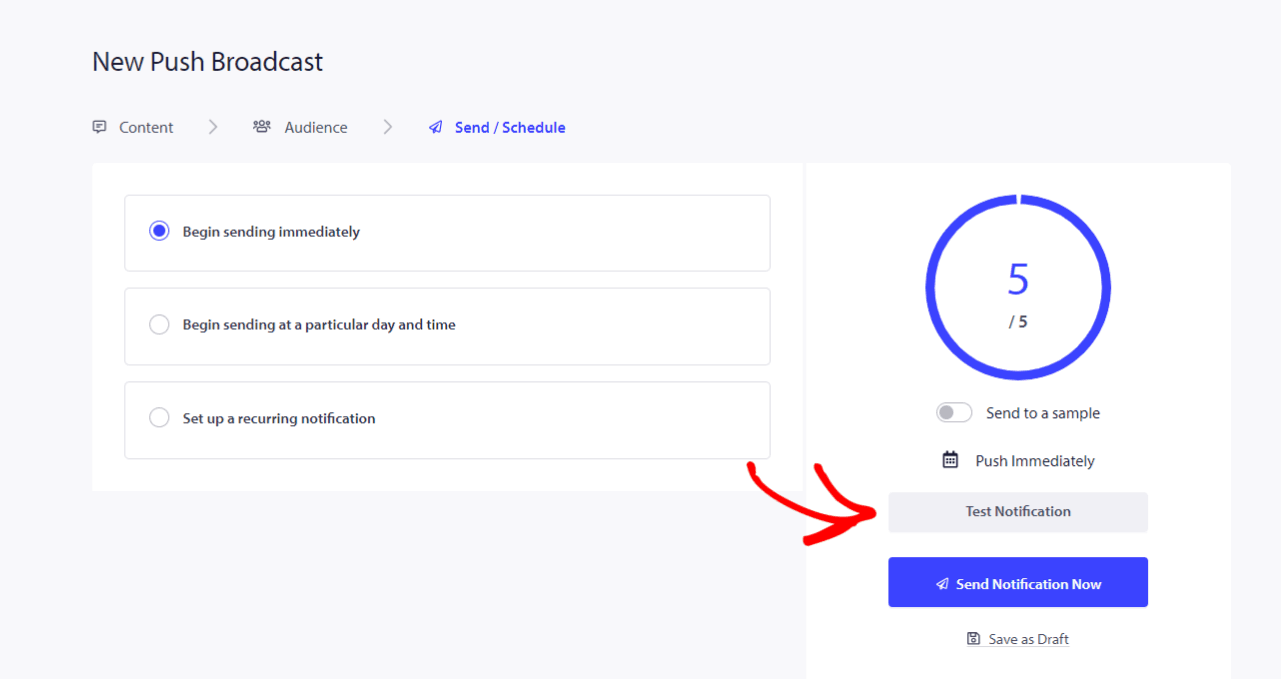
Scheduling Options: You can schedule the notifications to go out at a later time even when it is out of your working hours or you are enjoying your vacation. Also, the scheduling can be repeated by setting up the days in a week and setting the timing of the sending as well.
Below are the filters that you can select:
- Schedule on a particular day & time.
- Schedule recurring campaign
Testing Campaigns
A Test send will show you what the broadcast would look like when it is sent to the subscribers. Navigate to Notifications » Create » New notification » scroll down & click on Test Send Notification. Make sure that you have Allowed notifications for PushEngage.
Once you’re done setting up now you are ready with your First Push Campaign for your site and can collect subscribers
If in case you run into any issues, please feel free to contact us by clicking here. Our support team would be able to help you.


