Notice: There is no legacy documentation available for this item, so you are seeing the current documentation.
The First-Time Buyer Welcome Sequence is a drip autoresponder that sends a series of push notifications to new subscribers who have not yet made a purchase. It introduces your store, showcases your best products, and delivers a first-order incentive to convert browsers into buyers.
This guide explains how to set up the welcome sequence and target it to the Leads segment in PushEngage.
Before You Start
- PushEngage is installed on your WooCommerce store and connected in the PushEngage dashboard.
- The Leads segment is active. PushEngage automatically creates a Leads segment for subscribers who have not completed a purchase. See Segmenting WooCommerce Subscribers by Purchase Behavior if the segment is not visible.
How the Welcome Sequence Works
When a new visitor subscribes to push notifications on your WooCommerce store, PushEngage adds them to the Leads segment if they have not yet placed an order. The drip autoresponder fires automatically for all subscribers in this segment.
The sequence stops for a subscriber as soon as they complete a purchase and move to the Customers segment. This prevents welcome drip notifications from going to people who have already converted.
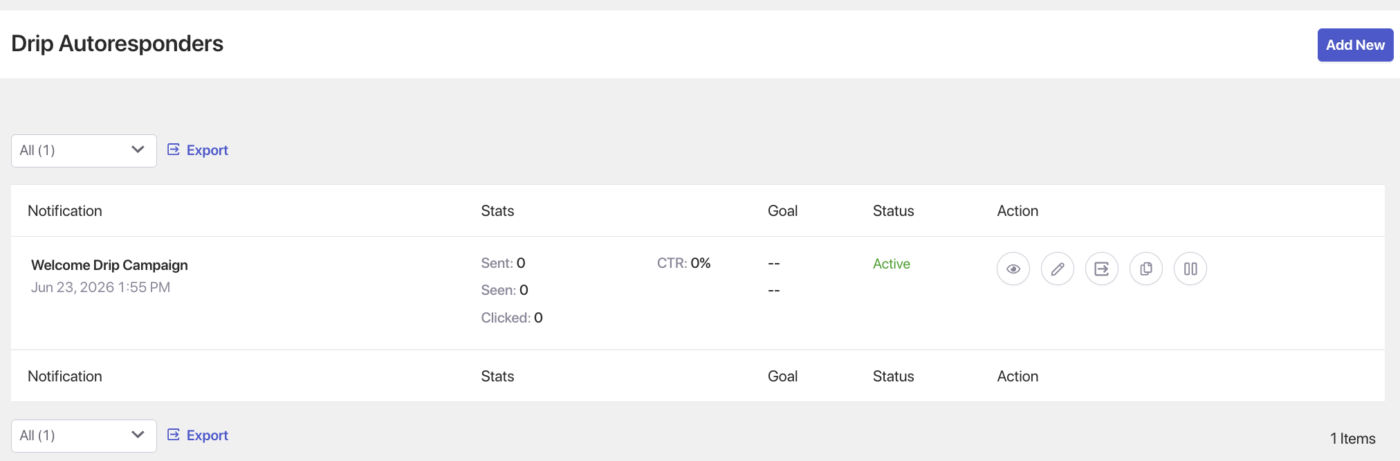
Step 1: Create the Drip Autoresponder
- Log in to your PushEngage dashboard.
- Go to Campaign » Drip Autoresponders.
- Click Create New Drip Autoresponder.
- Enter a name, such as WooCommerce First-Time Buyer Welcome.
Step 2: Build the 3-Push Sequence
The welcome sequence runs across three pushes spaced over a few days.
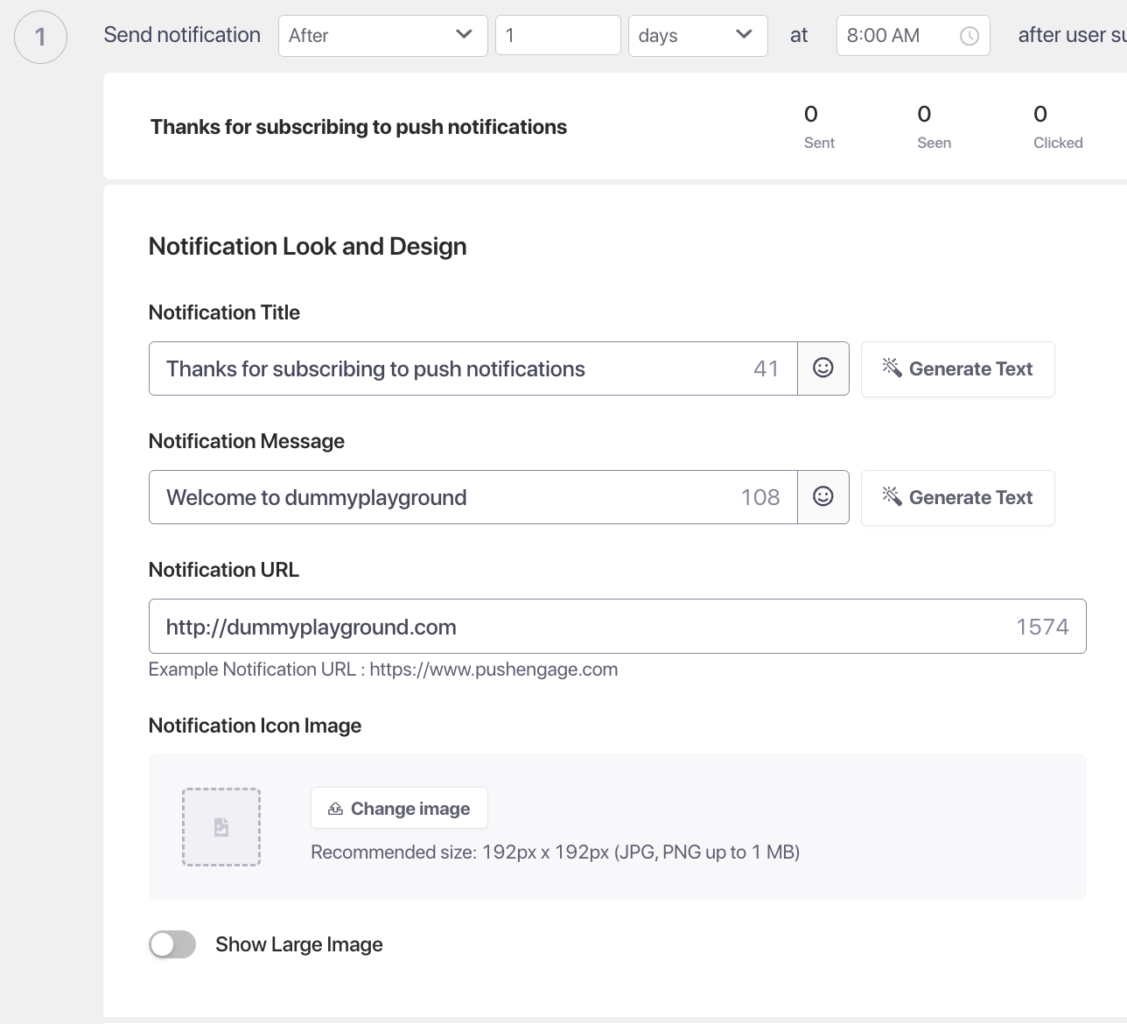
Push 1: Welcome (Immediately on Subscription)
Send immediately after a visitor subscribes.
| Option | Title | Message |
|---|---|---|
| 1 | Welcome to [Store Name]! | Thanks for subscribing. Browse our latest collection and find something you’ll love. |
| 2 | You’re in! | Welcome to [Store Name]. Discover our most popular products and start shopping today. |
| 3 | Great to have you here | Welcome! Explore our store and find your next favorite item. |
URL: Your homepage or a featured collection page.
Push 2: Best Sellers (1 Day After Subscription)
Introduce your top-selling products to give subscribers a clear starting point.
| Option | Title | Message |
|---|---|---|
| 1 | Our best-sellers are waiting | Thousands of shoppers love these products. See what everyone is buying at [Store Name]. |
| 2 | Start with what’s popular | Not sure where to start? Check out our best-selling products. |
| 3 | These are flying off the shelves | Our most popular items are here. Shop before stock runs out. |
URL: Your best sellers or most popular collection page.
Push 3: First-Order Discount (2 Days After Subscription)
Deliver a first-purchase incentive to subscribers who still have not bought.
| Option | Title | Message |
|---|---|---|
| 1 | Here’s a gift for your first order | Use code FIRST10 for 10% off your first purchase. Shop now before it expires. |
| 2 | First order? Save 10% today | We’d love to have you as a customer. Use FIRST10 for 10% off your first order. |
| 3 | Your first-order discount is here | Use FIRST10 at checkout for 10% off. This offer is just for new customers. |
URL: Your shop page or a landing page with the discount pre-applied.
Step 3: Set Segment Targeting to Leads
Target the sequence only at subscribers who have not yet purchased.
- In the Drip Autoresponder editor, go to the Audience section.
- Select Segment.
- Choose Leads from the dropdown.
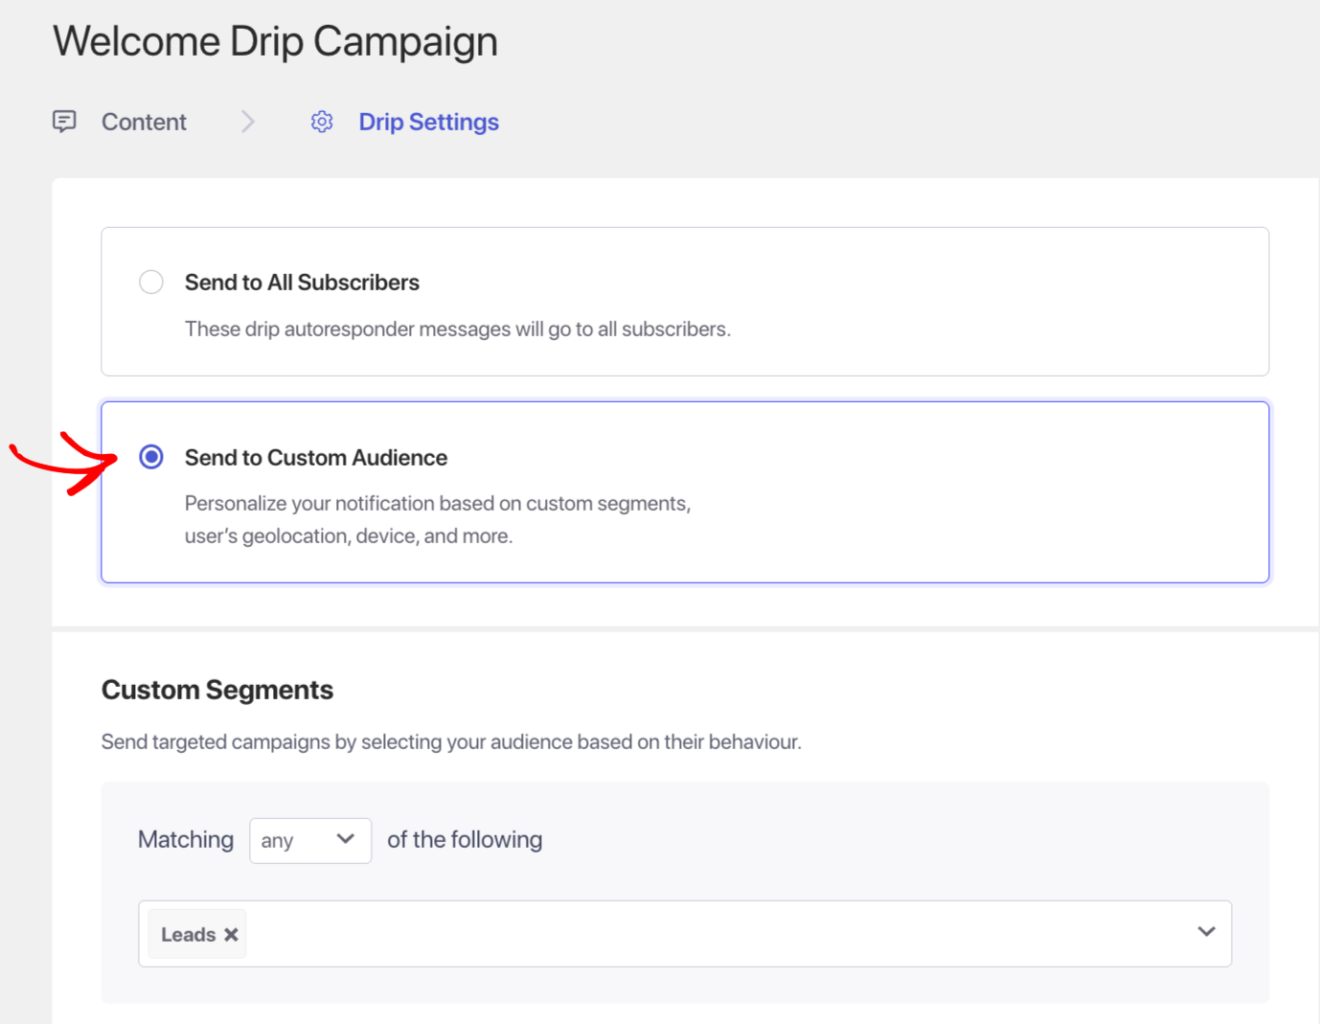
Why Leads only: If you target all subscribers, customers who have already purchased will also receive the first-order discount, which wastes the offer and can frustrate loyal buyers.
Step 4: Configure Drip Settings
- Click on Drip Settings in the campaign editor.
- Review the timing for each notification.
| Push | Timing |
|---|---|
| Push 1 | Immediately after subscription |
| Push 2 | 1 day after subscription |
| Push 3 | 2 days after subscription |
If your store uses a longer consideration cycle, extend Push 2 to 2 days and Push 3 to 4 days.
Step 5: Activate the Sequence
- Click Save in the campaign editor.
- Return to Campaign » Drip Autoresponders.
- Click the Play / Resume button next to your welcome sequence.
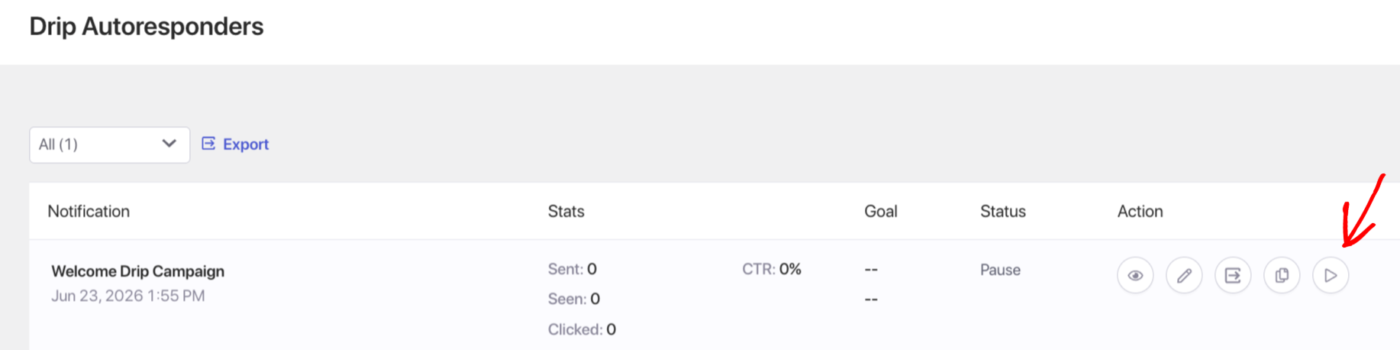
The sequence is now active. Every new subscriber who qualifies for the Leads segment will begin receiving the sequence automatically.
Customizing the Discount Code
You can change the discount code in Push 3 at any time by editing the notification message. The code must exist in your WooCommerce store under WooCommerce » Coupons before you reference it in a push notification.
For a percentage discount, create a coupon with a fixed code. Avoid automatically generated codes since the same code must work for all subscribers who receive Push 3.
Tracking Performance
To review how the drip is performing:
- Go to Campaign » Drip Autoresponders.
- Click on the welcome sequence to expand the analytics view.
- Review sent, delivered, clicked, and conversion metrics per push.
Frequently Asked Questions
What is the Leads segment? Leads is a default segment PushEngage creates automatically when you connect your WooCommerce store. It includes all push subscribers who have not yet completed a purchase. Once a subscriber places an order, they move to the Customers segment and exit the Leads segment.
What happens if a subscriber purchases after Push 1 but before Push 2? If you use the Leads segment with the sequence set to check segment membership at each step, the subscriber will not receive Push 2 or Push 3 after converting. Check your drip settings to confirm segment re-evaluation is active.
Can I add a fourth push to the sequence? Yes. Click Add Notification in the drip editor and set the delay. A fourth push at 5 to 7 days could serve as a final reminder or introduce a different product category.
Should I use a unique discount code for each subscriber? Drip autoresponders send the same static message to all subscribers, so a unique code per subscriber is not supported. Use a single shared code with a usage limit set in WooCommerce to control how many times it can be redeemed.
Can I run this alongside a cart abandonment campaign? Yes. The welcome drip and cart abandonment campaigns can run simultaneously. If a subscriber abandons a cart before their drip sequence ends, both will queue for that subscriber. Frequency capping helps prevent notification overload.
If you run into any issues, please feel free to contact us by clicking here. Our support team will be able to help you.


